3 Things : playing with printing + a giveaway
Tags: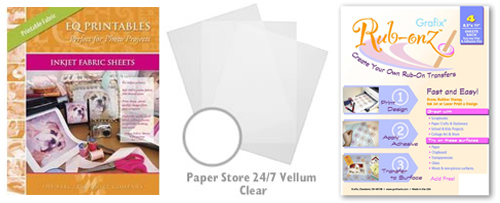
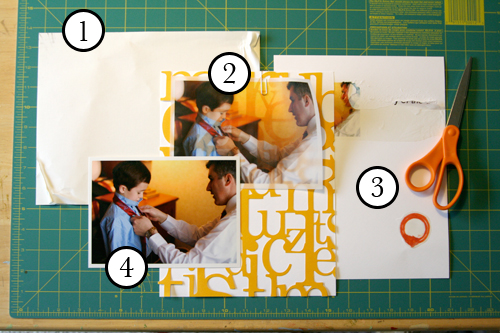
Staying in the theme of words + photos this week I wanted to experiment with a couple different inkjet printing surfaces. I took that photo of Chris & Simon and the tie and printed it on each of the following using my HP Photosmart D7360
[ Warning : any of my experiences below could very well be operator error. ]
WorldWin Inkjet Printable Translucent Vellum : Quick and easy. Great result. See sample below. It's been awhile since I last used vellum and it was fun to reintroduce it into my supplies. Definitely want to play with it more: thinking about layering with transparencies and text and photos.
EQ Printables Peel & Stick Fabric Sheets
Grafix Rub Onz - Create your own rub ons. Super cool idea. I wanted to see if this would work with a photo + some words...and at least in my case it was a challenge. This is a multi-step process that includes printing, then placing adhesive paper on top, and then adhering your image to final paper. The real challenge is getting the adhesive paper onto your image without bubbles. The second challenge is in the choice of the paper you rub on to. I tried it on textured cardstock and it didn't seem to work - it just tore the paper. I will probably try this whole process again to see if I can make it work.
[1]
EQ Printables Peel & Stick Fabric Sheets

And now, the giveaway:
3 readers will receive the following from The Papermill Store/Worldwin:
• 1 pack 27 lb WorldWin Inkjet Printable Translucent Vellum
• 1 pack 40 lb WorldWin Inkjet Printable Translucent Vellum
• 1 pack 12x12 WorldWin Doublemates Cardstock
• 1 pack 12x12 WorldWin Rouche Cardstock
For more information on The Papermill Store/WorldWin, check out their blog here.
For a chance to win this selection of papers leave a comment below with your favorite photo tip or what you want to work related to taking photos. Winners will be drawn tomorrow at 5pm Pacific.
Don't miss today's words + photos post below.


Comments
Sign in or sign up to comment.
780 comments
I have the hardest taking the time to print my pictures. What's the best way to organzie my pictures after I work on them in Photoshop?
Tip: Try to make a habit of checking three things when you pick up your camera: white balance, ISO and camera setting for the moment you're snapping your pics.
Replies
Sign in or sign up to reply.
I am at the planning stage of just about everything related to card marking; just deciding what look I want and what papers, printer....
I really like the background effect created with the injet WorldWind vellum.
I have started collecting photos, keeping in mind how I will use the photos and in what type of card: Mother's Day, Christmas, Valentine's. I would encourage taking shots this Spring (all the beautiful blossoms on flowering trees, to get a head start on next year's Mother's Day cards. I took lots of great shots this past winter (2007) with the plan of using them for Chirstmas 2008 cards. This gives me the time to grow ideas.
Replies
Sign in or sign up to reply.
My favortie photo tip is change your position! get on the ground, stand on a chair, stand above your subject, bend below it, lay on your stomach, climb up in the swing fort and shoot down at them swinging on the swings!! Take a different look at it and you will be surprised at what you get. Happy shooting!! Dawn H
Replies
Sign in or sign up to reply.
OOOOH, aaaahhhh!
I LIKE THIS!
IMAGINE ALL THE WAYS WE CAN MAKE THIS WORK.
You continue to inspire us DAILY.
Thank you Kim D
Replies
Sign in or sign up to reply.
love this Ali! My fav photo tip is if you take a picture from slightly above the subject it will always make a person look more flattering
Replies
Sign in or sign up to reply.
We just bought our 3 year old his own digital cameral. Many times his shots are better than mine--his point of view is just different. I try to learn from him!
Replies
Sign in or sign up to reply.
my photo tip would be enjoy taking as many as possible but don't forget to BE in the moment. Loving this feature!
Replies
Sign in or sign up to reply.
I have two tips -
1. Always keep your camera with you
2. Turn off your flash! yup go with the natural light and you'll be surprised how you don't need a flash as often as you think!!
Replies
Sign in or sign up to reply.
I am really bad at taking Photos so I don't have a tip but I have enjoyed this topic and reading everyones tips!
Replies
Sign in or sign up to reply.
My favorite photo tip is to JUST CLICK! I have to remind myself to do this a lot! LOL! Sometimes it's not about taking a long time to compose the perfect shot, but rather it's about getting that perfect shot because you hit that shutter button! So...my word to the wise...JUST CLICK!
Replies
Sign in or sign up to reply.
Some of my favorite tips:
-keep the blurry pics (got that from you!)
-when you aren't doing posed portraits, try using the multi-pic setting, so you get 'flip book' style photos.
-take 'catchlight' photos of each person and then far way shots as well.
-try different angles...lay down and look up, tilt the camera, stand above and look down...
My personal photo basics:
1. I use a Canon Digital Rebel XTi.
2. My everyday lens is the ‘kit lens’, 18 - 55 mm F3.5 - 5.6 Mk II EF-S lens. I also have a Canon EF 75-300mm f/4-5.6 IS USM Telephoto Zoom Lens for Canon SLR Cameras. (I plan on getting a few more lenses, like the macro for sure).
3. I need to let my husband grab my camera and shoot what he wants, maybe I’ll be in more photos then, eh?
4. I like to shoot flowers, the beach scenes, my family and my pug the most.
5. I love to shoot in natural light andutdoors.
6. I consider myself a photographer…the family photographer mainly, but a photographer none-the-less. Not a professional, yet…but an avid photographer.
7. I use Photoshop CS3 to resize, adjust, add text to my photos.
Thanks Ali- that was fun.
Happy Snapping!
Peg
Replies
Sign in or sign up to reply.
I love to print photos on watercolor paper...it has a wonderful texture and lends a perfectly aged effect to photos which works well for me as my work is currently focused on documenting the lives of my ancestors.
Replies
Sign in or sign up to reply.
I love printing my journaling text on vellum. Printing pictures on vellum is a wonderful idea!
Replies
Sign in or sign up to reply.
Loved what you said about the photos telling the story. I want to try and get more photos that tell the story. I take lots of photos but I'm not always getting the story.
Sherry
Replies
Sign in or sign up to reply.
thanks ofr the link toPapermill--awesome
Replies
Sign in or sign up to reply.
What I really want to do is learn how to play with the depth of field. I just got a DSLR (an upgrade from my point and shoot) and that is what I want to learn first!
Replies
Sign in or sign up to reply.
I love printing on acetate, but I flip the image before I print so it is face up on the waterproof side.
Thanks for the inspiration,
Rachel
Replies
Sign in or sign up to reply.
I think it's really fun to print photos onto a transparancy. Just a different look and it adds another texture to an album. Thanks for all of the wonderful ideas you're posting!
Replies
Sign in or sign up to reply.
My favorite tip is ...get in closer! Unless it's the landscape you are trying to capture, you just don't need all that background clutter.
Replies
Sign in or sign up to reply.
My photo tip is don't forget to take photos of the every day and not just the special occasions. It's the everyday shots that really tell the story of our lives. But anyone who reads your blog all ready knows that.
I have the Grafix make your own rub ons and LUV them. I peel just part of the adhesive back and lay just a small area down and then slowly work it on by getting that area adhered before exposing more of the adhesive. I also trim really close as not to get much of a halo. This is not a fast process but I still enjoy it. I am pretty sure I used them on textured, as Bazzill card stock is pretty much all I use. Really try it again and see if it works.
Thanks for the awesome week of words + photos.
Rose
Replies
Sign in or sign up to reply.