December Daily Album : Part Two
Tags: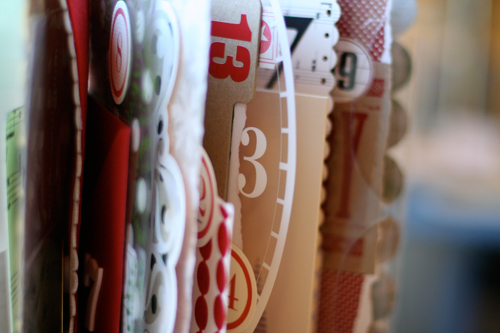
Now comes the fun part: selecting + organizing + numbering pages.
One of the things I aim for in this album is variety: sizes, textures, colors, edges, etc.
For this album I cut a bunch of pieces 6 inches x 9 inches and arranged them inside the album (or as close as I could get with some circle + die cut papers). You will cut yours to whatever size makes sense for the book you are using. After putting them in I did other things: tearing, cutting smaller, creating decorative edges with the Fiskars Threading Water Punch, etc.
Next, as you will see below, I added numbers to each page.
For me, this book is less about decoration and more about documentation. What that means is that when the time comes in December to add my words and photos I will not spend a lot of time trying to figure out what I want to add product-wise. I don't have any plans to spend more time each day than it takes to upload and print a photo (here at home), write up some journaling, and adhere it into my book (and maybe add one embellishment or a couple word stickers). I don't want this album to take up more time than necessary during the holiday season. Again, I want to be present and experience the season and do a bit of documentation as we go along.
I like to do documentation as we go along, rather than after the holidays, because I find that I have a tough time remembering what were the specific important or poignant or endearing or special parts of the day months after the fact (sometimes they are comments in passing or very simple things that end up meaning the most). Instead of "we went to see Santa today" I want the journaling to be more personal and real: how did Simon react, what was special about the moment, did he say anything silly or wonderful, what made it unique from last year, etc.
Those are the things I want to capture in this album.
As you will see below this is all about keeping it simple. Don't spend too much time deciding where to put the numbers or journaling blocks. Get it done. When December rolls around you will be working with what you have in front of you rather than starting from scratch. Making it work is a creative task in and of itself.
Day One:
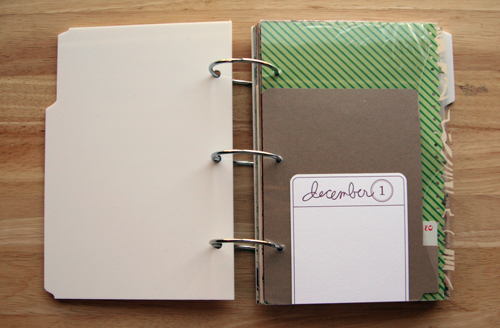
[ Clear Scraps XL Deco Acrylic Page (cut in half + used the second half for Day 18); Ali Edwards December Daily Photo + Journal Overlays ]
Day Two:
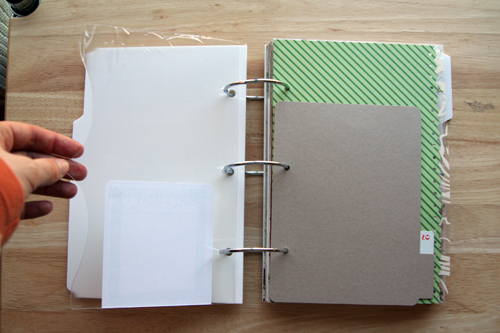
[ Scenic Route Kraft Photo Mattes; random playing card tucked behind the tabbed photo matte ]
Day Three:

[ Art Warehouse Mistletoe Ledger; Ali Edwards December Daily Photo + Journal Overlays; Fiskars Threading Water Punch (for decorative edges) ]
Day Four:
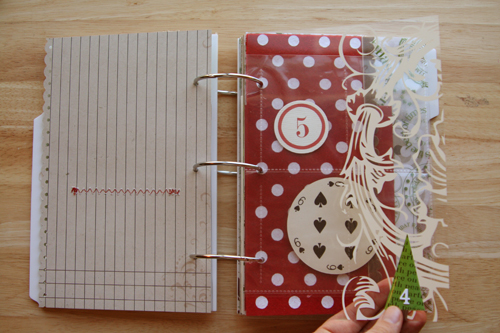
[ Hambly Climbing Vine Antique White Transparency; Tree: Art Warehouse Noel Epoxy Sticker ]
Day Five:
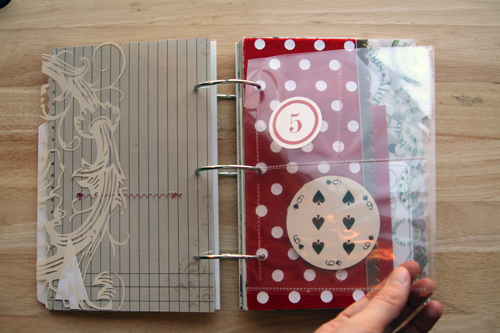
[ Baseball card page protector cut to size; Every Jot + Title Red Circle Numbers ]
Day Six:

[ Creative Cafe Dark Red Polka Dot Felt; vintage circle 6 card; American Crafts Ribbon #57604 ]
Day Seven:

[ Paper Source Red Envelope; American Crafts White Subway Foam Thickers ]
Day Eight:

[ Art Warehouse Mistletoe Transparency; #8: Every Jot + Title Red Circle Numbers ]
Day Nine:
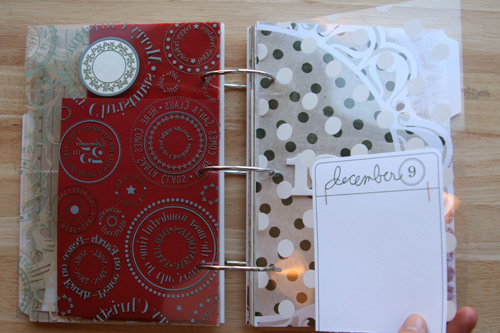
[ Heidi Swapp Overlay Dots; Ali Edwards December Daily Photo + Journal Overlays ]
Day Ten:

[ Art Warehouse Mistletoe Dot Die Cut Paper; American Crafts White Subway Foam Thickers ]
Day Eleven:
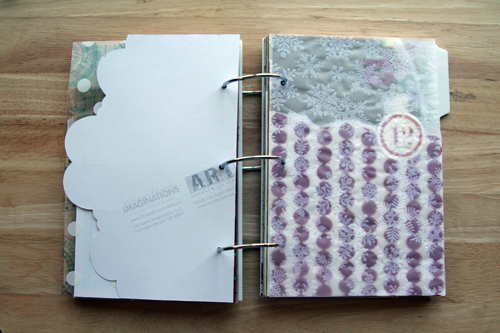
[ Making Memories Flocked Vellum Snowflake Paper; still needs a number ]
Day Twelve:
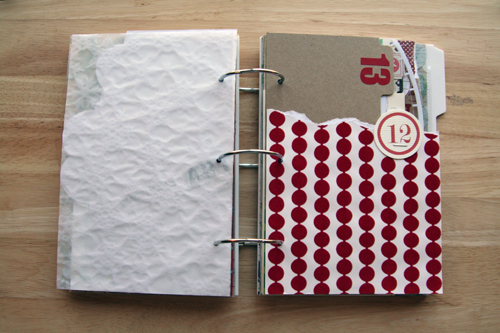
[ Making Memories Flocked Dot Papier Rouge Paper; #12: Every Jot + Title Red Circle Numbers ]
Day Thirteen:

[ Random Chipboard Piece; Scenic Route Berkley Red Letter Stickers ]
Day Fourteen:
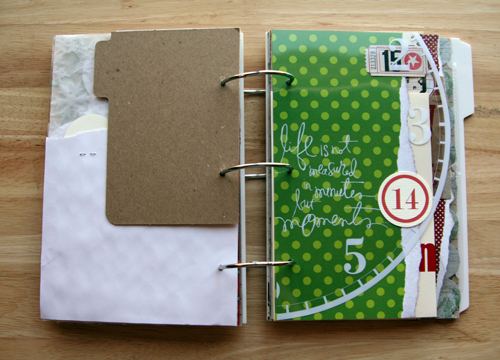
[ Heidi Swapp White Moments Clock Overlay; #14: Every Jot + Title Red Circle Numbers ]
Day Fifteen:
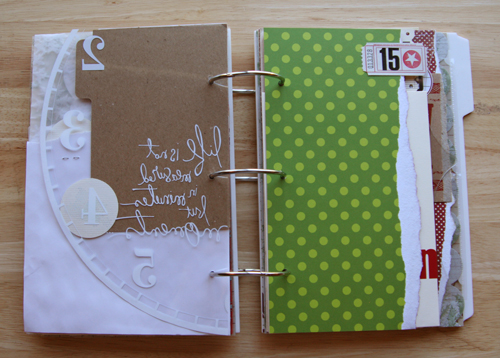
[ American Crafts Bushels of Fun; Jenni Bowlin Studio Boy Icons Printed Journal Ticket; American Crafts Black MOMA Remarks Letter Sticker Book ]
Day Sixteen:
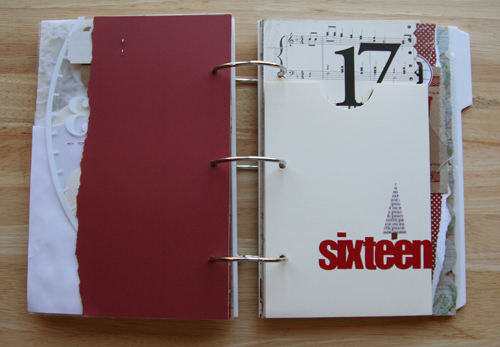
[ Paper Source Pocket Envelope; Scenic Route Berkley Red Letter Stickers; Tree: Art Warehouse Noel Epoxy Sticker ]
Day Seventeen:
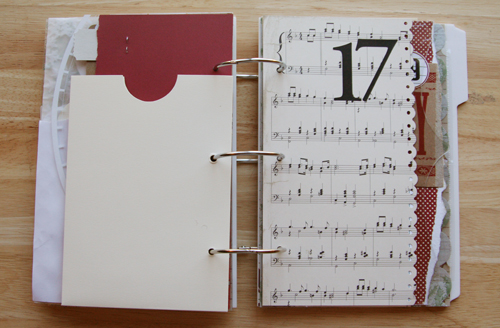
[ Unknown Music Paper; American Crafts Mumbo Jumbo Black Letter Stickers ]
Day Eighteen:
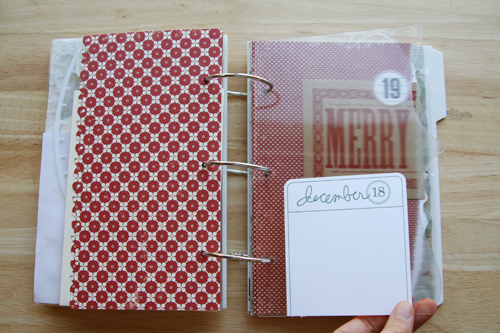
[ Clear Scraps XL Deco Acrylic; Ali Edwards December Daily Photo + Journal Overlays ]
Day Nineteen:
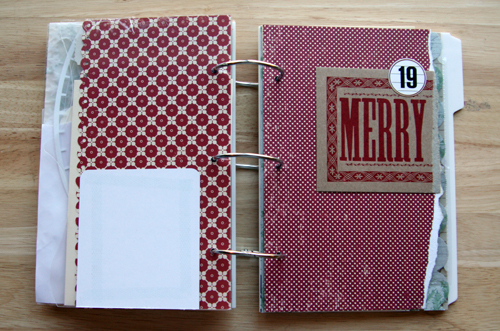
[ Making Memories Skinny Stripe; Circle Sticker: Art Warehouse Christmas Cardstock Stickers; American Crafts Black MOMA Remarks Letter Sticker Book; "Merry:" Unknown ]
Day Twenty:
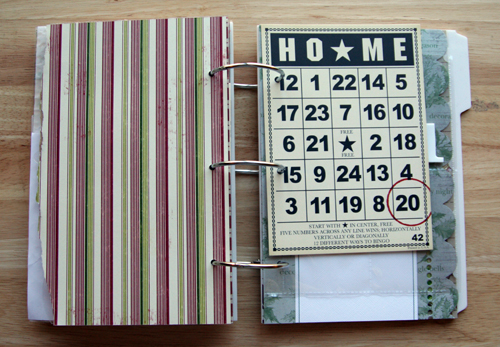
[ Jenni Bowlin HOME Bingo Card (may be replaced with one from her holiday collection coming soon); Circle Stamp: Savvy Stamps ]
Day Twenty-One:
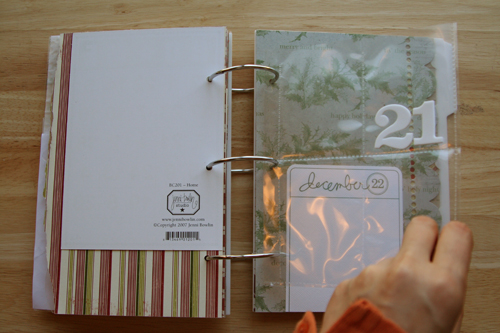
[ Baseball card page protector cut to size (end up with four pockets); American Crafts White Subway Foam Thickers ]
Day Twenty-Two:
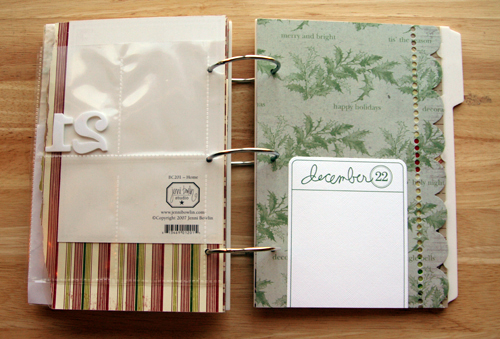
[ Art Warehouse Die Cut Mistletoe Text; Ali Edwards December Daily Photo + Journal Overlays ]
Day Twenty-Three:
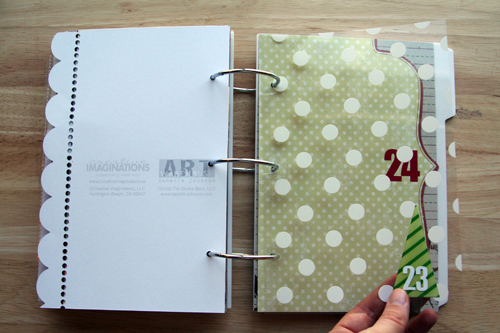
[ Heidi Swapp Overlay Dots; Tree: Art Warehouse Noel Epoxy Sticker; American Crafts White Moma Remarks Letter Sticker Book ]
Day Twenty-Four:
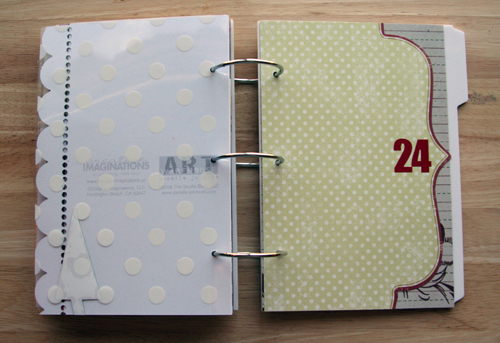
[ Making Memories Artisan Solid Die Cut Paper; Scenic Route Berkley Red Letter Stickers ]
Day Twenty-Five:
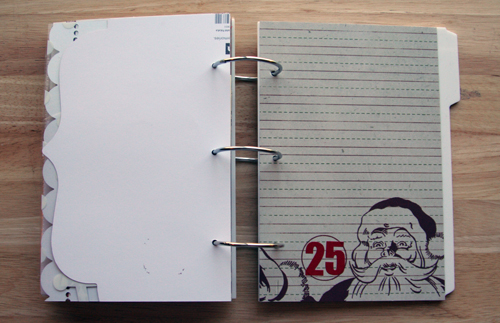
[ Art Warehouse Dear Santa Hollyberry Paper; Scenic Route Berkley Red Letter Stickers ]
These albums get more stable (vs. just a piece of patterned paper as a page) when photos are added. Some photos will cover the entire page, some will be cropped and arranged on top of the patterend paper, and others will be added in as pages themselves. Most of that will depend on what happens on that particular day. Take a look at last year's album to see completed examples.
Edited: Feel free to leave questions in the comments today. I will address them in a post tomorrow.

Am I skipping Thanksgiving?
Someone asked in the comments yesterday if I was going to do anything for thanksgiving/November/gratitude-related and the answer is YES. I am hoping to have more information and details on a great project for you soon! I mainly just like to get this one out and done with early on as I have lots more projects planned for the lead up to December (you can see the holiday projects I did last year here).
This is part of a series of posts on creating a December Daily Album. All posts can be found here.


Comments
Sign in or sign up to comment.
148 comments
I really like the idea of a daily album.
Sort of like the book "The 24 Days Before Christmas" In the book they do something special each day in December leading up to Christmas.
Being the packrat that I am, I'm thinking that old Christmas cards would make great pages.
Viki
Replies
Sign in or sign up to reply.
Thanks so much for listing all of the products you used to assemble your amazing album. It makes the whole process much easier for me. :) You really inspire me! Thanks again.
Replies
Sign in or sign up to reply.
Hi Ali, Last year you gave us a recipe for muffins that you made on the 4th of December. I think they were Angel food muffins, I can't remember and would like to make them could you please email me and let me know where to find the recipe. crystalladoux@yahoo.com.
Thank you
Crystal, Fountain MN
Replies
Sign in or sign up to reply.
Thank you for inspiring me to begin this project early. Every year I join in Shimelle's class (and I love that)but I only end up completing maybe half of the entries because I get bogged down trying to create something pretty. I spend all my time playing with the papers and embellishments rather than documenting the memories.
This year I will follow your lead and make up my album/journal ahead of time. Maybe I will have better luck completing it.
Thanks for the idea.
Replies
Sign in or sign up to reply.
It looks amazing!! I can't wait to see how it progresses.
Replies
Sign in or sign up to reply.
You have no idea how inspired you make me. If only I didn't have to work so I could scrapbook non-stop. one day I will get this all done and I'll be awesome like you. :-)
Replies
Sign in or sign up to reply.
Wow.. yours is such an inspiration. Sometimes, I get afraid if the pages and elements i added in are not the same... does not have this 'uniform' look. Maybe i am trying too hard for it to be perfect.
Replies
Sign in or sign up to reply.
I just went shopping yesterday for my holiday papers and I sure wish I would have seen that Art Warehouse transparency!!! I love it!
This may be too time consuming, but when you start doing and posting your pages in December, I would love it if you could post the uncompleted page with the completed page. It seems like last year I was sometimes curious as to how your page ended up the way it did--it would be interesting to know your process as you figure out how to make the stuff from each day work with the page you had available.
I realize part of the reason of this project is for simplicity, so that may be more than you will want to do during that month--but in case you have time, maybe you can do that, at least for some of the days! =)
Replies
Sign in or sign up to reply.
Thank you!
Such inspiration, and I can use lots of "old" stuff which finaly can be used.
Rianne
Replies
Sign in or sign up to reply.
You are so gosh darn talented!! :0)
I love how you circled the 20 on the bingo card for day 20.
Replies
Sign in or sign up to reply.
You put so much work into each of your blog posts, and it is much appreciated. This December Daily album is very inspiring--I'm not planning on making a holiday themed one, but now I'm inspired to make an "everyday" one. Thank you for your always beautiful blog!
Replies
Sign in or sign up to reply.
I'm curious, did you buy anything new for this album or did you just use supplies you had on hand?
It's an amazing album. So creative and festive.
Replies
Sign in or sign up to reply.
Ali,
I love the Clearscraps acrylic, but how do you cut it? Can you post a comment or email me at katehaddad@comcast.net?
Replies
Sign in or sign up to reply.
This is absolutely GORGEOUS Ali! I so want to get started on this now. :)
Replies
Sign in or sign up to reply.
I am loving this project-since we are on a uber tight budget, I made my cover with chipboard from the back of notepads. I covered them with Bazzill Parakeet (my fave) and am using up some OLD chipboard numbers I had..finally got around to painting them. I hope to do this entire album w/o buying any new product.
Replies
Sign in or sign up to reply.
I am LOVING the step-by-step directions. Your projects are always so amazing.
Have you (or are you) going to have a book with a similar step-by-steps? I have Sharing Your Story, but I would really like something to cover step-by-step instructions.
Replies
Sign in or sign up to reply.
Ali, I think it is great that you are providing photos and instructions for these great projects on your blog!! You are such a great source of inspiration for scrapbookers. Thank you for everything you do.
Keely
Replies
Sign in or sign up to reply.
great album again this year :))))
thanks for sharing your great ideas with us!
Replies
Sign in or sign up to reply.
I love, love, love your album! I worked on mine last night and this morning and now need to reorganize the pages and get the dates on the pages.
I cheated a bit because a stuffed tomte (elf) I ordered from Finland arrived yesterday. I saved his tag, and the customs declaration from the envelope and tucked them in a small green and white checked envelope I had. I glued that on a page and left space for a photo of the Tomte when he is placed in the red chair by the fireplace with a sprig of holly and a ribbon tied to the chair. And a few lines for "his story"... how he happened to come to live at our house (even though this happened in October, I want to remember it all). The lady who created him gave him the name Melker and wrote a note on an enclosed Tomte post card. I punched holes in that and put it in the album too.
Wisc. hugs!
Joni
Replies
Sign in or sign up to reply.
I thought I'd make it easy and just use only pics + your December overlays on pics w/journaling on the opposite side. But NOW I want to create, create, create...like how your used the overlays w/stitching for soon-to-be journaling. Cool. . . Thanks for our everyday blogging during projects---I live for it now! So...WHO inspires you these days???? ;-)
Replies
Sign in or sign up to reply.