Sweet Baby : New Stamps & A Layout
Tags: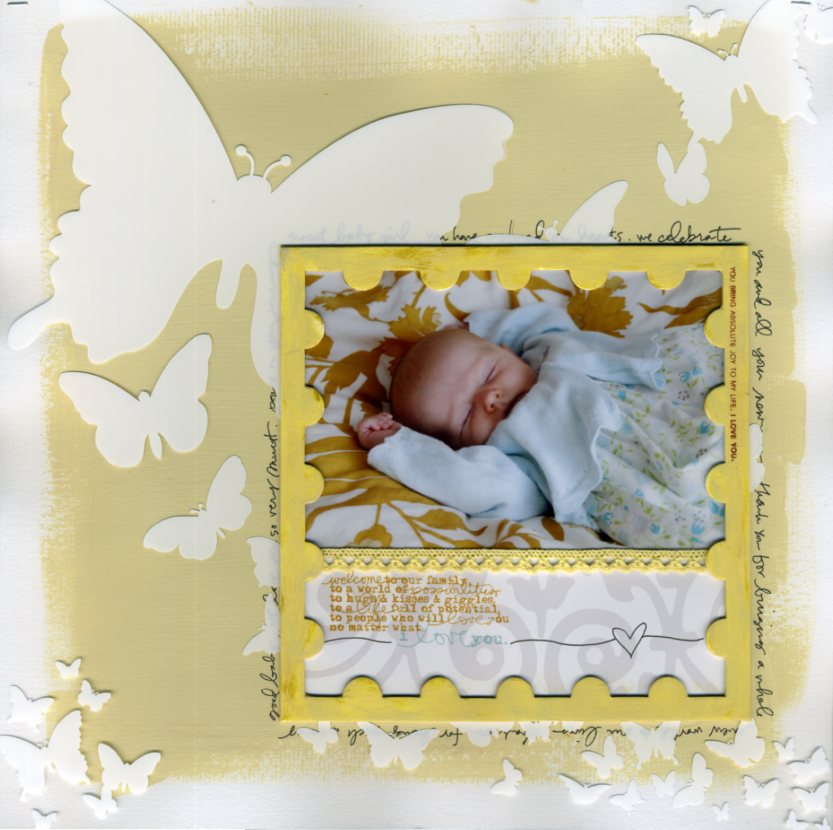
[ Supplies: Technique Tuesday Fundamentals Postage Frame; Technique Tuesday Sweet Baby Stamps; Making Memories Flower Patch Trim; Hambly Butterfly Transparency; Adirondack Dimensional Pearls in Butterscotch; SEI Praline Glitter Chocolat Paper Patterned Paper (white with grey) ]
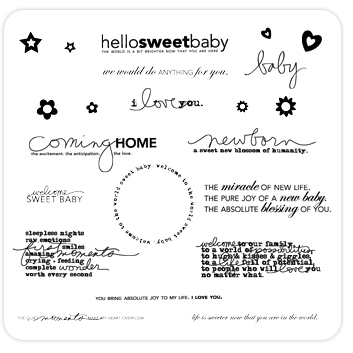
I am excited to introduce you to the newest stamp set in my collection for Technique Tuesday. Sweet Baby stamps are now available through Technique Tuesday's website or ask for them at your local scrapbook/stamp store. These same designs are also available as Digital Baby Word Art at Designer Digitals.

Here's a run down of my process for creating the layout featured at the top of the post:
1. Begin with a sheet of textured white cardstock for your background. Paint a large rough-edged square in any color (I used cream paint and a foam brush). Let dry.
2. While the paint is drying, apply the Adirondack Dimensional Pearls to the Fundamentals Postage Frame. I put it on with my finger and then ended up adding a bit of lighter yellow paint on top of the pearls to tone it down just a bit.
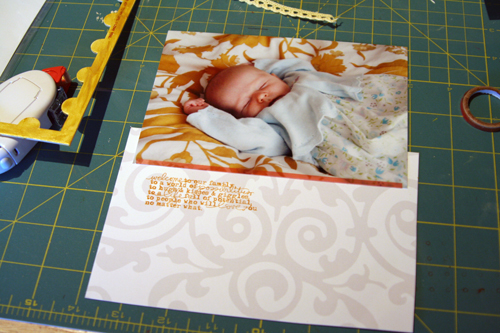
3. Cut patterned paper to fit with the photo behind the postage frame. Adhere photo to patterned paper.
4. Stamp two of the Sweet Baby Stamps onto the patterned paper. Use a different color for each stamp. Hand-draw the black line and heart.
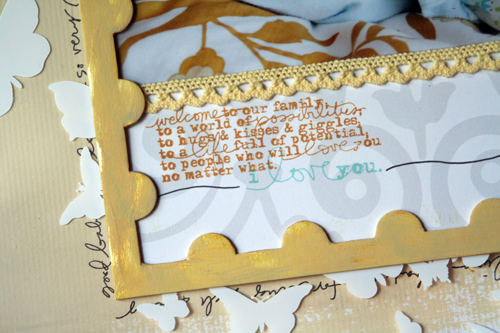
5. Adhere Making Memories Flower Patch Trim along the seam where the photo and patterned paper meet. I often use Therm-O-Web super tape to adhere ribbon.
6. Adhere the postage frame to the photo/stamped patterned paper combination. I used the super tape for this task.
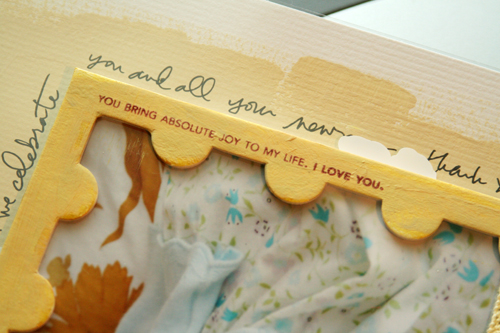
7. Using one of the lined sentiments from the Sweet Baby collection, stamp directly on to the painted postage chipboard. I used Technique Tuesday ink from the Earth Essentials pack.
8. Staple the Hambly Butterfly Transparency on top of your painted piece of cardstock. I just used two mini staples on the top corners using Tim's new mini-stapler which is awesome.
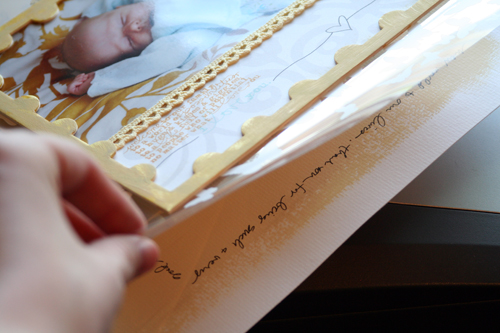
9. Lay your photo combination on top of the background transparency/cardstock and choose your placement. I went for the bottom right corner. Once I figured out where I wanted that piece on the page I lifted up the transparency, laid the photo combination on top of the cardstock (not adhered, just sitting there) and journaled around the outside following the square shape.
10. After hand-journaling I picked up the photo combination, laid the transparency back down, and then adhered the photo combination on top of the transparency (using the hand-journaling square as a guide for placement). Some of the journaling is covered by the white of the butterflies which I decided was completely fine. If someone wants to read the journaling they can lift up the transparency (this is partly why I only stapled on the top).
11. Don't forget to add the date! I just noticed that I forgot to add a date somewhere on the layout and will make that adjustment before pu
tting it in her album.

2nd Annual Autism Awareness Fundraiser Crop at Ben Franklin Crafts in Bonney Lake, Washington : Ben Franklin in Bonney Lake is hosting an Autism Awareness Fundraiser Crop again this year on Saturday, April 25th from 6pm to Midnight. Cost is $35. You can find more information on this event here.


Comments
Sign in or sign up to comment.
45 comments
beautiful layout !
i love the color, the presentation... all is so wahoo !
Replies
Sign in or sign up to reply.
This is such a beautiful layout of Anna! Thanks for sharing it with us! :)
Replies
Sign in or sign up to reply.
Your layout is just precious! Not a bad model either!!! LOVE those products, just so perfect for a new little person.
Replies
Sign in or sign up to reply.
Wow Ali - your designs are amazing and your tutorials are so thorough. I absolutely adore your work. You are so talented!
I aspire to be a great as you are someday VERY soon.
Sincerely, Cijaye
Replies
Sign in or sign up to reply.
[...] SWEET BABY. Details on this layout can be found here. [...]
Replies
Sign in or sign up to reply.