Tuesday Tutorials : Elise Blaha : Small Blank Books
Tags:
This week Tuesday Tutorials welcomes Elise Blaha.
One of the things I admire about Elise is that she does a fantastic job bringing a bunch of random elements together and making them work in wonderful compact packages. She has a super inspiring list of all the ones she has created here. Also check out these posts: GOventure : pocket, Letterpress Printing, and Daily Card (seeing them all together in an album is so cool).
Here's Elise:
My favorite thing to make are little books. I make them for anything - days, weeks, special occasions, seasons, vacations, colors, favorite objects. I have been known to plan things just so I can make a book about it. I experiment will all sorts of ways to get pages together in book form. The type of binding shown below is one of my favorites.
Download a PDF of Elise's project here.
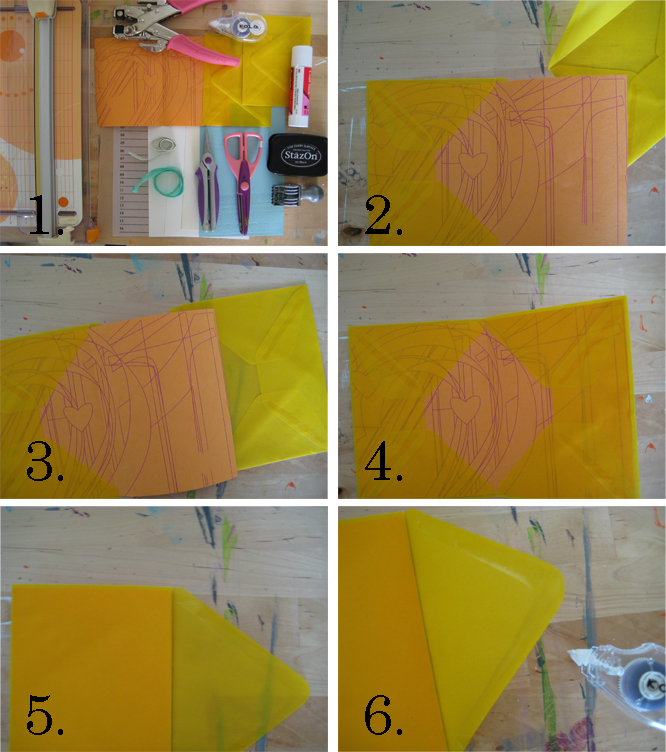
Step 1 :
Gather supplies. You will want two envelopes of the same size (mine are size A2 and semi transparent), approximately 6 sheets of different paper (sized 5.5x8.5 inches), ribbon or string, adhesive, a hole punch.
Step 2 :
Slide a piece of paper into one of the envelopes. It should fit snugly and stick out as shown.
Step 3 :
Stick the flap of the second envelope behind the paper already inside the first envelope.
Step 4 :
Your cover should look like the image shown with the patterned paper tucked into each envelope.
Step 5 :
Fold your cover in half. The flap that is not tucked into an envelope should stick out.
Step 6 :
Add adhesive to the envelope flap and "seal" it to the back of the other envelope. You should now have a book cover!
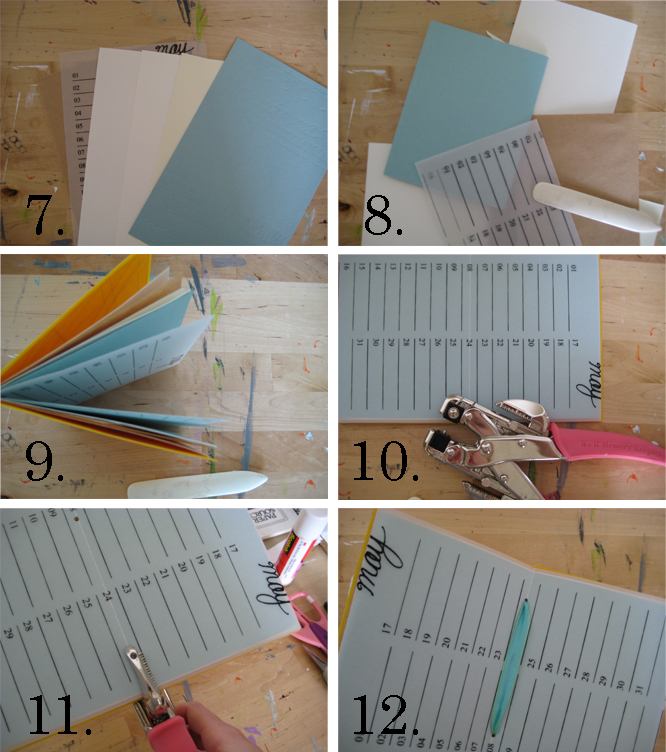
Next, you can add pages to your book.
Step 7 :
Gather various papers and cut down to 1/4 inch smaller than your envelope width. If you are using A2 envelopes, this would be 5.5x8.5 inches or half of an 8.5x11 piece of paper.
Step 8 :
Fold your papers in half the short way.
Step 9 :
Open up your folded papers and layer them within each other and within the envelope book cover.
Step 10 :
Flatten your book out.
Step 11 :
line up your pages and using a hold punch, punch through the book pages on the folded crease. I used a Crop-A-Dile which was strong enough to go through all the papers at once. You can also punch through each page separately and line them up so the holes are in the same place of each paper.
Step 12 :
String a piece of ribbon or string through the holes. Tie in a bow on the outside of the book.
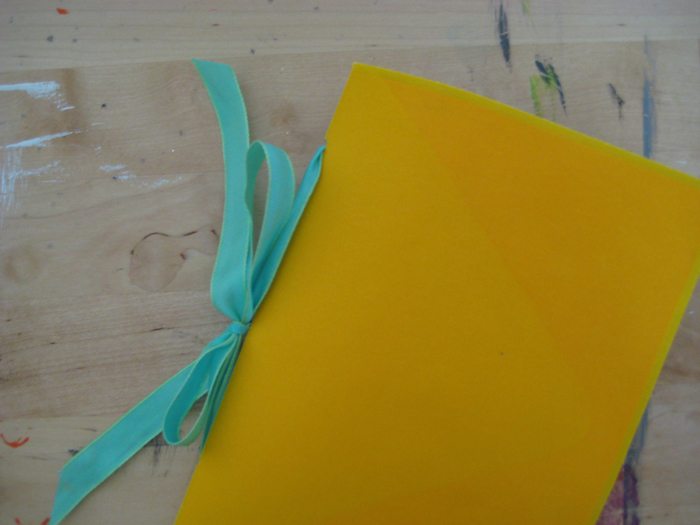
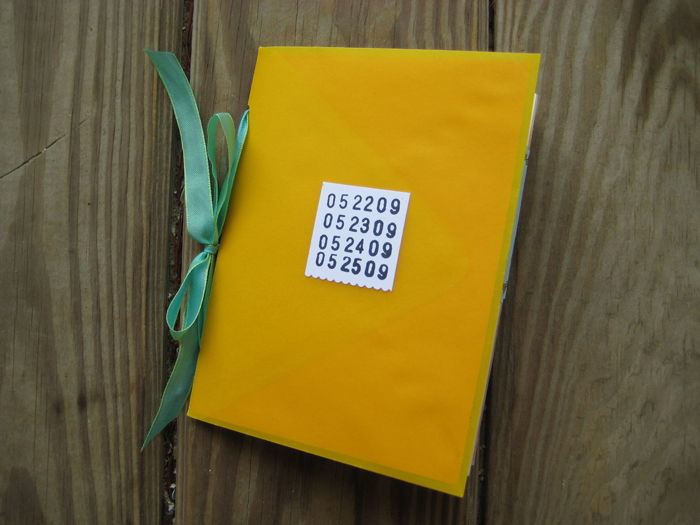
At this point you have a unique blank book that could be used for pretty much everything - the easiest would be a journal to carry with you. I decided to use mine as a home for the many photos I took during a busy Memorial Day weekend. I had over 150 photos from the weekend and decided the best way to share a bunch would be to make them all the same size.
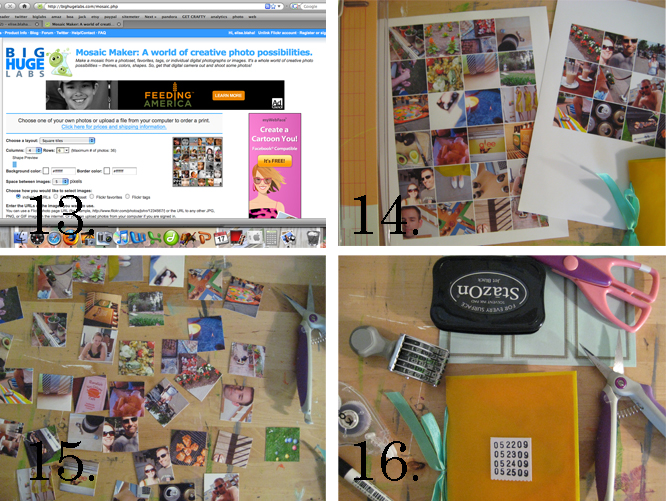
Step 13 :
I uploaded the photos I wanted to include to flickr.com and used Big Labs mosaic maker to create 4x6 grids out of the photos. This accomplished two things at once: it cropped them into squares and got them all in one place so I could easily print at home on to photo paper.
Step 14 :
Print the photos.
Step 15 :
Crop your photos. I used a paper cutter to get straight lines.
Step 16 :
Gather simple supplies to complete the book. I used a date stamp, adhesive, blue bordered labels, scalloped scissors, my cropped photos and a black American Crafts slickwriter.
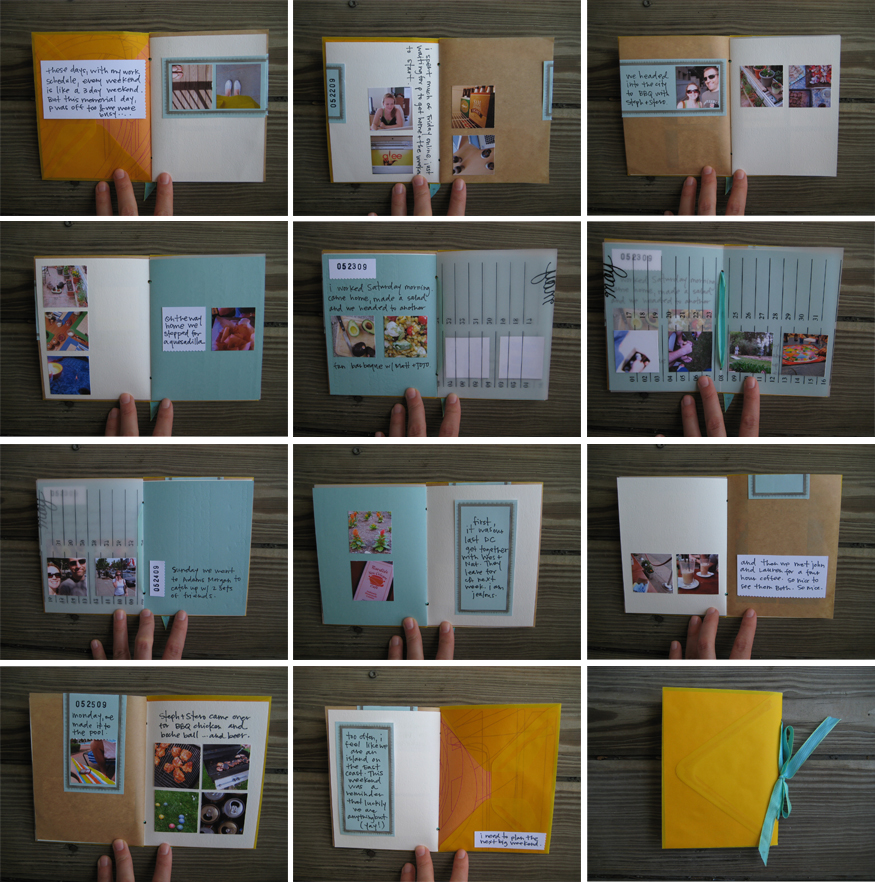
In the end, I have a small book that captures a variety of our weekend in photos and words.


Comments
Sign in or sign up to comment.
43 comments
I love all of Elise's designs! Just got a couple of her journals in the mail this past week, and am thrilled to fill it up. I really enjoyed this tutorial and Jamaica's tutorial. Thanks so much Ali! These are all so fun!
Lisa
Replies
Sign in or sign up to reply.
Hi Rebekah,
The mosaic maker crops your photos into a square. It will go right for the middle. If you want your photos to be cropped a certain way, simply upload already cropped squares to flickr and use the mosaic maker on them.
Hope that helps!
Replies
Sign in or sign up to reply.
Good question. I will work on getting a PDF together :)
Replies
Sign in or sign up to reply.
I love these Tuesday Tutorials! I also love Elise's style and her minis! YAY!
Replies
Sign in or sign up to reply.
I love it !
Thanks !
Replies
Sign in or sign up to reply.
Thanks Olivia ! This is a great idea !
Replies
Sign in or sign up to reply.
This is an AWESOME tutorial. Thanks so much. I love making little books and I am always looking for new ways to bind them. I love the envelopes.
Thanks again!
Replies
Sign in or sign up to reply.
This is one of the coolest things I have seen in an age! I love the use of envelopes...you are a creative GENIUS!! ThankS!
Replies
Sign in or sign up to reply.
thanks for this, Ali! i got lost on Elise's blog today- i have added her to my "favorites"
Replies
Sign in or sign up to reply.
Love it! I just made one in less than 10 minutes. Great idea and tutorial, Elise!
Replies
Sign in or sign up to reply.
very very cool! I'm so going to make one of these... to add to my ever growing collection of sketch books, journals, etc.! Thanks Elise & Ali!
Replies
Sign in or sign up to reply.
Ali you have done it again! Your Tuesday Tutorials get me through the day!! I have loved Elise's work for a while and am so happy to learn more of her mini book making tips!
Replies
Sign in or sign up to reply.
wow I love your job Elise:) you have a talent for this I respect people like you, who feel something inside and they try to create and show it to other people :)
Replies
Sign in or sign up to reply.
Ali - thank you for sharing this! I found you through Elise but I'm definitely coming back. I even made my own mini book after seeing this - I just posted about it here - http://leavesinthespring.blogspot.com/2009/07/little-book.html
Replies
Sign in or sign up to reply.
This is darling! I'll be linking to this.
Replies
Sign in or sign up to reply.
I never thought to use Big Huge Labs to make pictures a smaller size. That's brilliant!
Replies
Sign in or sign up to reply.
i love this! thanks for sharing it.
Replies
Sign in or sign up to reply.
I also made my own mini-book after seeing this tutorial linked through Elise's site. So much fun to make...I am already completely addicted and thinking about what my next mini-book will be about. Crafty girls rock!
http://dianamoffo.blogspot.com/2009/07/okay-ill-admit-it.html
Replies
Sign in or sign up to reply.
having trouble uploading pix on big huge labs. Not sure if I'm doing it right. First you choose the layout then I wanted to upload pix from my computer. I would pick them individually which only allows you one at a time. But I don't know what happened only one pix showed up. what am I doing wrong?
Replies
Sign in or sign up to reply.
Elise is a very talented young artist. I took her June class and loved it. She is fresh and great.
Replies
Sign in or sign up to reply.