Week In The Life : Bringing It All Together • The Words
Tags: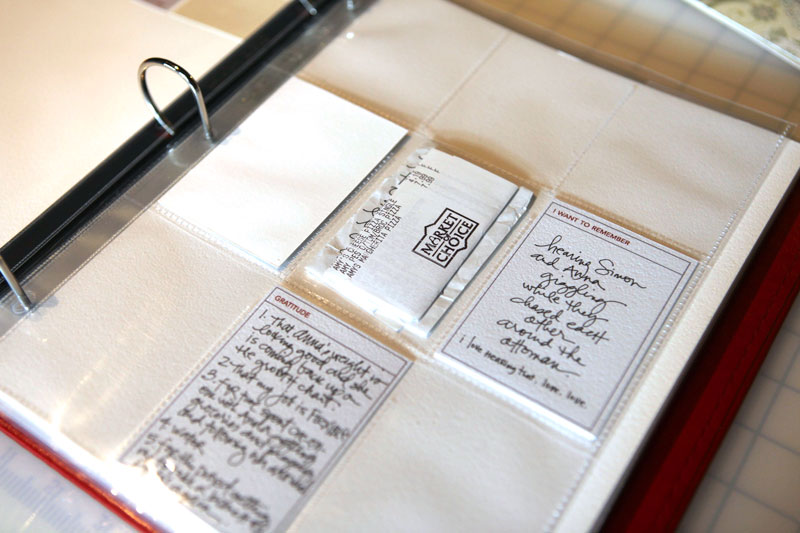
On Tuesday I spent some time assessing the words portion of my Week In The Life album.
In reading comments and talking to people over the years of doing this project, it seems that people tend to either have a ton (as in pages & pages) of journaling or very little.
This year I found myself being less obsessed with the words. Don't get me wrong - they did not lose their place of importance in the album one little bit. I simply adjusted my expectations and let myself go with the flow a bit more. Each day I did something a little different. Some days I wrote directly on the journaling cards. One day I jotted down almost everything I did on the front and back of an 8.5x11 sheet of printer paper. Another day I opened up a Word file and typed in stuff as I walked by the computer on the kitchen counter. Other days I just included the photo captions I included with the photos I shared here each day.
As I looked back over what I have in terms of words for this year I kept being drawn to the simple words I added to the photos when I posted them here on my blog. I haven't decided how exactly I will incorporate those words just yet - I think I will wait until I get my photos back and try a couple things at that point (maybe creating text strips to add onto the photos).
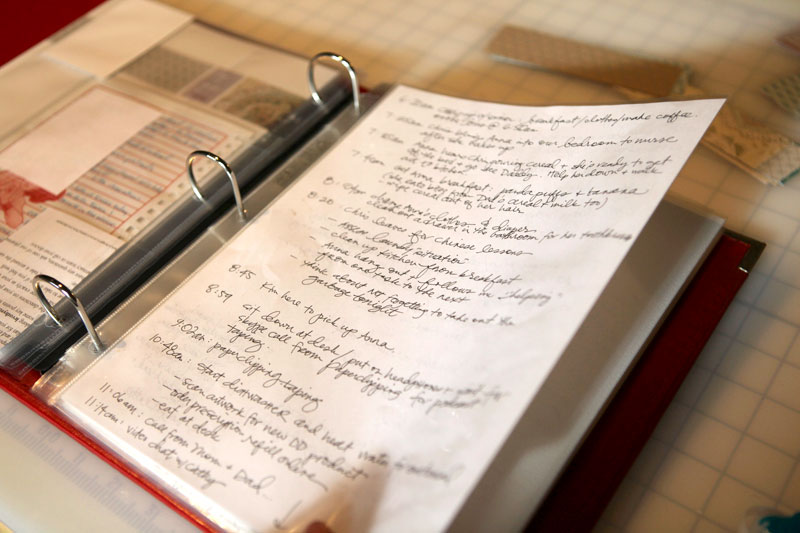
If you are one of those people who really ran with your written documentation you will never be sorry you took the time and effort that went into collecting all that data. You may decide to type it up or simply place it in a page protector like I did above for Tuesday. I purchased an extra package of page protectors to be able to play around and include some additional pages (see more about that below).
Even if you include a full page such as this you might want to consider highlighting some of the key pieces or comments on the journaling cards. I liked having the option to use the cards for one sentence or thought or observation.
DON'T FORGET THE BASICS
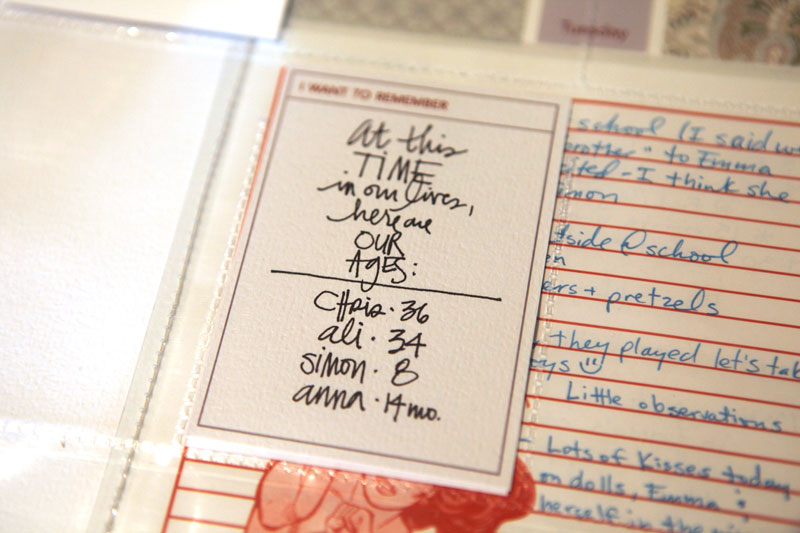
"Did I capture what I wanted to with my words?" was the question I asked myself as I reviewed my collected journaling. It was helpful in making me think about some of the really basic things about my life right now. I included two cards that simply listed how old we are all and what time each of us goes to bed.
It is perfectly ok to add thoughts and reflections after the fact (meaning you didn't write it down during your week) or to use your photos as inspiration for adding more stories. I find that including some of these after-thoughts adds another layer of richness to my album.
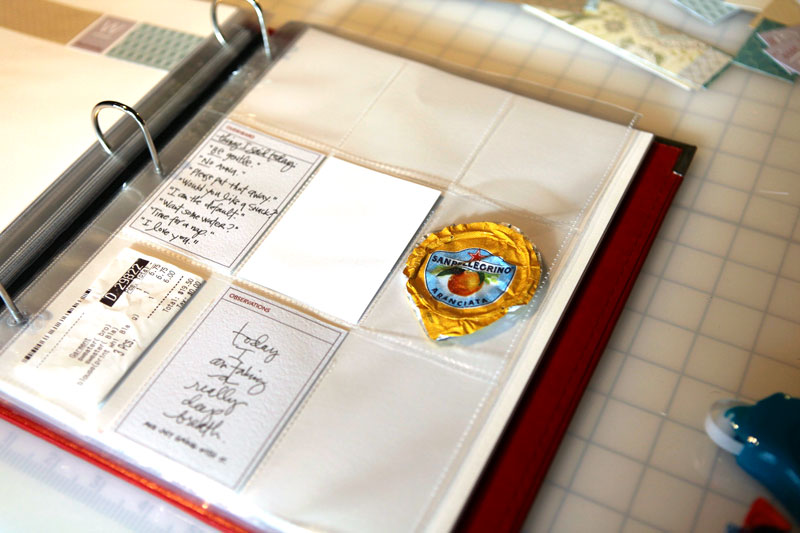
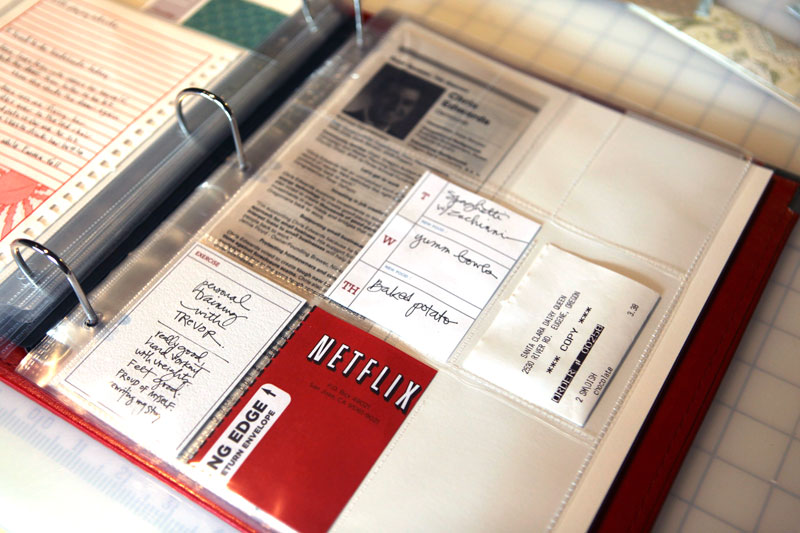
As I go through the "stuff" I collected last week I do things like fold receipts, crop random mail pieces (like a Netflix envelope) and other papers, etc. I didn't end up gathering very much extra stuff this year - a few things per day. If you have more consider creating an additional 8.5x11 page and collage a bunch of your "stuff" together, add more baseball card page protectors, or use a page protector at the end of your album to hold some of the larger pieces.
CREATING CUSTOM-SIZED PAGE PROTECTORS
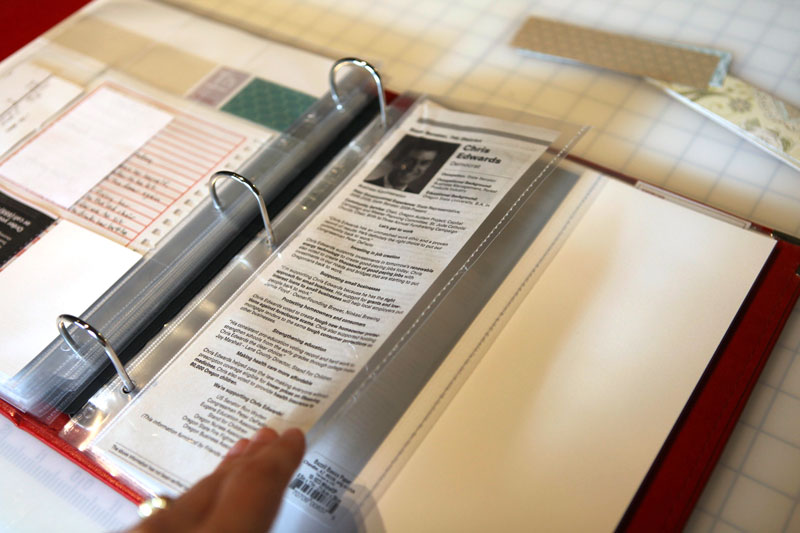
One of things I love to do in albums such as this is to trim and stitch page protectors to custom sizes. I did this back in 2006 with my Disneyworld album and it was a great solution for working with a bunch of papers that were different sizes.
So far in this album I created one for the campaign piece above and two for smaller sheets. It's really a nice way to include random sizes that aren't full 8.5x11 sheets. For papers that are shorter than 11 inches tall I simply trim off the top (cut to size with the paper inside as a guide). I find that this works best with papers that are tall enough to keep at least two of the holes on the page protector for the binder.
To create these custom sized page protector pockets I start with a 8.5x11 (or 12x12 if that's the album size I'm working with) and I slip my paper inside. Next I trim off the top (if it is shorter) using my trimmer - yep - just lay it right on there and slide the blade back and forth.
Next I take it over to my sewing machine (with the paper still inside) and do a straight stitch down the side using the paper as my guide. I usually stitch about 1/4 inch away from the side of the paper. After stitching I bring it back to my trimmer and trim off the excess page protector (again about 1/4 inch from the stitch).
Want to see how I run a page protector through my machine? I recorded a short video here:
Stitching On Page Protectors from Ali Edwards on Vimeo.
My journaling approach in 2008 was a little different. You can read about that process (and how I used The Story of Today templates) here.
I hope that many of you will be taking some time this weekend to get your album creation process in motion. Remember, there is no right or wrong way! I am getting excited to see your albums coming together and I would love to feature some of them next week. Feel free to send me some samples of your work at ali@aliedwardsdesign.com. Please put Week In The Life Example in the subject line.


Comments
Sign in or sign up to comment.
52 comments
Hi Lori - this is the one I am using on this project: http://store.scrapbook.com/bb-10-1023.html
Replies
Sign in or sign up to reply.
Wow I just found your blog and have very much enjoyed reading through it. I have been taking a picture a day since the beginning of the year but felt it needed something more than just being put on my blog. Thanks for the inspiration!
Replies
Sign in or sign up to reply.
Ali-
Thanks for the paper info - I just checked it out and the WHOLE paper pack is awesome. I am definitely buying and/or self publishing w/ it being on sale now :) Now I just need to decide if I will use it for my Week in the life or other digital scrapping!
Replies
Sign in or sign up to reply.
I'm still in the figuring which photos to upload, layout and get printed stage...but I'm planning on tackling the words this weekend. I too have more words for certain days than others, so it's nice to see different versions of how to include them.
And I also LOVE the 7G date stickers...I've been holding onto my last few, not wanting to use them...but wanting to at the same time. Now I don't have to!
Thanks again Ali for this project!
Looking forward to seeing this put all together!
Replies
Sign in or sign up to reply.
Oh and thank you so much for the tutorials, they are really helpful. Your work is very much appreciated!
Replies
Sign in or sign up to reply.
Hey Ali,I am loving the Week in the Life project. I am in NZ and we cant get divided page protectors here.I have sewn my own and divided the pages into 9 even sized pockets. My dilemma now is how did I create a cut so I can slip the cropped photos, etc into the baseball card sized pockets?
Replies
Sign in or sign up to reply.
Thank you for the video of stitching on the page protectors. I have a request, would you mind doing another video of Stitching over chip board? Do you do this? Does it require a special needle? I have not seen much on this but see it often in magazines and I'd love to try it. Thanks again for the video!
Replies
Sign in or sign up to reply.
On the little card "at this time in our lives" is this your handwriting or is it printed, and if printed, can you tell me what font! thanks, angela
Replies
Sign in or sign up to reply.
Thank you so much for the video tutorial on creating custom page protectors. I am definitely someone who benefits from seeing something being created. You have such a lovely voice too.
Replies
Sign in or sign up to reply.
Hi Ali,
This is only my second try at doing anything digital and so I really appreciate the video tutorials. I purchased the journalling cards and I'm trying to customize them using the psd file but I really don't get how to do it. Are there any instructions that I may be missing somewhere? I'm not even sure if this is the right place to be asking this!
Replies
Sign in or sign up to reply.
Hello Ali,
I would love to have a chance to win the baby journal. Three weeks ago our first grandchild was born, and it would be so nice for our little Eli.
Thanks
Helmi
Replies
Sign in or sign up to reply.
I just watched all of your video tutorials at Vimeo. They were very helpful, thank you very much for taking the time to record and post them. I hope there will be more coming! Thank you!
Replies
Sign in or sign up to reply.