Week In The Life 2011 | The Photos
Tags: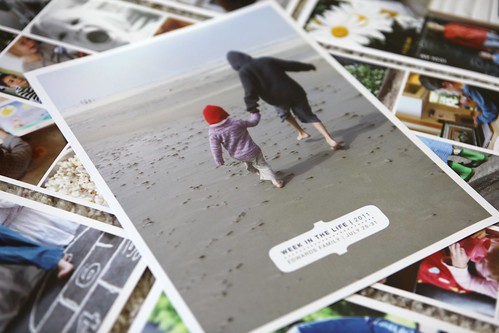
Working through my photos from Week In The Life I'm reminded once again that this is a really big project.
Actually, it's really only as big as you want to make it. There are so many options:
Some of you did Week In The Life on your blog this year - documenting with words and photos. You are most likely done with the project and have moved on to new things. Not printing anything definitely simplifies the process.
Some of you are doing your album all digitally and are likely going through the process of working with some templates (or creating your own) and are getting all the photos and words together. Some of you might even already be done with that process and have uploaded a photobook to a printer or printed at home.
Some of you have uploaded all your photos from the week to a photo developer and are patiently waiting for them to arrive home. When they get to your house you will do any number of things to create your album in a more traditional scrapbook style.
Some of you might be doing a combination of things (like me) - I just finished printing out all my pages and photos here at home and will start the process of cutting out the ones I want to use in the divided baseball card page protector later tonight.
I've said all along that there's no right or wrong way to participate in this project. There's also no right or wrong way to bring all your content together.
Here's a look at where I'm at right now:
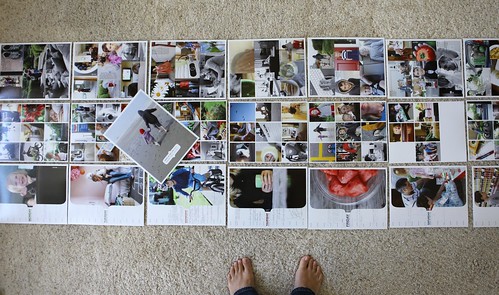
Today I finished printing all the photos I'll be using.
In my case that means I printed out the digital layered template pages - technically the first and the last page for each day - and the photos that will be added to the divided page protectors.
Sometimes people have a hard time choosing which photos to use (especially if you took a ton). My suggestion to you, and what I do, is pick the ones you feel tell the most complete story of your week. You can always create other layouts with the photos you don't use if you really have a desire to work with everything. I never have an intention of using all the photos I take and I'm pretty quick at picking which ones to use. Make a decision and move on so you can get this project done.
I used these templates this year for the spreads + this template for the photos that will go in the middle page protector.
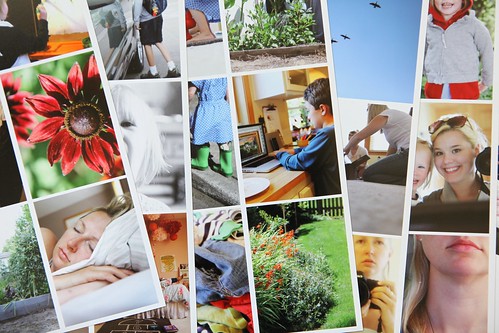
I laid them all out on the floor so I could take a couple photos of the whole group and see it all come together before placing the individual pages in the album. I'm using a Vanilla 8.5x11 album from We Are Memory Keepers.
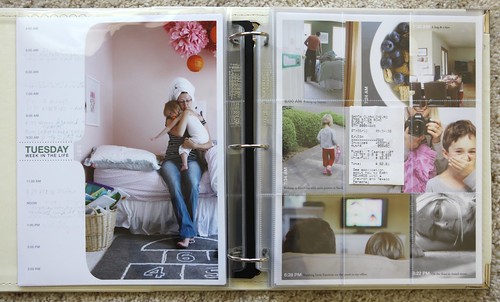
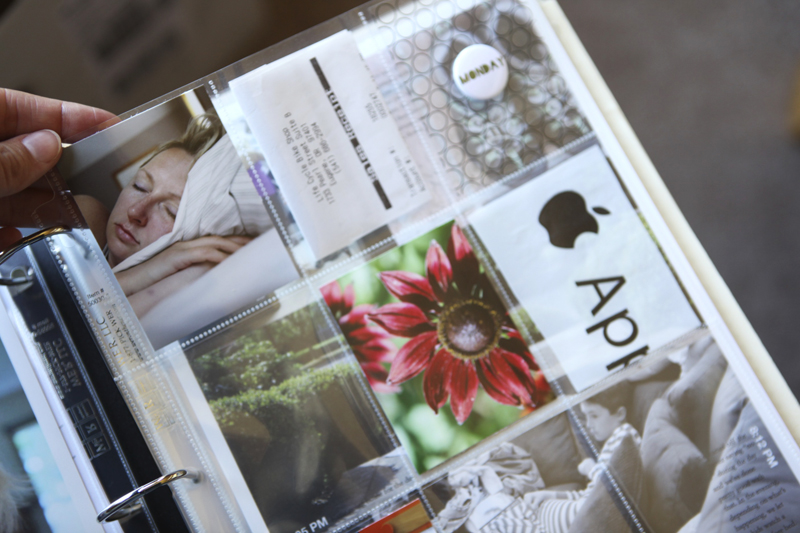
Here's a look at what the pages look like after placing them in the album (with only a receipt inside the page protector at this point).
You might be able to see a bit of my Daily Sheet on the first page of my spread. I scanned in the first page of the Daily Sheet and placed it behind my photo on the template and scaled back the opacity to 45%. You'll be able to see it better on the examples at the bottom of this post.
These pages (made using this template) will be cut up and the photos will be added inside my divided page protectors along with some embellishments and other things collected over the course of the week.
Here's a look at that template in Photoshop before I printed it out:
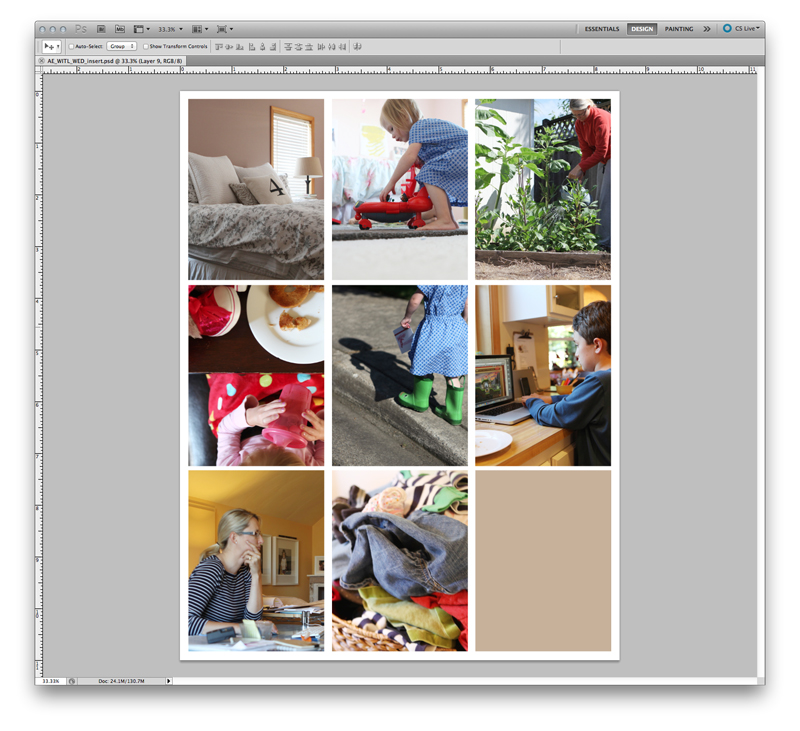
I simply "turned off" the layers that included the tabs and the words and just used the rectangle shapes for all the photos.
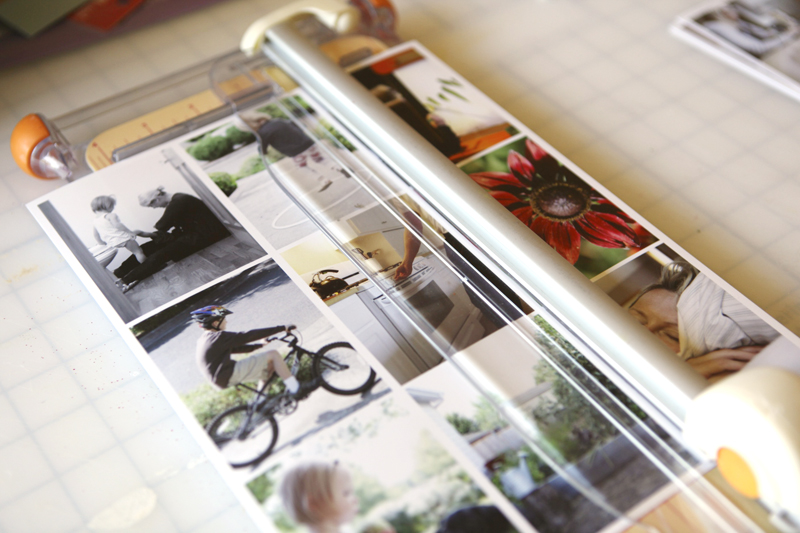
And now I'm cutting them out.
And placing them inside the front and back of the page protectors for each day.
PRINTING DETAILS
This year I'm printing here at home testing out an Epson Photo Stylus R2000 printer and Epson Ultra Premium Photo Paper in Luster. Love this printer. Super happy with the quality of the prints after I messed around a bit with what I was seeing on the screen and what was coming out of the printer. I've always found that each printer I use takes a bit of getting used to as I find that sweet spot between what I see on the screen and the actual photo.
It did take me a bit to figure out the page set-up settings to get the correct margins around the page. You could simplify this by having the photos/content go to the edge of the page but I was determined to keep those margins. What I've found to work for me (printing the 8.5x11) on my Epson Stylus Photo R2000 is to select (1) Center (2) No fit to media - scale set at 100% and (3) select US Letter Sheet Feeder Borderless (retain size). PLEASE NOTE |Your settings may be totally different depending on your printer and it's likely you'll want to do some test printing before embarking on this project at home.
Last year I uploaded all these pages and photos to Scrapbookpictures.com for printing. They do a great job.
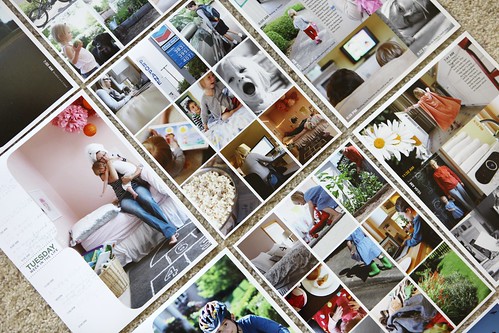
THE SPREADS
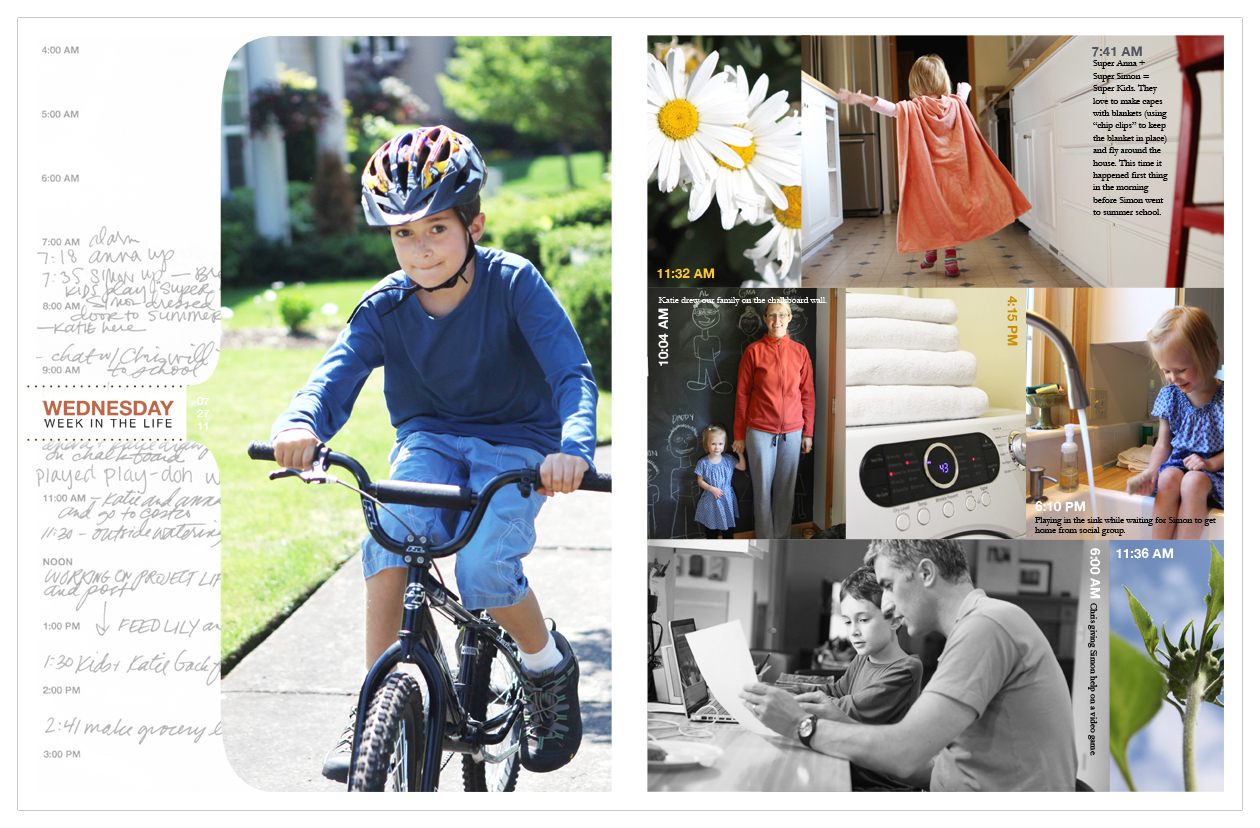
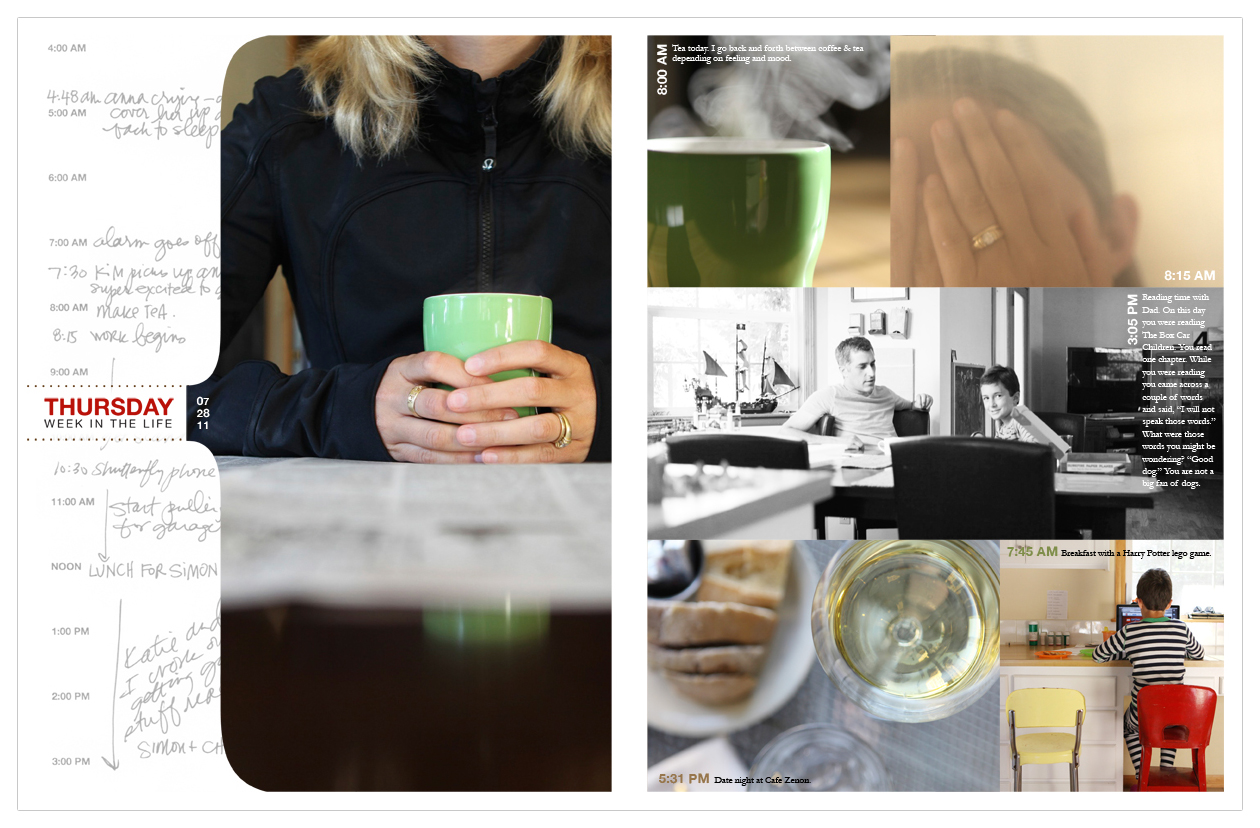
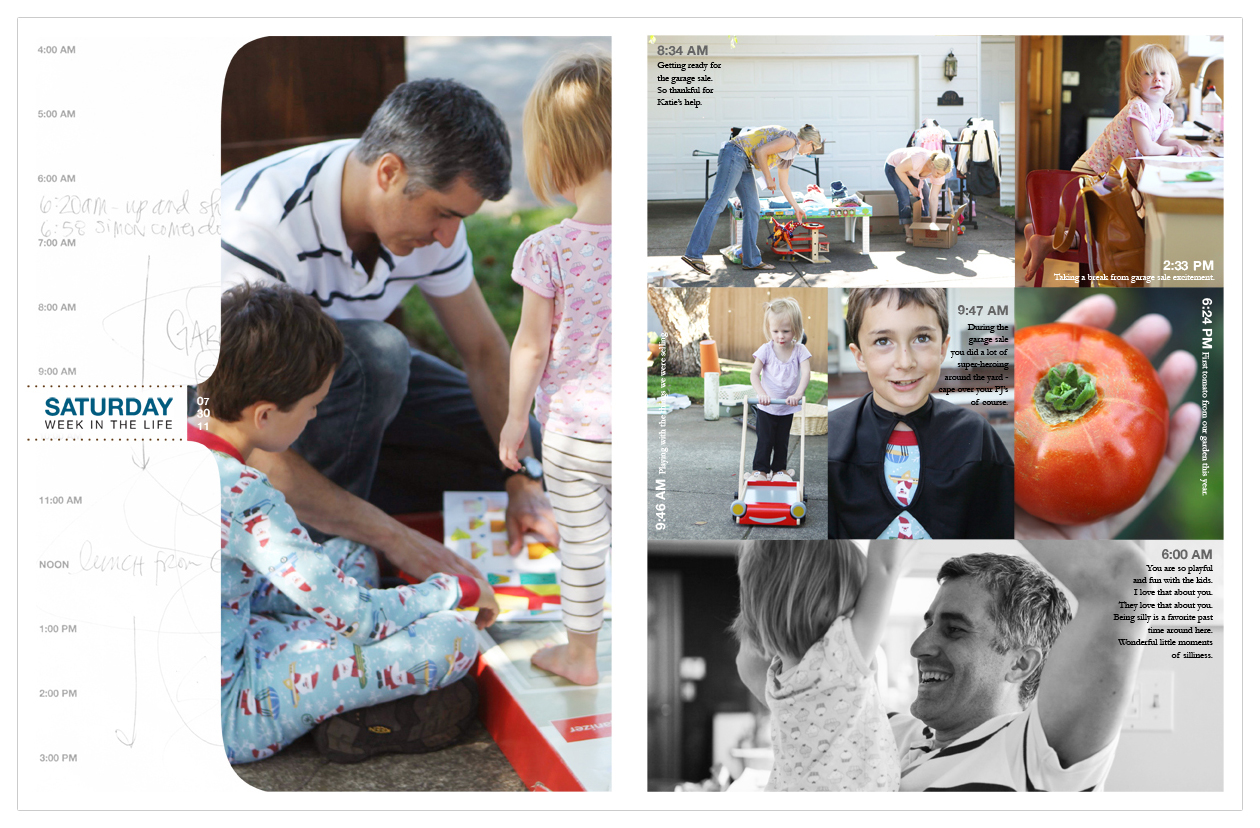
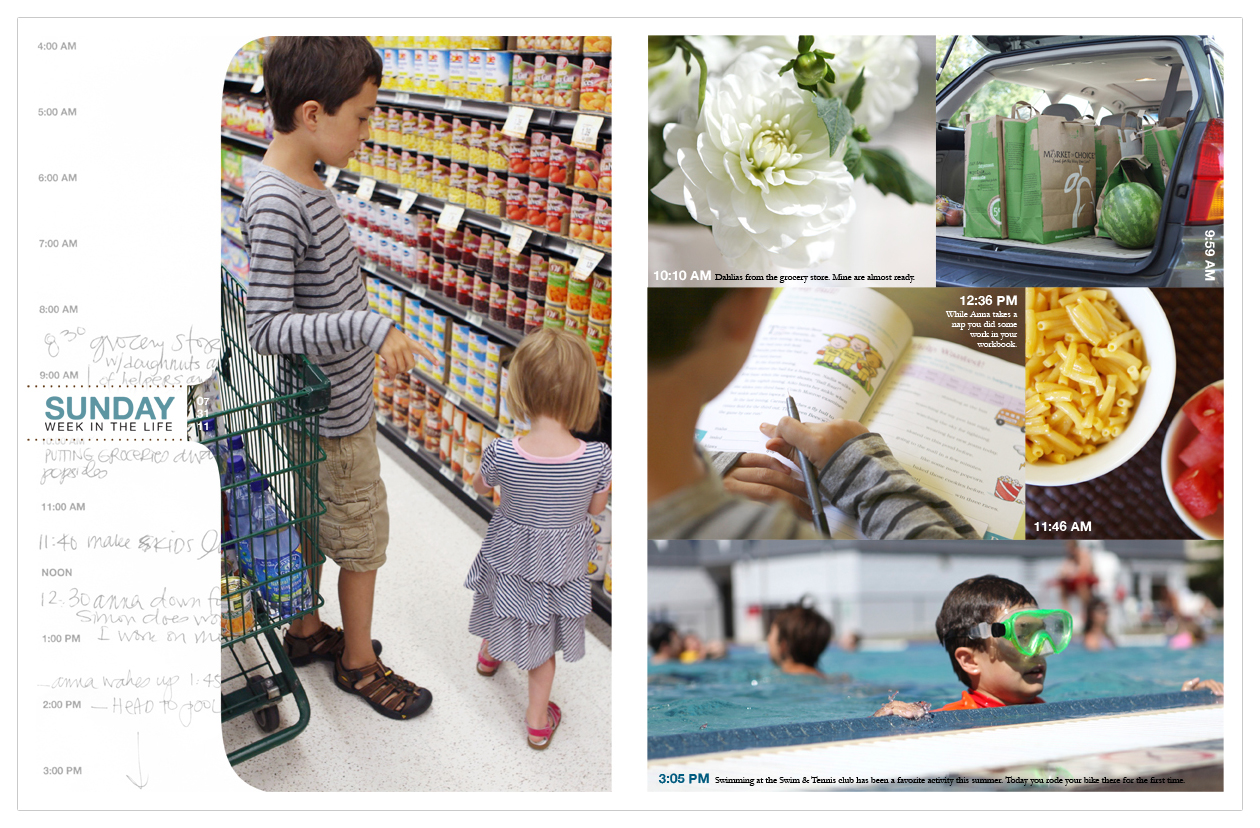
Here's a look at my spreads, without the divided page protector inserts, that I printed here at home (click to view larger):
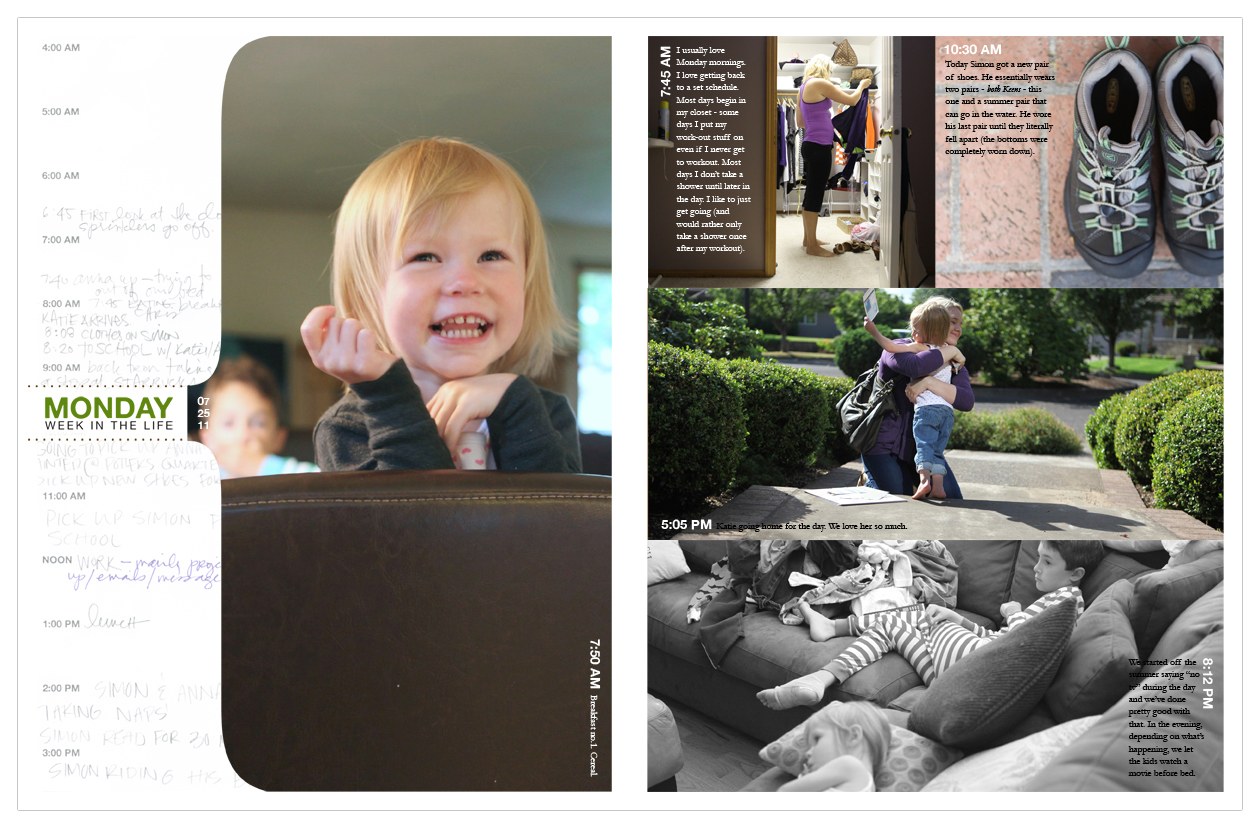
You might notice that I filled in the white space on the second page of the spread (compared to the original template). As I was working with my text and images I found that there were lots of times where I had very little to say and maybe just wanted to include the time. For that reason, and because I just liked how it looked, I decided to adjust the sizes of the photo spots (on the template) and have the time and journaling be on top of the photos.
I think it's good to remember that templates are great as a guide - make them work for you and the way you want to tell your stories.


Next I'll be working on adding some of the words to journaling cards and putting together a few embellishments to go inside those pocket pages.


Comments
Sign in or sign up to comment.
76 comments
Amazing as always Ali, and you make the whole technical bit sound so easy. I am thinking it must have taken you years to get so good making everything do what you want it to do on the computer. Baby steps I guess...
Replies
Sign in or sign up to reply.
Totally AWESOME. Love how you used your Daily Sheet as a design element.
Replies
Sign in or sign up to reply.
I've been so anxious to see your album come together - love the simplicity. I'm so glad I purchased the digital templates you designed - it has really saved me time and loves great too!
Replies
Sign in or sign up to reply.
Your pages are so great. You do such a great job with this and I always wish I had more going in my life so that mine could look as good as yours.
Replies
Sign in or sign up to reply.
I absolutely LOVE this. It's beautiful! What a great way to finish off your week - what a treasure for your family. I think you've inspired me to do a similar project of my own.
Replies
Sign in or sign up to reply.
This one might be my favorite one yet. I'm loving it so far.
Replies
Sign in or sign up to reply.
Ali- I followed your WITL project for a few years, but never really chose to do it myself. This year, I started Becky's Project Life and have found myself more captivated with documenting the everyday part of life- not just the special moments. My sister and her new husband came to visit this past week and I had so many pictures and memories to document and didn't know how to start! Your WITL templates were an answer to prayer!
My sister & her husband hopped on the plane at 3pm, and 3 hours later I have all the pictures inserted and am halfway done the comments. I am very much looking forward to getting them all done, printing them out and giving it to them as a gift!
THANK YOU!
Replies
Sign in or sign up to reply.
I printed of my daily pictures every evening on my Pogo printer and stuck them in my book along with some journaling. Loved the project and am in the middle of sharing it on my blog and Flickr.
Replies
Sign in or sign up to reply.
looks fantastic..............thanks again for running this project it is definately more inspiring when everyone is doing it together. Regards Kathy A, Brisbane, Australia
Replies
Sign in or sign up to reply.
Thanks again for hosting this. I had such a fun time documenting and taking photos. Now that I'm done school I can sit down this week and put it all together. Looking forward to next year... I'll be on vacation so I'll lots of photos to take and lots of stories to tell!
Replies
Sign in or sign up to reply.
Your album is looking really excellent. I'm using your digital templates pretty much as designed, since I've been journaling a block for each photo. Although it is a daunting project and I've worked many hours on it this week - 1. I am SO glad that I'm following through and I know I'll love the album and 2. Your templates are really making it easier for me to assemble my photos (as a novice PSE user). Thanks so much for the inspiration and tools you have provided!
Replies
Sign in or sign up to reply.
OMG... I LOVE LOVE LOVE your work. I have to admit that I have started a few WITL, but unfortunately the pictures haven't made it off my computer. I have scrapbooked a few pictures into layouts, but that's it. But, now I have an idea. I'm going to get myself a three ring 8.5×11 album (so I can print my pages at home) and create sections for each WITL. This album will house the three WITL i haven't finished and future WITLs. Thanks for the inscription.
Replies
Sign in or sign up to reply.
Wow, I'm impressed! Love your pages. I'm starting to work on mine now. Just picked all my supplies.
Replies
Sign in or sign up to reply.
I finished! This is my first year playing, and I loved it. Thanks for the inspiration.
Replies
Sign in or sign up to reply.
Oh, Ali, it's SO beautiful! I did the project for the first time last year, and it's truly one of my favorite albums to flip through. I am amazed at how different your album is this year. You are one creative cookie! ;) And your photographs just totally make the whole thing. GREAT job!
Replies
Sign in or sign up to reply.
The month of AWIL changes from year to year. Last year was April. Of course one can do it any week of the year - it's just funner with all these people world wide participating at the same time.
Replies
Sign in or sign up to reply.
I totally love your project, but I am a 100% digital girl
so I converted your "project life" and " a week in the life" into my own personal project...lol....I'm trying to make a daily journal page about our family life, with journaling and photos, so we have a great memory for later
I just want to thank you for your inspiration !!!
Replies
Sign in or sign up to reply.
it is looking great! I did the project on my blog, but I'm in the process of printing them out to make a minibook right now. I have a question about your printer. How much does the ink cost and does it last a long time? Any idea on how many photos you can print before having to put in new cartridges? thank you!
Replies
Sign in or sign up to reply.
Ali your project is wonderful! I do love and have so much respect for your design aesthetic.
I have to say that as I looked at your pictures through the week there was a wonderful 'lightness' to them, and, as I look at the final project there is that same sense of 'lightness'. I think that you have truly embraced your word and it is shining through in such a wonderful way. You must be so proud.
I really like the time line on the day page (I think I missed something somewhere); I think I might try and incorporate that into my book. I haven't finished putting it all together but hope to have it done in the next couple of weeks (giving myself a realistic timeline....lol). Thanks for the inspiration!
Replies
Sign in or sign up to reply.
These are amazing Ali! Thanks for sharing! I love that picture of you and Anna. I love how they all work together to tell the story. I can't wait to finally have time to put mine together.
Replies
Sign in or sign up to reply.