Studio AE from Technique Tuesday | January Blog Hop
Tags:
Welcome to the January 2012 Studio AE Blog Hop!
This month's stamp is called Bring On The Love.
![]()
A nice love-themed set that can be used for Valentine's projects or any time you want to express your love for someone in your memory keeping projects. Love is one of my favorite universal themes - always lots of stories to share about expressing love (totally not just for Valentine's Day).
Here's a look at the 8.5x11 layout:
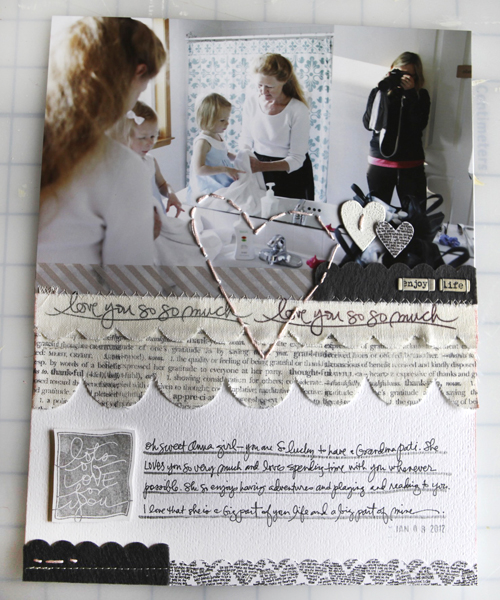
Now, let me be the first to say that I wanted to experiment a bit with this layout.
The truth is that I don't completely love it. I think it's mainly because I stuck that hand-stitched heart right in the middle of the page and it's totally bugging me. That said, I'm just going to put it in my album and move on. The process of playing was good.
If I was going to do it again or change it I'd probably keep the bottom portion (up to the scallop ribbon) and then have the rest be just the photo and the couple small hearts. Practice and learn!
Here's a look at the process:
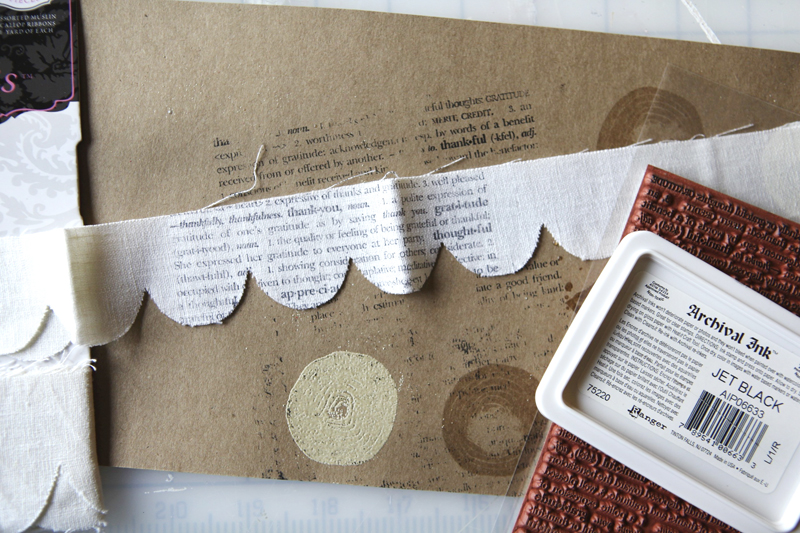
I've had the Pink Paislee Mistables Collection Scallop Ribbons sitting in my stash for awhile and was ready to make something happen with it.
Using both Bring On The Love and Hero Arts Clings Thank You stamps, paired with Ranger Archival Ink, I stamped right onto the Pink Paislee Scallop Ribbons. I stamped "love you so much" twice and used a bit of red line adhesive to initially attach it to the page. I stamped the text stamp a couple times along the larger piece of ribbon and then layered it up underneath the first strip.
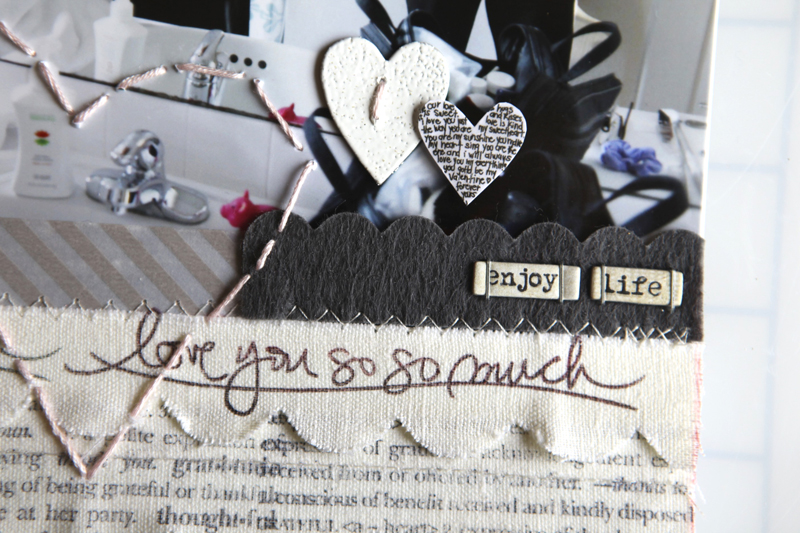
In the photo above you can see that I layered a strip of Pinkish-Grey Stripe Tape on top of the bottom edge of the photo. Aligned with the right edge I added a piece of scalloped felt from My Mind's Eye Everyday Fun Borders set. I stitched a zig-zag line along the edge between the stamped scallop ribbon and the photo.
The heart (yea, that one in the center of the layout) was hand-stitched using embroidery floss. Loved doing that but don't love the placement (and little stitches are easier for controling your shape - I didn't draw it on there first I just eye-balled it).
The other two little hearts include a Jenni Bowlin Hearts Plain Mini Chipboard Piece that I embossed with white Zing powder and a small heart cut from the 6x6 Fancy Pants Love Story paper pad and added a bit of Glossy Accents on top.
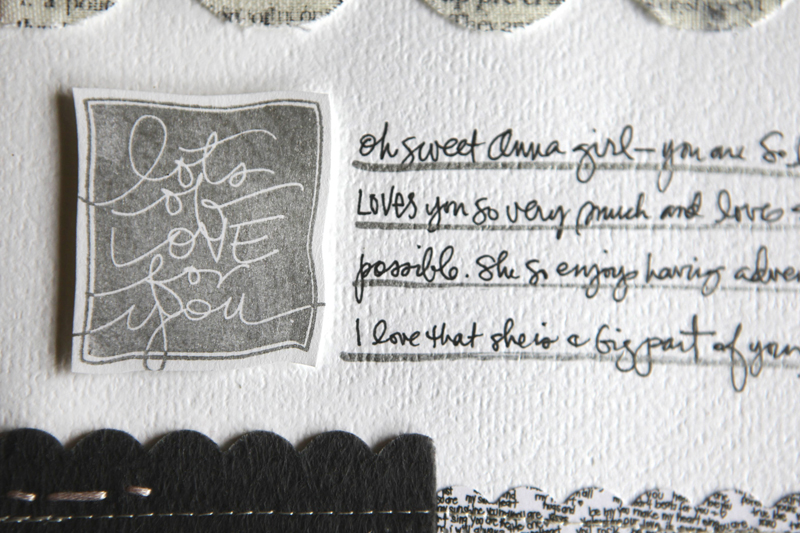
Along the bottom for the journaling section I stamped the "lots of love for you" design using silver ink from Colorbox Basics Cat's Eye Classic Pigment Ink Queue. I tried a couple other inks with this stamp and it seemed that the chalk ink turned out the best. I drew the jouranling lines with a Sakura Pen Touch pen in silver and wrote my journaling using a Precision Pen from American Crafts.
Along the very bottom of the page I added another piece of the scalloped felt and a strip of that great heart paper from the 6x6 Fancy Pants Love Story paper pad. I used the Fiskars Scallop Border Punch to created the scallops along the pattern paper.
SUPPLIES
Click on the images to link to the products.
Be sure to check the blogs of all taking part in the Blog Hop today:
As a thank you for all the comments received during the hop on all the blogs, as well as those left on the Technique Tuesday blog, we will give away two stamp sets.
One person will win Our Hearts by Ali Edwards stamp set and one other person will win our The Cupcakery stamp set. You don’t need to leave a comment on all the blogs to be eligible to win. All comments must be made by midnight PST on Jan. 13th. Tune into the Technique Tuesday blog on Jan. 14th to see if you are one of the lucky winners.


Comments
Sign in or sign up to comment.
266 comments
I love the layout! I like how you stamped the scalloped canvas.
Replies
Sign in or sign up to reply.
Lots of wonderful techniques going on in this layout.
Replies
Sign in or sign up to reply.
You say you don't completely love this layout but I think it's awesome. I don't completely love everything I do either but when I look back on things I am glad I can see the difference. Maybe it was a mood or the weather but we can't have everyday be perfect so that's how I look at it, I love your LO.
Replies
Sign in or sign up to reply.
This is really pretty. I like the hand stitched embroidery heart.
Replies
Sign in or sign up to reply.
I actually really like the layout, including the stitched heart! Hopefully it will grow on you. Love all the scalloped fabric on this one.
Replies
Sign in or sign up to reply.
Just wanted to say that I got some of your Technique Tuesday stamps for Christmas and the quality was amazing. They are the best stamps in my collection.
Replies
Thank you!
Sign in or sign up to reply.
As always I love your stamps and the wonderful possiblities!
Replies
Sign in or sign up to reply.
Soo puts me in the mood for Valentines day! If only I could get that tree put away from the LAST holiday :)
Replies
Sign in or sign up to reply.
Love it, heart in the middle and all.
Replies
Sign in or sign up to reply.
So glad you're making these stamp sets. I absolutely love them!
Replies
Sign in or sign up to reply.
Thanks for sharing that sometimes even you wish you had done it differently. Great stamps!
Replies
Sign in or sign up to reply.
Absolutely love the stamp set! Thanks for chance to win.
Replies
Sign in or sign up to reply.
Love it Ali Your work as well as stamps are pure perfection...xo
Replies
Sign in or sign up to reply.
It's nice for us to hear you explain about a layout that clearly took time and effort and yet, you're not completely happy with.
tfs as always! (ps love the simon/cat story,too!)
Replies
Sign in or sign up to reply.
Love the layout.
Replies
Sign in or sign up to reply.
Love your layout! the heart makes it personal and unique. thanks for explaining your page. it is made special with a mothers heart.Now I need that stamp set. yes I'm an addict. lol
Replies
Sign in or sign up to reply.
I love the technique shared with stamping on the fabric. Love the texture it gives this layout. Don't change a thing. : )
Replies
Sign in or sign up to reply.
I just love it! Loved all the techniques on the blog hop! Super cute stamps!!
Replies
Sign in or sign up to reply.
love the enlarged photo and how the layout feels with all the fabric, stamping and stitching!
Today the same thing happened to me, I did a layout, did not love it, but put in the album and moved on. I think it actually look good in the album, together with another pages ;)
Replies
Sign in or sign up to reply.
Love this layout!! The only other spot for the stitched heart (in my very humble opinion) might have been around grama and anna in the mirror. Having said that I still think it is better not to undo your first instincts. You have THE TALENT Ali!
Replies
Sign in or sign up to reply.