December Daily® 2015 | Foundation Pages, Video Overview + Free "Intentions" Printable
Tags: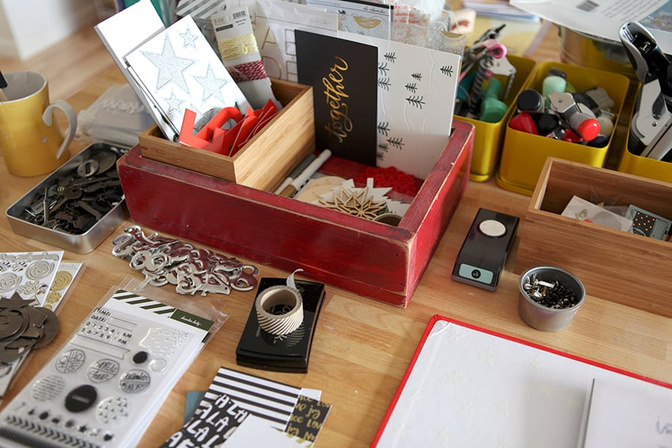
Here we go!
Welcome back (or welcome if this is your first adventure) to one of my most favorite storytelling adventures: December Daily®.
I've been getting my album ready recently and am here today to share my start. I'm primarily using the Main December Daily® Kit this year with a few things added in from some of the Mini Kits as well as a few additional products from my stash (there can never be enough stars). As I share my images below I'll be sure to identify which products come from which kit if they aren't from the Main Kit.
I'm taking my own advice this year and making this project work for me. This year it means simplifying my foundation pages a bit to give me a little more freedom in December to get the stories told I want to tell. As you view the pages below you'll see that not everything is adhered down or pockets stitched/fused shut. I've also included a video overview at the bottom of this post for a more in-person look at where I'm at with my album.
A couple other things I know to be true as I embark on this adventure again:
I am very likely not to use a full 2-page spread for each day. Right now I've left more than enough page protectors in the album to accommodate a 2-page spread (a left and a right page) for 25 days. I know I'll be adjusting that as I go because not all stories need a spread.
I am loving the neutral, white and grey this year with pops of red and green and silver and gold.
I shared my Design Map a couple weeks ago - basically the current layout of the page protectors. If that's helpful you can download it here. My current pages seen here follow this set up but keep in mind it will likely adjust as I make my way through the month and don't always use 2-pages for a spread on a particular day.
Please forgive the color discrepancies in some of my images below. I had a challenging time editing these this time around (dealing with loss of daylight).
I'm excited to add more embellishments from the Main Kit to my photos and journaling as I identify the stories I want to tell over the course of the 25 days. I'll also be printing any daily overlays on demand vs. printing them in advance. This will allow me to print them on my photos as well as onto cardstock without printing so many out in advance that I end up not using. I've cut up cards from the Main Kit 6x8 pages and have them in a basket on my table along with a box of other embellishments from the Main Kit ready to be used in December.
I love this project.
BEGIN WITH AN INTENTION
If you are in my Storytelling With December Daily® workshop you heard me talk a lot in the presentation this week about setting an intention for December/the holiday season/the album as a really wonderful way to begin this process. Last year I offered a free printable to begin your album with the title "My (or Our) Reason Why" and you can still grab that here if it speaks to you. This year I'm starting off my album with a page titled "Intentions" which is similar to my reason why in terms of stating in advance why I'm embarking on this adventure again. Click the text below the image to download the easy-to-print PDF/PNG package.
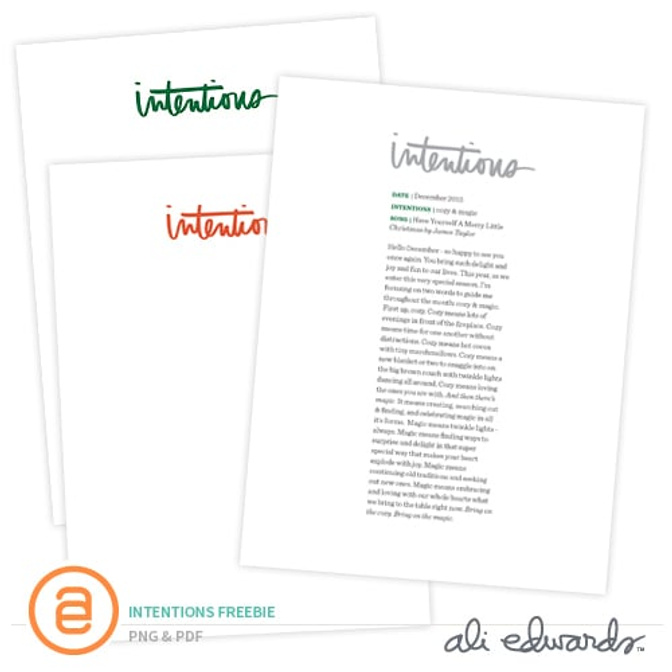
CLICK HERE TO DOWNLOAD THE INTENTIONS PACKAGE.
If you'd like more inspiration and ideas about setting your intention and telling your story this year there's still time to join my Storytelling with December Daily® workshop. This is my first time offering an in-depth and official December Daily® workshop and over a thousand people have joined in and are sharing and supporting one another as we head into December. The first lesson includes video walk-throughs of all nine of my past albums with thoughts on what I've learned and loved over the years. The feedback about the content has been really great. We still have a few 4x6 stamp sets available that ship free to you after registering for the workshop (the class shop page and images will be updated when they are all gone).
Here's a look at my starting point for 2015 (video at the end of the images):
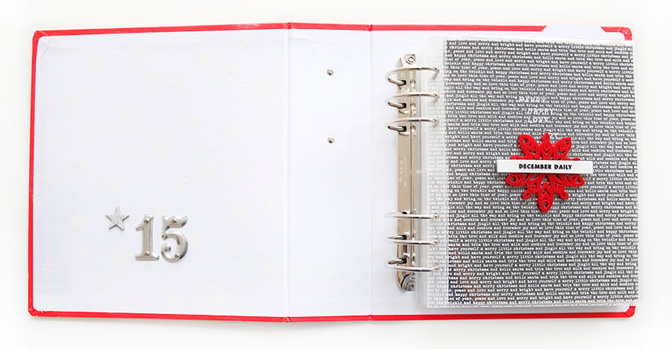
It's really hard to see via these images but I embossed the inside of my cover with White Embossing Powder (White Opaque Zing) and this 12x12 star stencil from The Crafter's Workshop by Jenni Bowlin. The size of the stencil is awesome because you can lay it right down in the album and then use Versamark Embossing Ink right on top without having to reposition a smaller stencil.
You can see it better in this close-up here:
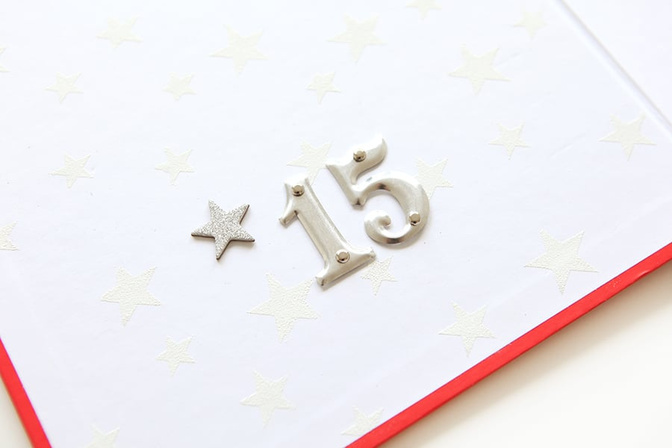
The silver star is from the main kit and the metal "15" are an older product from Tim Holtz. He has something similar still available that is about 1/4 an inch shorter. These numbers are not actually attached to the album, rather I used placed the brads and then used a rolled up Sticky Dots inside the number to adhere it to the album.
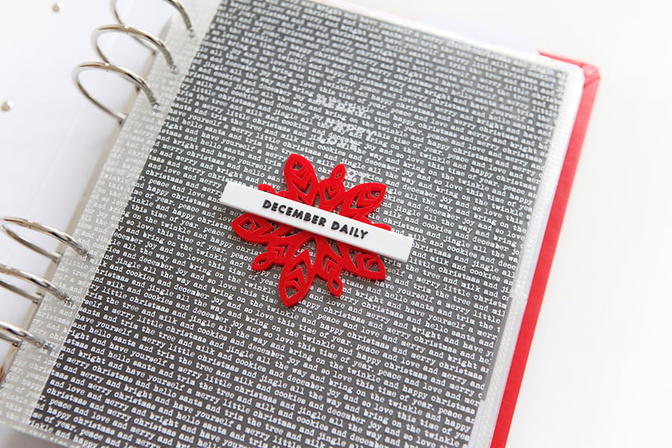
Opposite the embossed stars I added one of the printed transparent pages with a red snowflake and the rubber December Daily® banner on top (all from the main kit). I adhered the rubber banner to the snowflake and the snowflake to the patterned transparency using Super Sticky Red Tape.
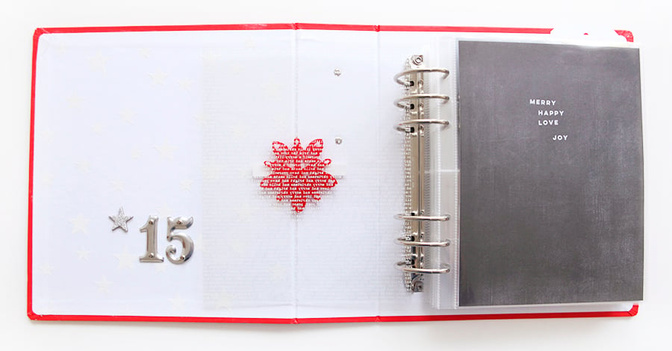
Currently the next page is holding the "merry happy love joy" pattern paper from the Main Kit. I might leave it as is or I might add something to it. I kinda just like it as it is.
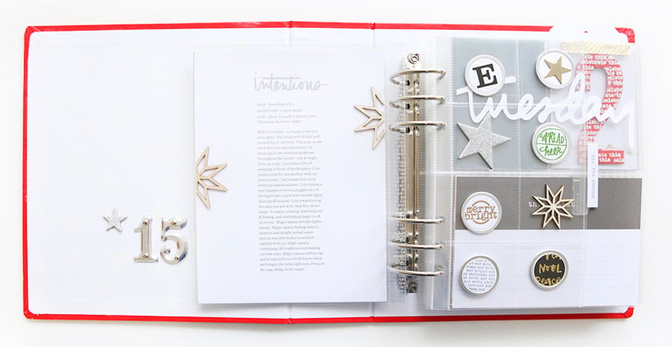
On the backside I included my Intentions page for 2015. You can grab this printable up at the top of this page. I included a couple different colors for you as well as the PNG file that you can use as you'd like for your personal projects.
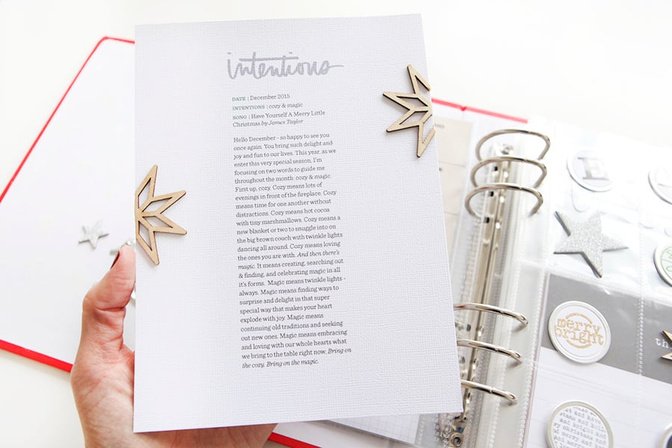
I used Tim Holtz scissors to cut one of the wood snowflakes in half and adhered them with a Scotch Dot N Roller adhesive.
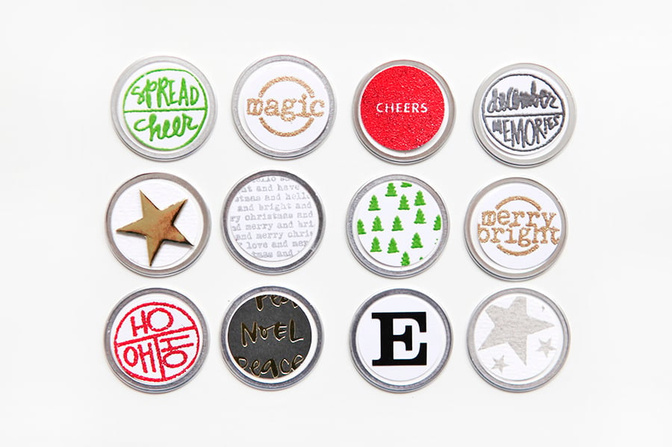
One of the things I did while setting up these pages was play with metal rimmed circle tags, embossing powders, stamps, and a 1-inch circle punch (among a few other things). For this sample I used the Icon Stamps and the Holiday Circles Stamps (both part of the December Daily® collection this year). The embossing powders I'm using this time include: Zing White Opaque, Tim Holtz White (works just like the White Zing),Tim Holtz Red Tinsel, Tim Holtz Gold Tinsel, Zing Pewter Metallic, and Zing Green Metallic. I stamped and embossed the above circles onto white cardstock, punched them out, and then adhered them to the metal rimmed circle tags. The black and gold "noel" pattern paper is from the Jasmine Jones Mini Kit and the "E" (for my last name) is part of the alphabet that's included in the Kelly Purkey Mini Kit. The chipboard gold star is from my stash of stars.
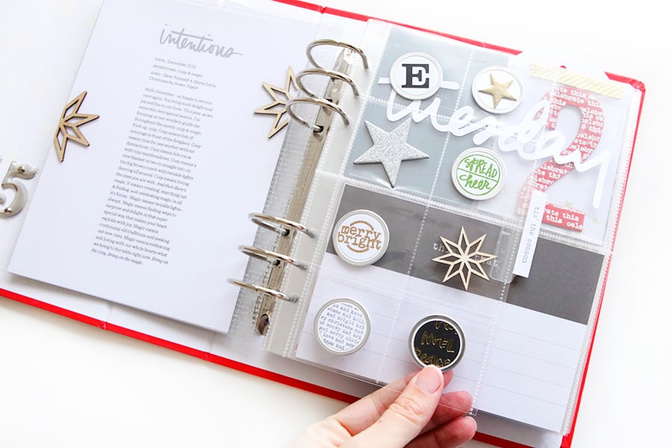
Opposite my intentions page I have one of the 2 inch x 2 inch pocket pages. I cut off the third row of pockets (just laid it on my trimmer and cut it off) and added a 2-inch index tab. Inside I stamped "tis the season" on both sides using Memento Luxe Gray Flannel Ink. Into the pockets I added some of the metal rimmed circle tags I created above + a wood snowflake + a silver star (both included in the Main Kit).
On the back side I punched more circles from pattern papers and adhered them to the backs of the circle tags. I also used the white embossing powder on the back of the silver star.
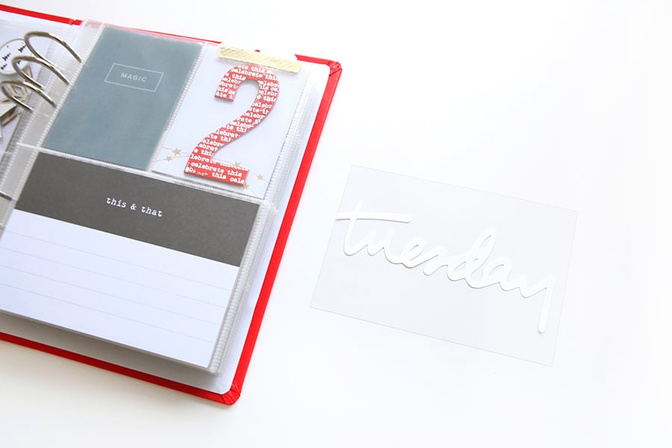
Knowing that December 1 begins on a Tuesday I decided to cut out "tuesday" using white cardstock and my Silhouette (traced the PNG file) and lay it on top of a piece of thick, clear plastic. Bazzill offers this and it's called Plastic Paper. The sheets I have here are from Studio Calico - I looked on their site but I didn't see them anymore. You can also achieve this same thing by simply cutting up some extra page protectors to slip inside the pockets.
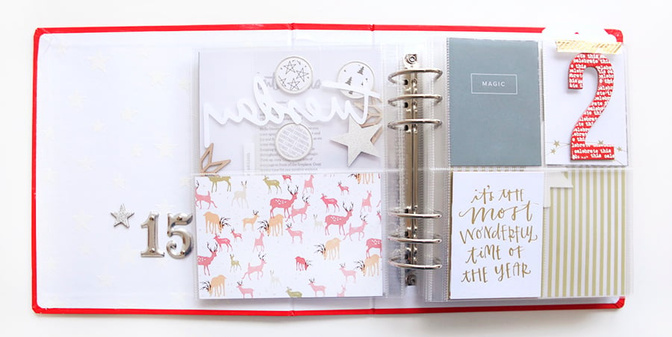
Day two currently includes an embossed large red #2 + one of the Jasmine Jones gold foil cards. The other two 3x4 pockets are empty.
Sometimes these foundation pages are a challenge to look at online because the backs of other cards are often still visible that will be covered when the final stories are told.
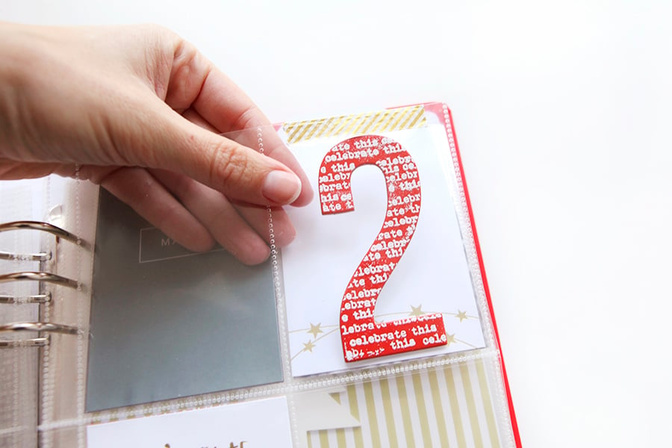
I took one of the large red letters from the Main Kit - the 2 obviously - and used the "celebrate this" stamp + white embossing powder to create the textured pattern on top of the 2. To keep the two in the pocket I simply used some of the gold stripe washi tape from the kit and folded it in half across the top of the pocket.
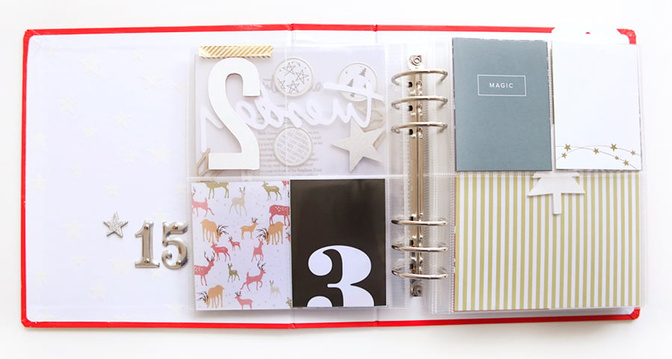
Day three includes the "3" card from the Main Kit + a "magic" card from the Kelly Purkey Mini Kit and an embossed 3x4 card from the Jasmine Jones Mini Kit.
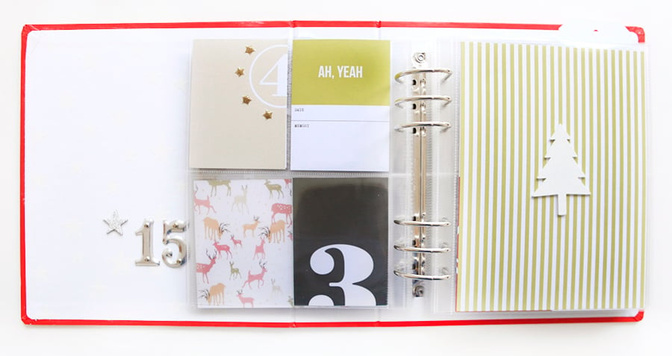
Day four includes the "4" card with some small gold stars around the circle. It also includes the "ah, yeah" card, a tree, and green striped paper from the main kit.
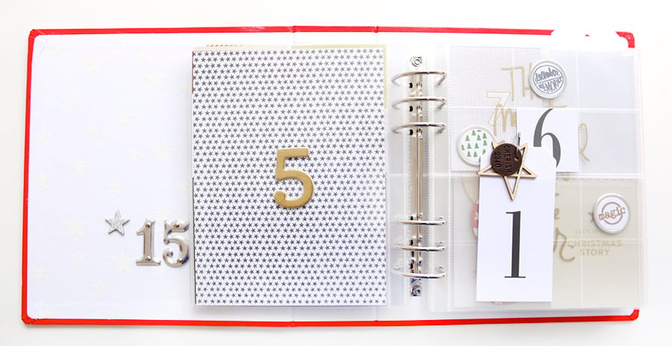
Day five currently includes a full pattern page of stars, a #5 from the Emily Ley Mini Kit, and a set of five numbered tags (Main Kit) held together with one of these loop pins from Tim Holtz.
Right now the tag set is just sitting in a 3x4 pocket. My plan is to do some kind of list of five "somethings" on this day and will either write or attach photos to the back of each tag.
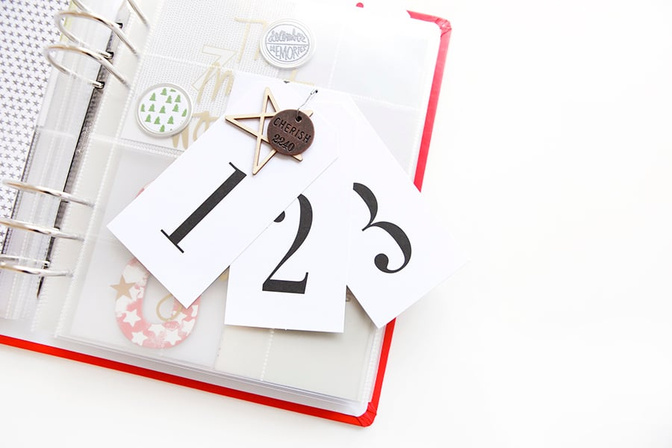
On the loop pin I also added a metal circle philosophy tag from Tim Holtz ("cherish") and a wood star. The wood star is either from a previous December Daily® kit or from Freckled Fawn - again it came from my star stash.
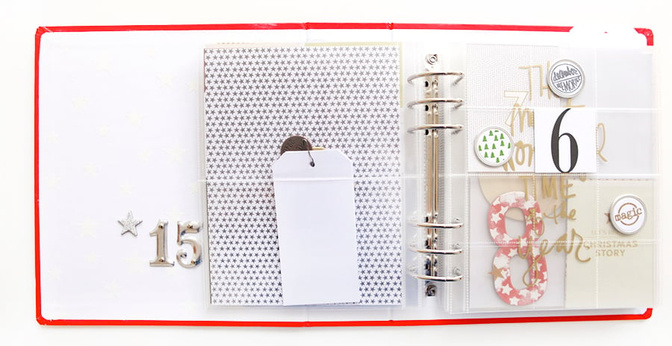
For day six I've got the back of day five and one of the 2 inch x 2 inch pocket pages. I took one of the white number tags and cropped it to 2 inch x 2 inch. I also added a couple more of those metal rimmed tags with the embossed circle stamps.
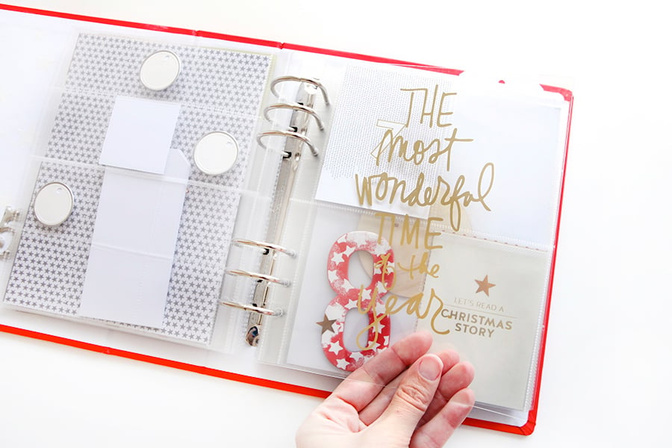
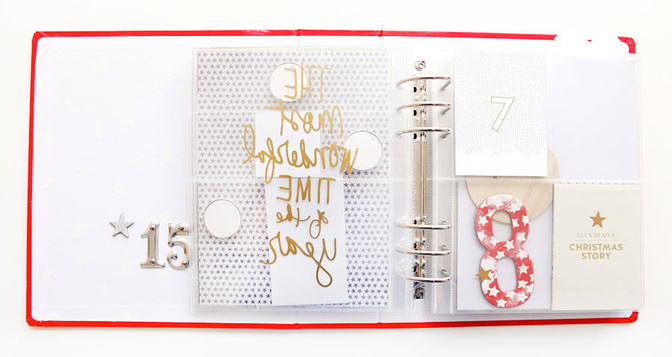
In between day seven I added the full page "most wonderful time of the year" transparency (main kit).
The day seven card is from the Ashley Goldberg Mini Kit.
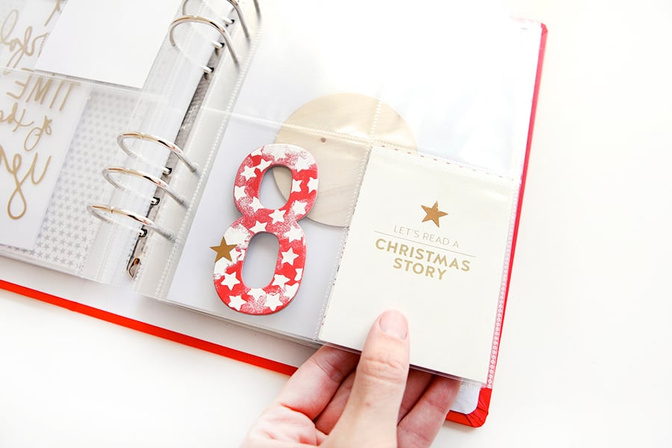
For day eight I embossed another one of the large red letters - this time with a small star stamp. I paired that chipboard 8 with one of the super cute cards from the Emily Ley Mini Kit.
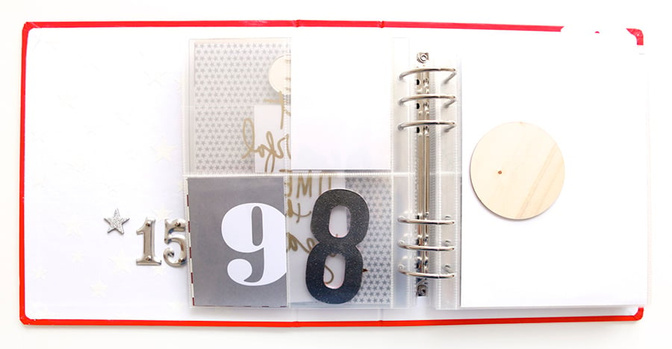
Day nine currently features the #9 card from the main kit. I embossed the back of the red eighth (it's actually the pewter color but looks different here). I might not leave the 8 there or I might put a card or photo behind it - not sure just yet. On the full page 8.5 x 11 I slipped in one of the large wood circles. I'm thinking about doing a full page of circles (photos, etc) but want to wait to see what story I'm inspired to tell on that day.
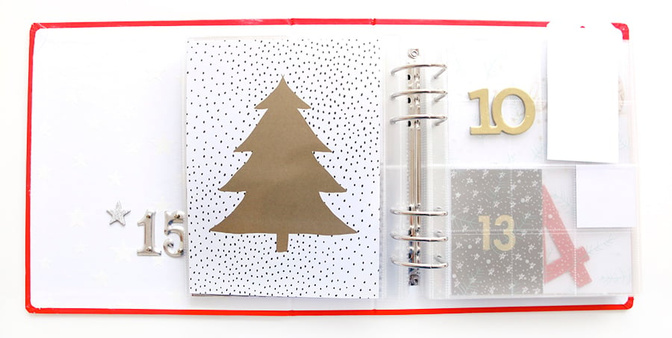
Day ten. I love this 6 inch x 8 inch paper from Ashley Goldberg's Mini Kit. I'm thinking of writing on that tree with a silver or white pen once I know my story (I'm still skeptical of white pens).
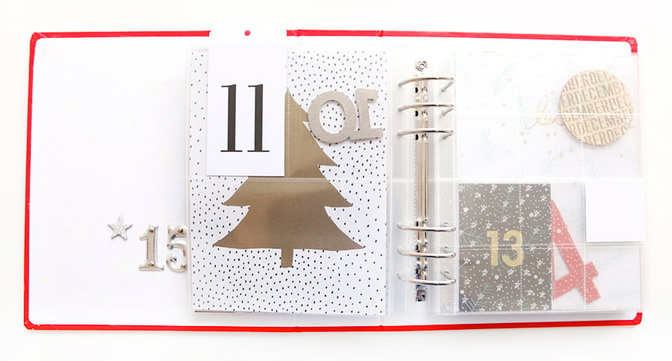
Right now day eleven only includes one of the white number tags - I'll be using it in some way or another. One thing you might see me do is use that tag as a page in the album - punching three holes using it that way. Maybe a photo on the back trimmed to the same size as the tag.
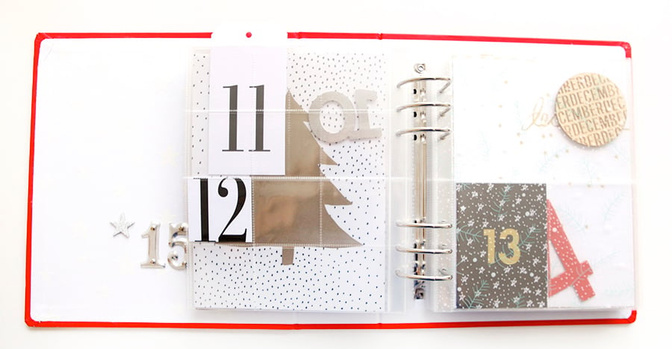
For day twelve, which currently begins on the back of the 2 inch x 2 inch pocket page, I cropped another one of the white tags to fit into the pocket. I've also added the branches full page pattern transparency here.
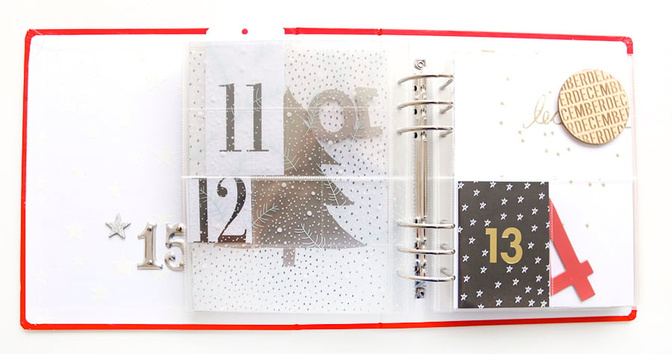
Wood "december" circle from the main kit paired with a 13 card from Ashley Goldberg's Mini Kit.
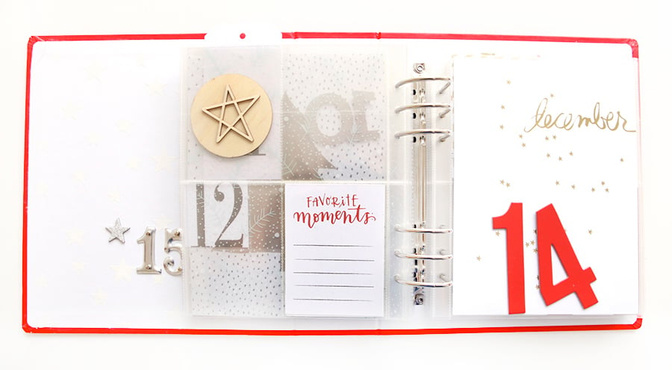
Day fourteen includes large red numbers, the back of the wood circle + a wood star, the "favorite moments" card from Jasmine's kit and the embossed "december" 6 inch x 8 inch page from the main kit. I'll likely emboss something onto those numbers again - another stamp maybe once my story is established.
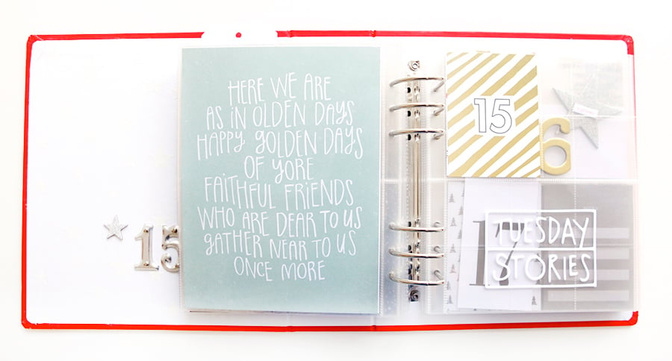
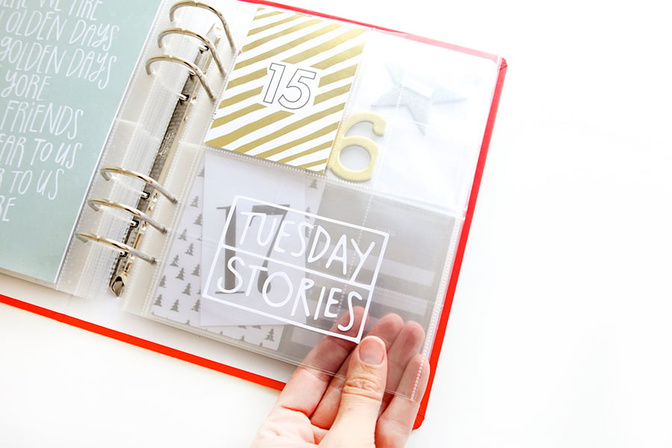
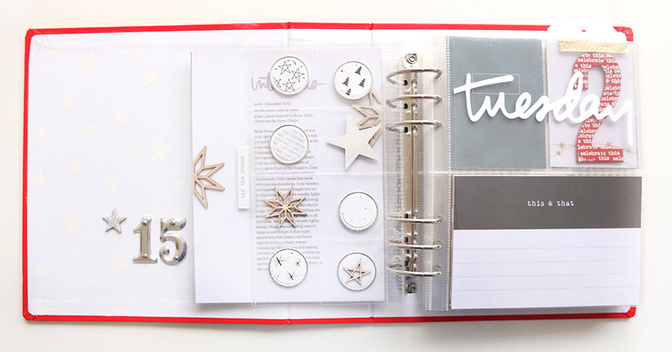
Day fifteen features the "golden days" 6 inch x 8 inch pattern paper + a "15" card from the Ashley Goldberg Mini Kit + a silhouette cut using this digital set: Daily Stories & Photos. I used the same plastic 4 inch x 6 inch piece I used on the "tuesday" at the beginning of the album. Those two cuts have been sitting on my desk for months and when I started putting these pages together I decided to include them here.
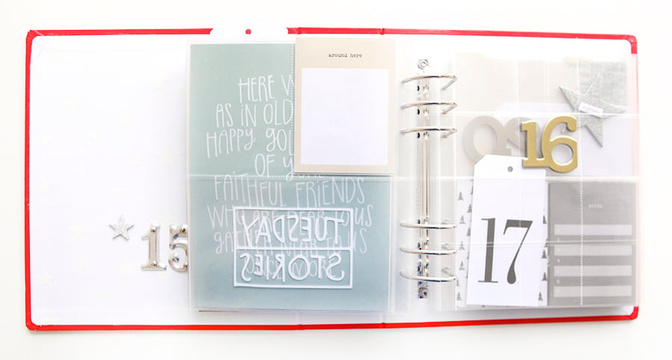
For day sixteen I've included the "around here" card from the main kit + a gold chipboard 16 from the Emily Ley Mini Kit that I trimmed to fit into the 2 inch x 2 inch pocket.
And for some reason I didn't get a shot of day seventeen - but you can see I've got a white number tag in there waiting to be used.
Day eighteen includes one of the silver stars + the word "eighteen" from the One Little Bird Mini Kit. I love those little chipboard numbers.

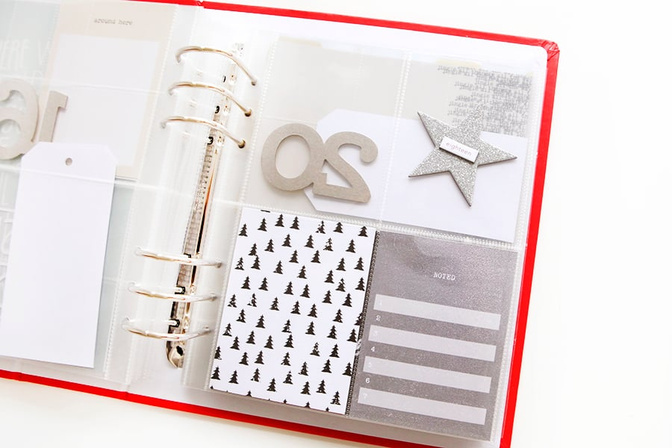
In the image above you can see both days 19 and 20 ( 20 is obviously in the next pocket page). I paired one of the activity cards from Emily's Mini Kit + the #19 from Ashley's Mini Kit + the "happy holidays" 4x6 from the main kit.
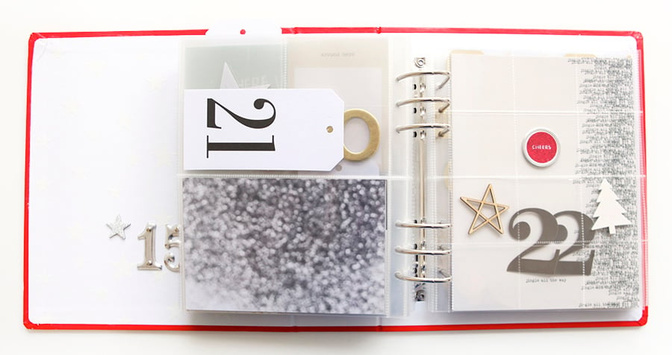
Day twenty-one features another one of the white number tags + the a 2 inch x 2 inch pocket page. Right now I've got another metal rimmed tag + a wood star + one of the wood trees. I might end up cutting that page down so they are less pockets when the day actually arrives or I might need them all.
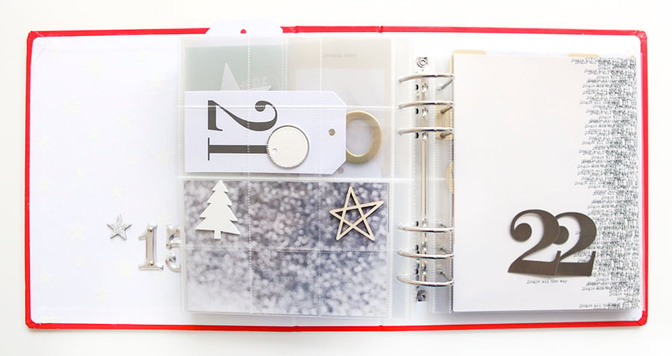
Day twenty-two features the "jingle all the way" pattern paper + two two's that were part of a metal number set. I have no idea on the source - anyone else have those and remember who made them? They are not attached to the page yet.
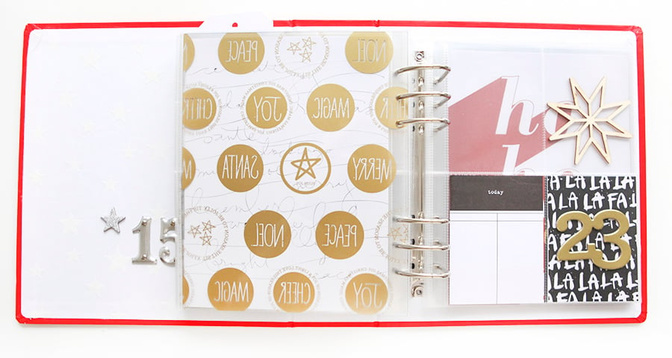
For day twenty-three I've added the 6x8 hand drawn words pattern paper + the full page transparency with the circles + a today card + a wood snowflake + a "23" from the Emily Ley Mini Kit + a 3x4 "fa la la" card from Jasmine Jones Mini Kit.
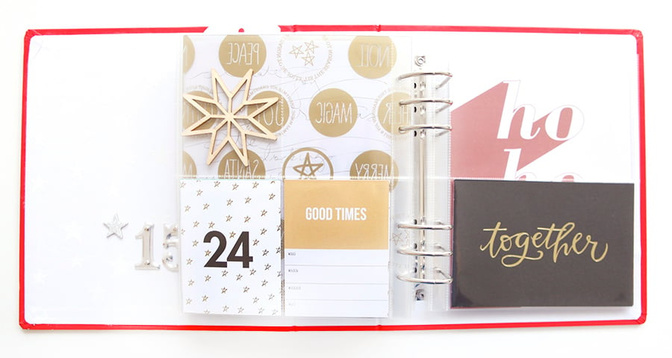
Christmas Eve currently includes a "24" card from Ashley's Mini Kit + a "good times" card from the main kit + one of my all time favorite cards designed by Jasmine and included in her Mini Kit ("together"). Rather than hoarding it I'm using it.
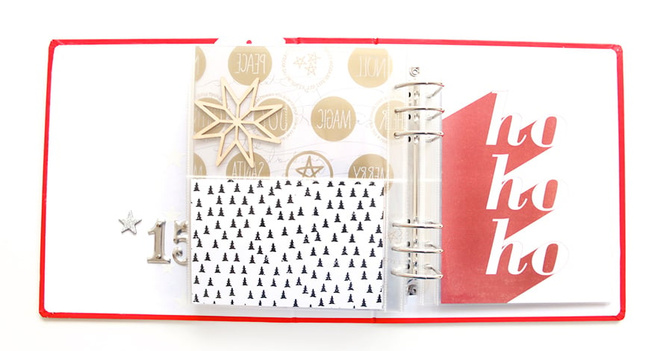
For the twenty-fifth I'm leaving it pretty open and spread out over a couple of pages. Above you see the tree pattern and the 6x8 "ho ho ho" page from the main kit.
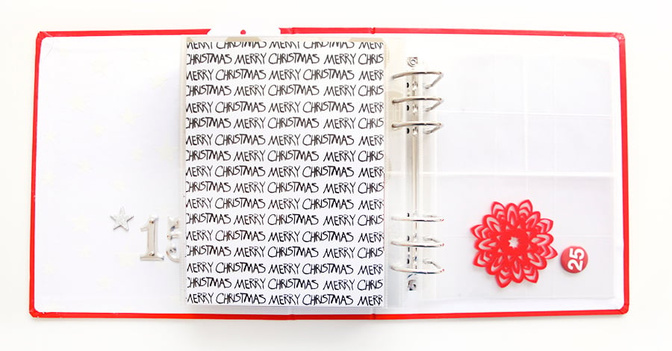
Current last page is the "merry christmas" pattern paper from Ashley's Mini Kit. In the next page of pockets I've got a red snowflake and the "25" badge waiting. I ended up with a few more page protectors after the 25 spreads that I'll take out after I make my way through the month.
Here's a look at my album via a video overview:
Again thank you so much for joining me in telling your own stories in your own voice this holiday season! If you have any questions about your order please feel free to connect with my Customer Service team here (make sure you are logged in to your account before starting your conversation). I'm happy to answer any process questions in the comments below.
Bring on December!
SUPPLIES USED IN 2015 FOUNDATION PAGES
December Daily® Mini Kit by Jasmine Jones (a few 3x4 pattern cards)
December Daily® Mini Kit by Ashley Goldberg (a few 3x4 number cards)
December Daily® Mini Kit by Kelly Purkey (black alphabet)
December Daily® Mini Kit by Emily Ley (a few gold chipboard numbers and 3x4 cards)
December Daily® Icon Stamp (available digitally here)
December Daily® Holiday Circles (digital circle set available here)
Embossing Powders: White Opaque Zing, Tim Holtz White,Tim Holtz Red Tinsel, Tim Holtz Gold Tinsel, Zing Pewter Metallic, Zing Green Metallic
Tim Holtz Silver Metal Numbers (similar by smaller)


Comments
Sign in or sign up to comment.
95 comments
Wonderful words, inspiration and spirit. So ready for the holidays now after reading your intentions letter. Cozy and magical are the perfect words for the season's goal.
Replies to summer82
Sign in or sign up to reply.
I have a question. On day three and day eight you say the '3' and '8' cards are from the main kit. I have the main kit but haven't seen these. Are you sure they aren't from another kit? Just wondering. Pages look great. Thanks for the inspiration.
Replies to deedee58
Hi! They are on the backs of one of the 6x8 patterns (well, the '8' is a red chipboard piece so i'm guessing you mean "9").
Sign in or sign up to reply.
looking gorgeous Ali, and so making me wish Id brought a few other of the mini kits! Can't wait to sit and have a play around with my album.
I have a quick question about embossing. It's something i love the look of but not sure on what the correct why to go about it. do i ned to "stamp" with a special ink then add the embossing powder and heat?
Replies to kelfergie1803
Hi - yes. You need a stamp + embossing ink (Versamark is the brand name I use) + embossing powder. You basically stamp using the ink and then pour some powder on top, shake off the excess, and then use a heat gun to set or essentially "melt" the powder. It's super fun :).
Sign in or sign up to reply.
Love the embossing on the inside cover and on the red numbers! I spent the day working on my album today assembling some pages and on the cover. Looking forward to this Dec. journey with you!
Replies to RhondaN
Sign in or sign up to reply.
I have metal numbers like that, and I am pretty sure they were 7 Gypsies? Love this foundation, and I am so excited to start mine! My youngest will take his first airplane ride during December with me, so I am so happy to have that in the album too!
Replies to tccba
Oh cool - I could have been totally wrong about it. And a first airplane ride? That's awesome.
No. I have them still in their package--Tim Holtz. Maybe they'll finally get out of the package this year!
I have them in the package too and they are Tim Holtz. I finally am going to use them as well.
Sign in or sign up to reply.
Your pages look amazing. I can't wait for my album to come. I've seen packages of the hand drawn stars by studio calico at JoAnn's this week.
http://www.joann.com/printshop-laser-cut-wood-veneer-shapes-28%2Fpkg-stars/13683875.html#q=wood%2Bstar&start=2
Replies to sarahsworld2000
Oh cool - thank you!
Sarah
Thank you so much for the link. I have tried to track these down for year with no success. I ordered them online because my local Joanns doesn't carry them.
Sign in or sign up to reply.
What font did you use for the Intentions? It's so pretty.
Replies to Thumper
It is Ali's handwriting.
Hi - that's my handwriting :).
So beautiful!!
Sign in or sign up to reply.
Beautiful foundation pages. I won't be taking this journey this year, looks like I thought ahead and made the right choice, I'm in the hospital now with no release date in sight. But I look very forward to following along, seeing your photos and stories, and the layouts as they come. Love the ideas here, great stuff. Michelle t
Replies to mtercha
Sending you love Michelle.
sending love as well. hope you get well soon.
Sign in or sign up to reply.
Dear Ali,
Thank you very much for this bunch of inspiration.
I am so in love with this project and can not wait to receive my 6x8 album in order to start with my story.
This year I allowed myself to order your main kit and 3 mini kits (one mini kit is a gift for a good friend). I am happy and hope there will be a lot of lovely memories in December.
Replies to PrinzessinN
Sign in or sign up to reply.
I think the amount of prep work is just perfect and I am now inspired to get my foundation pages finished! And I'd like to say that I'm in the Storytelling class and it is so wonderful, in depth and so worth it and we're only on week 2! Really I can't recommend it enough if you are a December Daily fan.
Thanks Ali!
Replies to Mel_12
Thank you!
Sign in or sign up to reply.
Thanks Ali for the awesome inspiration as usual. I'm done with my foundation pages but you have inspired me to break out my embossing powders this year and use them more! Love how you used that inside your album cover so may give that a try.
Replies to cannycrafter
Sign in or sign up to reply.
Ali, thank you for taking the time to put this together. I also really appreciate the photo overview in addition to the video. I struggle to watch videos because they take more time and I'm interrupted most of the time by my kids. ;) I love what you've done and how you've combined bits and pieces from the mini kits without changing your overall feel. I can't wait to see the rest in December!
Replies to dawnnikol
Dawn, you are not the only one who struggles with time to watch the videos! I love having the photo overview and then the option to watch the video later if I get a chance. Beautiful foundation, Ali :)
Sign in or sign up to reply.
Looks great! It's great inspiration that the foundation pages are manageable. Love the circle tags. I'm definitely going to do that!
Replies to Jeannew
Sign in or sign up to reply.
Thanks so much for sharing your process of putting together foundation pages. And thank you for the links to the products you used. I can't wait to start playing - my album arrived yesterday (no problem removing the sticker!).
Replies to hgauvin
Have fun!
Sign in or sign up to reply.
I adore your foundation pages, Ali! Thank you so much for sharing them. They're a huge inspiration for me. I never get started this early, but after seeing your pages I had to dive in!!! So excited for this project!
Question for you: how do you attach the Avery index tabs on your pages? Do they have an adhesive of their own already on them?
Replies to kathleen
Hi Kathleen - those index tabs already have adhesive on them :).
Okay. Thanks! Ill keep my eyes out for them.
Sign in or sign up to reply.
Rolling up my sleeves and ordering a heat gun :)
Also commiting to using my Sew Easy at last - it's been sitting there calling out "play with me" for way too long!
Thanks for the wonderful show and tell Ali!
Replies to ScrappinMyHeartOut
Sign in or sign up to reply.
first of all, darn you for being so awesome Ali. I love some of the things you did while prepping your album, so now I have to get back to work and buy more stuff to try some new things out.
Second, I found the star wood veneers you were looking for: http://www.joann.com/printshop-laser-cut-wood-veneer-shapes-28%2Fpkg-stars/13683875.html?mkwid=t2hLbYPs|dc&utm_source=google&utm_medium=cpc&utm_term=&utm_campaign=Shopping+-+Scrapbooking&CS_003=10131488&CS_010=%5BProductId%5D&gclid=CMHBqcXDi8kCFYQ8aQodLI0Ktg
hopefully they don't go out of stock in five minutes!!
Replies to jaimeelynn
Thank you!
I just bought them from Amazon :)
http://www.amazon.com/gp/product/B00G990DIK?psc=1&redirect=true&ref_=od_aui_detailpages00
Sign in or sign up to reply.
I love what you've done so far this year! I confess I usually shamelessly copy what you do for the most part. I am creative too, but this project is so much more fun for me if I do what you do, substituting my own photos and stories. I also go to the end of the month because we celebrate as a family on the 27th-30th-ish. This is my second year with DD, and I've already picked several layouts from your past DD albums for extras. Christmas was my Mom's favorite season and when she died (in 1998) it was years before I could even celebrate at all. Now I find I really want to do this project well for my kids and grandkids. Thank you so much!
Replies to alfamare
I'm super happy to do the work I do to help you enjoy the project that much more!
Sign in or sign up to reply.
Asymmetrical wood veneer stars are sold on Amazon (amazon.com). Studio Calico. They are about 1" and 1 1/4" across.
Replies to Peggydid
Sign in or sign up to reply.
I'm excited to jump into DD again this year! I'm curious to see how those number tags play out during December in your album. They seem a little "out of the box" (pun intended) for how orderly and organized your albums always are. It would bug me that they stick out past the top of the pockets but you will do awesome things with them I am sure!
Replies to ericathomas
Oh I'm pretty sure after setting up these pages that I will probably use them as a "page" and punch holes to fit the rings.
Sign in or sign up to reply.