December Daily® 2015 | Day Nine
Tags:
Welcome to December Daily® 2015 | Day 09.
Today was super fun to put together. I've been excited about playing with circles in some way or another in this album ever since I received the Main Kit with the wood veneer circles. And I love see-through pages. And yes, I did change this up even after I filmed the video. I ended up taking off the "E" and embossing the little white trees on top which keeps it consistent with the other large red chipboard numbers I've added on previous days.
Step-by-step video included below. You can also subscribe to my YouTube channel if you'd rather watch videos over there.
Don't forget to download my gift to you today over on Pinterest as part of my 12 Days Of Giving.
Here's my Day 09 from my foundation pages post:
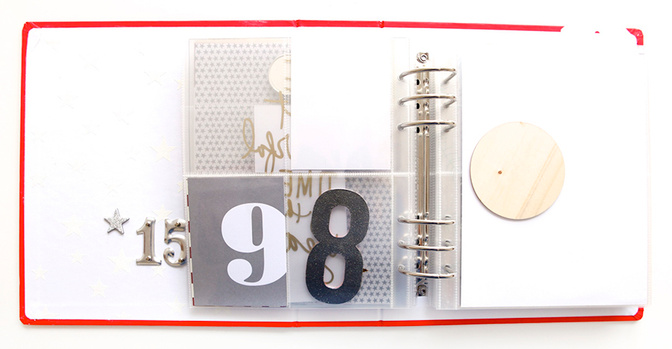
Originally Day 09 was in a 4-pocket, 3x4 page protector. Day 08 ended up being one page so I was able to remove that page protector before starting Day 09.
Here's what I ended up with for Day 09:
Day 09 includes a transparent plastic page (content on both the front + the back) and a full page 6x8 photo.
The photos in my album today were editing using RadLab which I use within Photoshop. The filter I used today (and a couple of other days in this album) is called Bullet Tooth.
The story, obviously, is quick and simple to fit into the 3-inch circle.
The transparent insert page is a thicker plastic piece that holds up well as a page on it's own. I originally bought these from Studio Calico in 12x12 sheets - this one was cut down to the same size as the page protectors - but you can also get them via Amazon here.
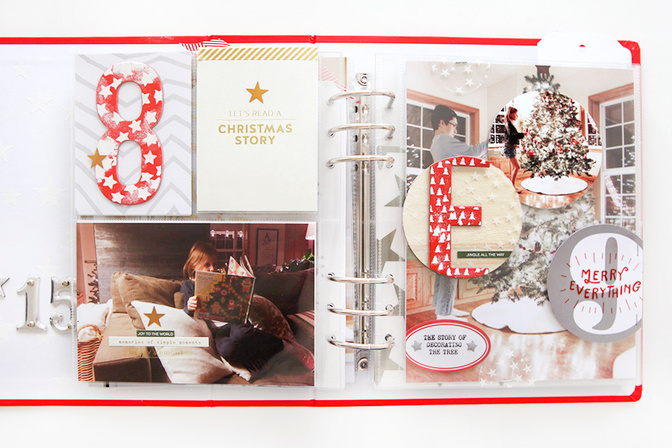
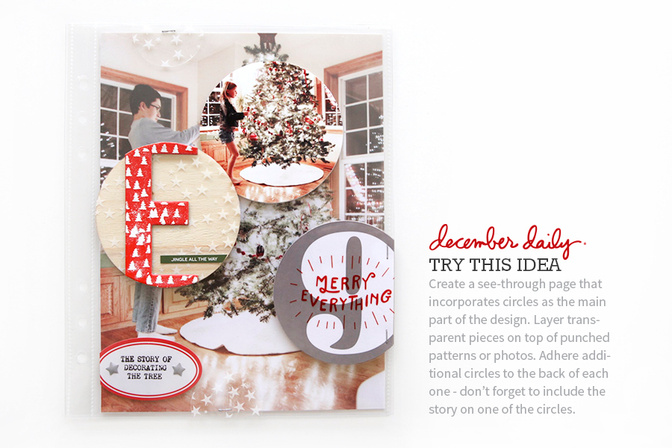
On the front of the page I included four things:
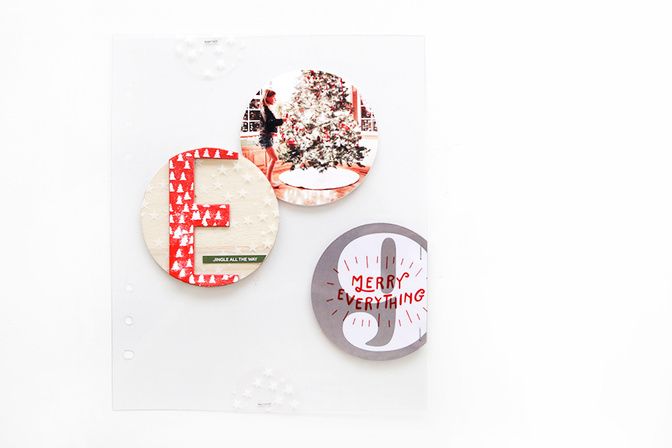
The large wood veneer circle from the Main Kit + a circle-punched piece of the white star transparency + a large letter red E (for my last name) that has been trimmed around the edges and that's embossed with small white stars + a green "jingle all the way" sticker.
The number 9 card from the Main Kit punched with a 3-Inch circle punch + a "merry everything" circle from the Seven Paper Felix Plastic Shapes (stapled on top).
A photo of Anna and the tree punched with the 3-Inch circle punch.
Two 1-5 inch punched circles from the star transparency.
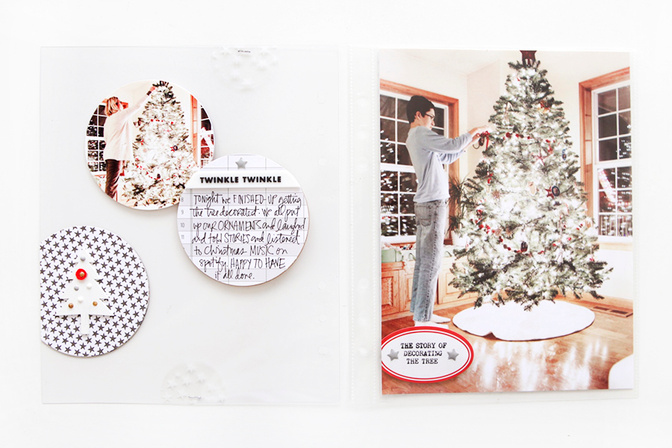
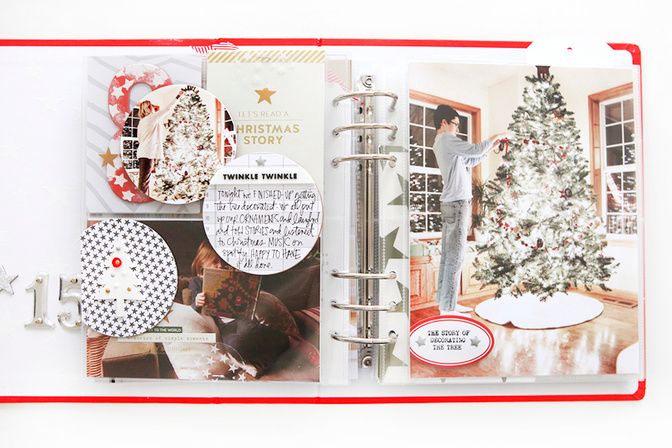
On the back of the transparent page I repeated the same circles - simply adhering these other circles directly on top of the other circles (simply on the other side). One photo of me, one star pattern paper (Main Kit) and one circle punched from December Daily® Jasmine Jones Mini Kit (lines with home for the story).
I cut the "twinkle" white rubber banner to have the same edges as the circle. Little circles on top of the white tree are from the December Daily® Jasmine Jones Mini Kit.
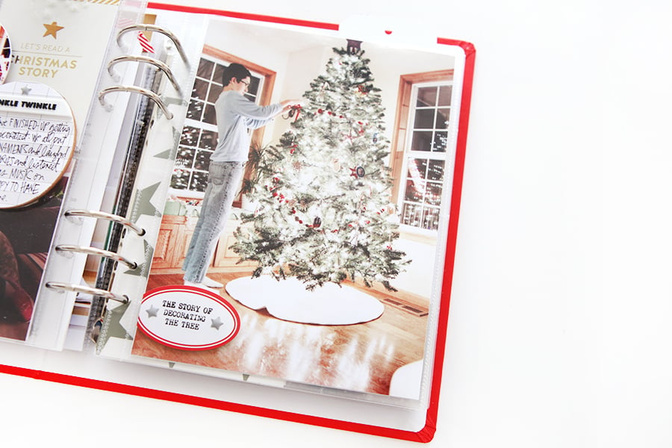
On the bottom of the enlarged photo I added a red label sticker that I had stamped on using stamps from the Storytelling With December Daily® workshop stamp set.
DAY 09 | STEP-BY-STEP
SUPPLIES
December Daily® 2015 Main Kit (red chipboard letter, label stickers, #9 card, green phrase sticker)
December Daily® Jasmine Jones Mini Kit (lined paper, mini stars and circles)
Seven Paper Felix Plastic Shapes ("merry everything transparent circle)
Grafix Transparent Plastic Page 12x12 (cut down to the size you want)
Epson R2000 printer (anything larger than 5x7)
SHARE YOUR DAY 09
I'd love to have you share a link to your Day 09 album pages below. Please link directly to your post vs. a general blog link.


Comments
Sign in or sign up to comment.
26 comments
Your DDs are so inspiring, Ali! Love circles! I still bust out my Creative Memories' shape cutting system - might be old school, but still fun. I finally bought RadLab during the Black Friday sale this year and it's been one of the best purchases ever!
Replies to YSandA
Sign in or sign up to reply.
That is stunning. Thanks you so much for sharing!
Replies to Carliep
Sign in or sign up to reply.