December Daily® 2015 | Day One
Tags: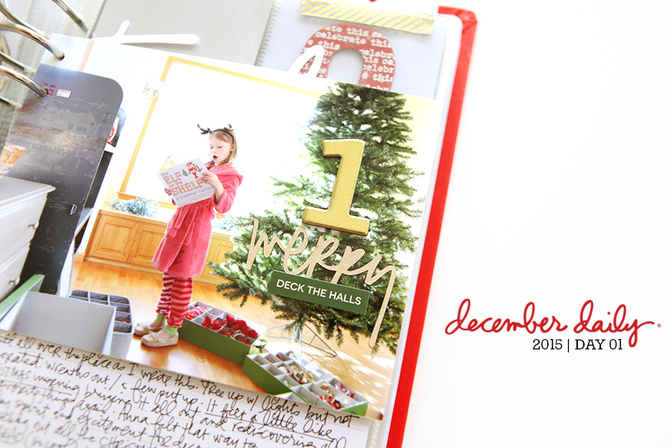
Welcome to December Daily® 2016 | Day One.
I always really start to fall in love with this album as it begins to come alive with the addition of photos and words.
One of my biggest pieces of advice (t hose of you who were in the workshop this year heard me say it over and over again): this album is not about any single story rather it is the sum of all the parts. Remember that as you go about your days and give yourself permission to make it work for you. I aim for a mix of short and long stories that come together in the end to make one big story of the season. Stick with it, even on the boring and/or busy days.
Also, one thing I hope to do on some days this year is include step-by-step videos. I was able to do one for today that you'll find at the bottom of this post as well as on my YouTube Channel. Hope you enjoy the peek at my process.
Here's a look at Day 01:
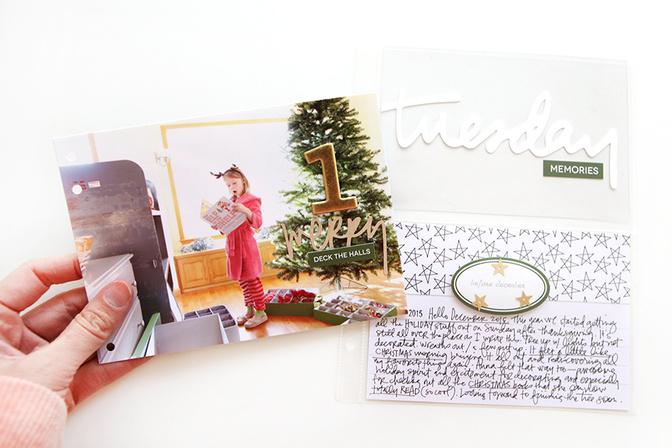
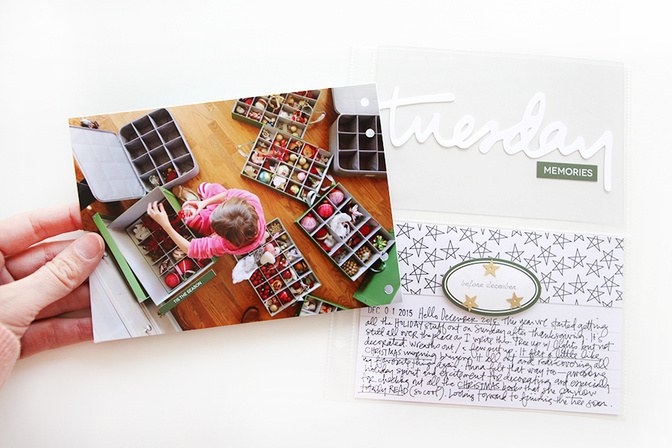
Today I decided to go outside the page protector and I printed two 5
inch x 7 inch photos, adhered them back to back, and added them to my album by punching holes using a Crop A Dile.
On the front photo I added a #1 from the Emily Ley Mini Kit, a "merry" from the cut files in the Storytelling With December Daily® digital package (cut with my Silhouette & kraft cardstock), and "deck the halls" from my main kit (popped up with foam dots).
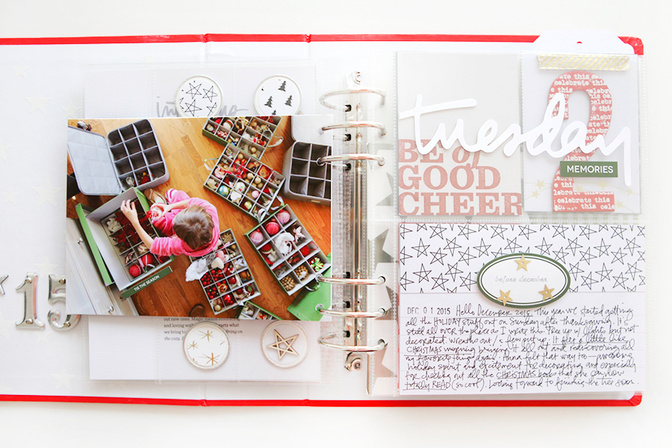
When you flip the card over you see the second image - looking down on
Anna and all the ornaments. As you take photos this season, think about your perspective: look up and look down vs. straight on for a different view. I love Christmas morning shots like this too.
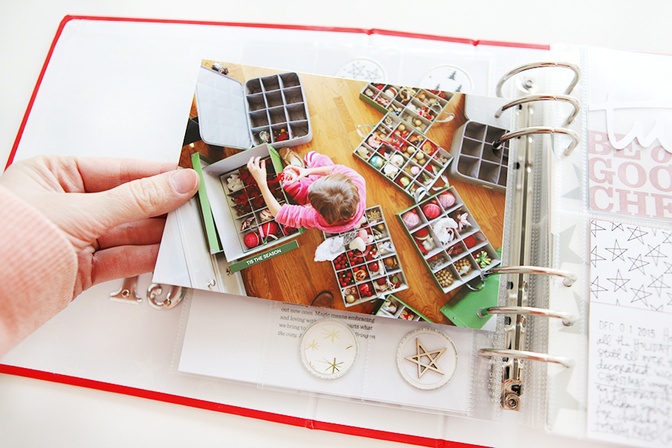
My large green ornament boxes are made by a company called Sterling Pair. I bought two from Amazon a few years ago when I was looking for a more sturdy option to hold our ornaments and they have been awesome. This year I also bought these grey twill ornament boxes with zippered lids for each kid that are just for their own individual ornaments (they are made for mugs but work great for ornaments - we wrap in tissue paper and then you can put multiples in each cubby). I had my own box growing up that my Grandma Cathy (Mom's Mom) made that I now have here at my house with all my childhood ornaments included. It was a big part of our family traditions when I was growing up to put your own ornaments on the tree and sit around and talk about where they came from (we had lists that documented who gave them to us because that's how my Mom rolls).
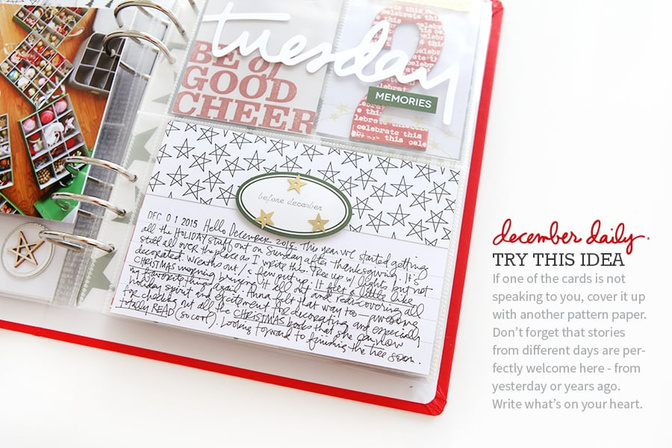
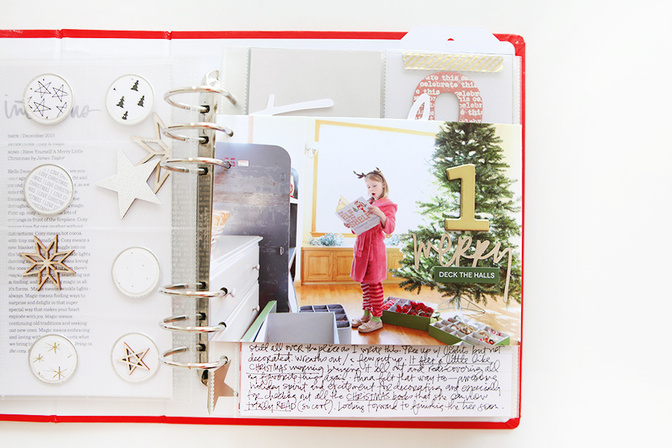
On the page opposite the 5 inch x 7 inch photos I added a "memories" sticker to the Tuesday cut with my Silhouette.
On the 4 inch x 6 inch card below I covered up the original design with the star pattern paper and added one of the circle label stickers + "before december" added with an electric typewriter that Katie found at a local thrift store a few years ago. On top of the label I added some gold stars from my stash.
Underneath I wrote my journaling by hand that talks about what we did on Sunday when we put up the tree and how it felt a little like Christmas morning bringing all the stuff in from the garage.
Here's a look at the pages outside the album:
DAY 01 | STEP BY STEP
SUPPLIES
Old Typewriter (Smith Corona Electric)
Cut File from Storytelling With December Daily® workshop


Comments
Sign in or sign up to comment.
32 comments
I love ornament tradition! That is something my parents did for me and my sister growing up, too. My husband and I have carried the tradition on for our sons, too, and I buy one for my niece and nephew each year. I have a plan to use one of the 2x2 pages to document favorite ornaments and their story, maybe as a flip up with the story on the back or something. I haven't worked out the logistics yet.
One of my favorite gifts my husband has ever given me was a set of ornaments the first year we were married (we had a December wedding). It was similar to the bride ornament sets you can find at Macy's or wherever, but he had gone to a local store here in town and handpicked them so they were meaningful to he and I and our families. So touching. Some of my favorites to put up each year.
Replies to Afink26
Sign in or sign up to reply.
I am so excited about this whole project - the community here, in your classroom and on the Facebook page is just over-the-top wonderful! Thank you Ali! I am going to treat myself to your blog post + a couple of these cool linked pages each day - then come back to all of these posts after Christmas and check out all of the links! This way I will follow your advice of taking action vs only looking, since a long work day is taking up some of my time.
Replies to ScrappinMyHeartOut
Sign in or sign up to reply.
Ali do you have any sort of "blog button" (have no idea if that is what it is called???) that we can add to our "current projects" on our blog??
Replies to banninglane
Sign in or sign up to reply.
Absolutely fabulous Ali. I hope you and yours have a brilliant season :-)
Thanks for ALL the inspiration and can you pleeeeeasssse send me some of your light for my photos :-)
Replies to JenHart
Sign in or sign up to reply.
When December 1st came yesterday, and I had decided not to do an album this year, I saw your post and ordered the kit. lol You get me every time!
Replies to carpecakem
Sign in or sign up to reply.
Thank you so much for sharing your process of thinking and putting things together. It may not seem like much to you, but it helps so much to get my mind wrapped around this project. I did it last year as more of a project life type project. This year I think I am going to attempt the one story per day approach because of your inspiration. Also, thanks so much for the tip about the new Playmobil set. My children have been setting up the Playmobil Nativity set for at least the last 10 years. Even though my kids are teens and twenty-somethings, they were so excited to see the new plastic creche for the nativity set that we discovered thanks to your tip :-)
Replies to lidohdee
Awesome. I love that thing :).
Sign in or sign up to reply.