Story Play | Love Story | Ali Project 02
Tags: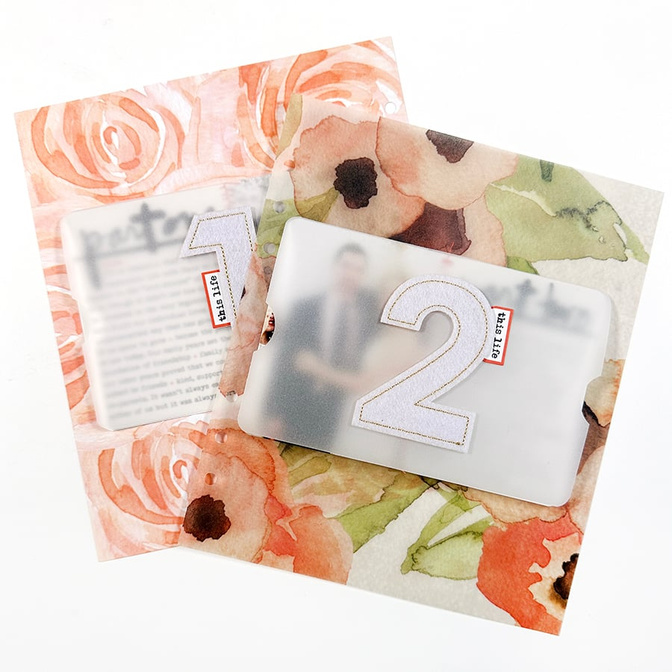
Welcome back to Story Play | Love Story.
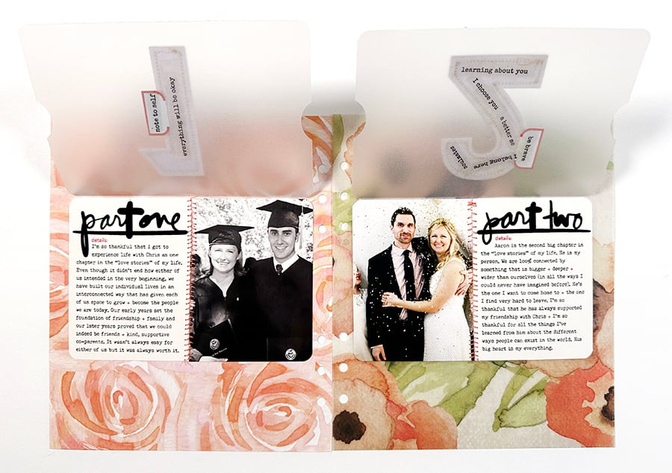
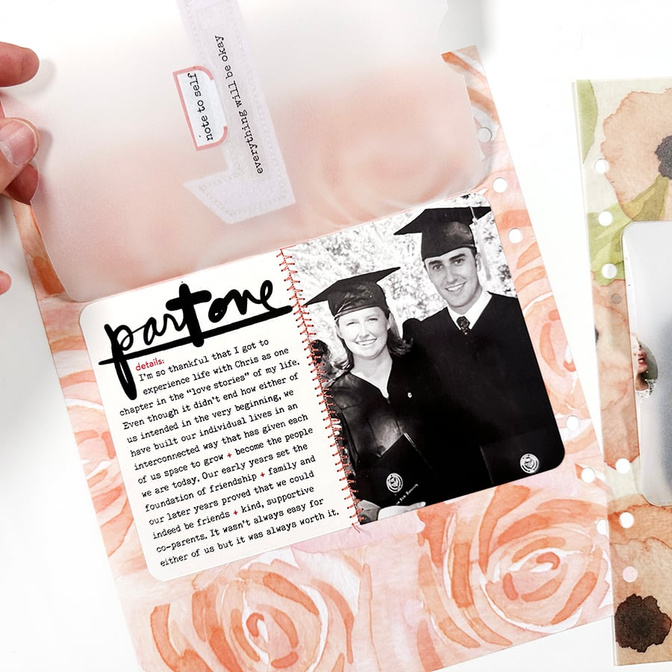
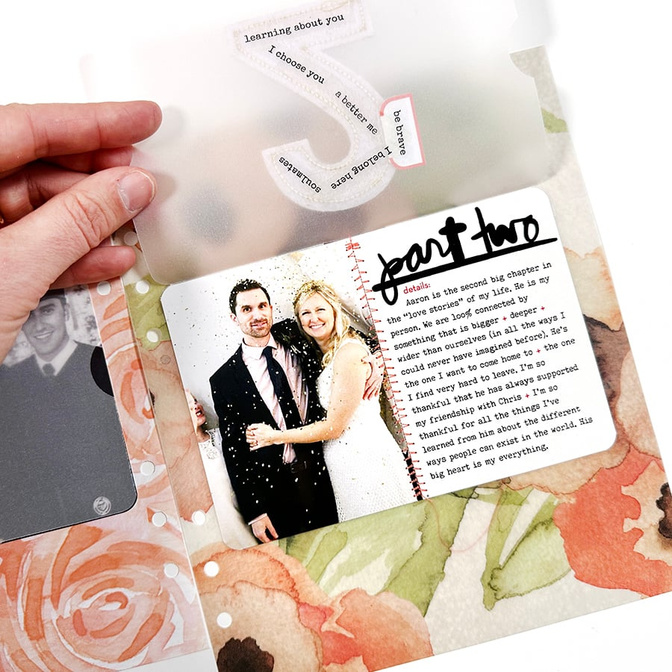
It's possible that you, like me, have lived more than one love story in this life. For today's Love Story project I decided to use the Part One and Part Two journal cards as a jumping off point for the two big love chapters in my own life. You might not have the same Part One and Part Two as I do, but you might have another story in your life with two distinct chapters and these cards are a great jumping off point for telling that story.
As I was editing my video for this project I kept thinking about how our stories are built one word at a time, one project at a time, through the various chapters of our lives. I was also thinking about how fun it is to compare and contrast now + then and to invite ourselves back into stories from our past to see how we might tell those stories differently today than we might have done with real time documenting.
We evolve and I'm so thankful for that.
Let's dive in to today's video:
Here's a look at my project via photos:
The background pattern paper on the left is from the Grow Scrapbook Kit and the pattern vellum on the right is from the September 2023 Stories By The Month Kit.
On the underneath side I added some clear word/phrase stickers to the backs of the felt numbers + tabs.
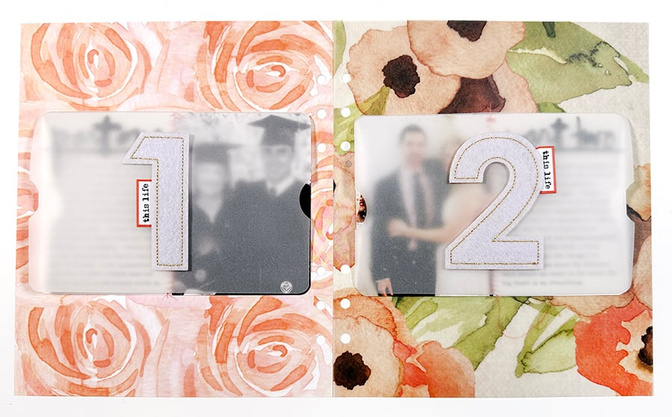
I ended up using the digital journal cards for this project since it was easy to just add text and print. You can also handwrite or use sticker paper or run the actual journal card through the printer. I paired each of my journaling cards with a 3 inch x 4 inch photo and rounded the outside corners. I temporarily adhered the photo/words combo to the background before running it through my sewing machine.
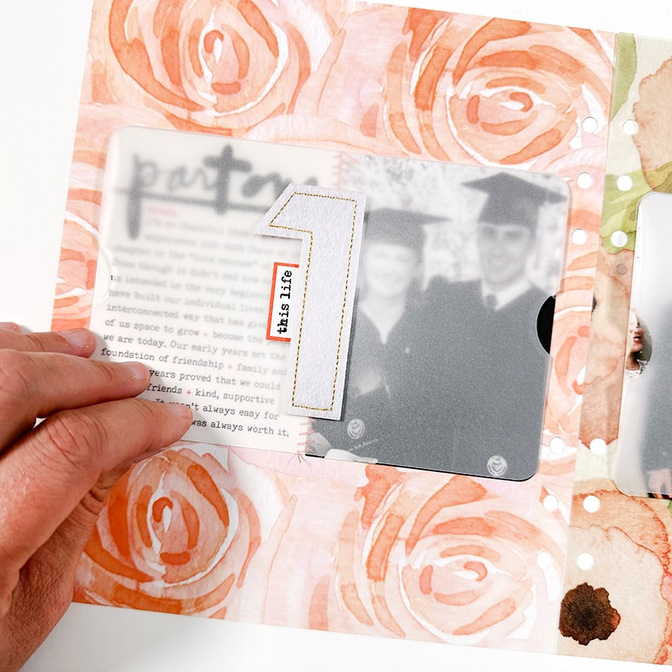
You could easily call it good with the words + photos stitched in place but I decided to play around with adding a vellum numbered flip up. To do this I cut a piece of plain vellum to 6 inches wide x 4.5 inches tall in order to fold over the top .5 inches. Because I had already stitched my cards to the background paper I made a small square cut from the vellum in order for it to fit folded over on top.
On top of the vellum I added a felt number (from December Daily®) and used the tab stickers + a "this life" stamp from the Pieces Of Me Stamp Set.
On the underside of the number I added clear word/phrase stickers.
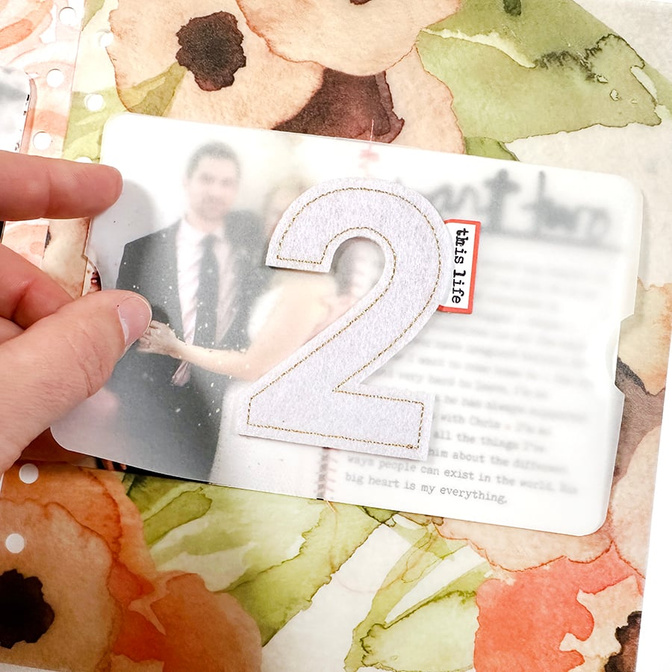
Along the outside edges of the vellum I used a 1 inch circle punch to punch a partial circle.
SUPPLIES
Pattern Vellum from September 2023 Stories By The Month™ Kit
Pieces Of Me Stamp
Felt Numbers (from December Daily® release)
Clear Word/Phrase Stickers
Additional basic supplies can be found via my Amazon Storefront


Comments
Sign in or sign up to comment.
8 comments
I’m so glad to see this post today. I was thinking of you and your story so much last night after another painful conversation with my mom. So happy for you Ali and your family who have worked and sacrifices to make it work for you and your family. Thank you for sharing this part of your life.
Beautiful layout!
Replies to dawnmi
Sign in or sign up to reply.
Goosebumps! ❤️
Replies to Jeannew
Sign in or sign up to reply.
This is beautiful in every way. What a great heart you have, Ali.
Replies to carrieW
Sign in or sign up to reply.
❤️❤️❤️❤️❤️
Replies to k8scraps
Sign in or sign up to reply.
So heartfelt Ali! Thank you for sharing - AND the flower vellum papers are some of my all time favorites.
Replies to michelezh
Sign in or sign up to reply.
This layout with 2 parts is both very kind and so sweet.
Replies to shandogs
Sign in or sign up to reply.
Love this so much! Both stories are part of you and worth telling. Thanks for the invitation to do the same!
Replies to ahiggins83
Sign in or sign up to reply.
LOVE this project! I am definitely going to scraplift this idea directly. Thank you for the story inspiration!
Replies to createdbysteph
Sign in or sign up to reply.