Story Play | Love Story | Ali Project 04
Tags: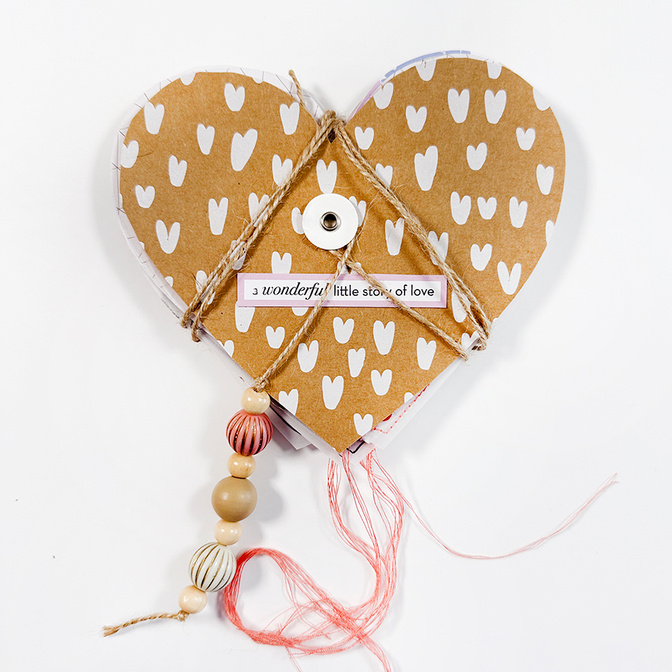
Thanks so much for joining me for me for our Story Play | Love Story week!
For my last project I'm sharing a little minibook created using a cut file I've added for you below and cutting up the packaging the Love Story Kit came in this year. Sometimes a kit like this can simply act as a jumping off point for a story your heart wants you to tell.
As I thought about what kind of story I wanted to tell for this last project what I most wanted to do was focus on the things I'm loving about each of my family members right now. The time to do this is not only when you are feeling love for another, but when you might be struggling (I talk more about this in the video). Look for the good in each other. Look for the heart of each other. Look for the light in each other. Find the goodness and write it down.
Let's dive in to the video:
Here are additional photos:
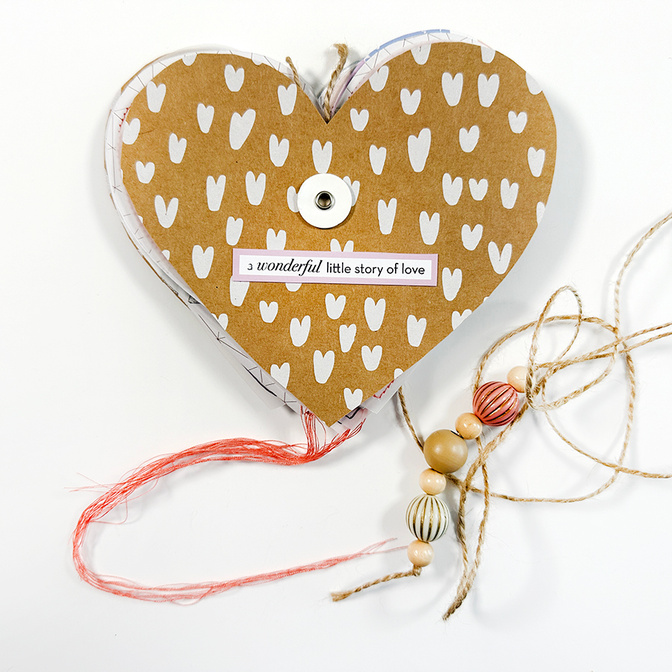
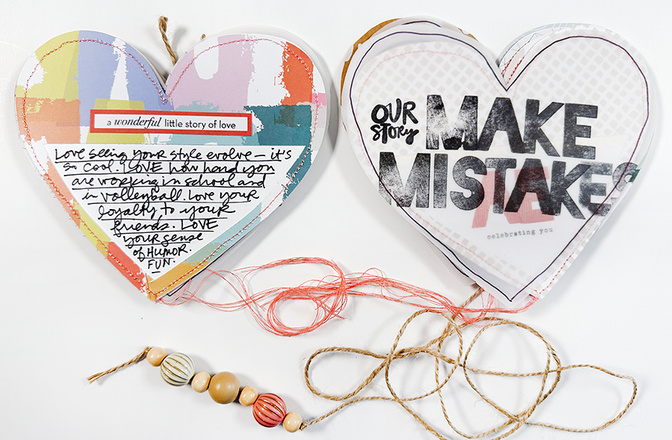
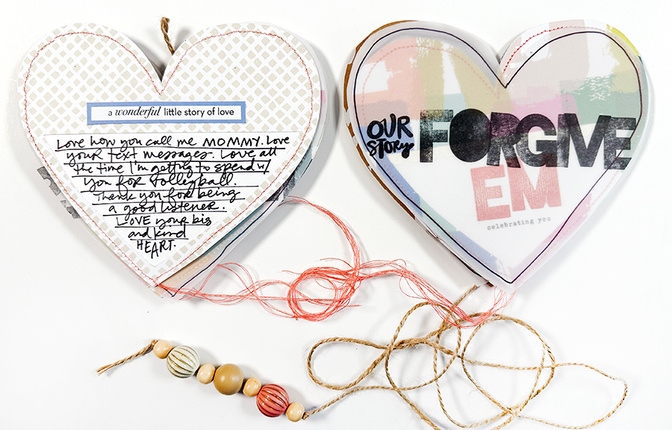
I used the Love Story Kit packaging to create a front + back cover for my project. I attached twine to the back (you'll see more below + step by step in the video) and added a few wood beads to the tail end.
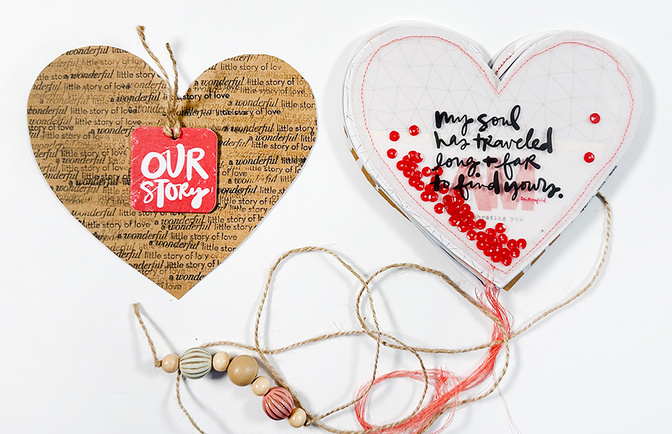
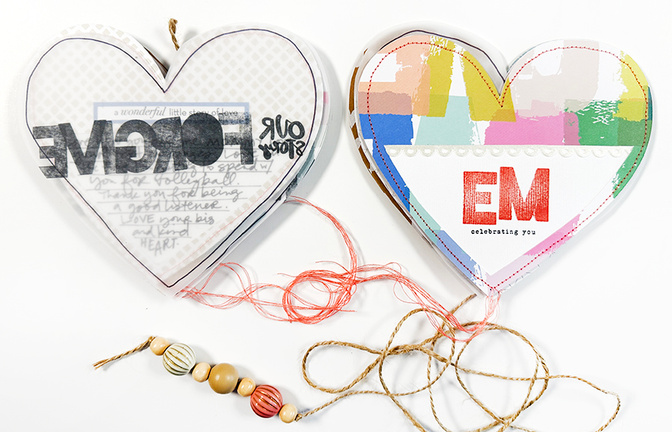
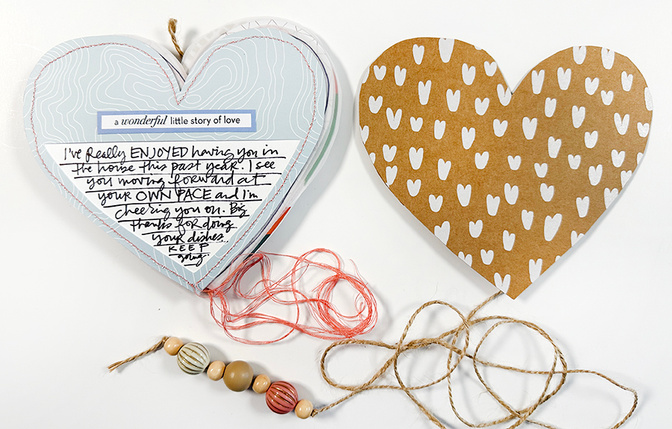
On the inside cover I repeat stamped "a wonderful little story of love" and rounded the corners on the "our story" chipboard piece.
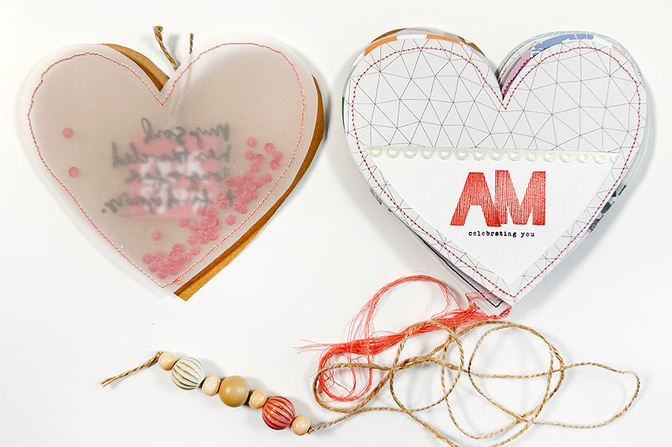
The first page in the project is a shaker with the "my soul" quote printed on transparency (this is available as a PNG for you in the download) and a piece of vellum on the back with red sequins inside.
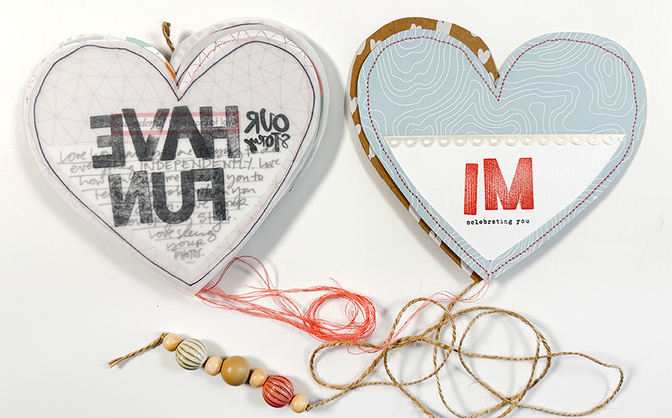
For half the pages in this project I used my Silhouette to cut out the front + back of the heart shapes using pattern paper from past Scrapbook Kits. If you don't have a Silhouette you can use the PDF in the download as a template for the front + the back.
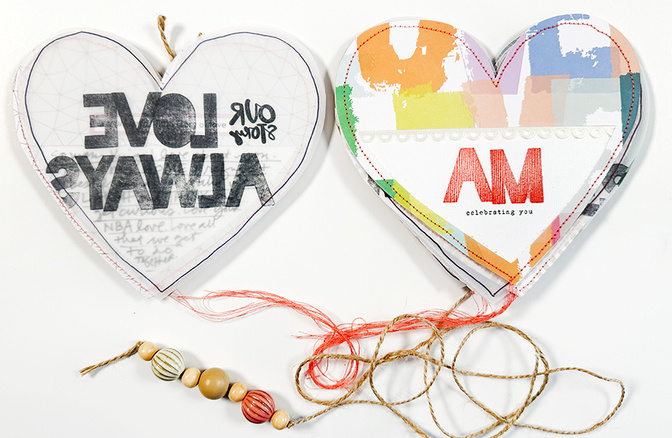
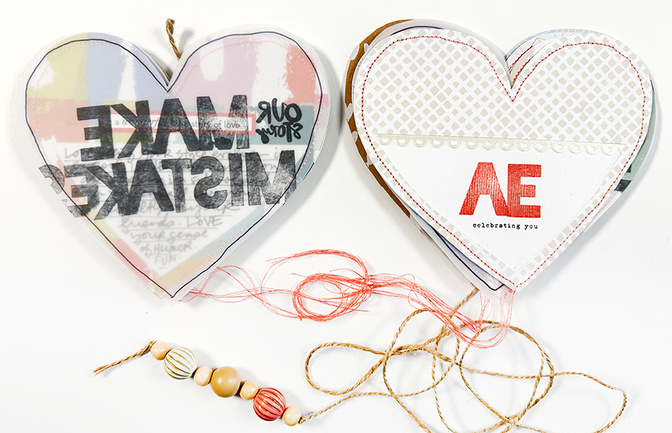
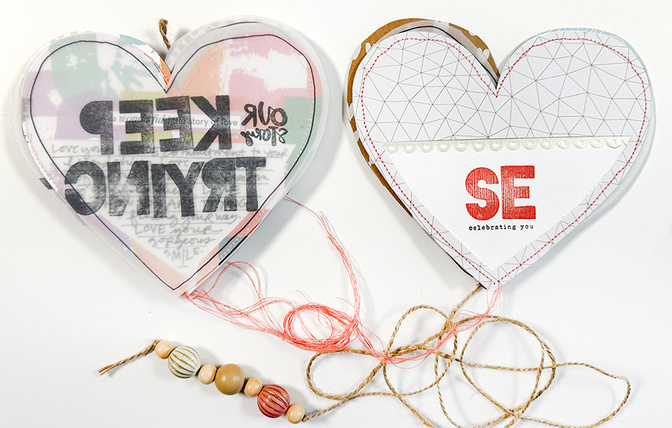
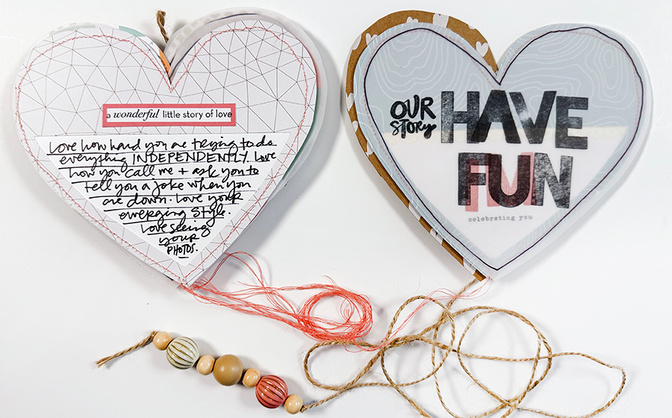
I added white cardstock between the two layers of hearts to create a home for my journaling. On the front I stamped my family member's initials using this stamp set + added some adhesive scallop ribbon along the edge. Under their initial I used the "celebrating you" stamp from the Birthday Story Stamp. I finished off each heart by running it through my sewing machine and chose to leave thread tails. Colleen Attara did that on a beautiful heart piece she sent me when Aaron and I got married and I always loved the look.
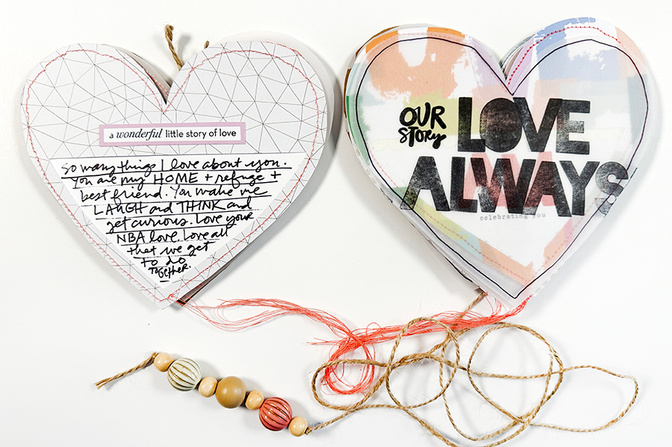
On the back of the die cut pattern paper hearts I added a stamped label (using a pattern paper from the Labels Scrapbook Kit) and used a Slick Writer to add my journaling.
In between the die cut heart pages I did vellum hearts with sentiments stamped on top. Next to each sentiment I used the "our story" stamp from the Love Story Stamp Set and drew an outline around the heart to finish it off.
I seriously love how this turned out.

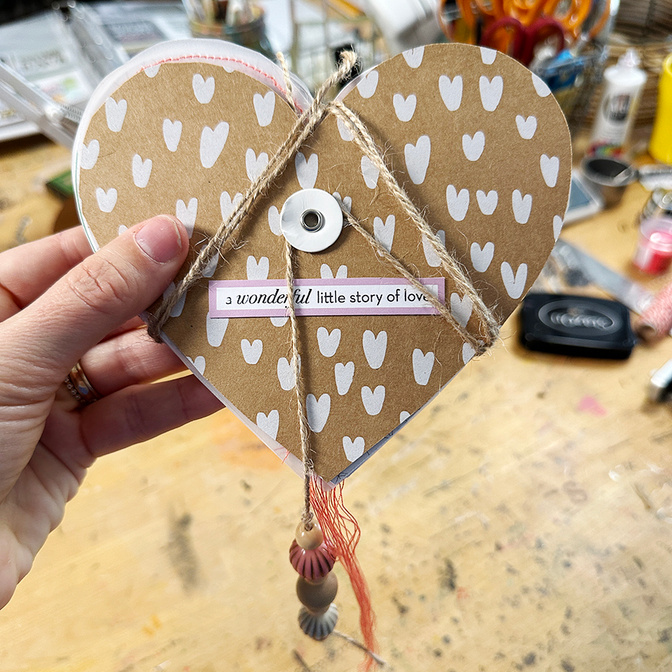
I cut another heart from the packaging to end the album. I wanted to be able to use the circle piece that comes with the packaging for my own twine so I ended up cutting off the top flip and adhering it to the other side of the heart:
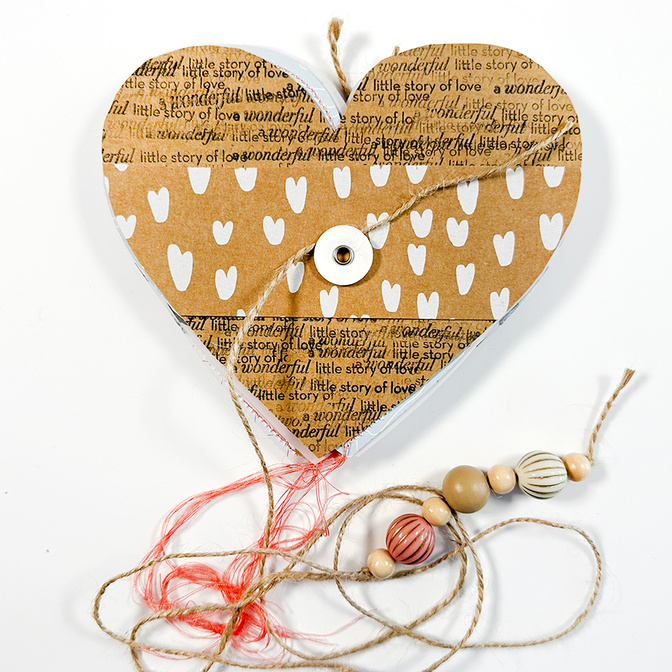
I repeat stamped the same stamp as I did in the beginning and then used red line tape to adhere the strip on the back before tying the twine in place. I left a long tail and added a few wood beads to the bottom. Watch the video to see how it gets all tied up.
This was such a fun project and I loved the chance to think about my family while I was making it and document those feelings + thoughts along the way.
Our Story Play series will be back again in a couple months with the next theme! Grab the bundle to play along here!


Comments
Sign in or sign up to comment.
14 comments
This is wonderful Ali! My OLW is Heart this year and I might do something with this idea, maybe what I love about myself in different seasons of my life. Looking back from being a child until now.
Replies to allhallowsraven
Yes! That would be so fun.
Sign in or sign up to reply.
Hi Ali - Thanks so much for the download - It has a studio, png and ai, but no PDF or word art from the shaker; could you add these?
Thanks so much!
Replies to Kegger
That's been updated!
Sign in or sign up to reply.
I love this so much! Thank you for the reminders that we can create outside of albums and to be actively looking for the positives (especially in our adult children). Life gets heavy and this is such a lovely project to lighten it up 🤍
Replies to shainalain
Yes! Agree 100%
Sign in or sign up to reply.
SO FUN!!
Replies to ahiggins83
Yes!
Sign in or sign up to reply.
So good and I love how you do your videos. It truly helps me think differently as I'm working.
Replies to Seester2t
Awesome! That's my hope!
Sign in or sign up to reply.
Gorgeous little mini book! Love it! And love that you found the good in all your people!
Replies to Jeannew
Me too Jeanne!
Sign in or sign up to reply.
Love this Ali! And it seemed so fitting how you described the hearts all being wrapped up together with the string (when your love stories as a family are all wrapped together in life!)
Replies to flowergirl85
Sign in or sign up to reply.
this is adorable!!
Replies to chrys23
Sign in or sign up to reply.