Story Play | Love Story | Ali Project 01
Tags: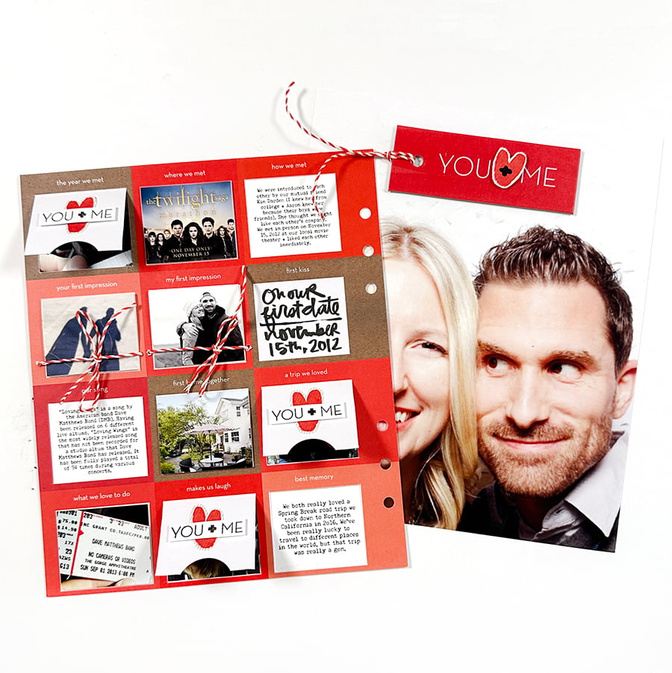
Welcome back to Story Play | Love Story!
I'm so excited to dive into this Story Play kit with you today. I love these kits so much because they are awesome for straight-forward storytelling and/or as a jumping off point for more crafty fun.
When was the last time you got lost in your memories via your photos? Photos are LIFE. I spent some time going back in my archives as I was looking for photos of me and Aaron and it was simply the best. I also really loved seeing the videos that popped up when I searched via "people" in Photos.
As you are looking back through your photos, think a little about the chapters of this particular love story.
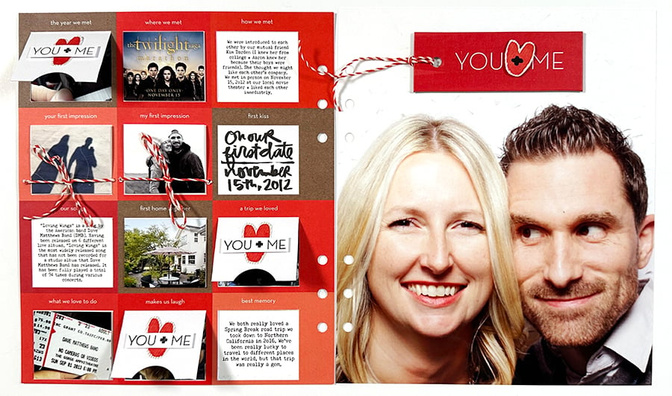
One of my favorite design formulas is a full page photo + a prompt page. For today's project I started off thinking I was going to go really simple but I ended up letting myself play a little more and enjoyed the process of playing around with the different things you could do with that pattern paper.
With this pattern paper you can:
Cut out the squares to use them in a 2x2 pocket page protector.
Cut out the white portion and add text or a photo behind.
Crop a photo to 1.75 inches x 1.5 inches and add it on the white space.
Cut three sides of the white square and fold along the top to create a flip up. Use a 1 inch circle punch to punch out the partial circle along the bottom.
Here's my process video of this page coming together. Let's dive in:
Here are some close up images of this project:
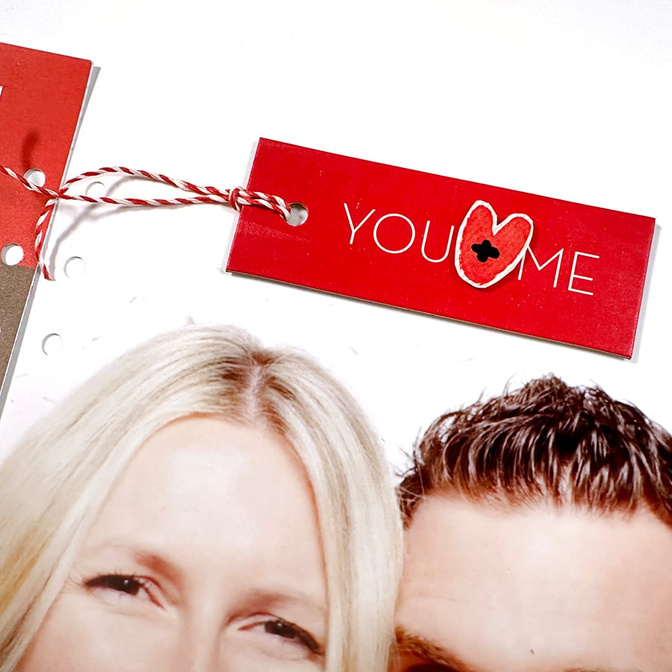
Chipboard piece + cut out heart from one of the 3x4 cards + a black POSCA Paint Pen on top. I added red/white twine through the hole on the chipboard tag and adhered the whole thing with foam adhesive.

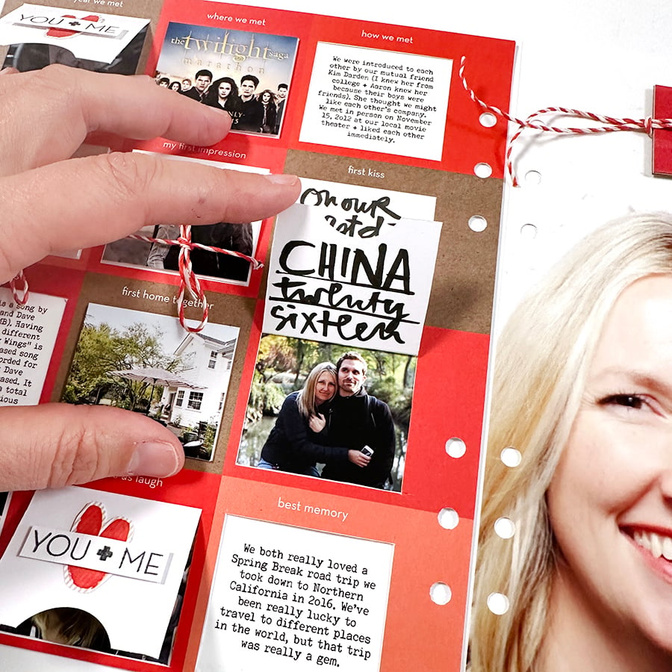
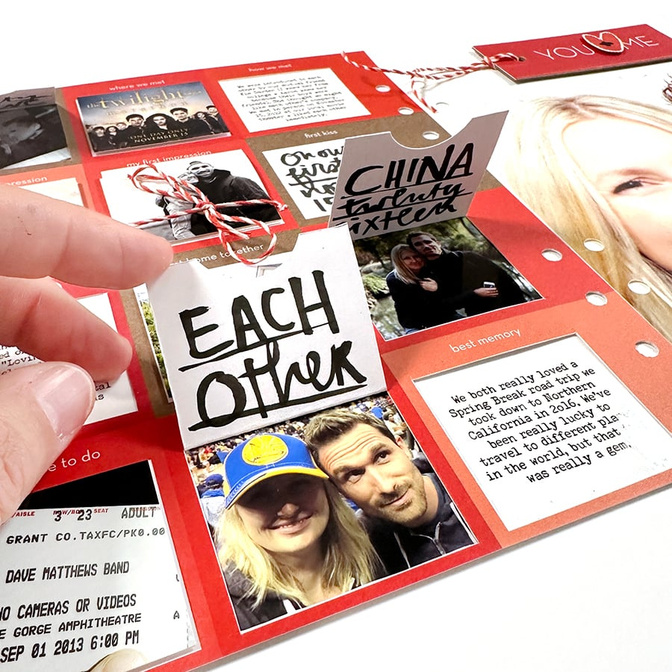
I had fun mixing and matching the treatment of the squares. Some I cut out completely (the ones with the text), some I folded up, and some I built on top (the folded photos with the twine).
On the outside of the folded up portions (I used a 1 inch punch to remove part of the bottom of the white) I added a cut out heart (from the 3x4 journal card) and stamped "you + me" using the stamp set.
The size of the white squares are 1.75 inches x 1.5 inches.
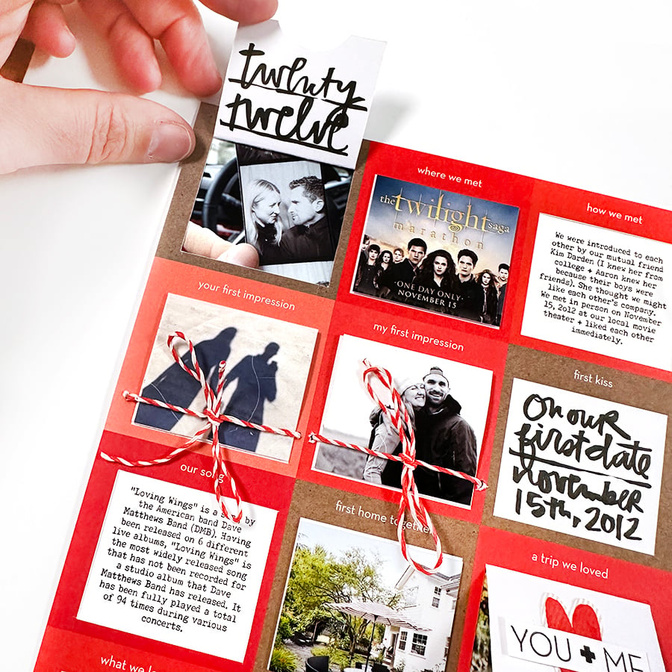
On the underside of the flip-ups I added a few details using a brush pen.
For the "first impression" spots I created flip-ups and used red/white twine to hold those in place.
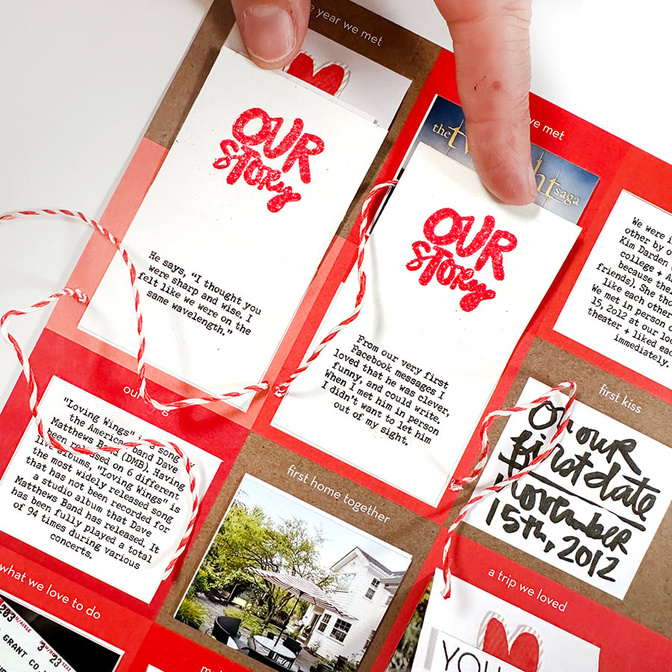
On the underside (these measure 1.75 inches wide x 3 inches tall) I stamped + embossed using red embossing ink.
This was such a fun project to put together!


Comments
Sign in or sign up to comment.
16 comments
I love that you decided to play, the page is filled with so many fun and beautiful treatments. One of my favorite ways to dive into my photo archive is to scroll back through my personal instagram account and see all the memories posted there.
Replies to jlutherdesigns
Thank you! So fun!
Sign in or sign up to reply.
Awww, I love how this turned out and it has sparked so much joy. This has inspired me to look back through my photo archives. Thank you for sharing.
Replies to JasminC
Have fun! I really loved it.
Sign in or sign up to reply.
Love it.
Replies to mariapresson
Thank you!
Sign in or sign up to reply.
So many great ideas, thank you!
Replies to Seester2t
Thank you for being here!
Sign in or sign up to reply.
Just such fun!
Replies to Jeannew
Yes! Can't wait to see what you do with stamping!
Sign in or sign up to reply.
Hi Ali,
I love this kit and your love story. I would love to order this for a friend who is a bride, whose wedding is later this year. Do the pages fit in the 6x8 album? I would like to purchase an album for her as well. Also, is there an online class with this kit? If I purchase it for someone, how would they access the class? Thank you in advance for answering my questions.
Replies to pwilliam968
Hi! Yes - these pages fit in a 6x8 album (the pattern papers are the same size as the page protectors in the album). There isn't an online class that goes along with the kit - we are just sharing ideas here on the blog. You could point her to this post!
Sign in or sign up to reply.
Thank you so much, I can't wait to give it to her.
Replies to pwilliam968
Sign in or sign up to reply.
Love this so much! Will do a similar spread for my husband and myself--met in 2002! I love the idea of doing this for my parents too, they just celebrated their 54th anniversary!
Replies to ahiggins83
Sign in or sign up to reply.
Love this so much! Can we please get a 10x8 paper like this for December Daily?
Replies to Mpasquini12
Sign in or sign up to reply.
Is the Kuretake Brush Pen 0.22 or 0.55?
Replies to PamelaG
Sign in or sign up to reply.