December Daily® 2024 | Special Guest Jill Drangsholt
Tags: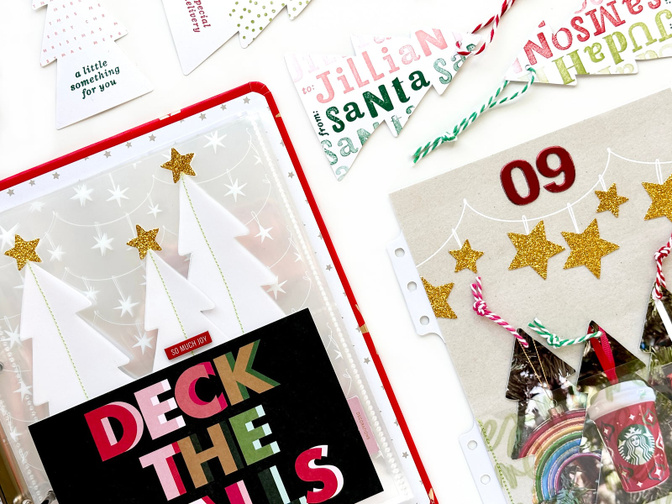
Hi again friends! For my final blog post during this year's boxing period, I will be focusing on ways to use the die cut trees. This pack comes with a whopping 50 trees in it, so I not only have a few pages ideas, but a couple of ideas for what to do with the rest in the pack if you are not joining Ali in her mixed media adventures.
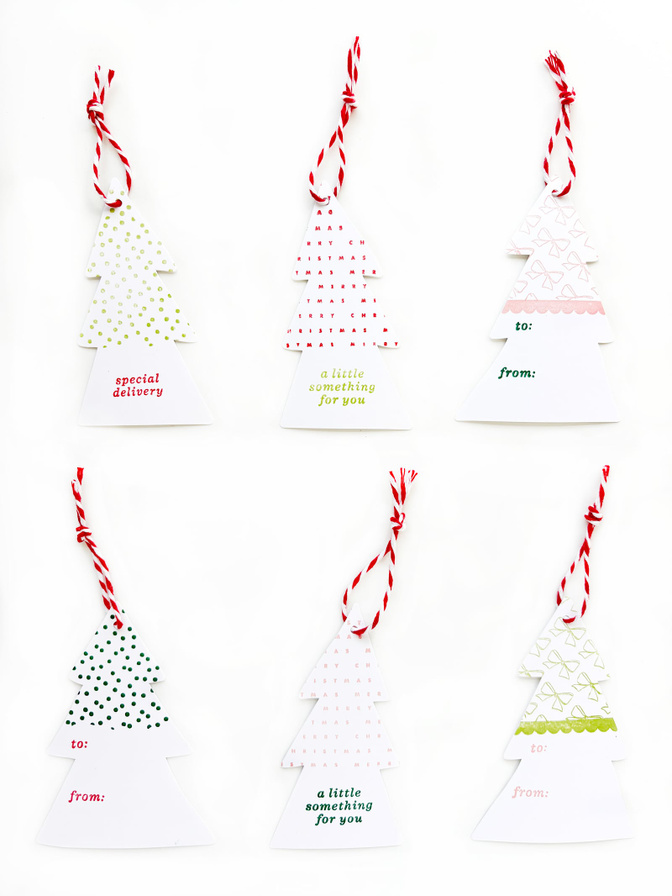
IDEA #1: TREE GIFT TAGS
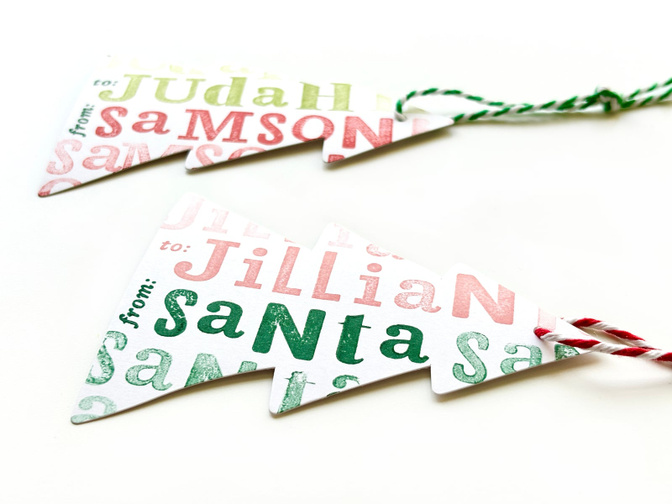
First up, I have some gift tag ideas for you! These trees paired with a few of the stamp sets make the cutest little gift tags!
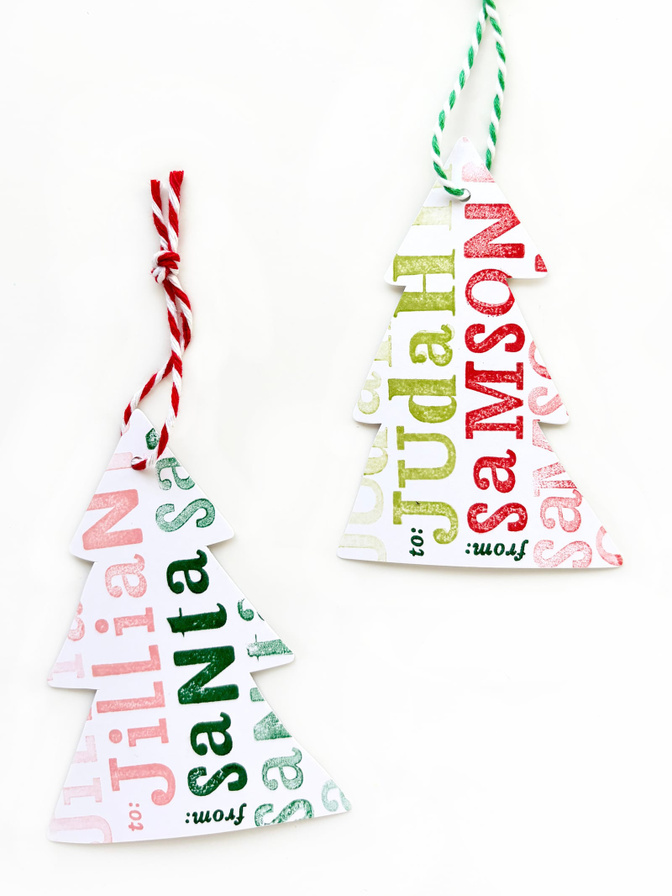
My favorite way to make gift tags was using the fun mixed alphabet stamp to stamp out the names in two colors. But I admit that it is not super practical for doing more than a few tags. So for a quicker tag option, check out my samples using the Scalloped and Holiday Tag 6x8 Stamp Sets.
IDEA #2: TREE CHRISTMAS CARDS
My second idea to use up a bunch of the trees is to make Christmas cards with them! And as an added bonus, you can stash bust some Christmas patterned paper for your backgrounds! Or snag the digitals if you want a bunch of the same pattern, like this HOHOHO paper.

Check out the process video to see how I used the silkscreens, vellum, and some stitching to add some flair to the trees for my cards.
IDEA #3: DECK THE HALLS TREE PAGE
For my first actual page idea, I decided to carry over the layered vellum trees I made for the Christmas cards. How cute are they as a little grove of trees!
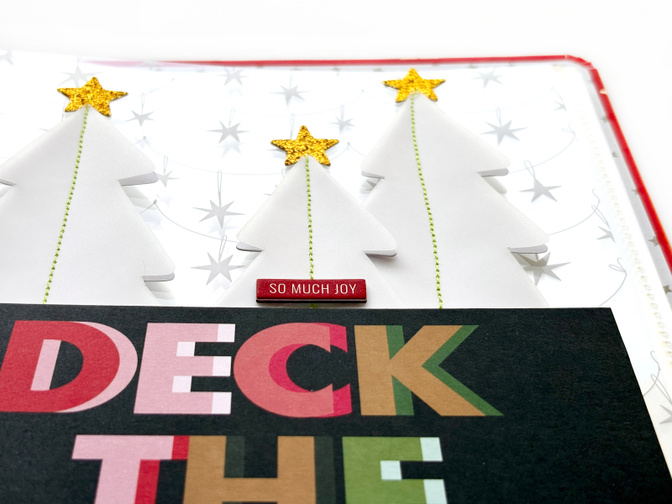
I really wanted a subtle tone on tone look with these white trees, so I paired them with the white garland transparency. And then for a pop of color, I had them sit on top of this "deck the halls" card.
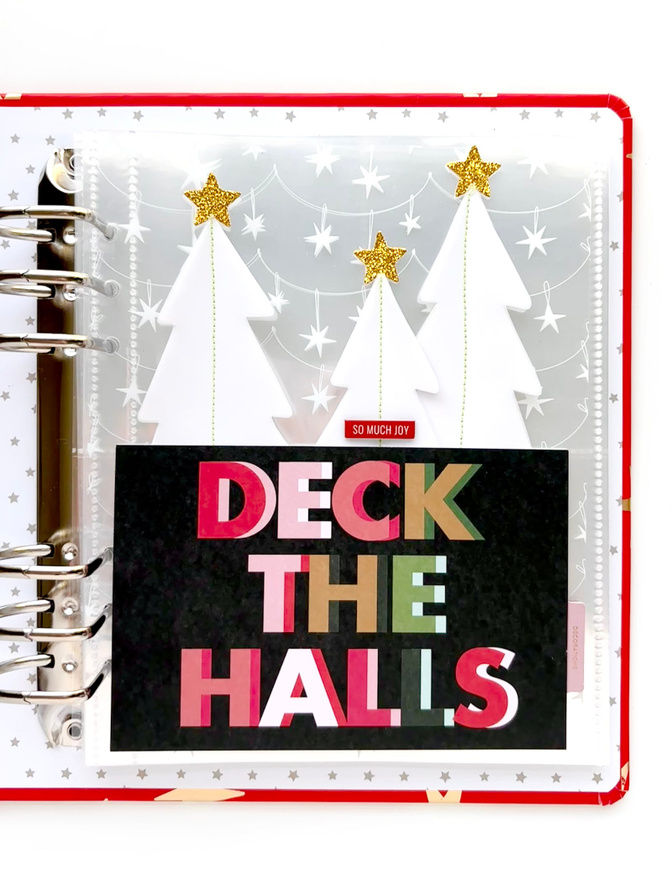
To give this page some room for a story and/or photos, I turned the "deck the halls" card into a flip up and added a tab. My plan for the back is to add some more trees and maybe a photo at the bottom.
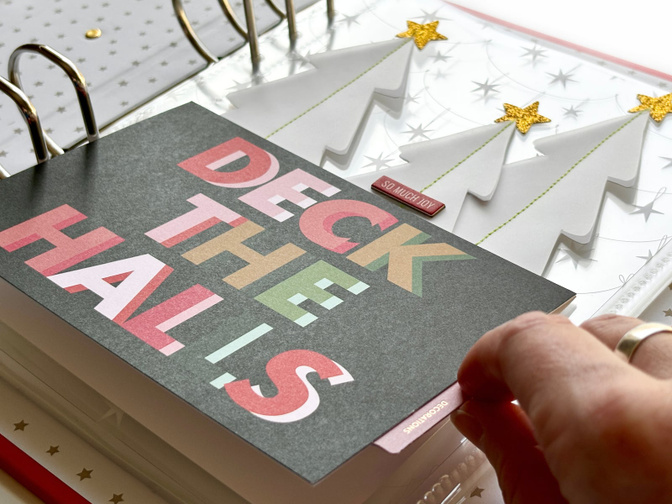
I finished off the page with some glitter stars at the top of the trees because every page needs some sparkle!
IDEA #4: TREE ORNAMENT PAGE
For my last idea, I thought it would be fun to use the trees as a home for the new ornaments I get this year. For the purpose of this lesson, I used photos from past years. When I use this page later this year, I will take the photos a little more zoomed out so that the ornaments fit better within the trees.
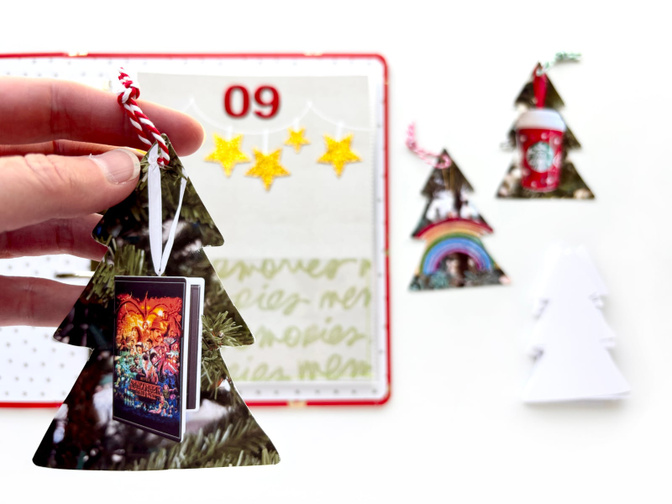
I chose to make a pocket for my trees using the neutral garland 10x8 paper. I love that it allows the trees to pop off the page and that the garland fits with the trimming the tree theme. To make the pocket, I stitched a bit of the green brush lettering transparency on the page.
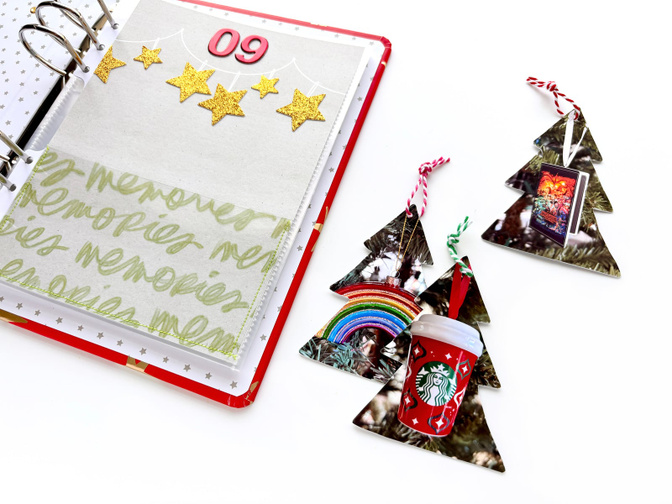
After I had cut down my paper with the garland centered, there was an awkward partial white star on one side. It was really bothering me so I experimented with adding the gold glitter stars on top of the garland to hide that and balance the page out. I love the result!

SUPPLIES
Merry Merry 10x8 Paper Pack
I hope you enjoyed following along with all of my December Daily ideas this month! You can find me on Instagram at @jill.drangsholt if you want to follow my December Daily journey and my other crafty adventures.


Comments
Sign in or sign up to comment.
15 comments
Brilliant! Love all of these ideas Jill! And yay for an excuse to get some new ornaments this year! :)
Replies to AnnetteH
Sign in or sign up to reply.
Great ideas, Jill. Thank you for the inspiration!!!!
Replies to jstock17
Sign in or sign up to reply.
Great ideas, need to scrap lift, especially the ornament one.
Replies to mariapresson
Sign in or sign up to reply.
Loving the Christmas tags especially! So cute!
Replies to justlisa
Sign in or sign up to reply.
Amazing inspiration!! Thanks for all of the beautiful and fun ideas!
Replies to paperpicnic
Sign in or sign up to reply.
I don't know which idea is my favorite. So many great ideas. Thank you!
Replies to Anne235
Sign in or sign up to reply.
These are all really inspiring!
Replies to jlutherdesigns
Sign in or sign up to reply.
Loved all the ideas!
Replies to rhondawilcox
Sign in or sign up to reply.
Love all of these ideas, Jill!! Thank you for the inspiration! Now I need to buy another stamp set, lol. 💕
Replies to Lorretta
Sign in or sign up to reply.
Love all of these ideas, Jill!! Thank you for the inspiration! Now I need to buy another stamp set, lol. 💕
Replies to Lorretta
Sign in or sign up to reply.
Wow! I guess I need to add the trees to my box! I love your ideas Jill. Thank you so much!!
Replies to sewestgate
Sign in or sign up to reply.
Jill, such clever ideas! Thank you so much! I really love the ornament trees!
Shawn
Replies to User39396
Sign in or sign up to reply.
Love the trees with the photos of the ornaments!
Replies to colleen1
Sign in or sign up to reply.
These are such great ideas, Jill!
Replies to jenwong
Sign in or sign up to reply.
A picture ornament of the ornament is creative. We get a new one for our daughter each year.
Replies to kcp_
Sign in or sign up to reply.