December Daily® 2024 | Special Guest Linda Jordan
Tags: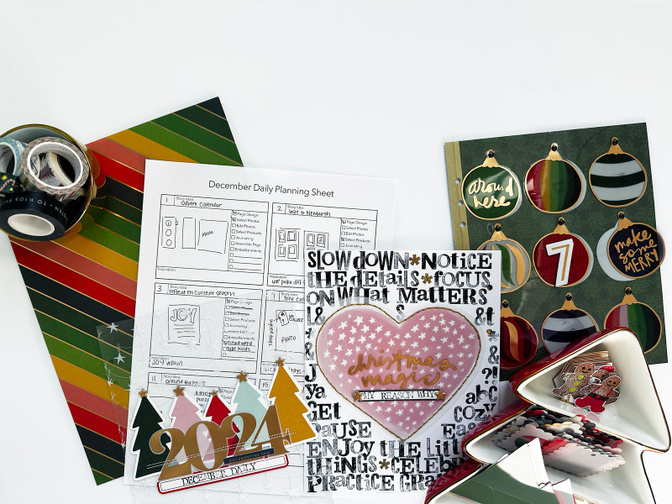
Hi everyone, it’s Linda and I’m so excited to be back today to share more December Daily ideas! I was on the blog earlier this month to share my 10 tips of what you can do now to get ready for December Daily, so if you missed that you can check out that post here.
Today, I am back to share with you my top tips for making this project manageable for you so that you can stay on track and finish your album.
10 THINGS TO STAY ON TRACK WITH DECEMBER DAILY
1. Set realistic goals for this project
December Daily is a super fun project, but it can also be really intimidating. It’s easy to look at other people’s albums and feel like you don’t have the time, energy, or space to make something like that, which leads a lot of people struggling to finish.
I think it’s important to keep in mind that, even though we are all brought together by our love of documenting our December, we are all different people with different interests and lives. If you are in a season of life where you have a lot on your plate, whether it’s working a stressful job, parenting small children, or living with a chronic illness, you might not be able to take on as much as someone who does not have these things right now. Likewise, if you are a person who has a lot of hobbies in addition to scrapbooking, you won’t be able to spend as much time on this project as someone who devotes all their free time to scrapbooking.
Keep this in mind while setting your goals for this project. If you are in a season of life with more on your plate, consider what you really want to get out of this project.
Is your ultimate goal to finish? If so, pick a smaller album or consider working with a daily formula (Pam’s recent blog post shared lots of tips for this!)
Is your goal to just have fun with products? If so, don’t worry about finishing and just do what you can. Maybe focus on creating a few spreads that you absolutely love rather than worrying about making 25.
Is your goal simply to capture the memories? If so, maybe consider focusing on capturing the words + photos and then putting your project together at a later date.
If, instead, you are in a season of life where you might have more time or energy to devote to this project than you have in the past, ask yourself the similar questions when setting your goals.
Do I want to use my extra time to focus on finishing this project “on time” or do I want to spend my extra time making more elaborate spreads?
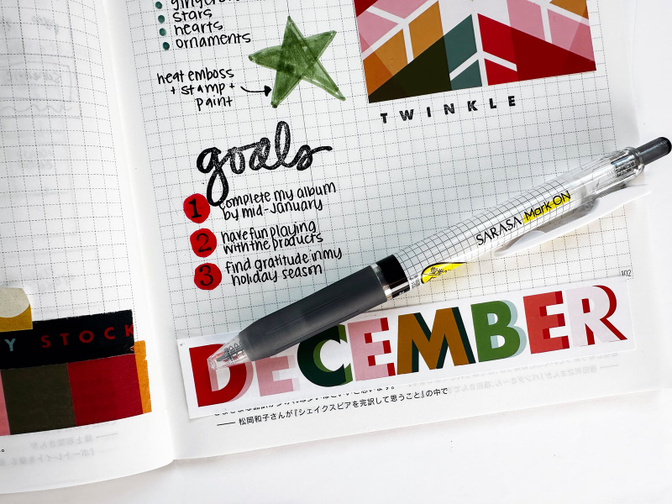
My top goals for this project are: (1) To have a completed album by the middle of January; (2) To have fun playing with my products; and (3) To find gratitude in my holiday season. These 3 goals are going to guide me in setting up my plan + working through this project.
What are your top goals for this project?
2. Make time to work on your project
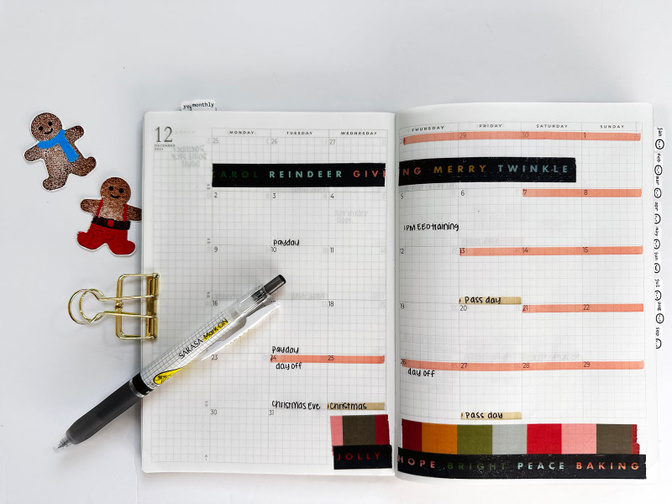
Once you’ve established your goal for this project, you need to make time to prioritize this project. For me, I know it’s not feasible to work on this project every single day in December because I work full time and on days I go to the office I am just too tired by the time I get home, cook dinner, do chores, etc. So, instead, I plan to work on this project a few days at a time on chunks, primarily on the weekends during December and maybe into early January. I also will try to find a few week days that I can work on this project as well. I already “set up” my December spread in my planner and added a red highlight to days that I don’t have work. I know some of these days will be devoted to activities/chores and others will be devoted to crafting.
Once I’ve selected times that work in my schedule to devote to this project, I think of ways I can eliminate other activities that would otherwise take up that time. For me, that means pre-planning some youtube content for my channel so I can devote my crafty time purely to this project. It also usually means taking one or two vacation days during the month of December to give myself extra space for this project (and all the other responsibilities of the holiday season).
3. Set up your album ahead of time
Before we get to foundation pages, there are other ways you can “set up” your album before the month. In addition to daily stories, you might want to include some other things in your album. Consider decorating your album cover, spine or inside cover. You can also create a title page, your reason why page, and your table of contents.
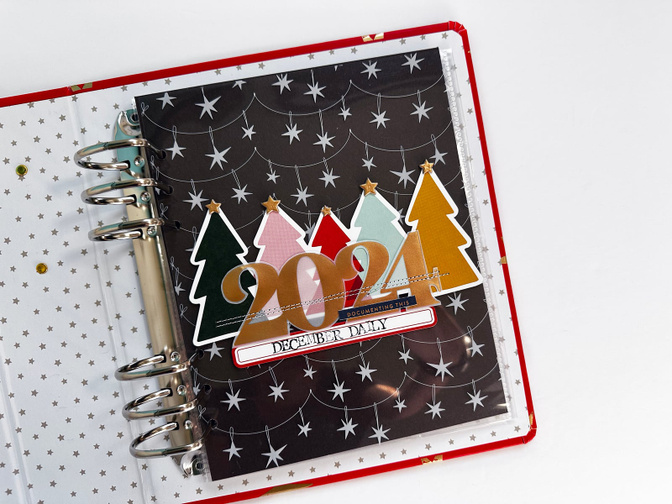
In the video below, I set up my title page + reason why.
I chose to set up a title page that requires me to only add a photo during the month of December which will be super easy. I spent a lot of time creating a detailed reason why page, and I love how it turned out. I am happy to spend the extra time stamping + stitching before December rolls around because I know I might not have the motivation or time to do it during the month.
Ali has shared her reason why for a lot of projects in the past, including December Daily, and I think this is an important part of the process. Even if you don’t want to create a detailed page for your album, identifying your reason why (and revisiting it during the season) can help create the motivation to get through the “messy middle” of this project later in the process.
Here is a closer look at my completed reason why page:
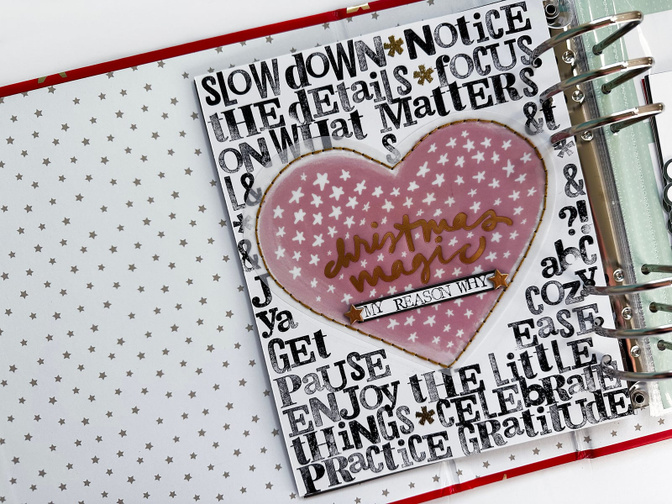
To create this page, I took a little bit of time to think about my reason why behind this project and wrote out a list in my daily journal. Then I stamped out some of the more important words using the new wonky alpha stamp that was released this year, leaving space for the large die cut heart that says “Christmas Magic” Then, I added some embroidery to attach the heart to my page. Finally I added a few final touches and slipped it into my album. Just having this start in place makes me feel so much more prepared for this project!
4. Create some foundation pages
Foundation pages can be one of the most fun parts of this project! In case you’re not familiar with foundation pages, the concept is to create the “fun” decorative part of a page now, so that once the month rolls around, you can simply add your photo + text and all the crafty work is done ahead of time. There is a lot of previous content on this blog sharing way more details and ideas for foundation pages if this is something that interests you.
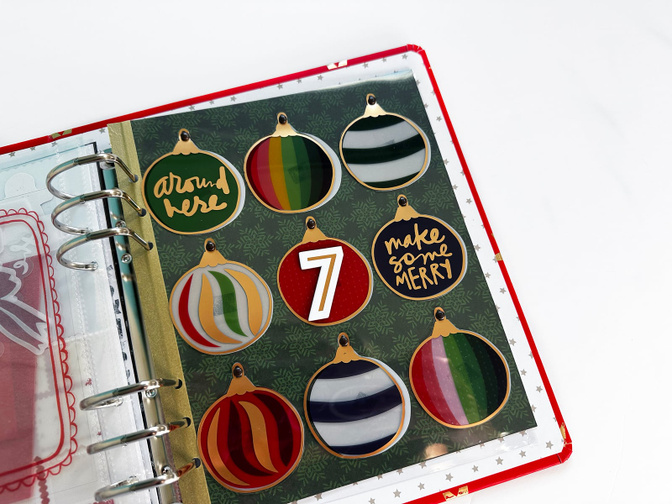
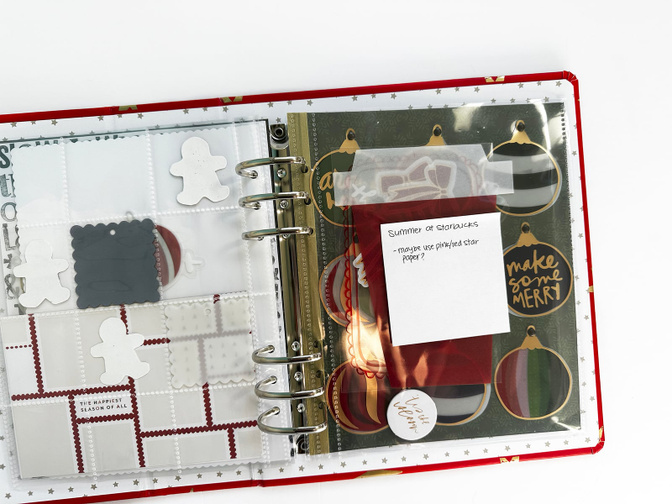
I created a foundation page shown above using the ornament transparencies. I cropped down and adhered the white ornament transparency to a piece of patterned paper in the kit so it would fit in my album. Then I cut out nine of the transparent decorative ornaments and added them on top of the white ornaments with a brad so that they can rotate out of the way. My idea is to add photos punched into a circle shape or words typed on clear sticker paper behind each of the ornaments to tell a story.
In the past, I’ve done a range of foundation pages. I’ve found that creating only 2 or 3 fully “created” foundation pages like the one above makes sense, for me, because I like to have the flexibility to tell organic stories + create pages during the month that are inspired by my photos + words. Foundation pages are one of those situations where you really have to think about what works for you—what works for other people might not work for you. If foundation pages are not your thing, don’t worry, there are other things you can do to get prepped for the month!
5. Organize your supplies for success
Creating pre-made foundation pages is not the only way to set up your album in advance. If you want more flexibility during the month, but still want a starting place to make this project more manageable, consider creating partial foundation pages or page kits. Even if foundation pages aren’t for you, you want to make sure your supplies are accessible during the month so that you can minimize decision fatigue and remember to get your favorite products into your album.
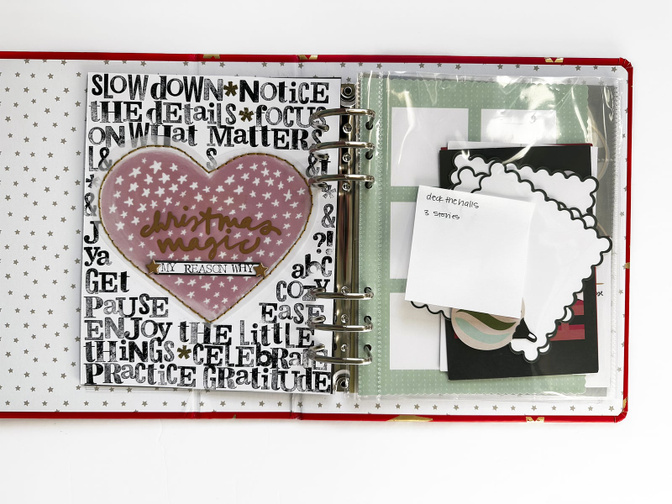
One of my favorite ways to do this is by adding some of my favorite products directly into my album as a place to store them until I’m ready to create a page with them. This way I will see them every time I open my album to work on it and I’m more likely to use them as a jumping off point for a spread.
In the video below, I talk you through a few of the page kits I set up and my thought process behind them. This way, I have a starting point when I go to work on these days, but I am not limited by a completely pre-made page.
In the video above I talked through a few ways to create page kits + some of the page kits that I set up for myself. These might not look as “pretty” in the album at this point, but they are super helpful when I go to put my album together during/after December!
Page kits are a great way to give yourself a jumping off point for a spread without “locking” yourself into any specific design. In the video I went through some of the page kits that I set up and talk through some ideas for how to create your own.
Some specific ideas for creating page kits (more details in the video):
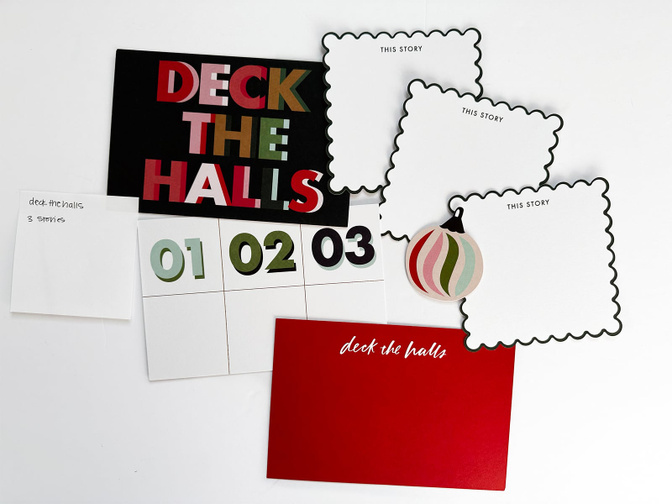
Use a story that you know you are going to want to tell as a jumping off point and select supplies that will support that story
Use the supplies as a jumping off point for a story. Select specific supplies that prompt a story + pair them with supporting supplies that coordinate.
Use a base page protector (such as the 2x2 pockets) or pattern paper as a jumping off point and select coordinating embellishments to fit in all of the spots.
Use a specific shape as a jumping off point and collect various supplies that coordinate together with that shape. Last year I did this with circles and tags, but you could do different shapes like stars or hearts.
Use a specific color scheme as a jumping off point and pair supplies that coordinate with that color scheme.
6. Come up with a plan to collect your stories
One of the best things you can do to set yourself up for success with this project is come up with a system to collect your stories during the month. Whether your goal is to complete this project in December or come back to it later, you have to collect the stories during the month of December or you will forget the details.
Before the month starts, come up with a plan that is doable for you to collect your stories + words + photos + ephemera each day. Here are some ideas:
Use an app (such as Day One) or a journal to write down your story for the day. This can even be just a simple few words, outline or bullet point list, if you don’t have time to write a detailed story.
Use your notes app to jot down details during the day such as quotes from your family members, story ideas, or details of what happened. You can also try the talk to text function if you don’t have time to stop and type.
Use social media as a home to collect your stories during the month. This could mean a daily instagram post or story to document what happened (note: you can access your own older stories that have expired by going back and adding them to a highlight).
Use sticky notes to jot down story ideas and stick them in your album throughout the month.
Use my downloadable calendar to write down your story on each day + make extra notes at the bottom of the page. If you missed it, you can download the calendar at the bottom of my previous blog post here.
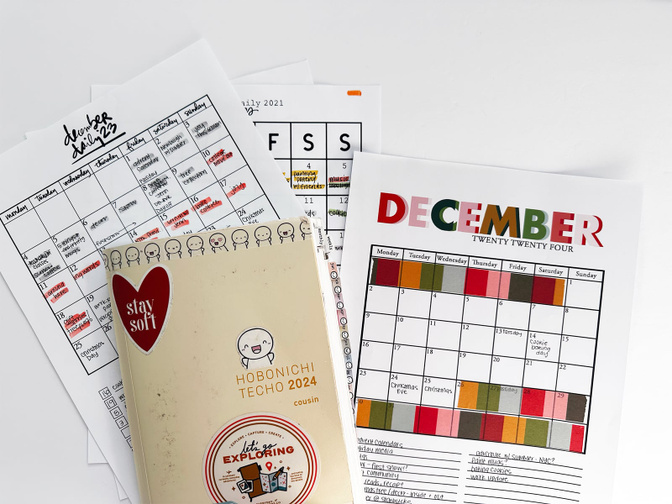
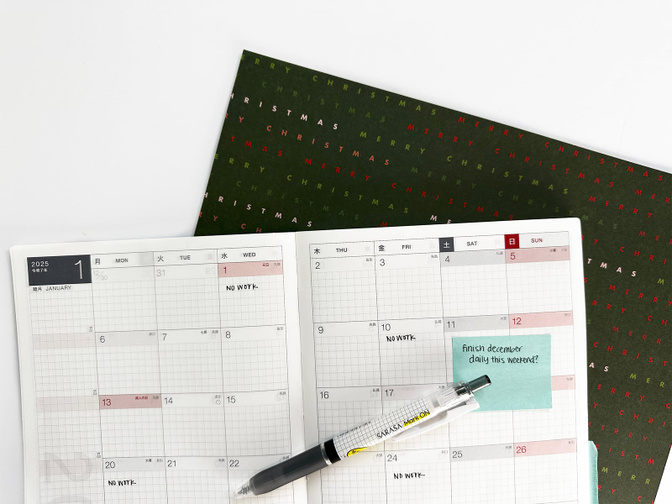
This year, my plan is to use a combination of my printable calendar + my daily journal (in a Hobonichi cousin pictured above) to capture my stories. I will likely jot down quick ideas on the calendar and use that to help arrange which story goes where. I will also likely add some longer words in my cousin for stories that happened on specific days that I want to jot down in the moment.
7. Break tasks into manageable steps
With any large project like December Daily, it’s easiest if you break it up into smaller steps. For each day your steps might look something like this:
Come up with a story
Design your page
Select and edit photos
Write your journaling
Assemble your page
Select a number
Add embellishments
For me, with any large project, I look at each of these steps individually and think about how I can best accomplish everything. I might not have time to sit at my craft desk every day, but I can come up with my story while doing chores + add it to a quick note in my journal. I can select + edit my photos on my iPad while watching TV from the couch. Think about what steps you can easily do up front so that when you do have time to sit down to craft you can focus on the parts that you couldn’t do elsewhere.
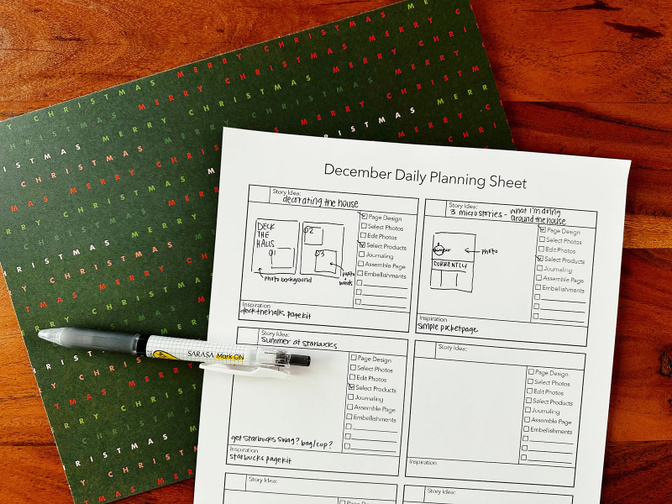
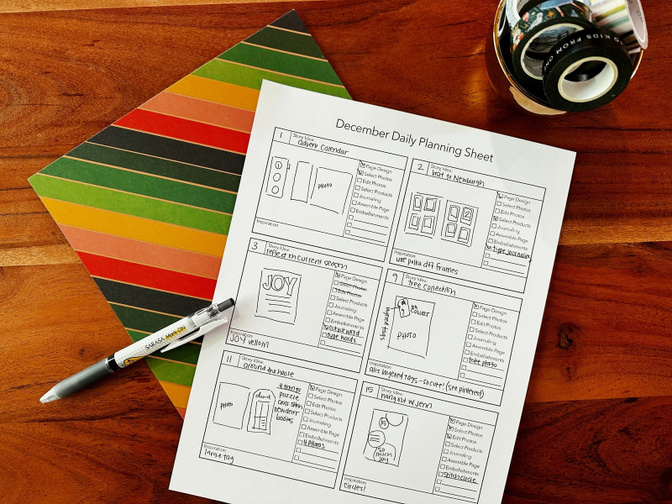
I have created a downloadable PDF for you to help you break down your project + organize your ideas as you are putting together your album. You can download this sheet at the bottom of this lesson.
Each page has space for you to sketch out 6 pages for your album with a checklist of steps. You can simply cross off steps that don’t apply to your page and add in extra ones that you might need. You can print out as many pages as you need and either keep these with your supplies as whole sheets, or cut out each rectangle to add with your supplies in your album like I did in the photo below.
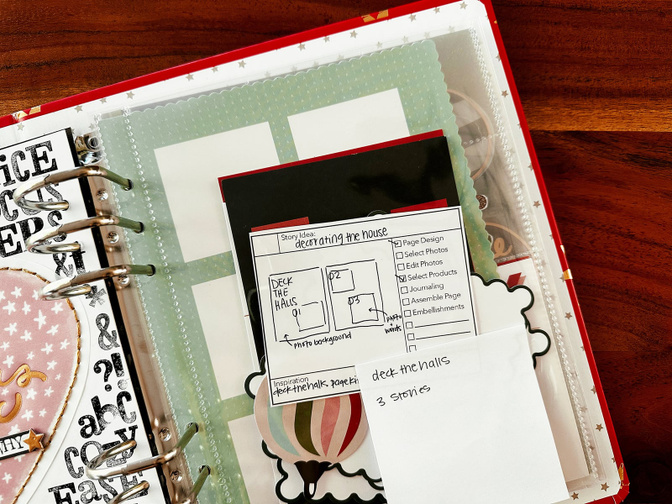
I haven’t yet fully planned out my 2024 album because most of these sheets will be filled in during the month of December, but I mocked up a planning sheet to show you how I would’ve used this for my 2023 album based on notes I had from creating that album. This year I plan to use these sheets in sketching out my project and cut them out to add into my album as placeholders until I get a page assembled.
8. Work on your project in “batch processing”
If you’ve taken my class Plan Prep & Play or followed me for awhile you might’ve heard me talk about batch processing. This can work for a project like December Daily too, especially if you “fall behind.”
Essentially what batch processing means is that you group similar tasks together and you can create more in the same amount of time. So, if for example, I wanted to catch up on 5 days in my album at once, I would work on each step (listed above and on the planning sheet) for all 5 days at once. Meaning, I would come up with my stories for each page and write those onto my planning sheet before moving on. Next, I would sketch out all 5 pages at once. Then I’d move onto selecting and editing photos.

9. Do what makes you excited
Sometimes a big project like this can really start to feel like a lot, especially when you’re in what Ali likes to call the “messy middle.” If you find yourself struggling to work on this project, consider what parts you are most excited to work on, and do those first. That might mean you really just want to play with the products or look through your photos. Whatever it is, do what makes you excited to work on December Daily!
If you are still struggling to find the motivation to work through this project, consider revisiting your reason why. If you have a strong reason why for wanting to do this project, that should help you with the motivation you need to move forward. If not, you might want to revisit whether or not you need to take your project in a different direction to help get you excited about it again. Remember, this is supposed to be fun! If it’s not fun anymore, change it up.
10. Set a realistic goal to finish your project
My final tip, and probably the most important one to actually completing this project, is to set a realistic goal to finish your project. If you tell yourself you have to finish by December 26, but you are traveling to see family for Christmas, that is probably not a realistic goal. If you set too high of expectations for yourself, you will be disappointed when you fail to meet those unrealistic expectations, and you’ll get discouraged with the project.
Instead, I encourage you to take a realistic look at how much time this project will actually take and what your schedule looks like. Try to set some time aside for yourself to work on it during the month of December, if that is what you would like to do. If you want to finish this project during January, make sure to give yourself extra time to work on it.
If, instead, your calendar just doesn’t work with that goal, that’s okay. Your realistic goal might be to finish 10 pages before the end of the season + take notes for the rest of your pages and then put your project away until next September. There is no award for finishing first. Instead, focus on enjoying the process of documenting your December memories.
Download my project planning worksheet here.
I will be on the @DecemberDaily instagram account this Friday chatting about staying on track for this project + setting up your album before December. If you have any questions you’d like for me to address in that live, leave them down below or message me on instagram. More details on the live will be announced on instagram this week.
In the meantime, you can find me on instagram or youtube.


Comments
Sign in or sign up to comment.
13 comments
What embossing powder and supplies do you use? I would like to try that this year for DD.
Replies to janellerenee17
Oooh, that's exciting! It's so fun and easy. Most of the supplies I've had for years so they're not available anymore but here is what you need:
+ A heat embossing gun. I've had mine for 10+ years so I couldn't find it, but something like this: https://amzn.to/47xo6cU
+ A clear ink, this is the one I use and honestly it's much better than other brands I've tried: https://amzn.to/3TB3uLc
+ Embossing powders. I have Zing branded ones for most of mine but it seems to be hard to find those.
To get colorful/bold results you can pair a colorful embossing powder with the clear ink, for example gold embossing powder or black. You also can get nice results if you buy clear embossing powder and pair it with Ali's inks. The color won't be as bold, but they are still super pretty and it gives you more options if you're just getting started without having to invest in a lot of embossing powders.
Sign in or sign up to reply.
Linda I love your title page and your reason why page. Thank you for the great ideas.
Replies to Jackie66
Sign in or sign up to reply.
Thank you for sharing your ideas and process. I love the structure and organization, for me that works best :)
Replies to asackr01
Sign in or sign up to reply.
This is so inspiring! I love your planning ideas and the way you demo with the products. I had to add to my box.... Thank you for all your work.
Replies to inouyeflo
Sign in or sign up to reply.
Linda! I love your post and it always makes me so inspired! Thank you so much, so sad that i´m working on friday, but i hope to catch up your instagram post later on the weekend (working 07:30-20:30 on saturday *eyeroll*)
Thank you for all the inspiration <3
Replies to Kamilla_I
Sign in or sign up to reply.
Love your reason why and title pages! Great tips too. Thank you for sharing!
Replies to ahiggins83
Sign in or sign up to reply.
Lots of great tips! Love the title page and reason why stamping!
Replies to Jeannew
Sign in or sign up to reply.
Lovely ideas and tips. And thank you for the planning printable.
Replies to Genia
Sign in or sign up to reply.
Linda,
Great inspiration especially love your guidance on creating foundation pages and prepping layouts. Giving me hope that I can complete DD this year. Thank you!
Replies to mgleeson
Sign in or sign up to reply.
Thank you Linda for the great page ideas and for the download for your planner sheets. I am planning to use those and for the December calendar download!
Replies to jackieb52
Sign in or sign up to reply.
Gorgeous title and reason why pages! Really enjoyed your videos and process! Thanks so much for sharing!
Replies to paperpicnic
Sign in or sign up to reply.
Oh my! This is exactly what I’ve been looking for! Someone to help me understand the process since I know foundation pages are not going to work for me as I have no idea what photos I’m going to take or exactly which stories will be told. I was starting to get overwhelmed big time. I’m working on 2023 right now and this post has given me so much help, ideas and hope for both now and this coming December Daily.
Thank you.
Replies to Valerie
Sign in or sign up to reply.