Week In The Life™ 2025 | Special Guest Jill Drangsholt
Tags: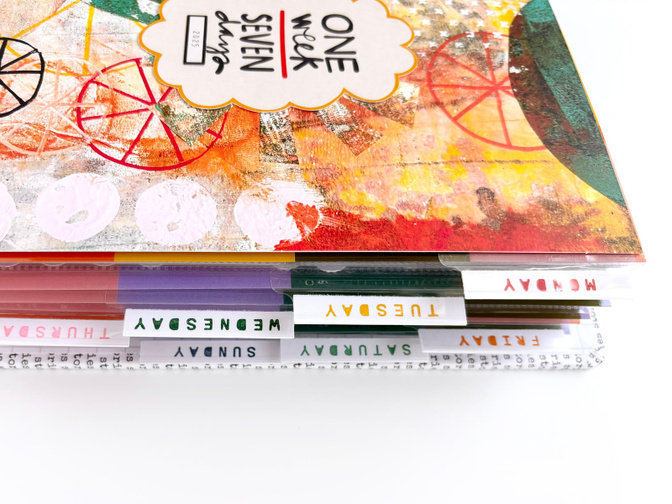
Hi friends! Jill here with a full walk through of my finished 2025 Week in the Life album. I actually did my documenting during the week of April 28th - May 4th so it took me about a month to finish this album. So if it is taking you that long (or longer!) don't be discouraged. Just keep chipping away at it. But I do hope seeing what I did for my album makes the process faster for you!
Okay let's get to the album. Below I have two process videos. The first one is a quick 3 minute flip through with no voice over if you just want an overview of my album. However, if you want to hear about how I put it together and hear me get chatty about some of my photos, then head to the 1 hour full album walk through below.
After the videos I have included some photos to try to include all the different ways I used the products in my album. Enjoy!
QUICK FLIP THROUGH WITH NO VOICE OVER:
FULL WALK THROUGH:
Here are a few photos from my album to give you a better idea of the design formula I used and a peek at some of my photos. I have included descriptions of how I used the products below each photo.
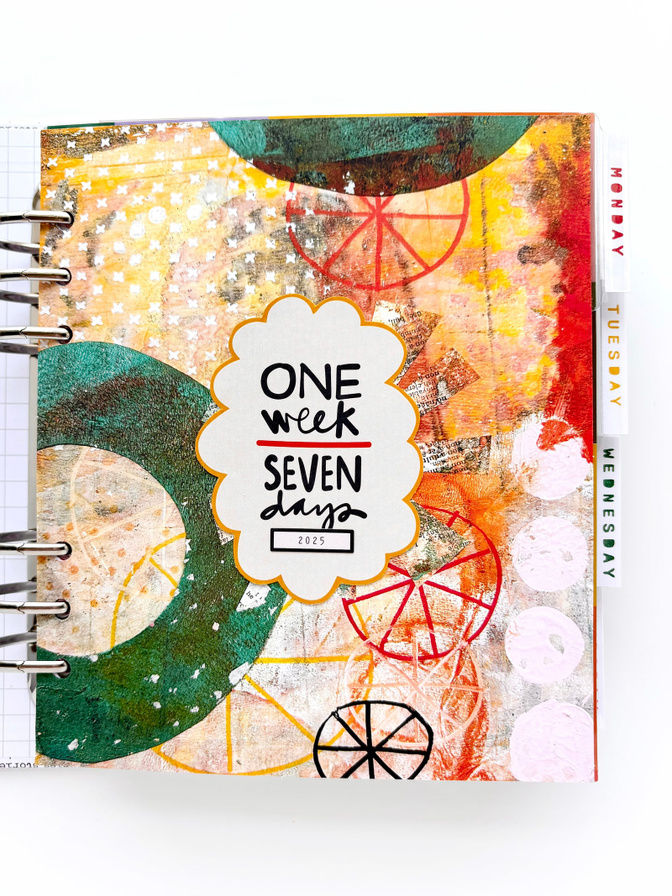
My title page is very similar to Ali's, except I used a paper from the Grit Story Kit.
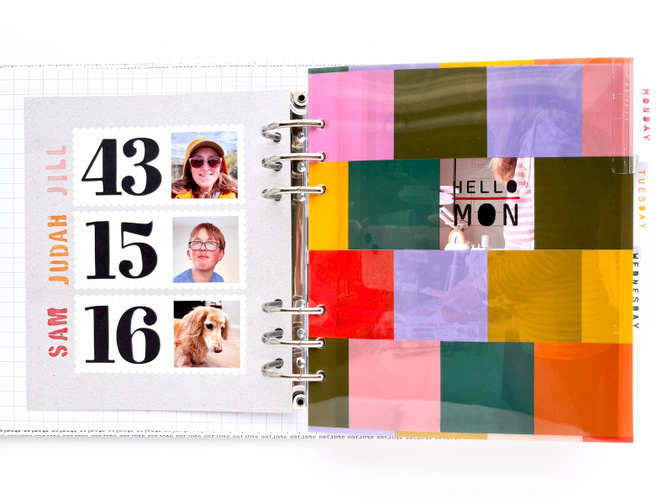
On the back of my title page, I included a simple page to identify the main characters in my documenting week along with our ages and photos. I used a paper from the Fun Storyteller Kit as my base paired with the paper numbers from the Numbers kit and stamped names using the new stencil alpha stamp.
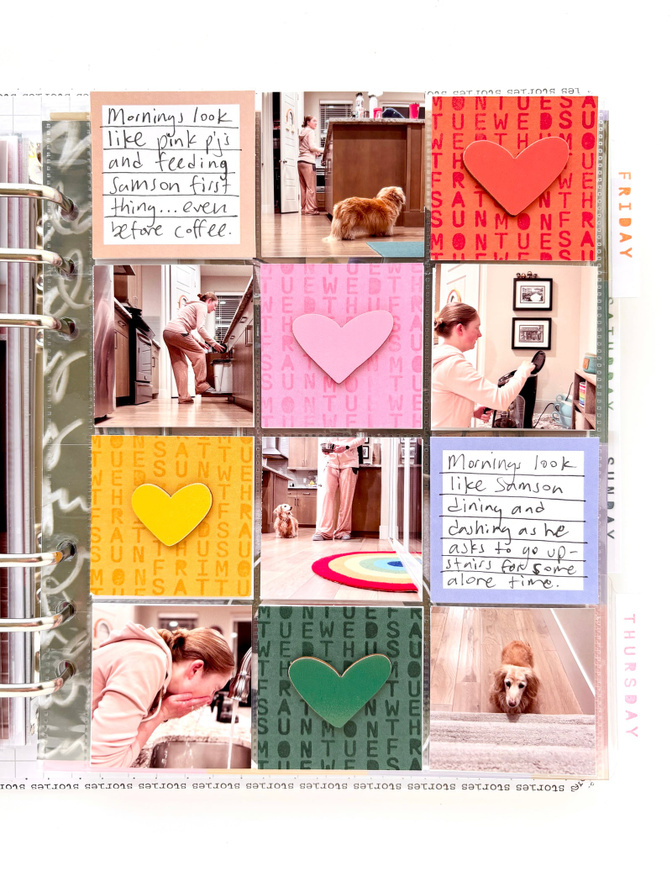
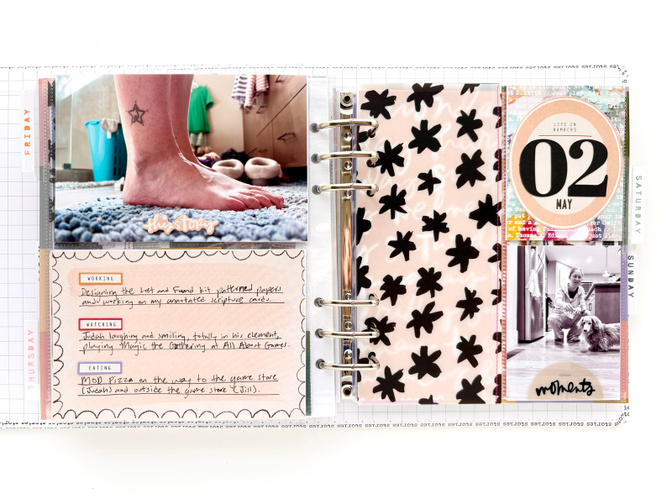
I took way more morning photos than I needed this year, so I decided to include a 2x2 pocket page insert to include some of those extras. I also challenged myself to find a way to use the wood veneer hearts on this page. I ended up cutting out 2x2 blocks from one of the patterned papers that coordinated with the colors of the hearts and then stamping on those using the 7 Days 4x6 set in matching colors to create a really fun tone on tone look. I love how it turned out!
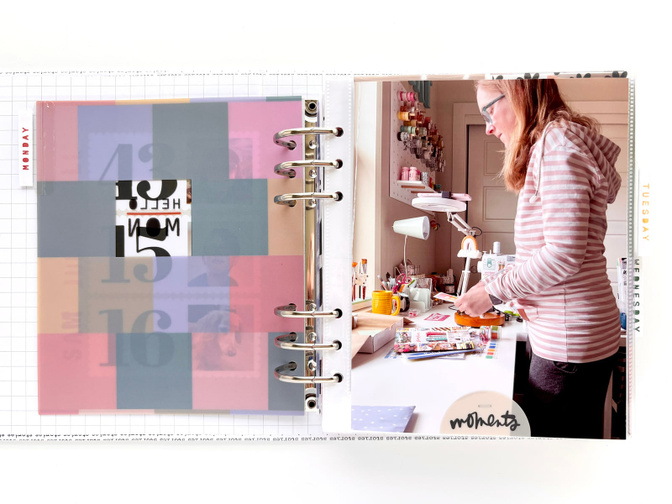
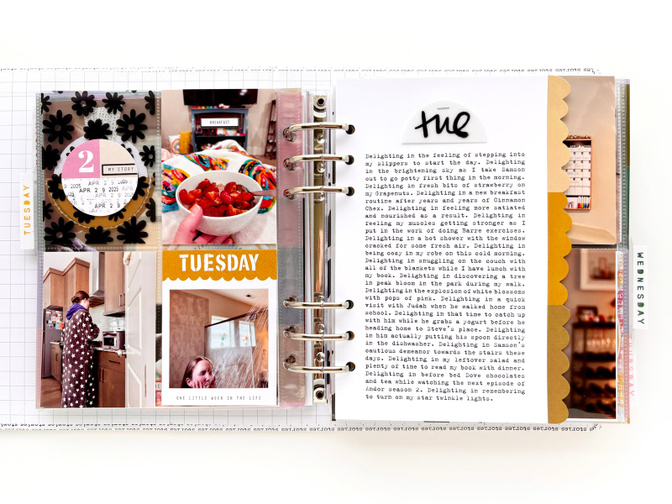
I started off each day with the color blocked transparency dividers with a tab attached to them. I created the tab using the 2 inch Avery index tabs and the days of the week stamps from the 7 Days 4x6 stamp set.
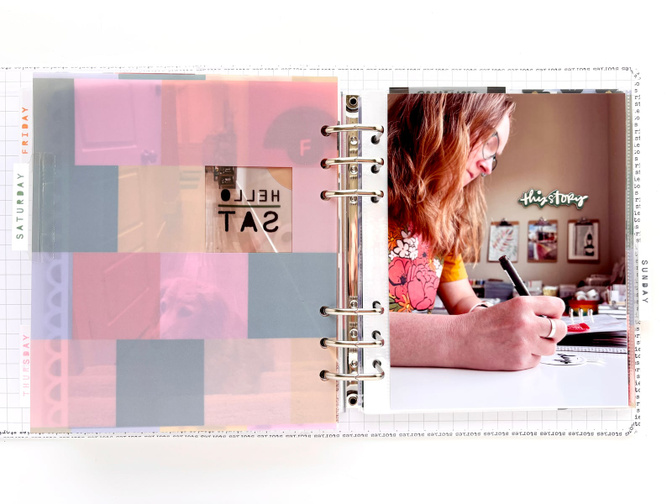
After my divider, I included 2 full page photos and often embellished them with the plastic half circle or the chip board pieces. I loved the half circles so much that I used up almost all 50 of them!
Next up I have my 3x4 pocket page divider. On the front I have my vellum half circles holding a 2.5 inch circle (punched from one of the patterned papers) that holds a life in numbers prompt. I glued on the plastic prompts using Scotch permanent glue sticks and made a washi tape ribbon for the top (see my set up blog post for how I did that). Inside the pocket I put this flower transparency piece from my stash.
I also sacrificed the quote on the plastic quote pieces to hold another photo.
I sandwiched the solid colored half circles with the black hand written ones to layer under the cute circle chipboard days of the week letters.
On the back of the 3x4 page protector, I attached the numbered circles from the Numbers Mini Kit to the back of where the vellum circles are. I repeat stamped the date to fill the blank white space and added a sticker over the prompt that was there already. I also used the scalloped day of the week journal card as a home for another photo.
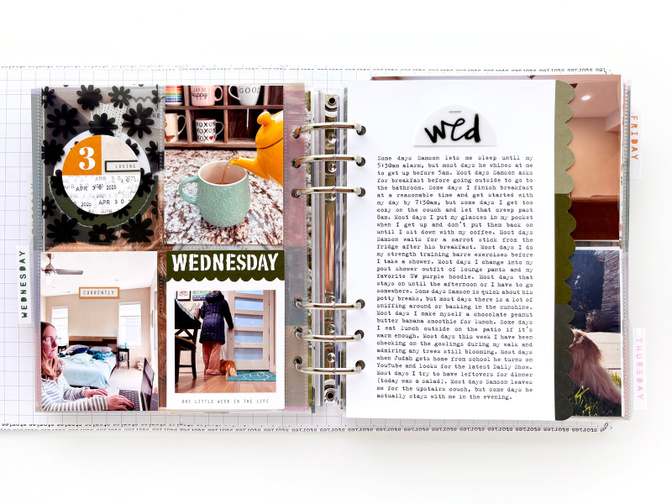
For my main journaling each day, I cut down the color blocked scallop inserts to 5.5 inches wide so that there is a bit peeking out from the next page. Then I printed out a block of journaling on white cardstock to layer on top so that just a bit of the scallop is showing on the left side. Before attaching it, I stapled the half circles with the day of the week on them on top of my journaling to create a title.

On the back of the scalloped pages, I included a newspaper front page from that day followed by a page protector with 4x6 photos.
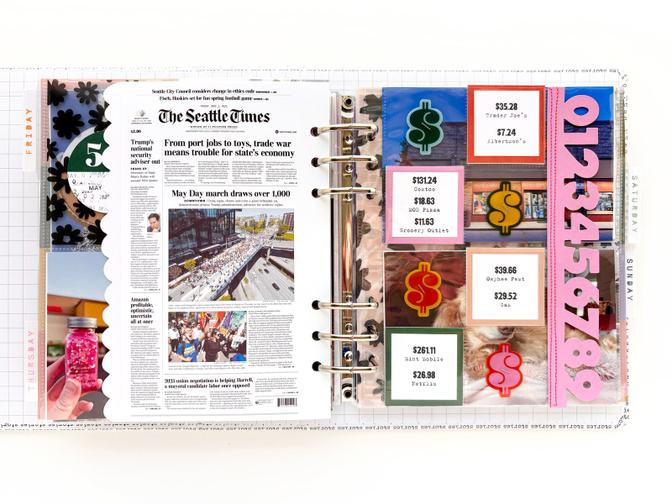
I created a place to record what I spent my money on for the week by combining a 2x2 page protector with the pink die cut numbers page. I first cut off the right column of pockets (leaving 1/4 inch to use to attach the numbers), then stapled the plast $ onto alternating pockets, then stitched on the numbers that I had cut off the original die cut page to the edge of my page protector. Then I filled in the remaining pockets with the 2x2 journal cards that I had attached print outs of my spending to.
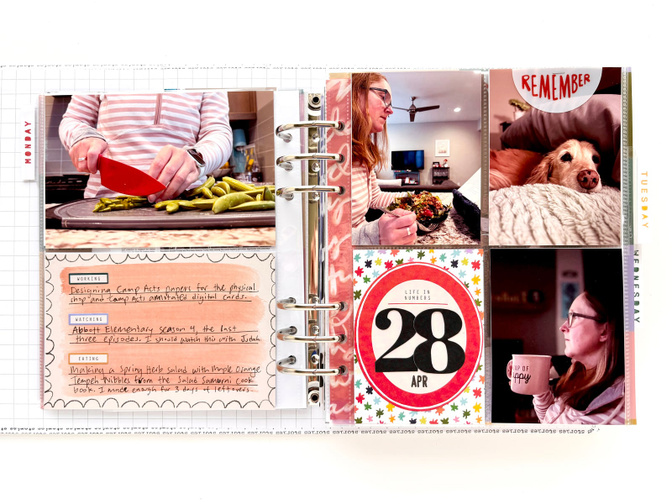
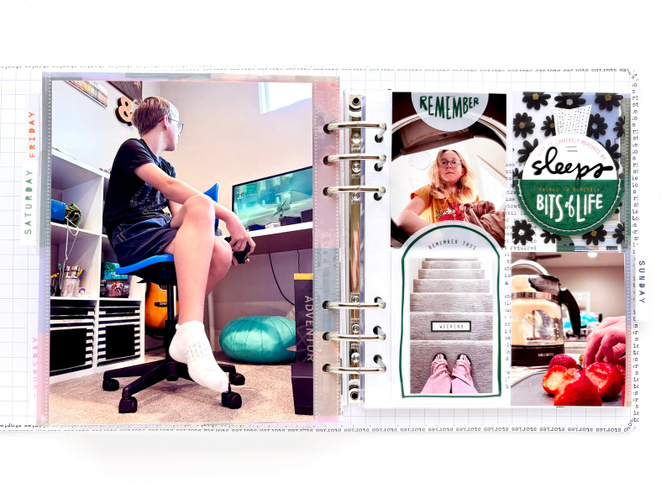
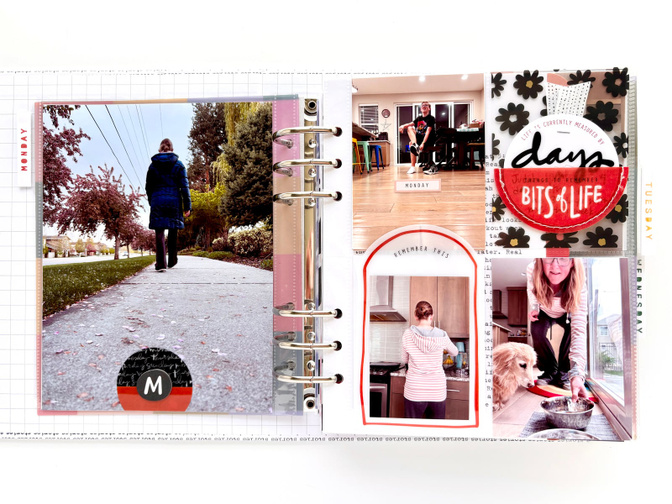
I used the 4x6 journaling cards to hold a few of the prompt stickers that came in the kit. I love the multicolor look of them, and that I was able to customize my "ing" words to each day and only use the ones that worked best for me.
I also added an additional 3x4 pocket page to some of the days for extra photos. When I did that, I created a filler card with the date on it using the "life in numbers" ovals, the die cut numbers and some patterned papers from the last two storyteller kits.
For a few of the days I only needed room for a couple more photos so I decided to cut my 3x4 page protector in half and sew it to some vellum just for fun! This vellum is from the Fun Storyteller Kit.
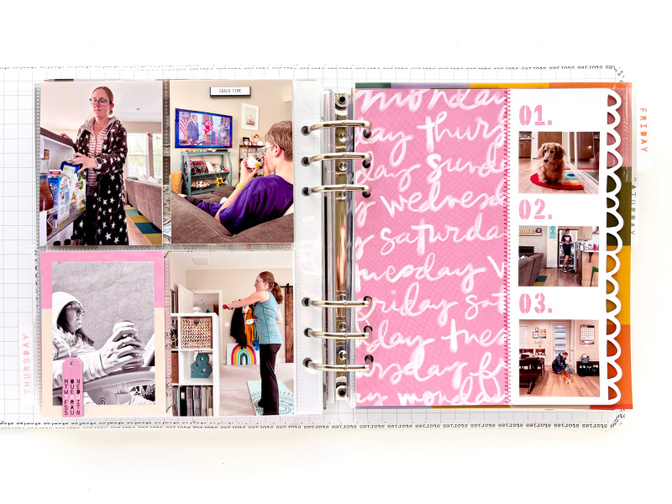
On the back of my second 3x4 page protector, I made a photo frame by cutting down the 10x4 papers from the paper pack and adding the mini tag chipboard on top.
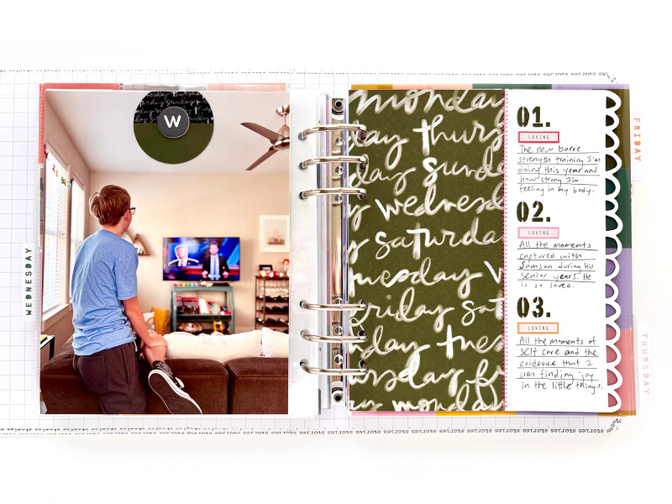
Like Ali did, sewed my 3x8 scalloped cards to the coordinating patterned paper. I cut mine down to be 6.75 inches in width so that the divider from the next day could peek through. On most days I added extra photos onto it (see previous photo), but for 2 days I added the "loving" and the "feeling" stickers to capture those feelings for the entire week.

On the back of that scalloped page I added one more full page photo. This one is my favorite photo of the wild turkey that I came across during a walk and chased down the path for a photo. LOL
Since I didn't have an extra page protector for this day I added the date oval directly onto my photo.
I hope you enjoyed this peek into my finished album! You can follow along with my other crafting adventures on Instagram (@jill.drangsholt).


Comments
Sign in or sign up to comment.
15 comments
Beautiful album!
Replies to erintaylor718
Thank you!
Sign in or sign up to reply.
Love the long, chatty video! So many great ideas. Thanks, Jill!
Tammye
Replies to Momany
I'm glad you enjoyed it!
Sign in or sign up to reply.
I love seeing your approach this year!
Replies to AliEdwards
Thanks Ali!
Sign in or sign up to reply.
Love this and I really enjoyed your chatty video!
Replies to carrieW
Thank you!
Sign in or sign up to reply.
I really enjoyed your chatty video. It's nice to see how you approached things. especially like the $ page and how you used the big color block pages only showing a bit of it. What a beautiful album. Thanks for sharing your ideas.
Replies to Untiedt
Sign in or sign up to reply.
Great execution to take Ali's kit collection and make it your own. Samson is precious, I hope you can make a lot more memories with him.
Replies to StillWater
Sign in or sign up to reply.
So so good as usual! I love how you put things together and I enjoyed your chatty walk through. :)
Replies to jillgaxiola
Sign in or sign up to reply.
I saved this to watch when I am getting ready to put my album together. I knew I would get lots of inspiration and ideas from you and I was not wrong! Thank you so much for sharing your beautiful album!
Replies to jackieb52
Sign in or sign up to reply.
Also you must take good care of Samson, he’s very sweet!
Replies to jackieb52
Sign in or sign up to reply.
Completely off topic question, but I have also subscribed to Barre Definition. Are there particular workouts/videos you have found helpful/enjoyed?
Replies to dcraytor
Hey! I've only been subscribing since January so I'm still trying out everything. But I really liked the first 60 days of the 90 day challenge (the last one was just too much for me). Right now I'm following along with the monthly workouts. I also love the shorter 5 minute workouts (like the ones done to songs) because I just do a quick 5 minutes when I've been sitting at my desk for too long.
Sign in or sign up to reply.