December Daily® 2025 | DIY Envelope Tutorial
Hello everyone. It's Kelly Ishmael here and in this tutorial I am sharing instructions for creating DIY envelopes using the digital version of the December Daily® Envelope Bundle.
There are two basic options to create the envelopes using the digital versions: 1) a manual method which involves printing the designs on cardstock and cutting out and assembling the pieces and 2) using an electronic cutting machine (like a Silhouette or Cricut) with your own cardstock or patterned paper and then assembling. I'll be demonstrating both methods, but either way, you'll need some basic supplies to get started.
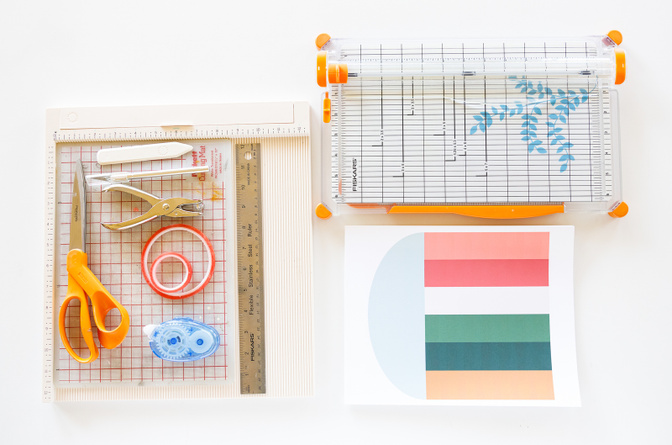
Supplies
Cardstock (for demonstration purposes I am using 8.5x11 65lb White Astrobrights Cardstock for the manual method and 12x12 Bazzill Cardstock for the Silhouette version)
Scissors, Craft Knife, and/or Paper Trimmer
Adhesive (rolling or sticky tape)
Hole Punch
Vellum (not pictured) for Frame Envelope
Optional: Scoring Board and/or Bone Folder
Manual Method
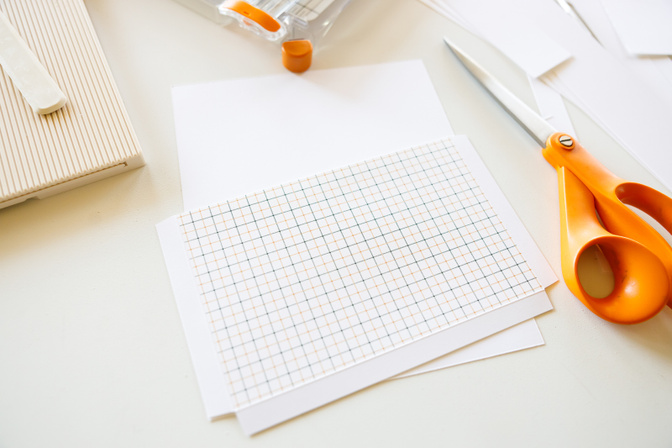
To get started, print all of your envelope pieces onto the cardstock of your choice. (Please note that when setting up your print job we recommend NOT using a borderless printing option to preserve the original envelope design dimensions.) Next, cut out the pieces using scissors, craft knife, or paper trimmer (or any combination).
Note: We have updated the download file with a printable version of the envelope pieces as well as an updated version of the FaLaLa pocket.
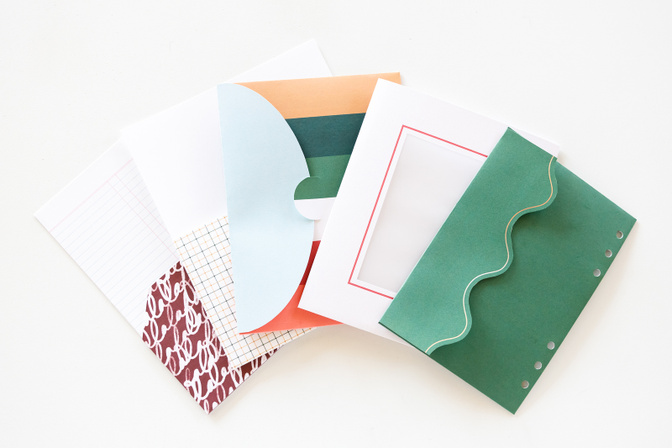
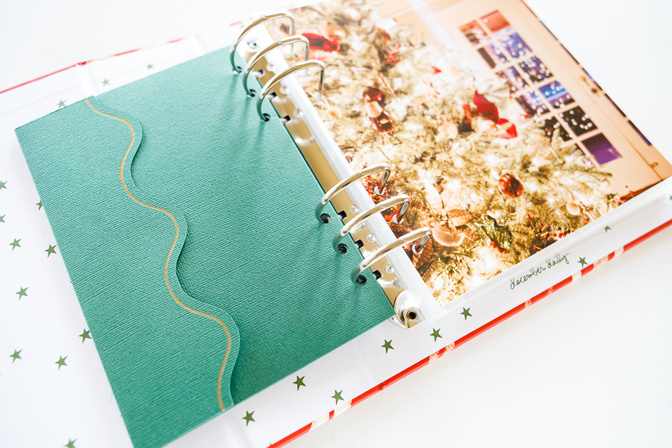
All of the envelopes basically consist of two parts - a base and a front pocket with tabs that will fold and adhere to the backside of the base.
You can follow along in the process video below to see how I assemble each of the envelopes.
Note: in the video I said to place the printed pink side down for the frame envelope, but meant to say to have the pink side facing out.
I love how by using some very basic tools you can create a fun, interactive element to add to an album.

Silhouette Method
In the download file, we have also included basic templates and Silhouette cutfiles if you would prefer to use an electronic cutting machine to create your envelopes. Unfortunately, the ‘Print and Cut’ functionality isn’t an option since most of these designs are larger than the margins required for the registration marks used with most home printers. But we wanted to include these options if you would like to create envelopes using your own patterned paper or cardstock.
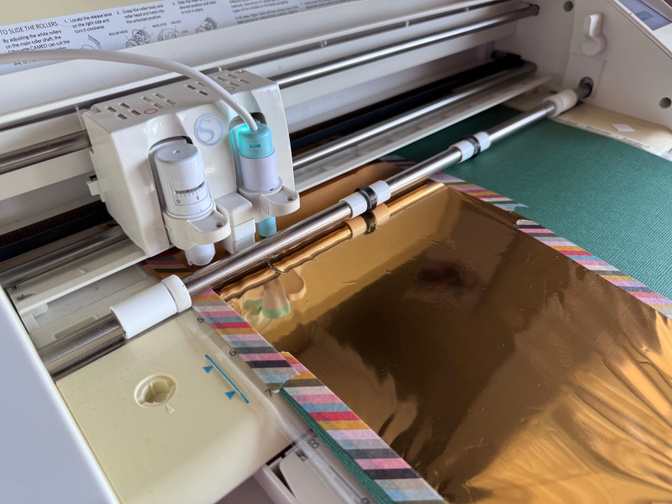
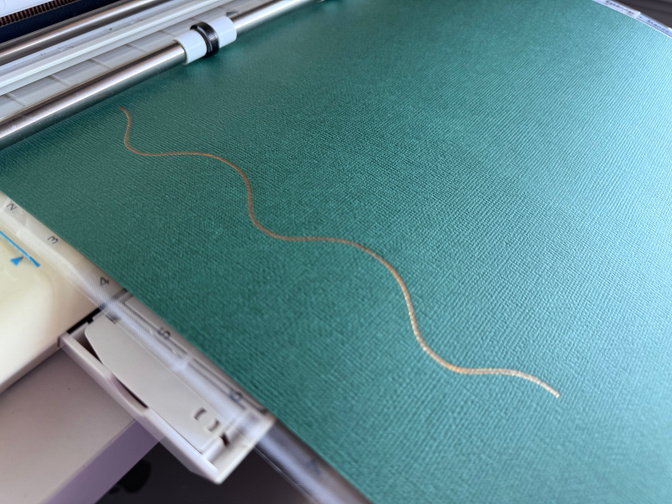
In the process video below I am demonstrating how to set up the Silhouette workspace to cut out the green scallop envelope. In addition, I am also including instructions for setting up the foil quill to add the gold foil detail along the scalloped edge. The basic process of using the trace and cut feature is the same for all of the envelope pieces, and once you have your pieces cut out the assembly process is the same as the manual method.
Silhouette Settings (for reference):
Foil Quill
Passes - 1
Force - 25
Speed - 4
Cut
Blade Depth - 3
Passes - 1
Force - 32
Speed - 4
Note: Be sure to allow 10-15 minutes for the foil quill to heat up before using.
Please let me know if you have any questions. The envelopes are a new digital offering this year and we hope that you enjoy being able to use these files to create your own envelopes to hold all of special December photos and stories.


Comments
Sign in or sign up to comment.
27 comments
Kelly this is awesome! Thank you so much!
Replies to Gladdie
So happy you found it helpful!
Sign in or sign up to reply.
Thank you for taking the time to demonstrate these pockets and envelopes, Kelly! It looks easy enough that I think even I could put these together! lol!
Replies to NancyMac
You can do it! :)
Sign in or sign up to reply.
I love this ! Thank you for the tutorials!
Replies to AnnieCarignan
Thanks Annie!
Sign in or sign up to reply.
I love this!
Will the updated version of the FaLaLa pocket be also available in the bundle included in the Side by side class? That would be great!
Replies to ana_manzana
Thank you! I have updated that file as well and it is ready to be re-downloaded.
Sign in or sign up to reply.
Thank you so much Kelly. You explain things so beautifully. I’m off to start creating. 😊
Replies to jkbroyles
Thank you so much! So happy to know you found it helpful. :)
Sign in or sign up to reply.
Love this, Kelly, thank you!
Replies to asackr01
Thank you!
Sign in or sign up to reply.
Thank you for sharing.
Replies to iscrapjohnson
you're welcome!
Sign in or sign up to reply.
Incredible detail, thank you for such great instructions!!
Replies to dafolmar
you're welcome! so happy you found them helpful!
Sign in or sign up to reply.
Thank you so much Kelly, these instructions and videos are great. I can’t wait to try and make them.
Replies to aussiehostie
you got this! :)
Sign in or sign up to reply.
Thank you Kelly. You made this so helpful and easy.
Replies to LoriLB
so happy to know it!
Sign in or sign up to reply.
Wow, this was a really helpful video! I was really disappointed I wasn't able to get the envelope package, but now I can make one..or two or more! Thank you!!
Replies to laura_g_
you're welcome! so happy you found it helpful!
Sign in or sign up to reply.
The video was very helpful, thank you. I would have thought the tabs would be adhered on the inside of the pockets so that they were not visible, and not on the outside of the pocket where they are visible.
Replies to joycarol
you could absolutely adhere them on the inside!
Sign in or sign up to reply.
Hey there! Thanks for this. It's been a hot minute since I've used my Silhouette. Just wondering if you can help with the red boarder envelope. When I try to select trace area, it just highlights the actual red boarder, not the entire outline of the front. Thoughts?
Replies to NorineRandell
Hi Norine! I'm reaching out to Kelly to see if I can get an answer for you!
Hi! Kelly responded and said that she increased the threshold all the way to 100% and she was able to trace the entire shape.
Sign in or sign up to reply.