December Daily® 2025 | Ali’s Story 03
Tags: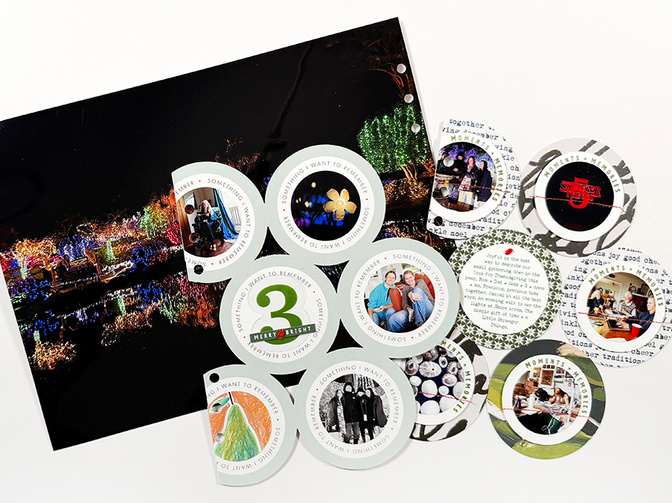
Welcome to Story 03 in my 2025 December Daily® album.
Today I'm including a story that includes a bunch of photos from my time down on the coast with my family for Thanksgiving. In your own project you might spread these two spreads into two or more stories - just keep that in mind as you are viewing my project. This idea might work for you later in the month at a point you have a story that includes a lot of photos.
This is also a good time to remind you that your album can be what you want it to be! You can be picking one story from the actual day you are living or you can simply pick out 25 stories (or whatever number you are wanting to do) from your life in this particular season. I don't always include Thanksgiving in this project - in fact this might be the first time I have done that - but it felt like a story I wanted to include this year.
Let's dive into today's video:
Here is the basic foundation for this story:
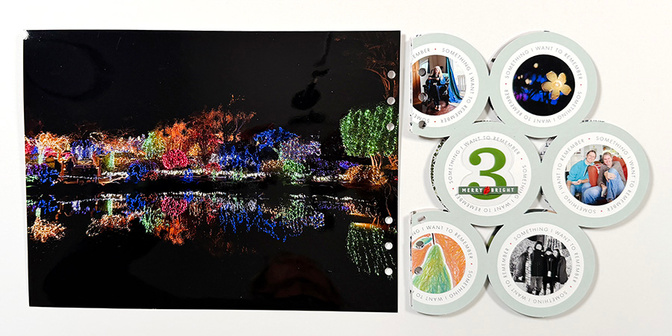
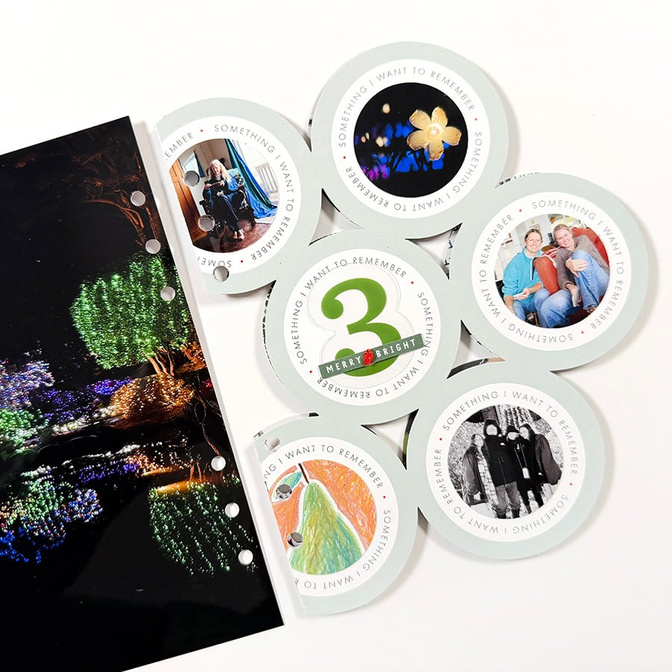
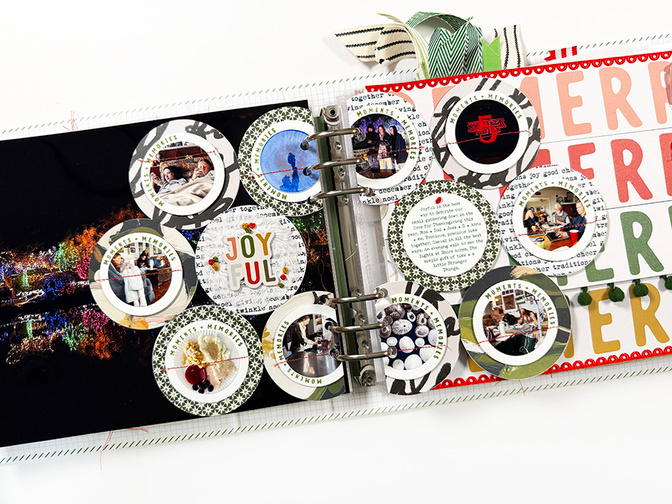
This project includes a full page photo printed on my Epson XP15000 printer (using Epson Ultra Premium Glossy Photo Paper) + a circle die cut from our Travel Collection + the circle die cut page from the December Daily® collection. I cut the Travel die cut (the one with the "something I want to remember" circles) so it was the same size as the December Daily® die cut page.
Let your story be as short or as long as you want. This can apply to the actual words and/or the number of photos you decide to include.
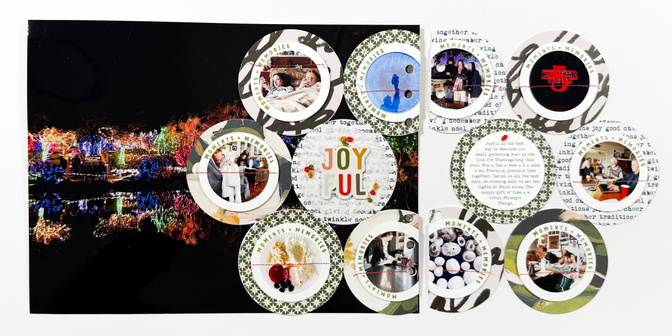
For the inside spread - a home for more photos from the week and some journaling - I decided to layer pattern paper circles + white cardstock circles + photo circles. I cut 3, 3 inch circles from 4 different pattern papers. On top of each of those I added a 2.25 inch white cardstock circle and then a 1.75 inch circle photo. I printed my photos already cropped to 2 inch x 2 inch which made it easy to use the 1.75 inch circle punch. I chose to run the white cardstock + photo circle through my sewing machine to add the red stitching and then adhere that finished piece using foam adhesive on top of the pattern circle.
The white cardstock circles are actually a 2.25 inch circle punch. In the video I mistakenly refer to it as a 2 inch circle punch. Using the 2.25 inch circle punch gives more space for the stamping around the edge on the white cardstock.
Here are some detail images:
You might choose to do the same design treatment on top of this first die cut page as you do in the middle - meaning adding pattern paper circles on top to create more design consistency from this page to the inside circle spread. I didn't think of that idea until I was doing the voice over for the video.

I love the look of this! Festive and fun!
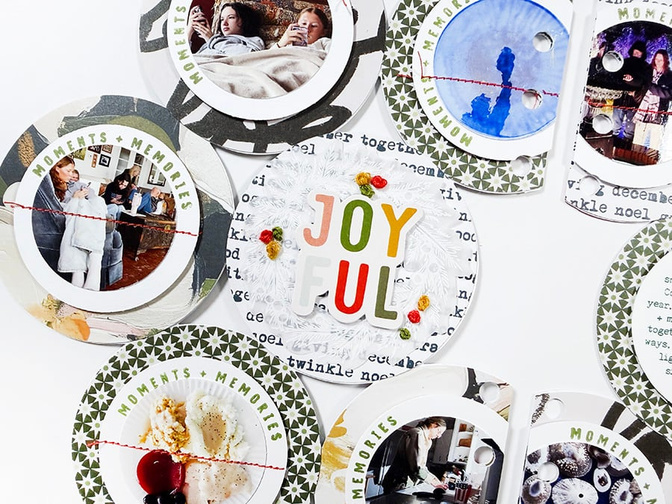
For my title I added French knots (I call them little roses in the video) to the vellum wreath from the Main Kit. I used foam adhesive to adhere the "joyful" die cut.

I used this stamp set to add "moments + memories" around the outside edge of the white cardstock circles.
Here are a few shots in my album:

SUPPLIES
2.25 Inch Circle Punch (I made a mistake in my video + kept calling this a 2 inch circle punch but it's actually 2.25 inch)

Looking for more ideas for putting together December Daily® pages? Don't forget to check out my December Daily® | Start Here workshop which includes a 150 pg PDF Idea Book with page ideas broken down by design foundation categories such as half circles, booklets, frames, flip ups, etc. In addition to the printable Idea Book this workshop also includes videos of me talking through each category. It's a fantastic resource to have in your pocket as you tell your stories in December (and beyond).
If you are brand new to this project you might want to start with Storytelling With December Daily®. You can read about that community favorite here.


Comments
Sign in or sign up to comment.
4 comments
I love this idea! I have my grandkids school concerts coming up and you know I will have tons of pictures, so this has just solved my problem! Thanks again!
Replies to forpahl5
Sign in or sign up to reply.
Great Idea! When I saw your photo with a lot of black space it reminded me on a photo I have similar from dragon lights to bring back out the gold foil pen :)
Replies to kruth29
Sign in or sign up to reply.
Love this! Had been undecided about the digital die cut inserts. But this has made the decision. And thankful for 'Give as Gift' option ... it's already been added to my list. :)
Replies to KimE
Sign in or sign up to reply.
Beautiful! On the ‘3’ theme this was also a story of three generations being together!
Replies to flowergirl85
Sign in or sign up to reply.