December Daily® 2025 | Ali’s Story 24 + 25
Tags: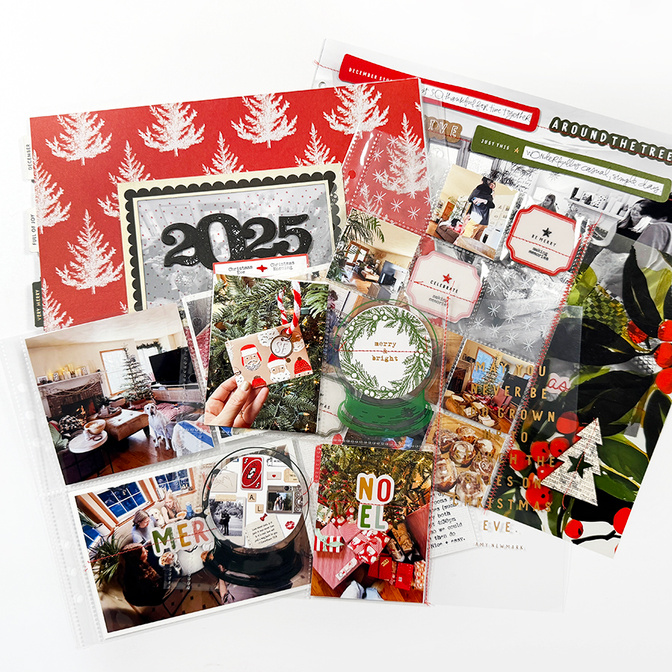
Welcome to Story 24 and 25 in my 2025 December Daily® project.
Some years I like to combine the stories of Christmas Eve and Christmas Day into one big section - that's what I decided to do this year. I printed out all the photos I wanted to print and used a few different page protectors to hold them all: some 2x2, some 3x4, some 4x6, and then one big full page photo of Christmas morning (a big messy photo that feels like a tradition at this point).
Some years I find these last stories to be the hardest to finish - mainly because I'm often ready to move on to the next project. This year I tried to give myself a little space in order to have it all feel "complete." What feels complete to me might not feel the same to you and that's totally okay - listen to yourself!
Here's a video that shows pieces of my process:
Here are additional images from my project:
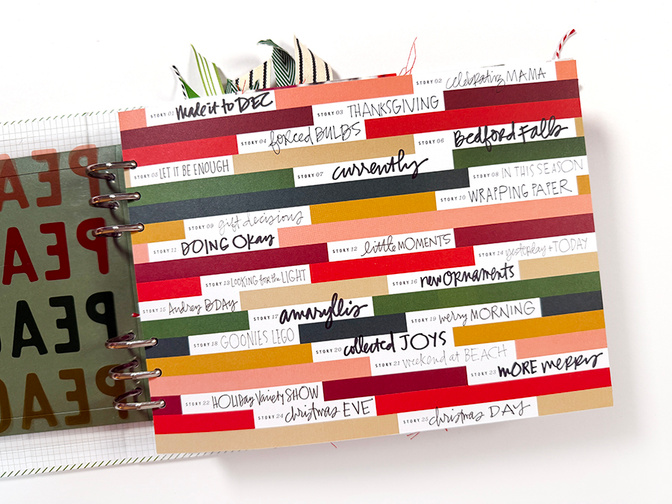
I wanted to start my sharing today with a look at my completed Table Of Contents page. Loved mixing and matching the different pen widths as I tracked my stories during the month.
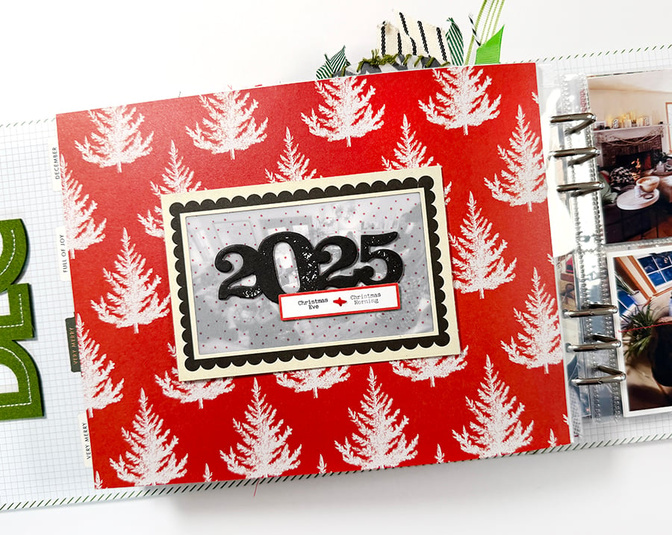
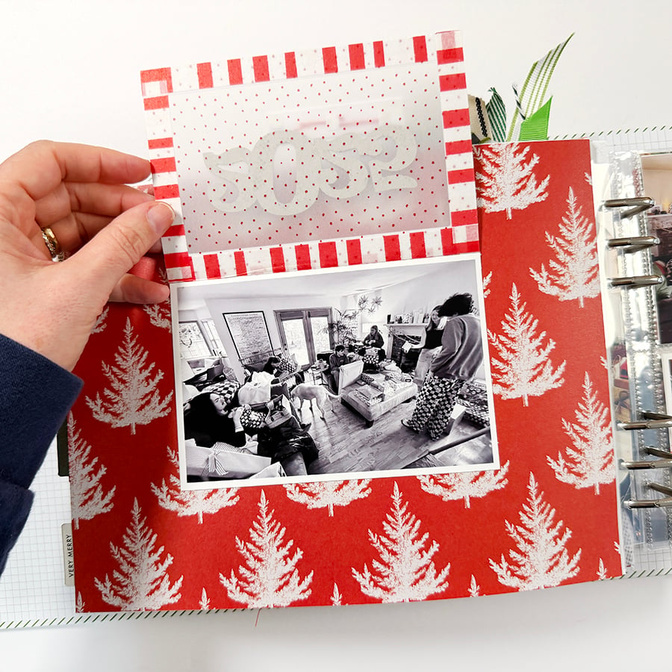
I decided to start off Story 24 and 25 with a full page pattern paper with a 4x6 flip up on top. I used a 4x6 frame and dotted vellum for the base and added the 2025 chipboard from the Advent Calendar on top. I stamped on one of the simple labels and then added a bit of embroidery floss for a pop of color between the sentiments.
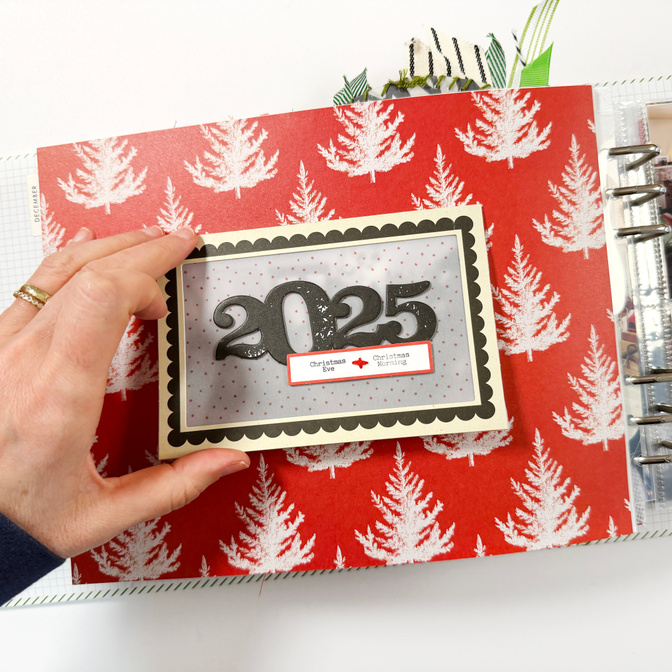
This flips up to reveal a smaller version of the full page photo that's coming at the end of the album.
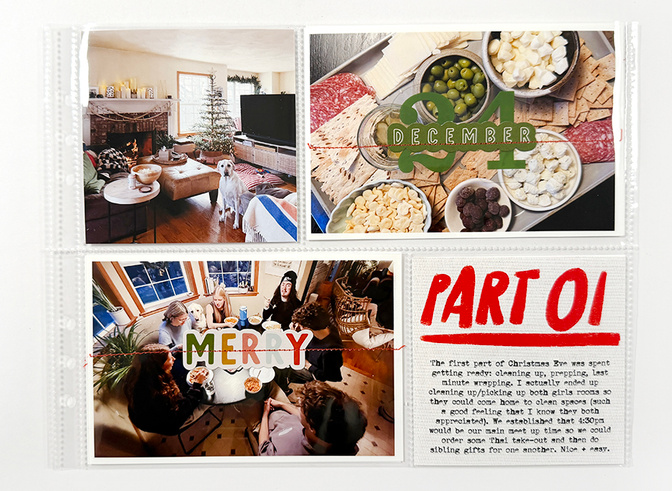
After the intro page I've got a four-pocket page protector that holds three photos and the "part 01" 4 inch x 4 inch journal card. I ended up using the digital version of the Main Kit journal cards and added my text on top before printing (sticker paper could work great here as could running the card through your printer).
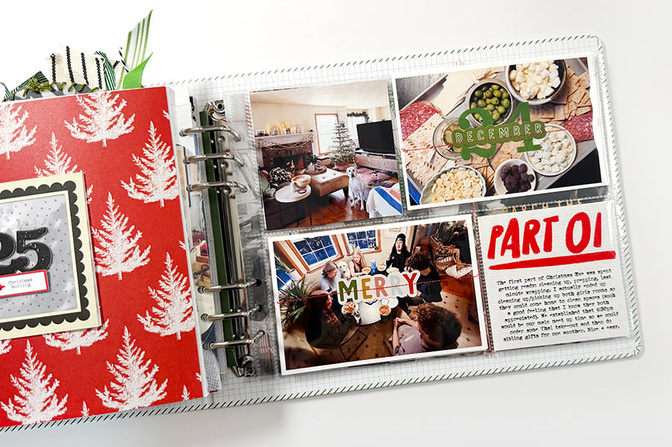
On top of the two 4x6 images I added die cut words from the Main Kit and added a plastic "24" under one of those words.
And I ran them through the sewing machine for added texture.
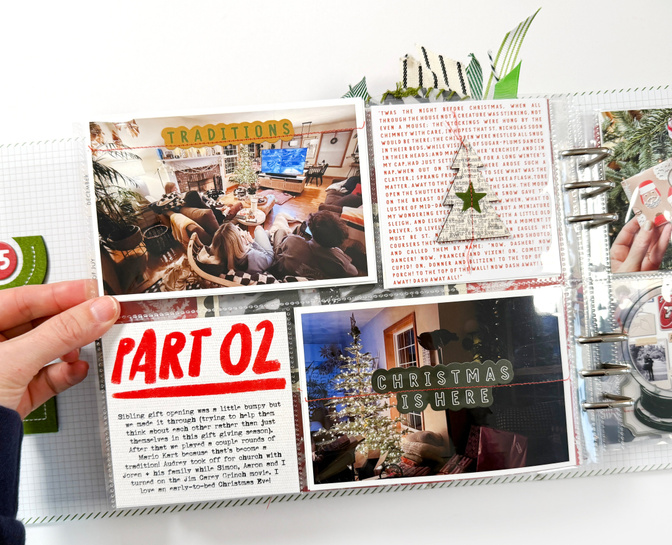
On the back I used the "part 02" card along with two 4x6 inch photos (same treatment as the previous side).
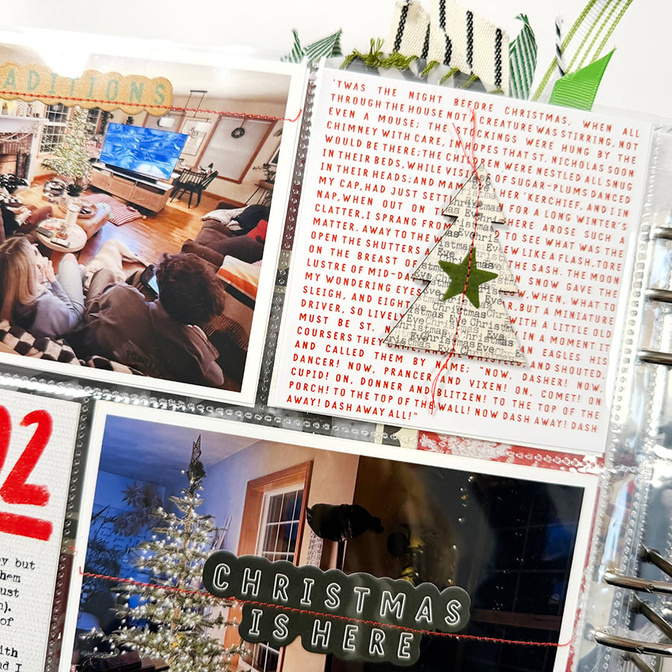
On top of the 4x4 inch Night Before Christmas card I added a wood tree that had been stamped with the "Christmas Eve" stamp. And yes, you can run wood veneer through the sewing machine.
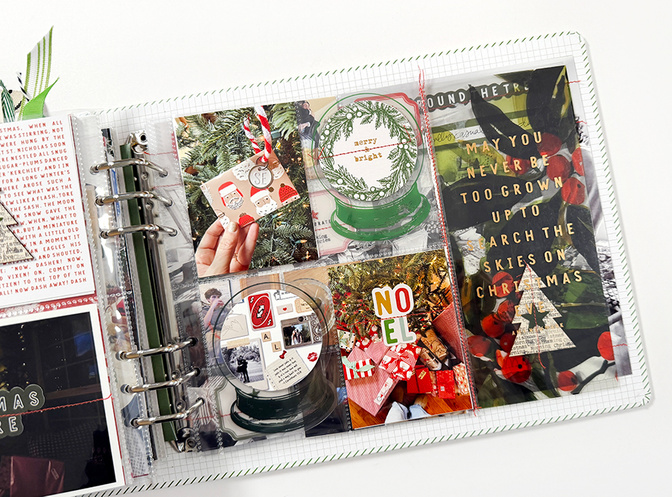
The next section includes a four pocket 3x4 inch page protector stitched to one of the tall transparencies.
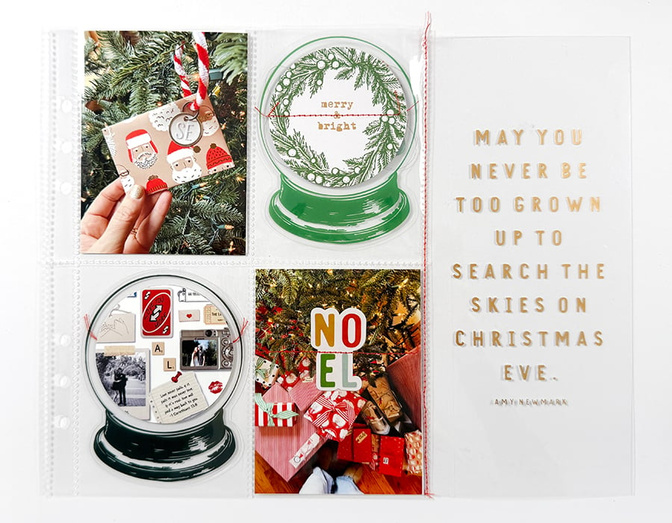
Inside the pockets I added 3x4 inch photos and also added in two of the plastic snow globes. Inside my globes I added a circle punched from a long journal card and a photo of a gift that Anna gave her boyfriend.
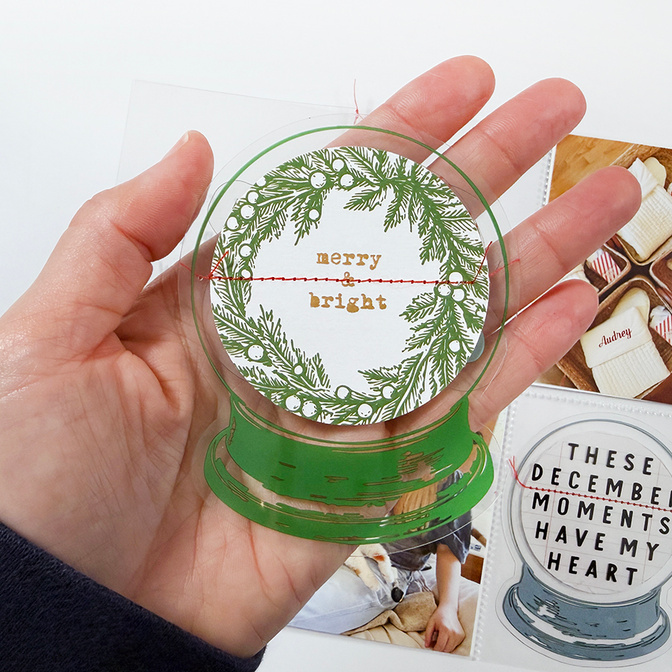
Here for the simple stitching! I just like how it looks.
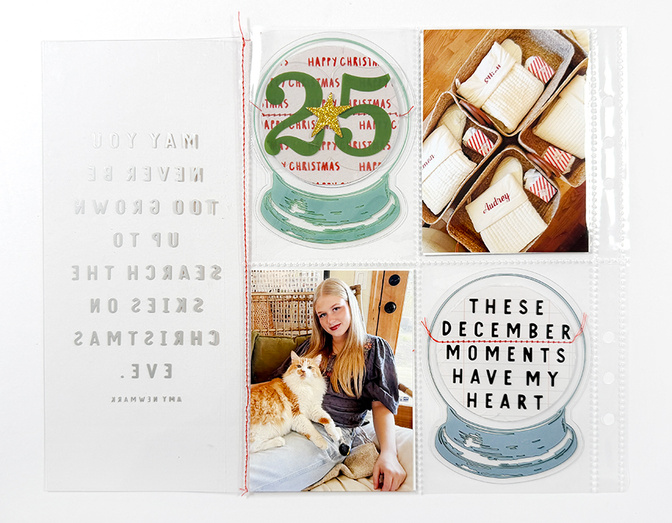
On the backs of each of the snow globes I added transparencies + papers/embellishments.
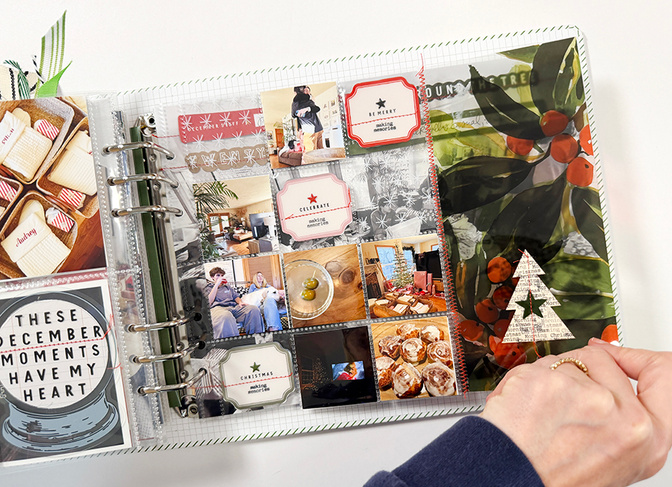
My next page is a 2x2 pocket page protector with the holly transparency stitched along the outside edge.
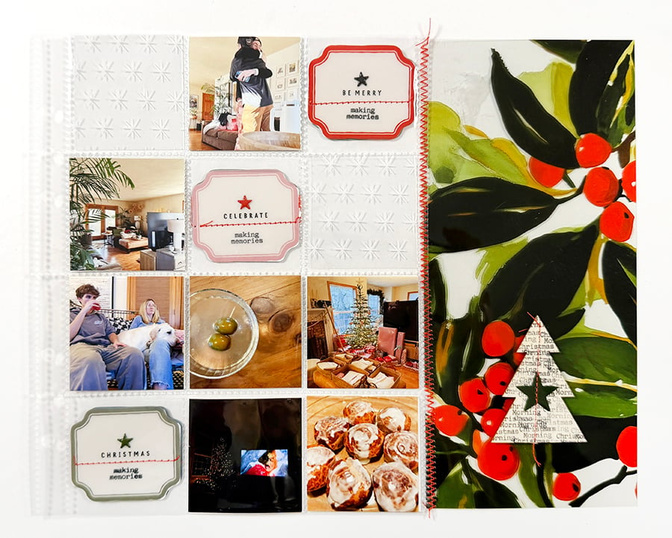
Inside the pockets I added photos, transparencies, and plastic label shapes with puffy hearts add on top.
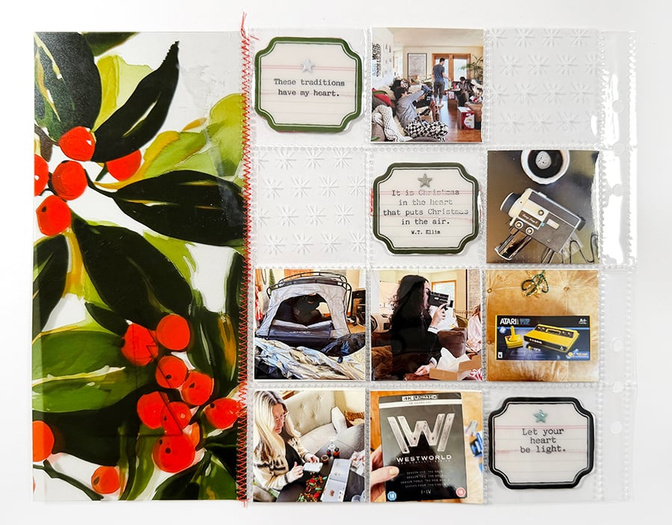
I added the same things to the back and stamped some of the short quotes from the stamp sets this year.
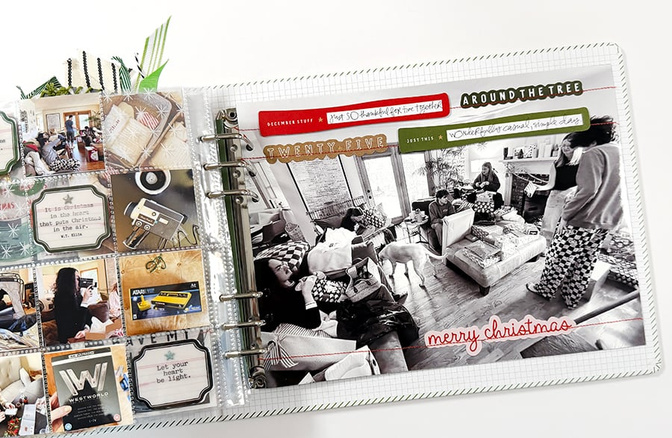
For my last photo I printed out one of our messy Christmas morning images and then added some of the die cut word art and journal strips along the top and bottom of the photo.
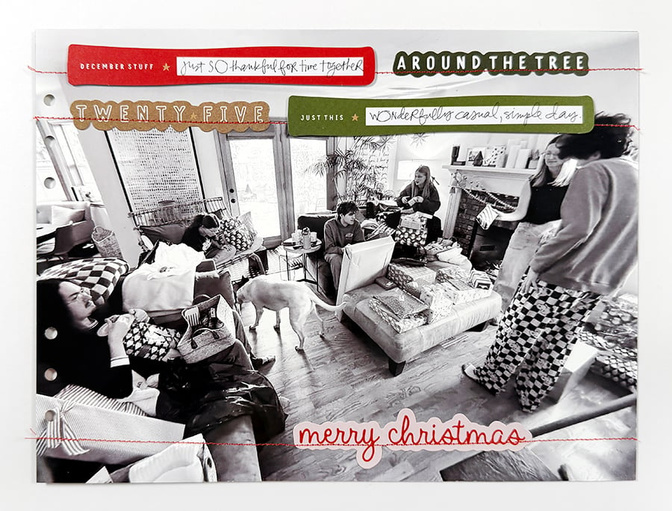
Messy stitching adds to the messy vibes. Lovely, simple time together.
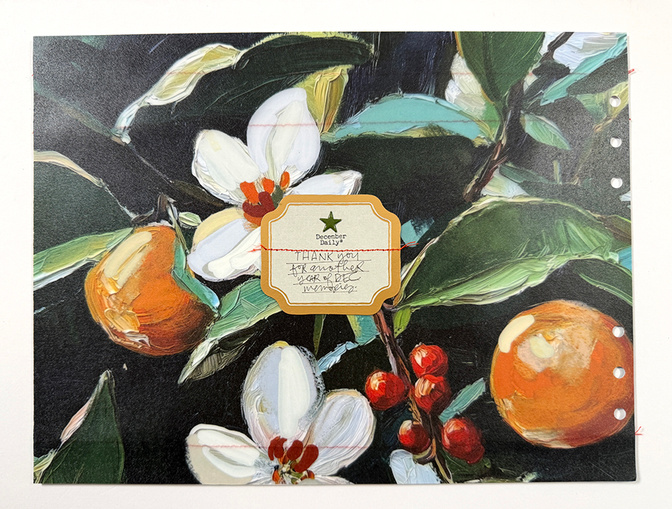
This year I'm ending my project with a floral page with a little message of gratitude on top.
I'll be back soon with a full walkthrough of my completed album.
SUPPLIES


Comments
Sign in or sign up to comment.
5 comments
Beautiful just like the rest of your album!! ❤️
Replies to dawnmi
Sign in or sign up to reply.
What a lovely Christmas captured beautifully! ❤️
Replies to asackr01
Sign in or sign up to reply.
So beautiful! Thanks for sharing. Does your hole punch have a guide for how close you are punching to the edge? I hope that makes sense. Happy New Year!
Replies to reneemc63
Sign in or sign up to reply.
Love these pages. Thanks for the inspiration once again this year.
Replies to cannycrafter
Sign in or sign up to reply.
Great end to the album! Any suggestions to that vintage split page that you didn't use but had in the videos in the album for today?
Replies to chelsp82
Sign in or sign up to reply.