I Love You MiniBook
Tags: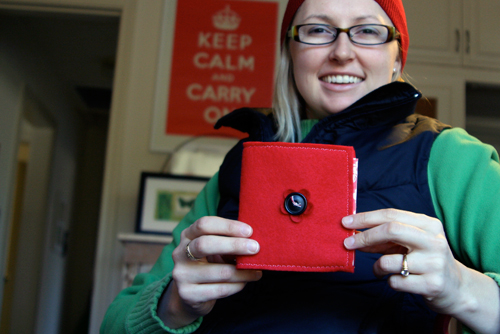
This weekend I'm bringing you a little valentine book, complete with a how to & downloadable interior pages (includes handwritten "i love you" and lines for journaling). Here's to working ahead a bit rather than scrambling the night before!This is a book focused mainly on words but could be easily adapted to include photos as well. Make one for a spouse, partner, child, parent, friend - anyone you love.
Right now I am really into my sewing machine + I have had this big piece of felt just sitting here waiting to be used for something (purchased it with good intentions for something else over the holiday). I've been inspired by a lot of things Emily Falconbridge has been creating with fabric and stitching and such - she is so great at putting all kinds of different elements together. She, along with Rebecca Sower, continue to teach me that my sewing machine and paper and fabric can be very good friends.
So here's to a creative weekend + making simple handmade things for the people we love most.
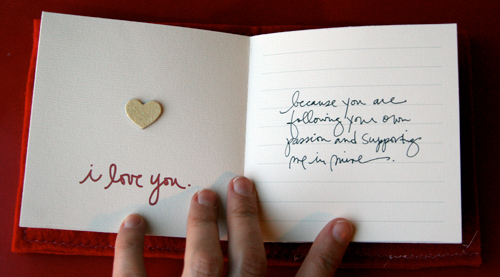
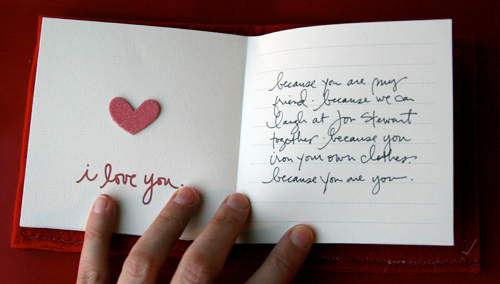
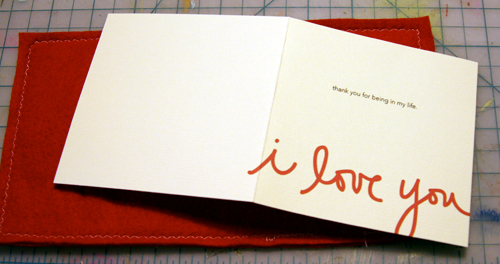
Let's start with the end in mind with a look at the completed project:
Supplies:
• 2 pieces of red felt (9.25 x 5 was my end result - I started with a bit bigger pieces and then stitched and trimmed to the final size)
• 5 pieces of cream 8.5x11 cardstock
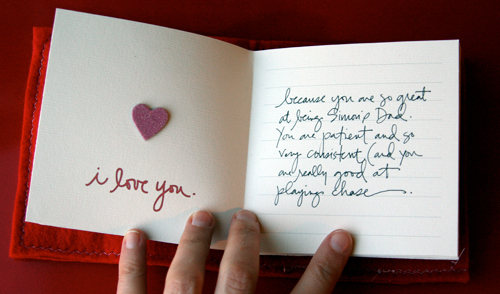
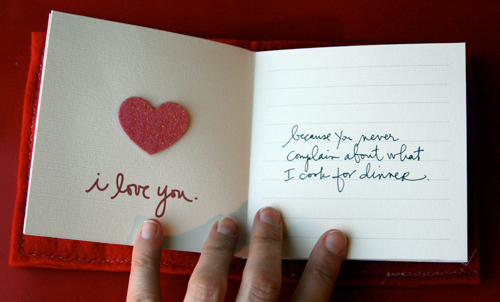
• chipboard heart accents (K&Company Smitten Chipboard Box Glitter Icons)
• 1 sheet of red patterned paper (Anna Griffin)
• red felt flowers (Making Memories Noteworthy Embellishment Jar)
• adhesive (Therm O Web Super Tape - love this stuff + have been using it a lot lately)
• sewing machine or needle + thread
How To:
This book can be made without felt if you are just not into the whole fabric + paper thing. Simply download the PDF cover and interior pages and adhere them all together (see tips below):
DOWNLOAD COVER |AEvalentines2008_cover
DOWNLOAD INTERIOR PAGES |AEvalentines2008
If you want to play around and create the felt cover you will need two pieces of felt. My finished felt size is 9.25 inches x 5 inches. Cut your pieces a bit larger than that to begin with and then trim down after you have stitched (I found that a bit of shifting happened while I was stitching so I was glad to have the excess I could trim off). Using a sewing machine (or by hand) stitch the two pieces of felt together.
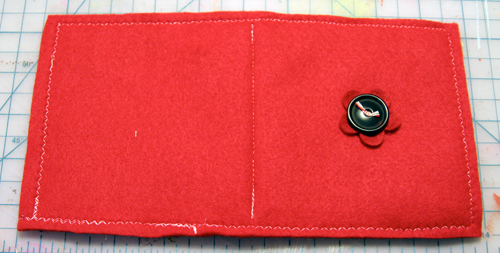
Lay a felt flower and a button on the cover (I used Making Memories Noteworthy Embellishment Jar for the felt flowers). Hand stitch button and felt flower (or use adhesive) directly onto/through the felt. For right now ignore the stitching down the middle.
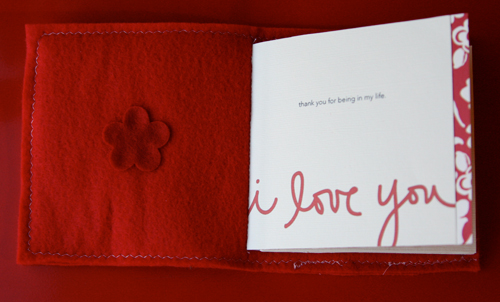
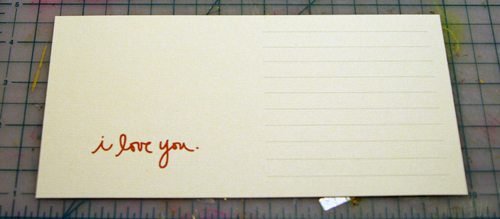
Next I printed out the interior cover (AEvalentines2008_cover.pdf) and the interior pages (AEvalentines2008.pdf). Each one includes trim marks so you can see where to cut the pages to size (8.5 inches x 4.25 inches before folding). I printed one interior cover and four interior pages (you could definitely do more if you wanted).
Work with the interior cover first. After printing and trimming, fold in half. I used a bone folder to get a nice even fold.
Turn the interior cover over and lay in the middle of the felt cover. Using your sewing machine or hand stitching, sew the interior cover right onto the felt cover.
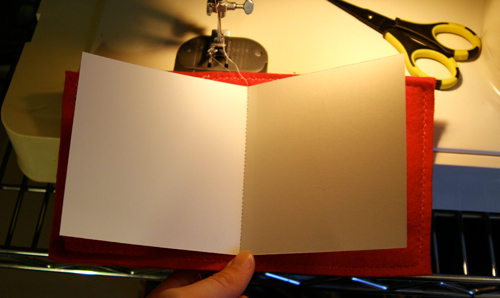
This is what it should look like when you are done:
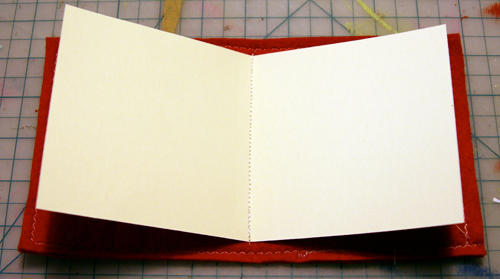
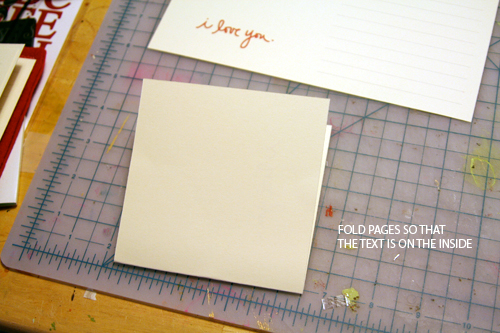
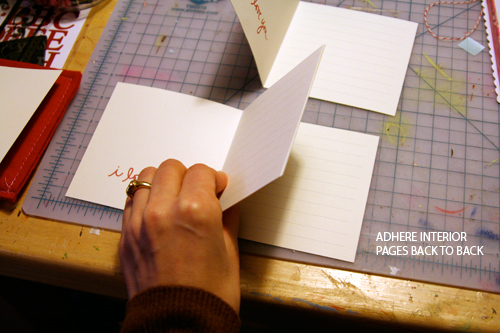
Next fold all the interior pages in half with the printed portion on the inside.
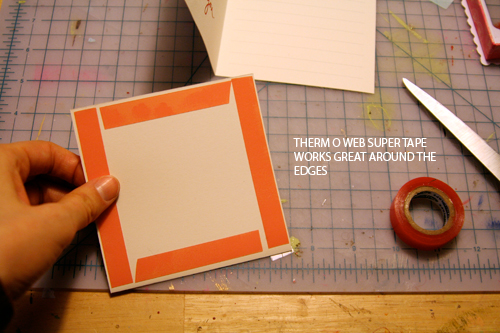
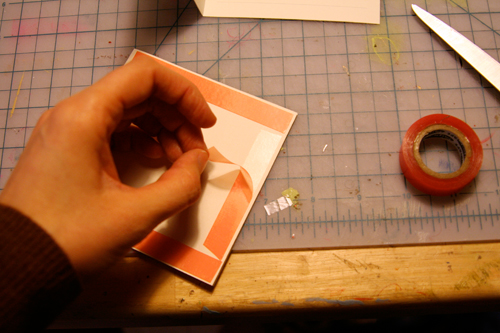
You will now be adhering these pages all together back to back to create the inside contents for the book. For my adhesive on this project I used Therm O Web's Super Tape.
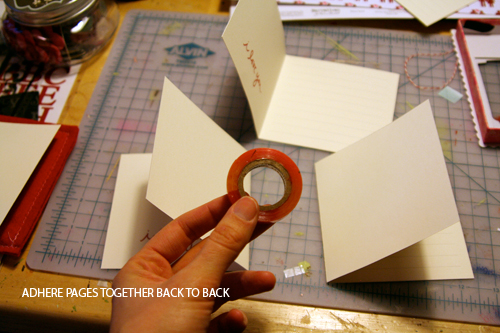
This is what you are going for as you are adhering:

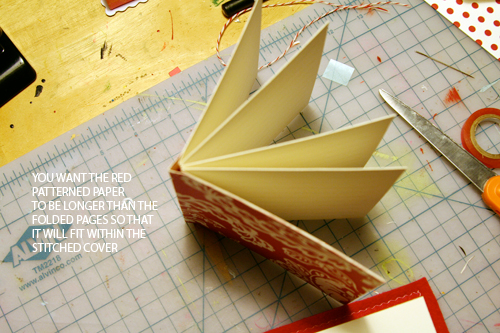
After adhering those pages together you will create an initial cover using patterned paper. This part came about because when I went to add the pages into the cover they stuck out due to not coming to a point when they were adhered together (they did not fit into the stitched seam). To get around this I cut two pieces of patterned paper (9 inches x 4.25 inches) and glued them back to back (so that you see pattern on both sides).
Fold the patterned paper in half and adhere the booklet into the patterned paper. I left a bit of room near the fold of the patterned paper. This whole part took a bit of messing around and trimming edges, etc. Just go with it.
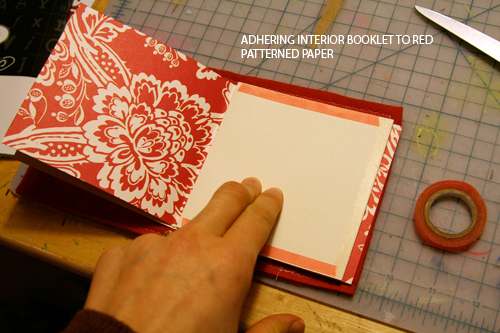
This is what it looked like when I was done:
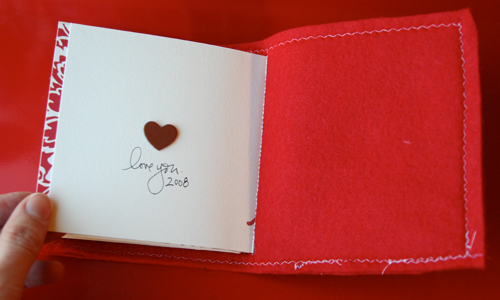
Now you are ready to adhere the booklet into the cover page. Lay the booklet in, match up the seams, and adhere.
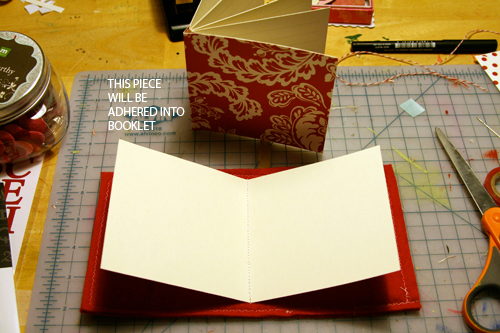
There should be a bit of patterned paper sticking out of the edge of the cover page. Add a felt flower inside the cover to hide the stitching from the front.

Add chipboard hearts (or photos or anything you have on hand) and journaling and you are good to go.

Enjoy!
I also wanted to let you know that I did set up a Flickr group for sharing photos and creations that come about through these weekend prompts. You can access the weekend creative Flickr group here.


Comments
Sign in or sign up to comment.
169 comments
I love the focus of text in this project. Sometimes I want to make things so complex and forget how special my own words can be to someone I love.
I've got something really similar in the works for Project 52 that debuts the first week of Feb. I've been really inspired by the fabric photo albums Jacqueline Yeo makes so I've come up with a version of a felt V-Day album.
I love this idea of sharing something creative every weekend. Thanks for the thoughtfulness you include in your creativity!
Replies
Sign in or sign up to reply.
Seriously, thanks for the cute idea!! You are amazing!
Replies
Sign in or sign up to reply.
Thanks Ali - you are so generous! Check you out all rugged up. It's a hot one down under where we are celebrating Australia Day.
Replies
Sign in or sign up to reply.
LOVE IT!
I've already printed mine to work on this weekend without Hub seeing it!
AND I my computer spent last night and all day today uploading pics to shutterfly and NOW to FlickR. Poor computer. It's so busy I can't even surf the web!
I can't figure out how to move my FlickR pics from my account to a group...anyone?
Replies
Sign in or sign up to reply.
This is the sweetest little gift book. I am going to a crop tomorrow and have already printed out a copy for myself and my friend. New I am off to Joann's to get the felt! Thank you so much Ali!
Replies
Sign in or sign up to reply.
AHA!
Never mind on the FlickR question...i just figured out how to send them to a group: FYI: ORGANIZE|SEND TO GROUP.
Replies
Sign in or sign up to reply.
Oh my gosh! This is so awesome! I can't wait to make several for my family. :)
Replies
Sign in or sign up to reply.
I love this. Can't wait to try it.
Replies
Sign in or sign up to reply.
Love the idea Ali- I have a tip for you! try threading your bobbin thread with thick sparkly thread like "razzle dazzle " by ricky timms and sewing upside down--the thicker sparkly thread will then be on the "good" side of your work and it looks really great> You cant do it the other way round ie thick thread on the top because it wont go thru the machine that way have fun!
Replies
Sign in or sign up to reply.
wow - what a treat! thank you, ali, for sharing! (and who would think that paper-crafting might convince me to get a sewing machine!)
Replies
Sign in or sign up to reply.
Thank you so much! How fun - can't wait to make this!
Replies
Sign in or sign up to reply.
This is a great project! I have been lacking motivation to use my sewing machine, so this is perfect! Thanks for sharing!
Replies
Sign in or sign up to reply.
This is very cute and will be well loved!
Where did you get the poster in the background?
I need one!
Replies
Sign in or sign up to reply.
What a great idea. I think everybody would love to know "Why" they're loved and appreciated.
Replies
Sign in or sign up to reply.
Thank you SO MUCH for this! It's wonderful! I'd really like to do this for hubby. I just made shadow box frames for his bday and I'm thinking that handmade gifts are the best.
Replies
Sign in or sign up to reply.
Wow that is so cute! Toooooo bad I don't have a clue how to sew!
I tried. Believe me. But, it is just not made for me!
Really!
Your book is "sew" cute!!
Replies
Sign in or sign up to reply.
love this project, thanks Ali x
Replies
Sign in or sign up to reply.
Hey Ali,
Super Cute project...posted a link on our blog!!!
Replies
Sign in or sign up to reply.
Ali!! Too many great ideas lately! lol I think I have to play hooky from work soon so I can stay home and play. lol I love how you talked about your husband ironing his own shirts, my Mom always says that's one of her favorite things about my stepdad.:)
Replies
Sign in or sign up to reply.
I don't normally post on a person's blog but I just wanted to tell you how much I've enjoyed going through your archives and reading about Simon. I've added a ton of your links to my 'favorites'. I am a speech/language pathologist working with autistic children (along with being an avid stamper and sometime scrapper)and I can't tell you how lucky I think you guys are to have such a special child (and he to have you). Thank you for sharing!
Replies
Sign in or sign up to reply.