Weekend Creative : March #1 : Butterfly Mobile
Tags:
Yep, more butterflies.
The prompt this weekend is to make a spring mobile. Something to brighten things up a bit + celebrate the coming season.
This is a great project for using what you have. Gather up some of those random pieces of this and that and plan a little creative time (you can always check out the supply list below for specifics). The idea here is to play and experiment with each of the butterflies as your canvas.
Another cool part of this project is that it can easily be done in bits and pieces. Paint all the butterflies. Go do laundry. Come back and add some accents to a few. Run around outside with your kids. Come back again and do some handwriting. etc. Or settle in for the long haul.
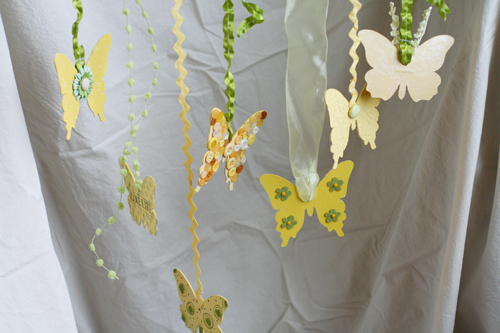
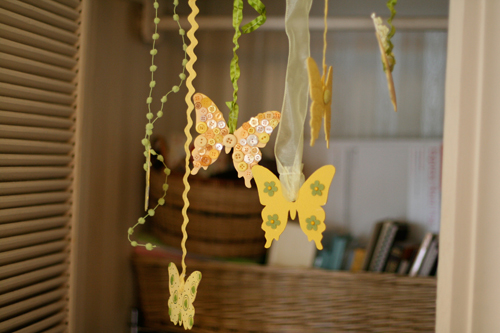
To attach each butterfly to the branch I punched a hole and wrapped a piece of ribbon through. Rather than creating a loop, I stitched the ribbon together to hold it in place + cut the ribbon (you will be able to see this in the photos below). To attach it to the branch I tied a knot at the top.
Supply Basics:
• Jenni Bowlin Butterfly Chipboard (4 to a package : could imagine using these birds too)
• Making Memories Paint (banana + buttercup)
• Crackle Paint: Tim Holtz Distress Crackle Paint (Mustard Seed) - one of the coolest things about this product, besides how it cracks
the paint with no work on your part, is that the brush comes inside the
lid (you can see Tim using it here)
• Ribbon: Amercican Crafts Halstead 87558 (green stitched), yellow rik rak, super cute green dot/puff ribbon from the October Cocoa Daisy kit
• A way to punch holes in the chipboard butterflies - I like the Crop-A-Dile or the hammer set from Making Memories
• Black Staz-On Ink
• A branch or something on which to hang the butterflies
Here's a look at each individual butterfly (both sides) with additional supplies listed below each photo:
Number One:
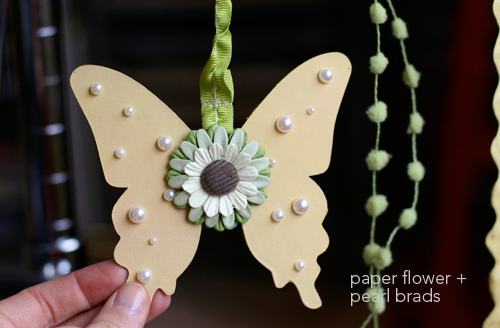
K&Company Paper Flower Brads + K&Company Blue Awning Adhesive Gems
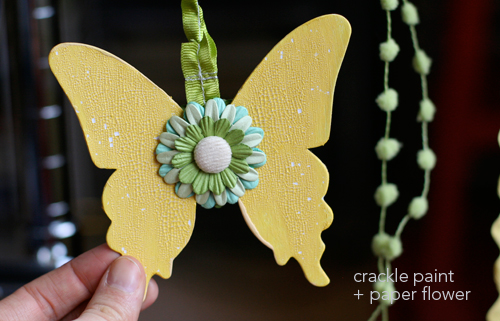
Here's what the crackle paint looks like after it dries. You just paint it right on (using the brush in the bottle) and then as it dries it cracks. Cool stuff. I attached the flower brads with a glue dot rather than using the metal feet (just fold them back and place the glue dot on top).
Number Two:
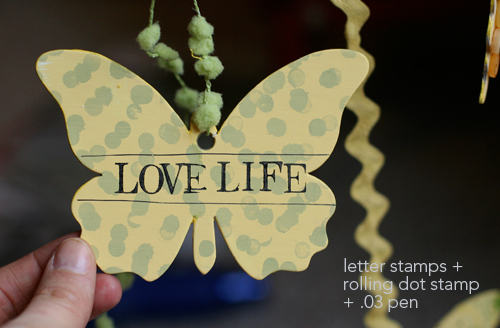
Letter stamps (from a Japanese company) that you can often find here. American Crafts Precision Pen (my favorites). The dots were created using a cool rolling stamp from Stampin Up (Looks like it's called Stampin Around).
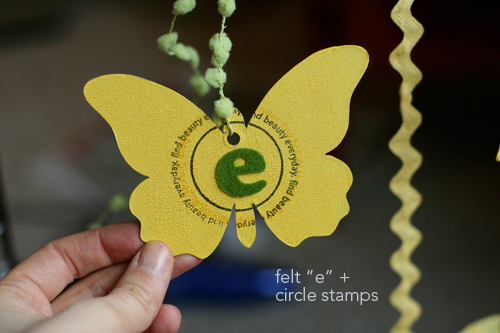
Felt letter "e" from American Crafts. Circle stamps from Savvy Stamps (581D Outline Circle) and the word one is part of an Everyday Life kit offered through the CK Kit Of The Month back in May of last year.
Number Three:
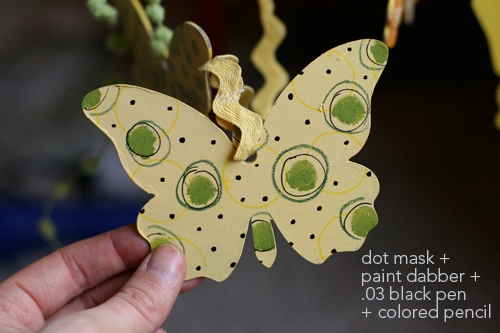
Green circles were created using the Heidi Swapp Dot Mask and an Adirondack Paint Dabber. Colored pencils are from Prismacolor.
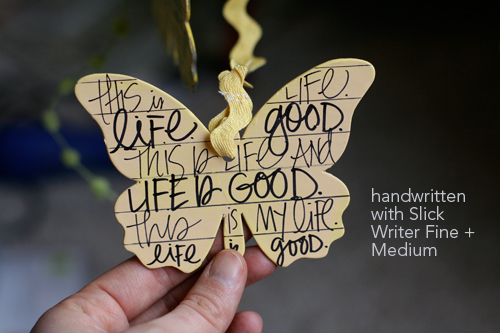
Slick Writers are another staple in my supplies. I used a ruler here to get the lines down.
Number Four:
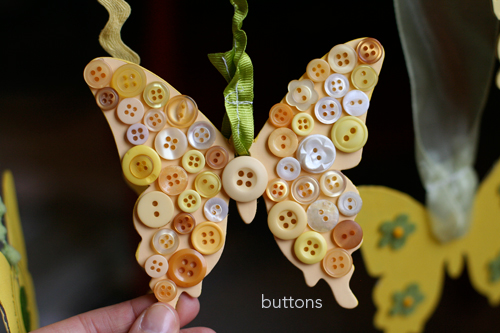
Bet you may just have some buttons in your collection of stuff. If not, here's some.
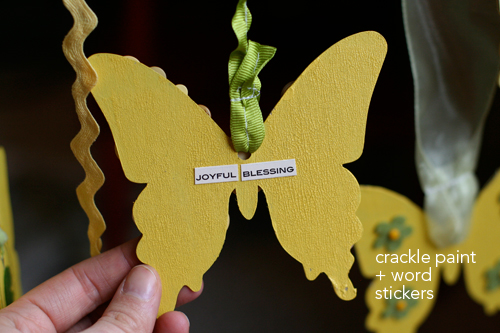
Words from 7gypsies 97% Complete Document sticker sheet.
Number Five:
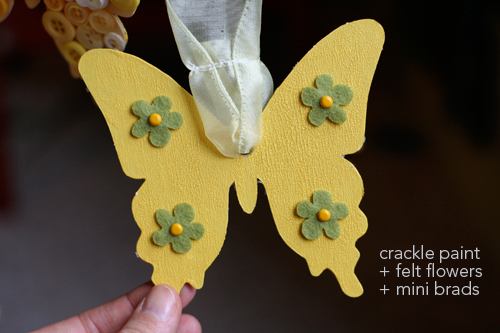
American Crafts Felt Flowers + Mini Yellow Brads (again, I used the brads for decoration rather than function)
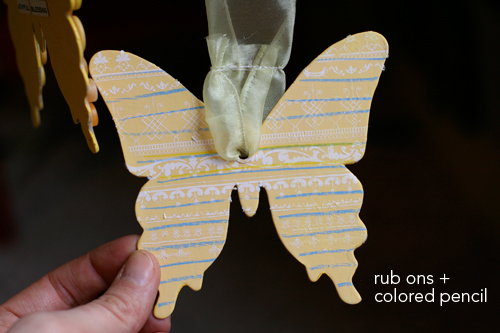
Basic Grey Rub Ons.
Number Six:
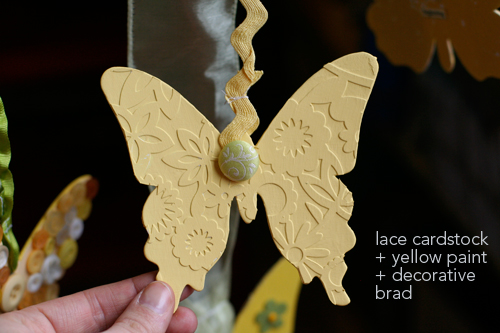
KI Lace Cardstock (Flower Child White) + K&Company decorative brad. This is the same technique as a couple week's back - see the prompt here.
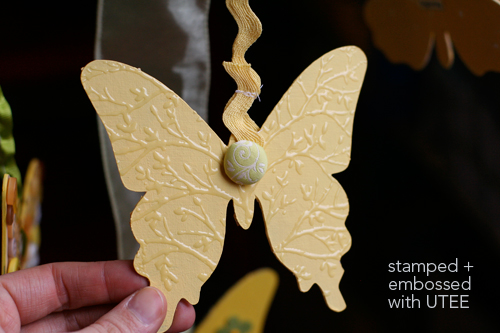
Hero Arts Design Block Tree Stamp + Embossing Ink (Versamark) + UTEE (Ultra Thick Embossing Enamel)
Number Seven:

The random flower wire here came from a wonderful little crafty Easter kit from Flea Market Studio. She has some great little ephemera kits. Word sticker is from a Making Memories Wordfetti package.
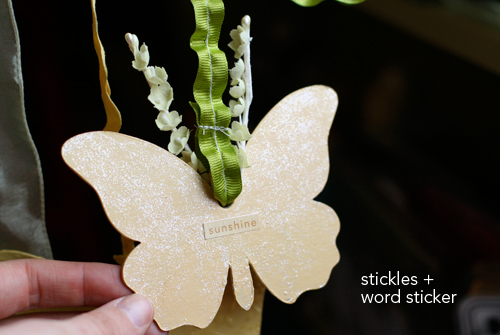
Stickles: Frosted Lace (basically just rubbed it right onto the butterfly with my finger)
The tough part seemed to be figuring out where to put the darn thing.
While I was working on it I hung it in between my closet doors:
When it was done I tried it on the ceiling in my office (using ribbon from Paper Source):
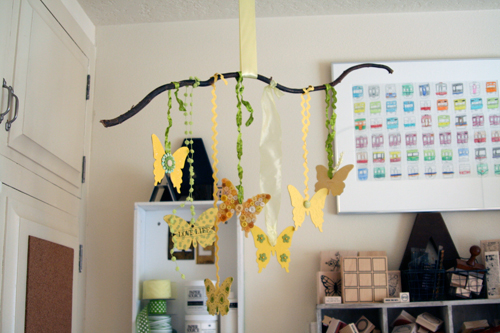
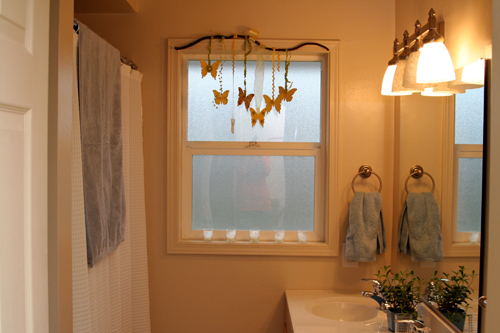
And then decided to hang it above the window in the bathroom:
For more visual inspiration to get you going check out this Mobile Swap Flickr group (based on the swap started by Elsie Marley). I also found a couple mobiles on etsy that I loved: check out this one + this one. And I love this one from Sally Shim that could easily become the inspiration for an Easter mobile (thinking ovals).

Comments
Sign in or sign up to comment.
70 comments
These are so cute. My son and I created our own version today with an Easter theme. Thanks for the inspiration!
Replies
Sign in or sign up to reply.
this is too cute I have sent your site to my friends to see.
Replies
Sign in or sign up to reply.
What a lovely mobile!
Replies
Sign in or sign up to reply.
Like it in the bathroom! Fits perfectly!!
Replies
Sign in or sign up to reply.
oh wow u did amazed job ...i never thought about that...my mom loves butterflies she is in nursing home, age 89 yrs old she would love that so thanks for sharing and im gonna think about how i can hang something i will find the way bigggg thanks Ali :)
Replies
Sign in or sign up to reply.
I just love butterflies what a great idea Ali - thanks for sharing :D
Replies
Sign in or sign up to reply.
This is beautiful!!
--Tif
http://www.tmathewsfineart.blogspot.com
Replies
Sign in or sign up to reply.
I love how you decorated each one! So many ideas!
Replies
Sign in or sign up to reply.
mobiles are so interesting. I've loved them ever since seeing the work of Alexander Calder years ago. the butterflies must have lovely movement with a breeze.
Replies
Sign in or sign up to reply.
this is just precious!
Replies
Sign in or sign up to reply.
Love it, Ali!
Thanks for the inspiration!
Cool ideas!
Have a great week!
Jenn
Replies
Sign in or sign up to reply.
Fabulous !!!! Love all the different techniques you used ......
Replies
Sign in or sign up to reply.
What a beautiful mobile. Perfect for the spurts of sunshine we've been having lately.
Replies
Sign in or sign up to reply.
So cute!!
I lovethis idea.
Thanks for the inspiration!
Replies
Sign in or sign up to reply.
gorgeous. i would love to do something like this for my daughters room, maybe with birds. thank you for sharing this! i'll have to print it out now! =) nlg
Replies
Sign in or sign up to reply.
Your mobile is so fresh and sunny! I went a little different direction and made these charms/pendants to hang on my necklaces: http://gauchogirl.blogspot.com/2008/03/charming.html
Thanks for always inspiring us!
tonya
Replies
Sign in or sign up to reply.
Ali your creations always make me swoon! :) I will have to see what I can come up with for an easter mobile :)
Replies
Sign in or sign up to reply.
Okay, I didn't have chipboard butterflies but I had tons of flowers! I made this into a mommy/kid project. So, my 2 & 4 year old are helping me and we are having so much fun! Thanks Ali for the inspiration!
Replies
Sign in or sign up to reply.
Another great spring project that I love! Now, if I only had time to get them all done!
Sue
Replies
Sign in or sign up to reply.
3-10-2008
Just now checking out your post from Friday. Funny thing is I was creative this weekend--even got some help from my 8 year old son. We made an Easter egg tree. Had gotten a "gold metal tree" from my Mom and some kind of pink and blue "ribbon" and just added our own plastic eggs all different sizes and colors. Very pretty!!
Replies
Sign in or sign up to reply.