December Daily 2009 : Day Two (+ Photo Overlay Video Tutorial)
Tags: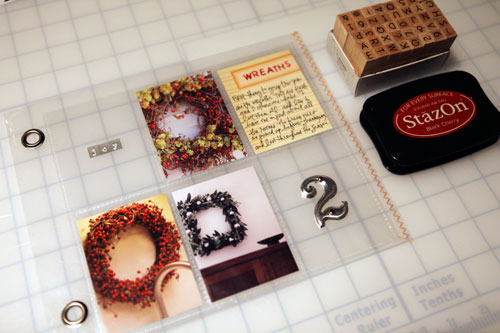
SUPPLIES : #2: Tim Holtz; Basic Uppercase Stamps: Hero Arts; Joy Letters: Little Yellow Bicycle; Ink: StazOn Black Cherry; Journal Card: Jenni Bowlin
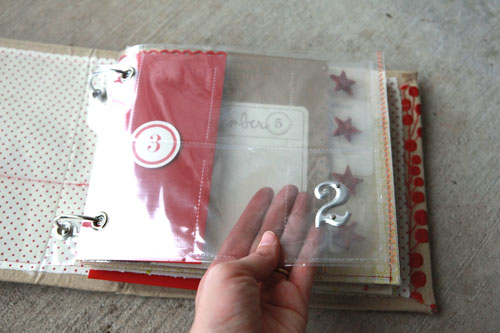
Today I worked with a baseball card page protector that was cut down to fit inside the 8x8 page protector that came with the album I am using. I really like keeping a couple of them "open" to the pages that follow.
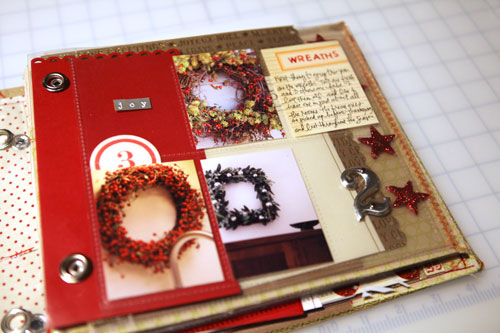
Here's a look at the page inside the album:
Here's the before image:
And here's a look at what the photo I put on the back of Day One:
SUPPLIES : Holiday Outline Word Art: Ali Edwards
I was thinking this morning about the process of building my December Daily. I was thinking how I don't always love the individual pages but what I do love is the totality of the project, the end result. Don't let a lack of love for any one page keep you from moving forward and don't let a quest to make it all perfect stop you from documenting the goodness of the season.
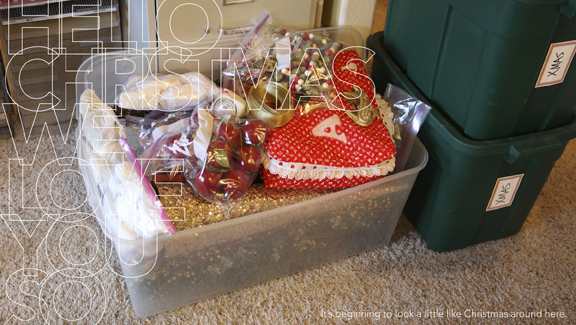
As I begin opening up my Christmas tubs and transforming our home into a den of twinkle lights I am reminded how much I love to savor this season.
Bring on the twinkle.

I also have a few new holiday things available at Designer Digitals:
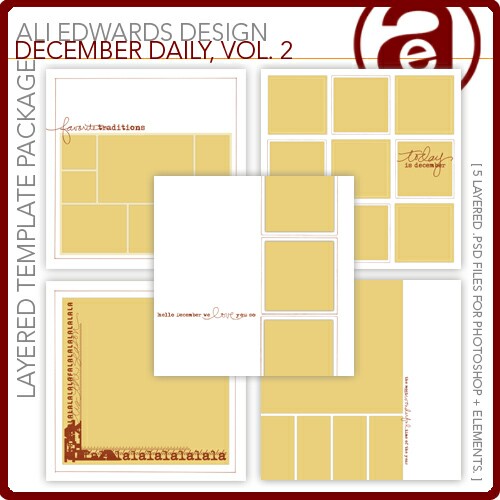
A second volume of December Daily templates to go along with the first.

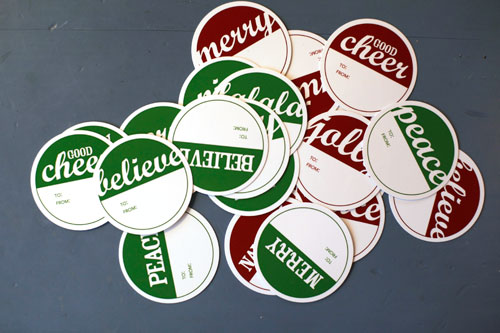
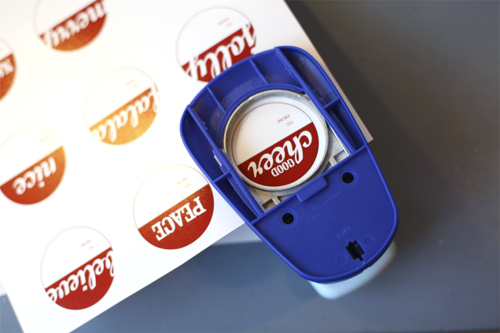
If you need some simple gift tags I created a new set that are now available at Designer Digitals. The downloadable file includes PDF files that are all set up and ready to be printed (in red & green). These were all punched with a Marvy 2-Inch circle punch.
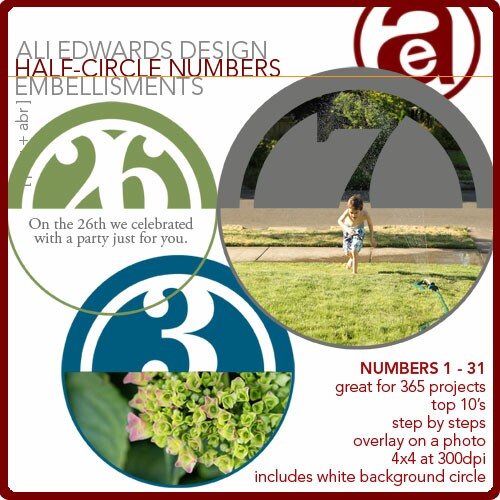
If you are still looking for fun digital or printable numbers to add to your December Daily these Half-Circle Number Embellishments I released back in July would also work really well.
I posted a video tutorial on how to work with these elements here.
In addition I put together a short tutorial on working with the 25 Days of December overlays that I used on my photo in Day One. You can click on the link below to see a larger version.
25 Days of December Photo Overlay Tutorial from Ali Edwards on Vimeo.

This post is part of a series documenting the month of December 2009. You find out more information and view all the completed pages of my album here.


Comments
Sign in or sign up to comment.
82 comments
I so needed that tutorial. Can't wait to try it tonight at home. I was trying my Dec 1 photo and just couldn't get it
Replies
Sign in or sign up to reply.
Great tutorial! Thanks so much.
Replies
Sign in or sign up to reply.
Ali, Thanks so much for the tutorial. Bought the overlays and have been using them... LOVE them....
Replies
Sign in or sign up to reply.
I do love how you work the clear pockets! Once into the new year I'd like and give 'em a try. Also, thanks for the reminder to remain focused on the overall finished project. I'm thoroughly enjoying seeking Christmas through my lens again this year.
Replies
Sign in or sign up to reply.
How right you are in recognizing that you don't have to love each individual page in order to love the entire project. Thanks for sharing.
Replies
Sign in or sign up to reply.
Not at all! Go for it!
Replies
Sign in or sign up to reply.
My guess is that someday that page full of handwritten words will be someone's most favorite of your entire album.
Replies
Sign in or sign up to reply.
Such lovely wreaths! Today is my day to get all that stuff out, after a sick day yesterday. Bring on the twinkle indeed. :)
Replies
Sign in or sign up to reply.
So enjoy your insight on scrapbooking. You remind me that my pages don't have to be "perfect" they just have to tell a story--I need to be reminded of that. Thanks for sharing your book. :)
Replies
Sign in or sign up to reply.
oh my gosh! i love this page. i think one of my favorite things about this book is that the page sizes are different and/or see thru so when the pages are on top of each other, the whole thing changes! i loved this so much last year, my whole 2009 album (8x8) incorporates the same concept.
Replies
Sign in or sign up to reply.
Thank you so much for the tutorial...I had no idea it was that easy!!!!! I just recently purchased Photoshop Elements and I'm so excited to start playing with those overlays!!!!!
Replies
Sign in or sign up to reply.
Hi Susan - I ordered that from http://www.cutting-mats.net/
Replies
Sign in or sign up to reply.
Hi April - make sure the file begins with "AEdwards" and not an underscore ("_").
Replies
Sign in or sign up to reply.
Thank you SO much! That was very helpful. Now, is there a way to change the color of just part of the overlay? Maybe with the rect marquee tool??
Replies
Sign in or sign up to reply.
Beautiful! Thanks Ali!
Replies
Sign in or sign up to reply.
Thanks so much for the tutorial. I purchased the overlays but had no idea how to use them!
Replies
Sign in or sign up to reply.
Thank you Ali - very helpful. You make it look so easy.
awesome!
Replies
Sign in or sign up to reply.
THANK YOU SO MUCH for the tutorial!!! I can figure things out SO much better when I can actually see someone using the program right along with me. I truly appreciate you taking the time to do that!!! AWESOME layout too! LOVE how you keep some of the pockets open...YOU ROCK!
Replies
Sign in or sign up to reply.
Ali,
You are the best I was going to ask you if you could post some type of tutorial on how you worked with the digial overlay that you used on Day 1. Thank you - I'm loving this project this year because I'm actually do it!
Have a great holiday season.
Replies
Sign in or sign up to reply.
cool wreaths! i'd love to know what your journaling says....care to share?
Replies
Sign in or sign up to reply.