Weekend Creative : Creating Room To Write With Photos
Tags: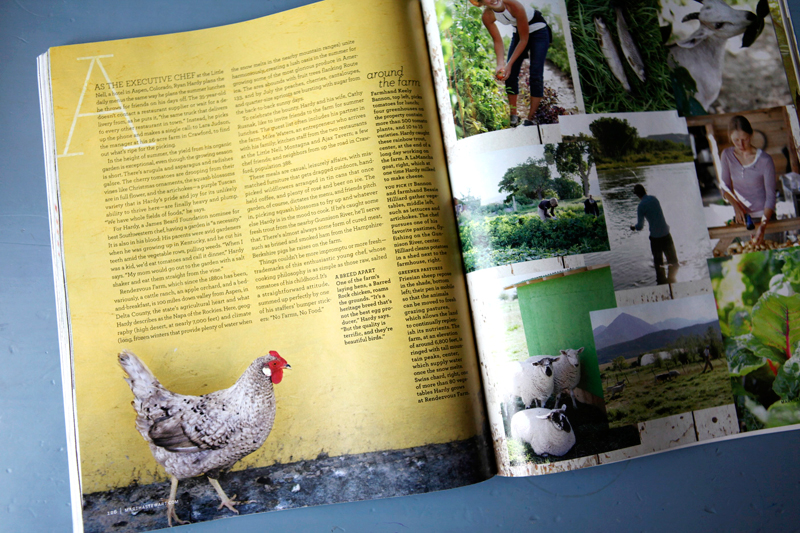
Last week I was browsing through Martha Stewart's Living magazine and was looking specifically at the way their designers use full-page photos to their advantage when designing the spreads for feature articles.
I love how they use "blank" areas on photos to create homes for the text of the article. I especially loved the example above with the chicken and the cool yellow wall. The wall is a perfect home for the story to be told. This is something that's super easy to do in scrapbooking and is the topic for this week's weekend creative.
This weekend's prompt is to take some photos that include specific space for telling your story. You're invited you to share the photos you take in the weekend creative group at Flickr. I'm totally looking forward to seeing your photos.
Here's a few things to keep in mind:
TAKE PHOTOS WITH INTENT :When you are looking through the lens of your camera, become aware of opportunities to take photos that will give you room to write/type your story. Walls, floors, the sky, looking down on a table, etc - these are all usually really great open spaces for text.
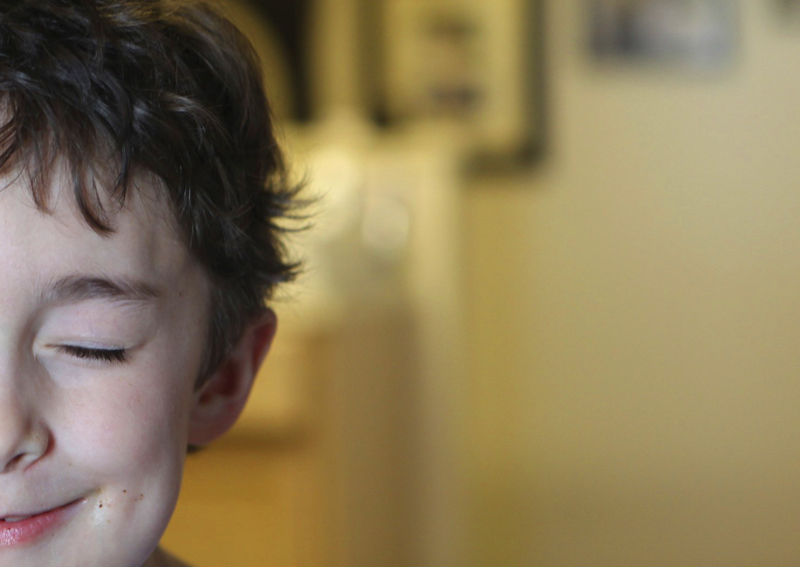
Walls tend to work well for this technique as they don't usually have many additional elements that will interfere with your text (too much interference makes it tougher to read). You could simply take a photo of a bare wall and use that photo as a part of your layout to hold text. Keep in mind that walls by themselves are nice, but add in a person (or a chicken as you see above) or part of a person (like shoes or hands or half of a face like below) and your results will tell an even more meaningful story.
SURVEY THE SCENE : Keep your eyes open when you are capturing someone or something for the chance to place your subject to the far left, far right, very top, or very bottom of the frame. By simply moving the focal point away from the center of the frame you are creating room for text to be added.
Here's an example: let's say I am outside taking photos of Simon on his bike. In addition to the regular shots of him zooming around, I will also include a couple where he is placed near the top of the frame where you might only see the wheels and his shoes. In this case the middle and bottom of the frame would be filled with cement - a nice open space for placing the words of my story.
This same affect can also sometimes be achieved after-the-fact by cropping your photo in a photo-editing program. See below for an example.
TELL A STORY: After capturing your image, journal directly onto your photo either with a pen on a printed photo or by using the type tool (T) in Photoshop.
Here's a recent photo of mine that had a nice space for my text. What you see below is what came out of the camera:
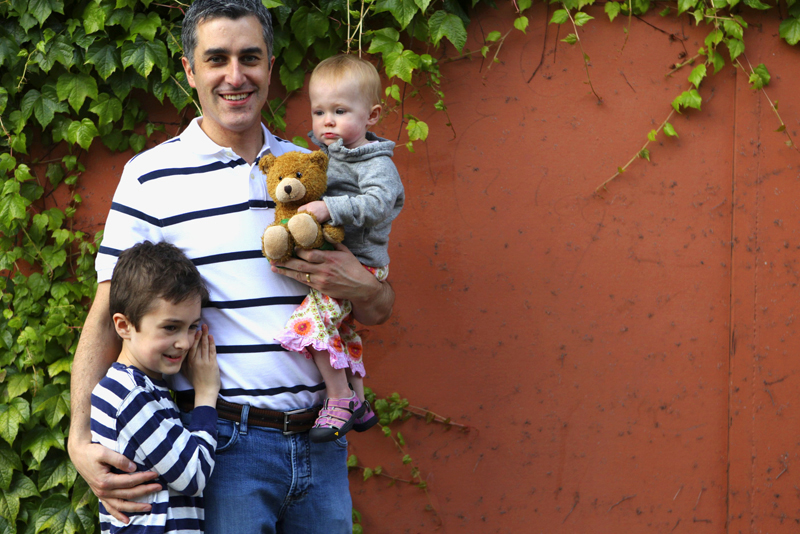
I actually love the proportion above but ended up cropping in tighter to make a 12x12 photo page.
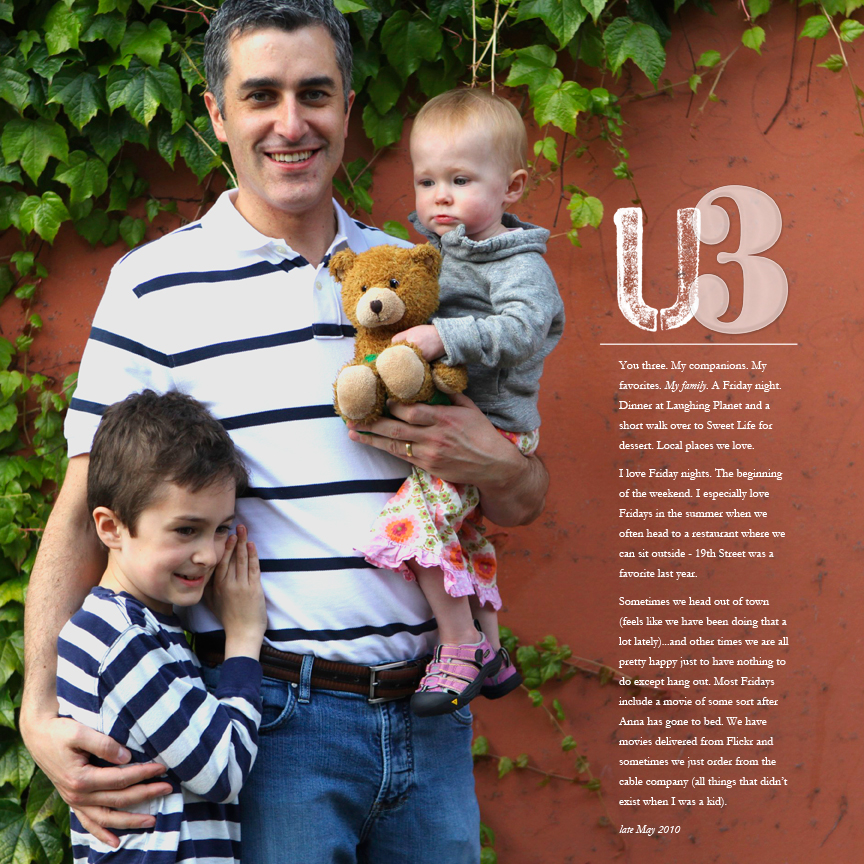
I'm thinking that I will add a second page of collaged images of the three of them to create a spread.
CROPPING AFTER: Another thing you might want to do is take a look at the photos you already have and see if any can be cropped to achieve this same effect. Here's a photo I found that's one of those shots that comes from taking a bunch
in one sitting at our table:
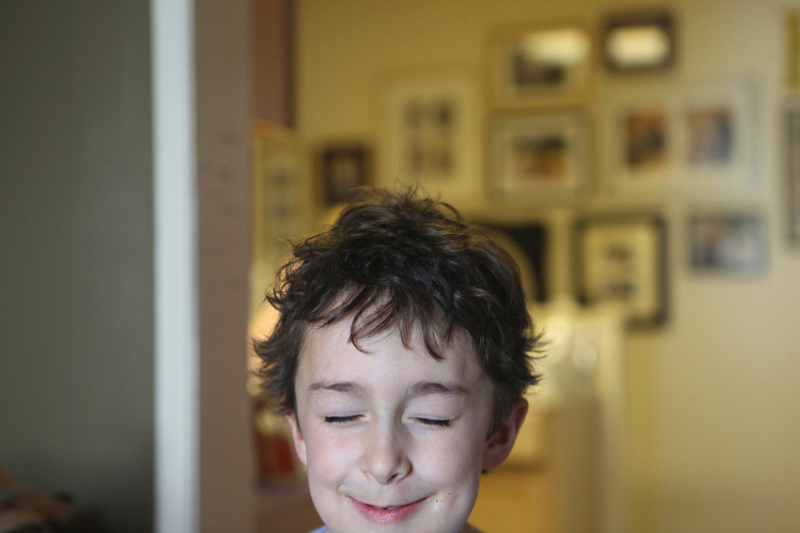
It's a funny, random of shot of Simon in the middle of repeating one of his current favorite movie scenes.
My goal with the crop below was to create a specific space for telling the story and move him drastically to the left side of the photo.
I love this.
Here it is with text added. The text is in progress so I just copied and pasted to give an idea of what the text will look like:

You could do something like this (sized to about 12 inches x 8 inches), print it out, adhere it to cardstock, and embellish with traditional products. I think that's what I will do once I complete the journaling.
Have fun creating room to write on your photos and enjoy your weekend!
[ Past weekend creative projects can be found here. ]

I wanted to take a minute and say a really heartfelt thank you for all the comments on the One Little Word post the other day. I've been holding that part of my story in for awhile, waiting for the right time to release it out into the world. It's so inspiring to me to read the comments and stories and words of support. Thank you.


Comments
Sign in or sign up to comment.
71 comments
I love your idea!! thank you for your inspiration :) http://chiarasloft.blogspot.com/2010/06/books-everywhere.html
Replies
Sign in or sign up to reply.
Fabulous idea. I adore MS Living. In every magazine there is a layout that inspires me. This one is definitely on my 'To Do' list! Thanks for sharing the idea with your pics. It helps to see the concept translated into the scrapbooking world.
Replies
Sign in or sign up to reply.
such great inspiration.......again!
Replies
Sign in or sign up to reply.
Great Tips! Love this idea. It's on my to-do list for this week!
Replies
Sign in or sign up to reply.
I never thought of taking pics this way..Thank you so much for this wonderful new way of looking through the lens! Can't wait to explore the new way!
Replies
Sign in or sign up to reply.
Well, I tried it... and liked it! You can view it here... http://seriousplay.typepad.com/cinback/2010/06/the-whole-truth.html
Replies
Sign in or sign up to reply.
Awesome, Love it!
Replies
Sign in or sign up to reply.
I love your "graphic designer" tips. It makes what would be ordinary pages become more polished and professional. Thank Ali!
Replies
Sign in or sign up to reply.
I have been roaming around scrapbooking sites to find inspiring works and I must say your work Ali is the best I've seen. Your blogs are not written in a childish manner and your designs they are terrific! Now that's a talent no one could ever take from you!
Replies
Sign in or sign up to reply.