December Daily® 2017 | Day 11
Tags: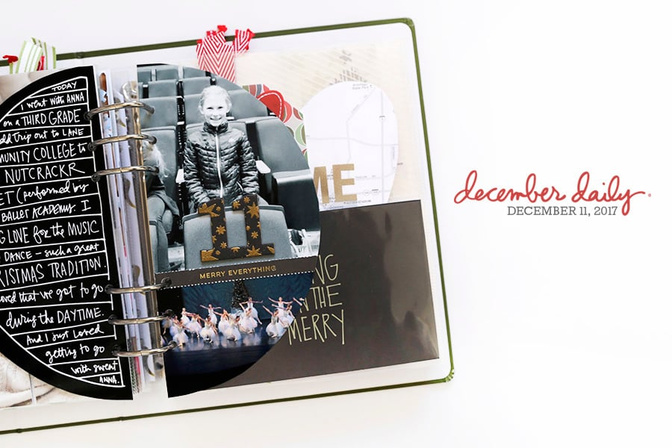
Welcome to December Daily® 2017 | Day 11.
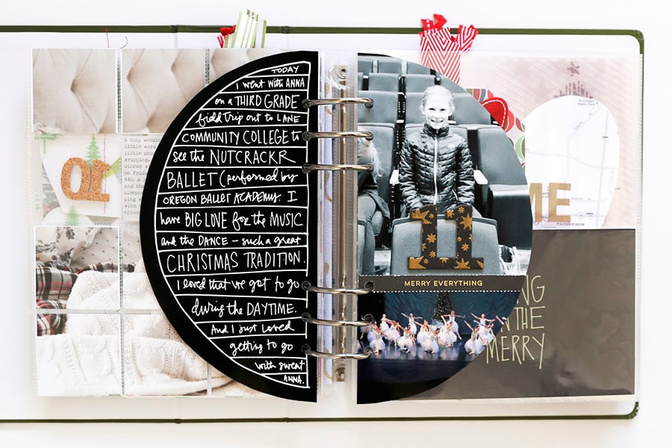
Here is a look at this page from my Foundation Pages post:
This page was built as part of my December Daily® Product Play Workshop. That workshop includes a Silhouette file and a digital layered template to use for this page idea. I used the layered PSD file to mask my photos and print the 1/2 circle out.
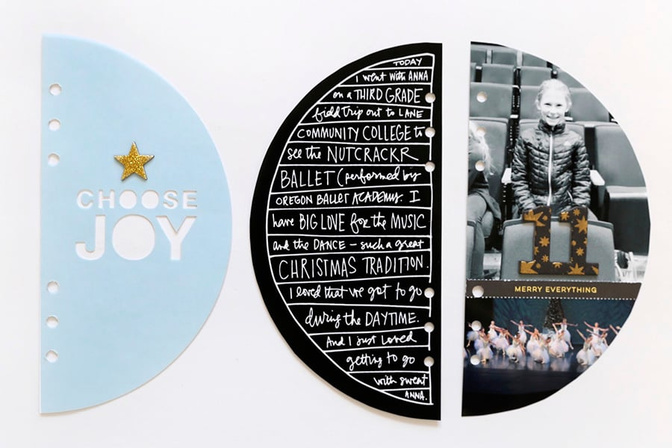
Here is how the story ended up looking in my album:
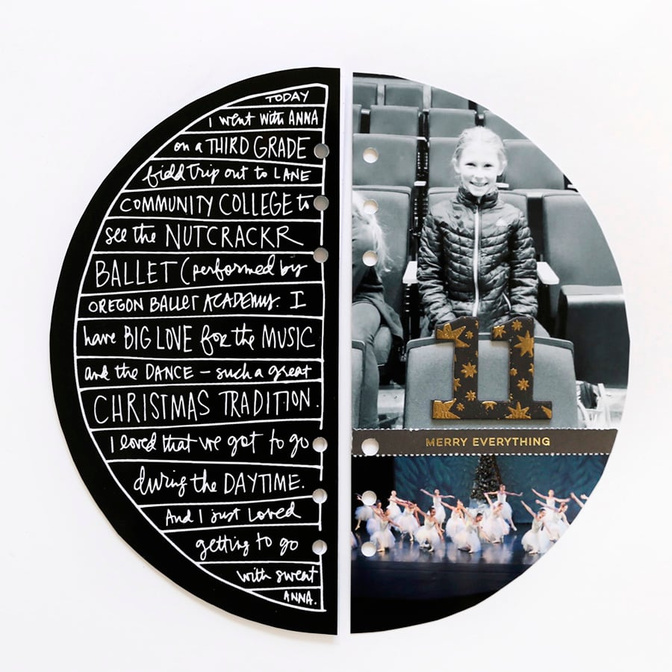
The journaling page actually started out with a black pen on white cardstock (you can view my entire process in the video overview below). As I was working on it I decided I wanted to try something a little different so I scanned in what I had hand-drawn on the 1/2 circle, traced it using Illustrator, and then changed the hand-drawn portions to white and added a black background.
The photo circle was created using a layered PSD file (from the Product Play workshop). I masked two photos into the 1/2 circle shape, printed on photo paper, and then added a gold foil strip from the main kit.
To learn more about using digital products in paper projects check out my Hybrid workshop.

You could definitely try this with black cardstock and a white pen (see my white pen recommendations here). I printed mine on photo paper because I like the weight and the gloss.

To add a date I used one of the black chipboard numbers and this stamp set from Jasmine Jones and some gold embossing powder.
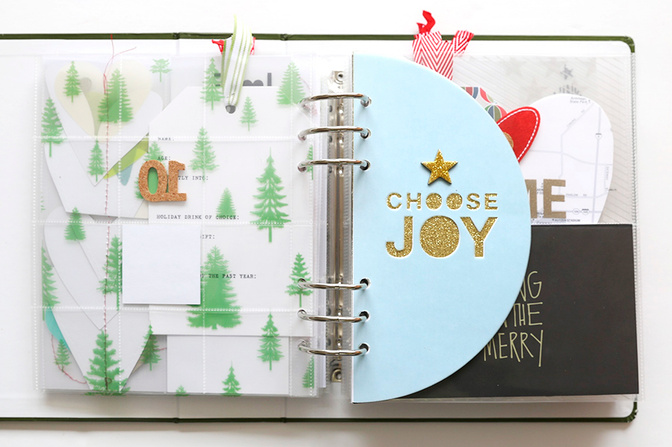
Here's a look outside the album:
I so love how this turned out!
DAY 11 | VIDEO OVERVIEW
SUPPLIES
December Daily® Main Kit 2017
Printer: Canon Pixma MG7720
Epson Premium Glossy Photo Paper
Heat Gun
December Daily® Black Chipboard Numbers
SHARING FOR 2017
This year I'd love to invite you to leave a link in the comment section if you'd like to share your daily pages. As usual, please include a direct link to your blog post vs. a general blog address link.
For more inspiration on working with products for this project, check out my December Daily® Product Play workshop - registration is still open with immediate access to all the content.


Comments
Sign in or sign up to comment.
21 comments
Day 11
https://marie-pierresavard.blogspot.ca/2017/12/dd-2017-11-decembre.html
Replies to Pepierre
Sign in or sign up to reply.
I love the different shapes you have in your album. Here is my latest: https://www.instagram.com/p/Bcmb_u1HK5Q/?taken-by=littlethingsbigdays
Replies to SusanB
Sign in or sign up to reply.
Really love this!
Replies to Jeannew
Sign in or sign up to reply.
Awesome as always.. but really loving the background christmas music! Merry Everything Ali!
Replies to cruisin_ali
Sign in or sign up to reply.
The circle pages turned out incredible!!!
http://avinashhecker.blogspot.com/2017/12/december-daily-day-10-wildflower-center.html
Replies to nirupama01
Sign in or sign up to reply.
Wow! This turned out so cool. Would you be willing to share the trace settings you used in Illustrator? Thanks for the inspiration!
Replies to kleecreel
Sign in or sign up to reply.
I know it's too late to change it now, but "nutcracker" is spelled wrong. ☺
Replies to adawson816
Oh well! Imperfect = life :).
Sign in or sign up to reply.
I love how the black and white look together! I have days 6-10 here: https://thiswestlondonlife.com/2017/12/12/december-daily-days-6-10/
Replies to Maxpuppy
Sign in or sign up to reply.
Love how this turned out! Any tips for getting the powder to slide easily out of the Snappy tray? I just got one and my powder gets stuck when I pour it out. Yours always seems to slide smoothly. Thank you!
Replies to ahiggins83
Sometimes mine gets stuck in there and I just wipe out the excess. I'm also not super careful with it and have had cross contamination happen in the past (glitter getting into other colors, etc).
Thanks! <3
Sign in or sign up to reply.
What a great memory Ali, I love the black with white writing so much!!!
Replies to sharylgolson
Sign in or sign up to reply.
I love your adventurous / risky product play for this December Daily! So unique and fun! I was wondering, did you hand-cut the photo of Anna and Nutcracker dancers, or cut it with the Silhouette? I know Silhouette has a feature called print and cut, but I think you need the Designer Edition to get this feature. You print the photo from within Silhouette turning the registration marks on. Then you take the print job and feed it into the Silhouette and at reads the registration marks so that it cuts precisely around the photo. I SO want to try this, but don't have the Designer Edition yet.
Replies to abbypimentel
I didn't cut it with a Silhouette. I also haven't tried the print/cut feature. In this case I used a 1/2 circle layered template in Photoshop and printed it out that way and then hand-cut it. Worked for me!
Sign in or sign up to reply.
My Day 11. Totally inspired by your puzzle page Ali. Thanks! http://www.petracorcoran.com/december-daily-2017-day-11/
Replies to petrac
Sign in or sign up to reply.
Love the lined + circle journaling. Here's my Day 11. http://susanbowers.typepad.com/in_the_storm/2017/12/december-daily-day-11.html
Replies to SusanBowers
Sign in or sign up to reply.
http://scrapinspired.com/2017/12/december-daily-2017-day-8-13/
Replies to smbradford
Sign in or sign up to reply.
Love the idea of making a mini album within the album! I did a page about putting up the tree for day 11. http://rockermorsan.blogspot.se/2017/12/december-daily-days-9-14.html
Replies to Rockermorsan
Sign in or sign up to reply.
http://www.paperandspool.com/december-daily-2017-day-11/
Replies to Ojyma
Sign in or sign up to reply.