Day In The Life™ 2019 | November Project Process
Tags: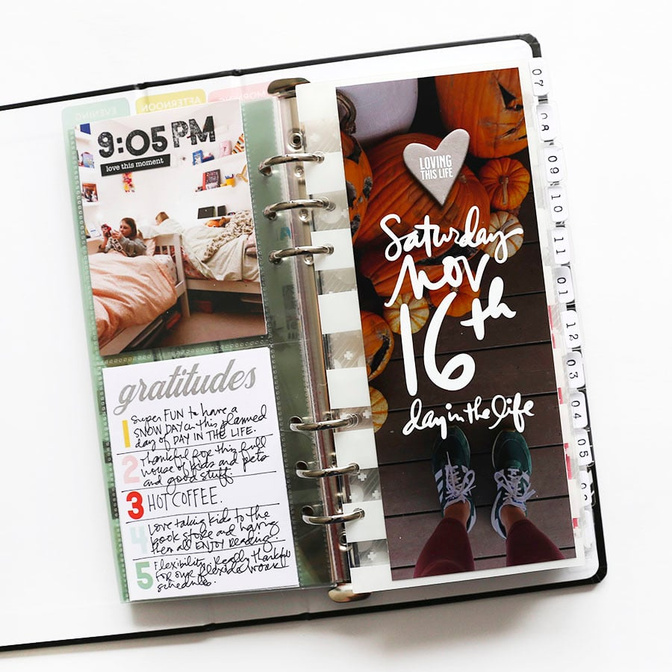
Last Saturday I documented my last Day In The Life™ for 2019.
I really liked the format this year (two documenting days, one album) and we will be following a similar formula again next year.
If you are looking to simplify your memory keeping this is a great project to participate in a couple times a year.
Check out my process video at the end of this post for a full look at how this came together.
STEP ONE
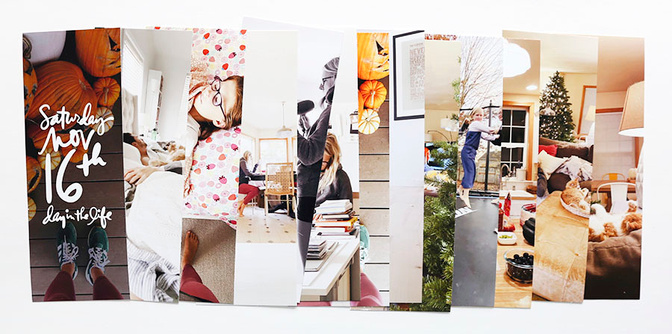
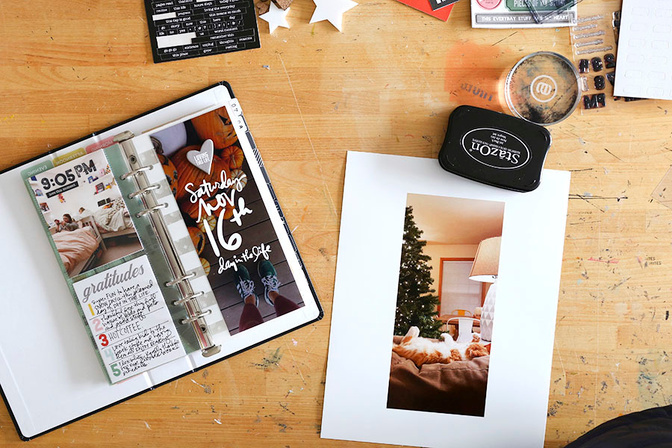
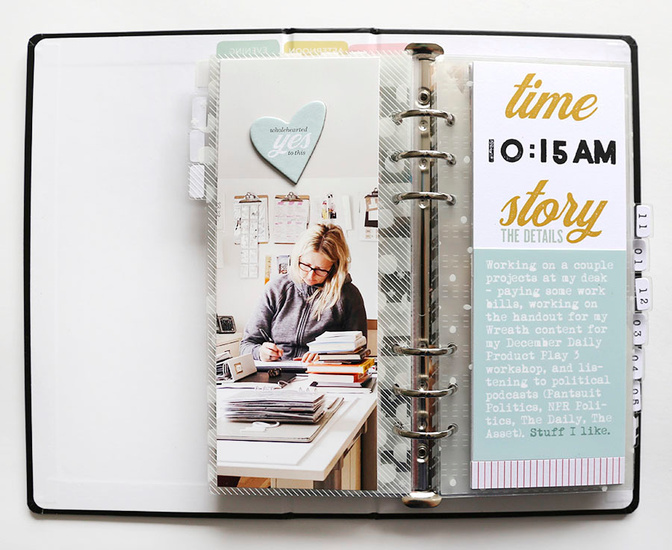
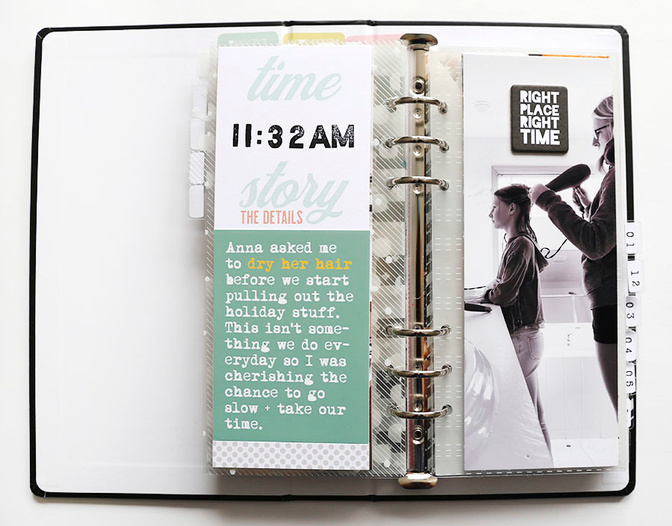
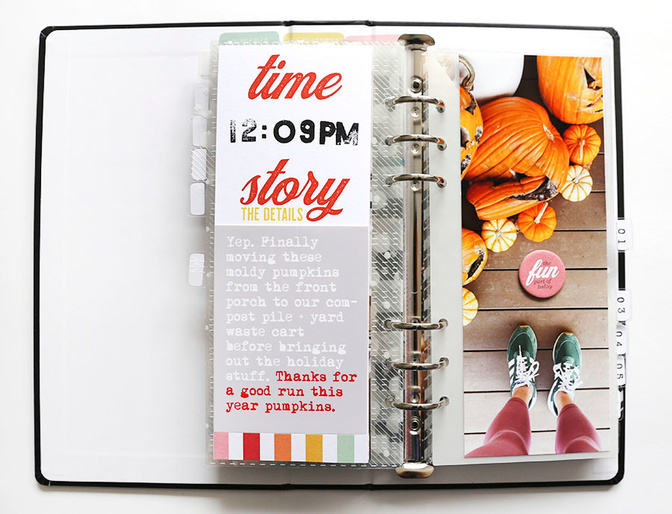
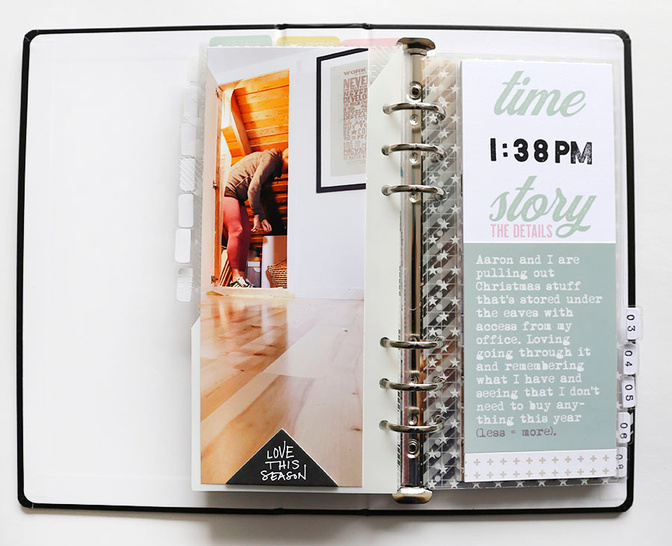
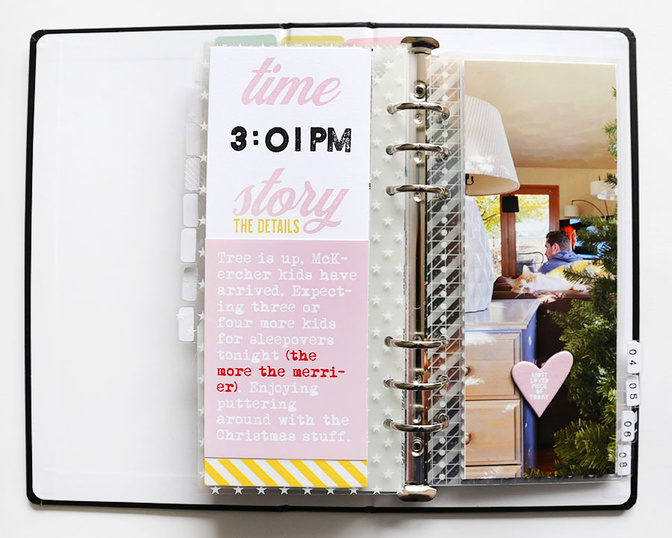
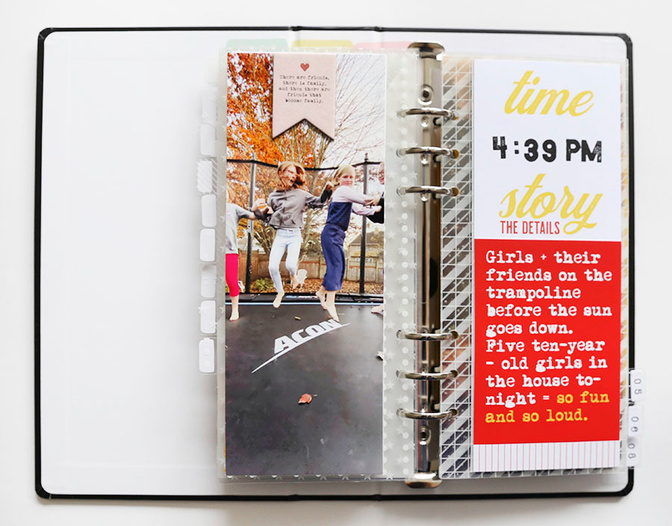
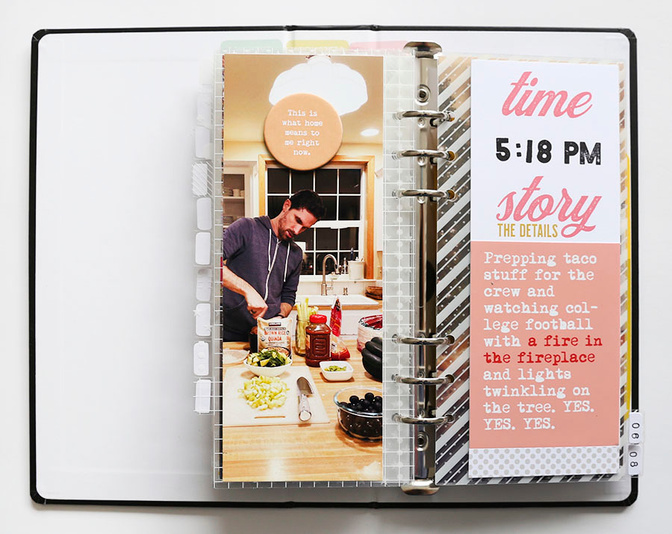
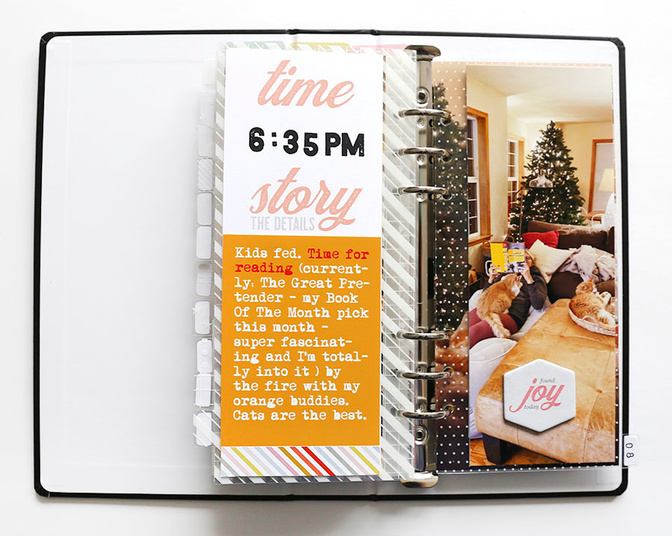
Document the day. I used my iPhone and Instagram to hold the stories of my day. I knew that I was going to be using this 3x8 album and that I'd have room for around 12 photo/stories based on the plastic dividers that were included with the album bundle. I also knew that my photos would end up being 3x8 so I intentionally took vertical photos that could be cropped to this size.
I didn't have a specific lens for my documenting this time (sometimes I use a specific word to guide my documenting). This time I basically aimed for one photo per hour to tell the story of the things that were happening over the course of the day.
One of the things I go out of my way to do with this project is include myself in the photos. I do this by using the timer function on my phone or by asking others in my family to take photos that include me. The way I approach memory keeping is that the stories I tell are from my perspective and I am the main character. My family, friends, etc., are supporting characters in this wonderful, messy story of my life.
STEP TWO
Print my photos:
Next up I cropped my photos in Photoshop to 3x8 and printed them using my Epson XP15000 printer (I put two on a 8.5x11 canvas in Photoshop before printing to save paper).
I added one photo that includes the Day In The Life™ word art for this documenting day.
Download the Saturday, November 16th word art here.
STEP THREE
Bring it all together:
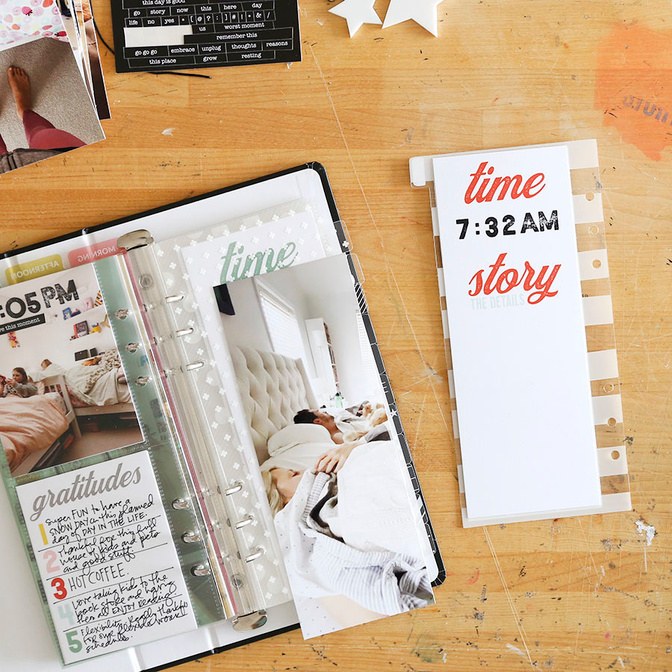
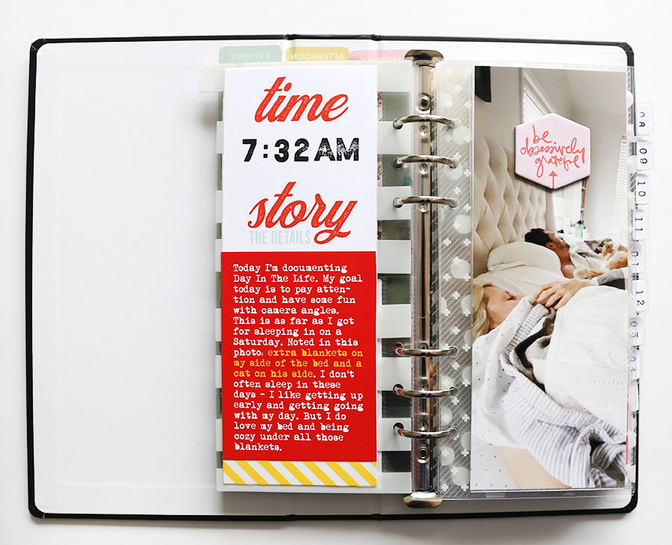
At first I envisioned that I was going to use the page protectors that came with the album. I changed my mind and decided to use the transparent dividers (these come with the album too) as the base for both my words and the photos and I adhered both directly to the transparent dividers and removed the page protectors from the album.
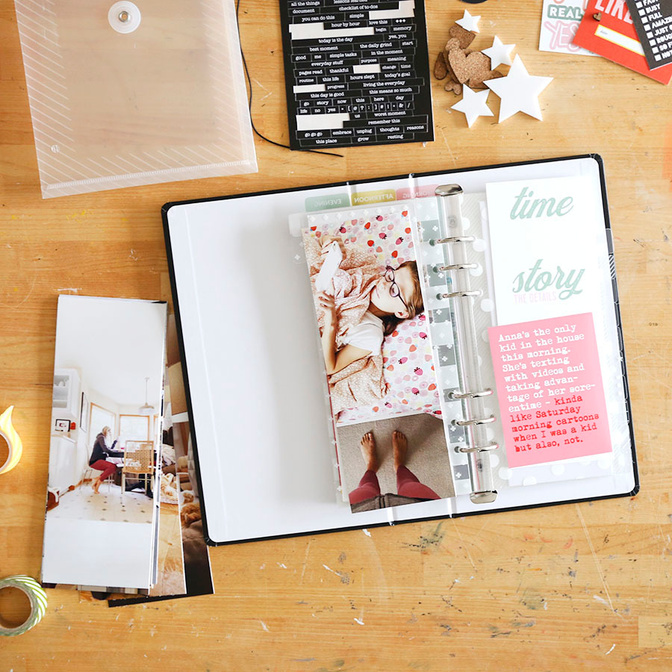
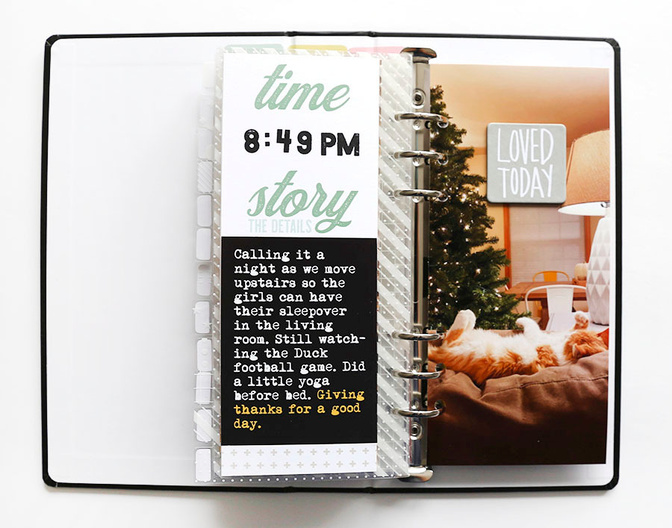
For my journaling I knew I wanted to stamp the date using the number stamp in the kit and at first thought I would just handwrite my words onto the 3x8 journal cards from the kit. As I was working I decided to simply copy and paste my text from Instagram (I shared all my words + photos there on the day of documenting) onto 3x4 canvases in Photoshop. This allowed me to play with colors from the kit as backgrounds and the size of my text - when my stories were shorter I simply enlarged the type size to fill the space.
I printed those 3x4's on photo paper and adhered them to the 3x8 journal cards and added either washi tape or a small strip of pattern paper to the bottom of the 3x8 card.
The font used is for my journaling is called Mom's Typewriter.
For my last page in the album I printed my photo to the size of the page dividers (approximately 3.75 inches x 8.25 inches) and punched holes using a 6-hole punch. I added a piece of pattern paper from my stash to the back of the photo to finish off the album.
Here's a look at all the spreads for this day:
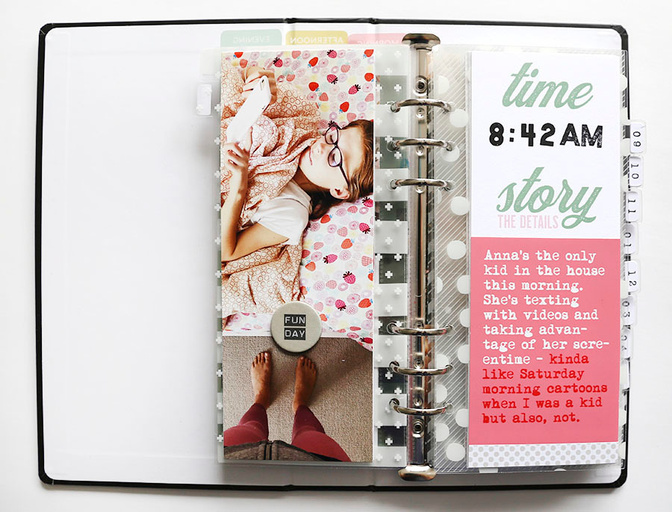
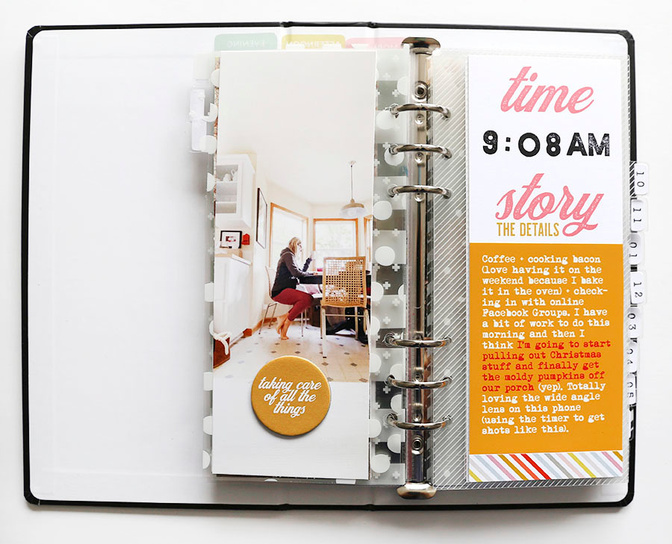
As you'll see below I added a chipboard piece either from the Day In The Life™ kit or from my stash to each of the 3 inch x 4 inch photos.
Here's a walk through of my process for creating this project:
SUPPLIES
Day In The Life™ 2019 Kit (includes the stamp set - thought this was sold out but looks like we have some available) // Digital version also available here.
Day In The Life™ 2019 Album Bundle (includes the album, transparent dividers, and page protectors)
Chipboard from other kits + products
Washi Tape
Pattern 3x4 cards from past kits


Comments
Sign in or sign up to comment.
11 comments
Gorgeous, thanks for sharing.
Replies to Eminepala1
Sign in or sign up to reply.
Love this. When you printed your photos for each of the hours, did you print 3x8 or did you have to make it a little longer?
Replies to jamie59
They are 3x8.
Sign in or sign up to reply.
Love this and my 3x8 photos have been shipped and will arrive this weekend. Could you say a bit about how you colored the journaling cards to match your kit colors? I'm thinking you made a 3x4 background and then used the change foreground color and just picked from the digital card? It would be lovely if you could share the psd file. I'm sure I can figure it out but if you have it handy :-)
Replies to tksbaskets
Sign in or sign up to reply.
Somehow I didn’t put the date in my calendar when it was announced! I had forgotten all about it! I like to do DITL when you do, as it keeps me on track and I can give my family ample notice. 😉 I will need to do one on my own very soon.
Replies to my3js
Sign in or sign up to reply.
Lovely and thanks so much for the word-art! I love it!!!
Replies to M_iranda
Sign in or sign up to reply.
If you turn your photo paper into landscape mode, you can save even more paper by getting 3 photos on one sheet!
Replies to adawson816
Sign in or sign up to reply.
Love your album! Having just finished mine yesterday- I loved hearing you say in the video how sometimes putting it together seems less crafty and you just need to get it done. I kept thinking, why is this stamping taking me so long?! Ha. But I love the completed project!
Replies to Jeannew
Sign in or sign up to reply.
Hello Ali, what font is your text for the Word Art download? I did my DITL on Sunday, November 17th and would like to replicate your word art. TY
Replies to CraftyCat
Hi - it's not a font - it's hand-drawn.
Sign in or sign up to reply.
Okay, thank you. I love your DITL and next to DD this is one of my favorite projects. Look forward to next year's DITL kit offerings.
Replies to CraftyCat
Sign in or sign up to reply.