Week In The Life™ | Ali's Embellishing Adventures
Tags: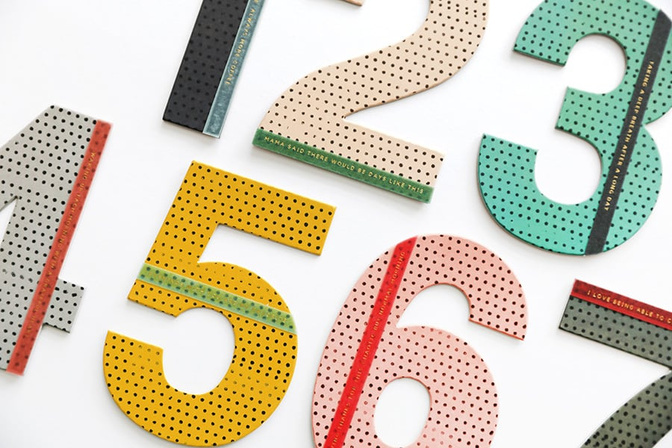
My 2023 Week In The Life™ album is almost complete!
Today I'm sharing a closer look at some of the repeated embellishing I created for each day in my album. Tomorrow I'll share a full walkthrough of my almost-completed album with additional information.
Let's dive in to a video that takes you through my production process for putting together these repeated embellishments:
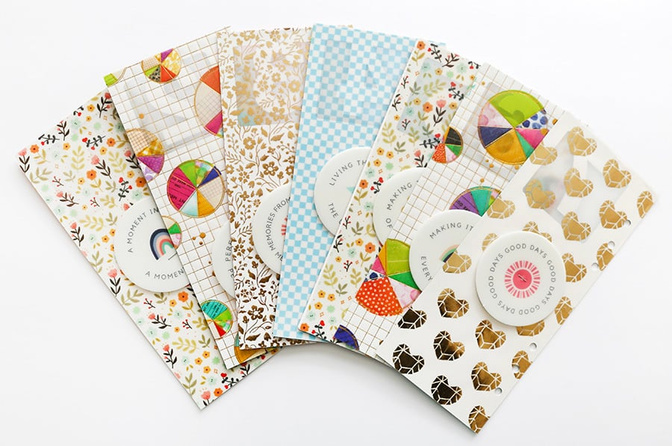
Here's a look at each of those embellishments via photos:
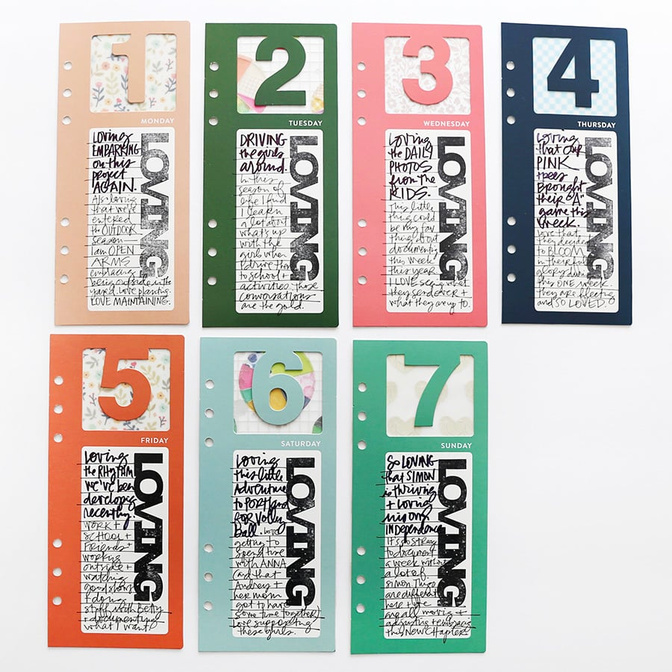
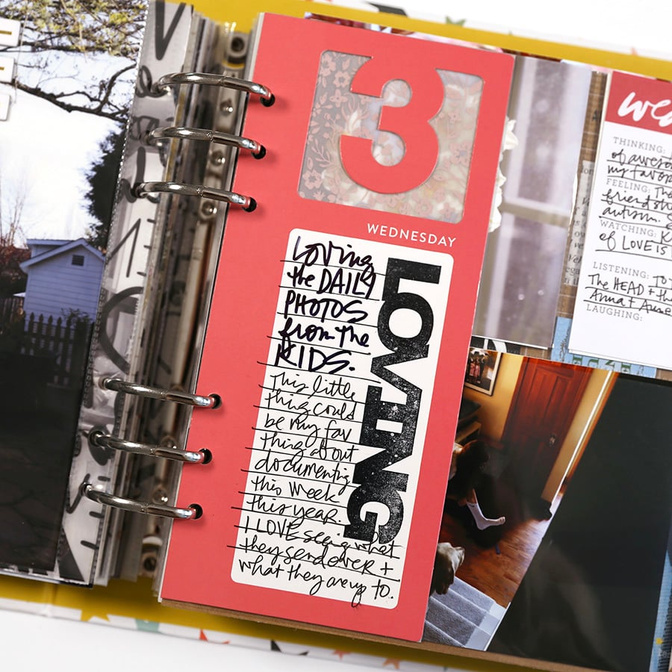
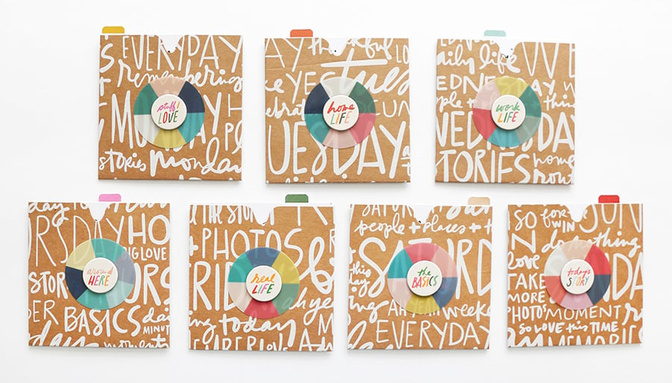
LOVING CARDS
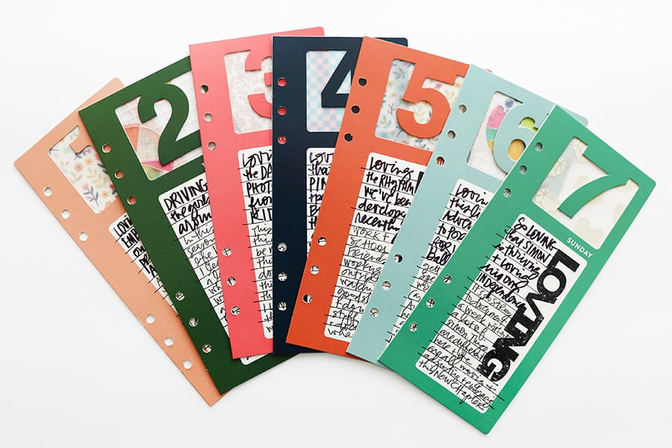
Each day includes one of these cards that documents something I'm loving right now on the front and on the back you'll find some fun pattern vellum/transparencies + the plastic circles from the Main Kit.
SUPPLIES
On the back:
I love the pattern pops in the album that is primarily focused on photos + words.
SUPPLIES
Transparencies from 2023 Stories By The Month™ Kits
White Cardstock (for behind the plastic circles)
Vicki Boutin Color Story Vellum
Miscellaneous Vellum from my stash
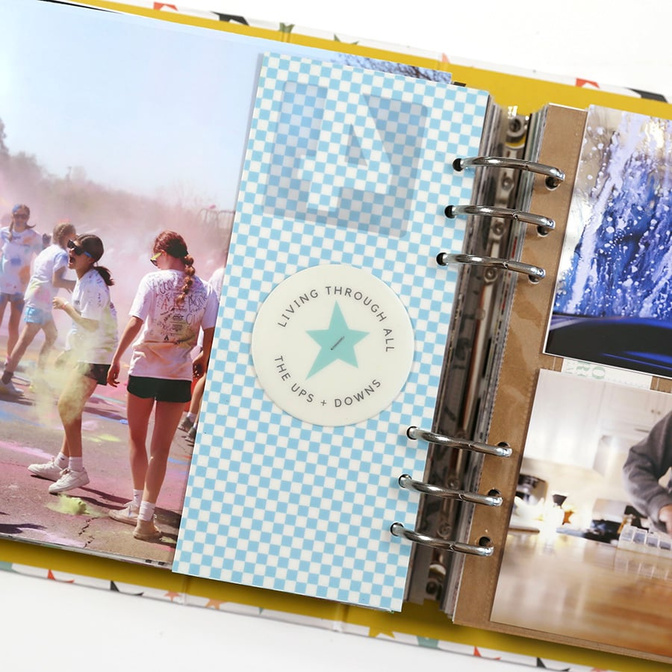
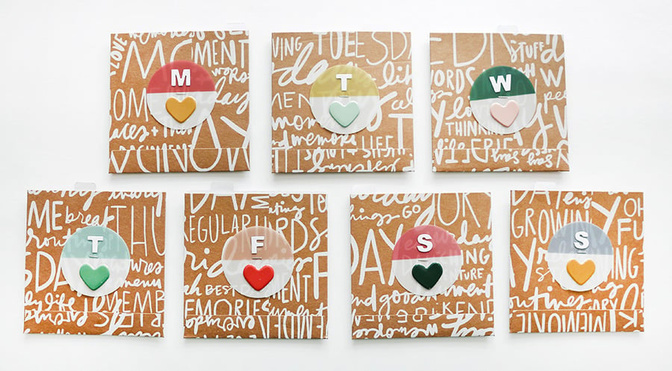
CHIPBOARD NUMBERS + VELLUM PHRASES
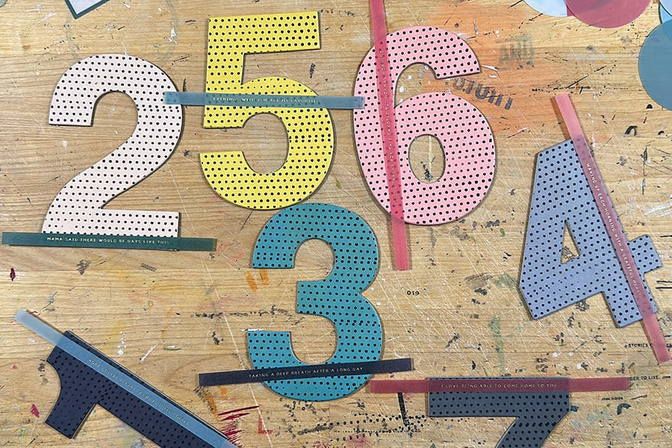
I knew I wanted to do a little something with the chipboard numbers in the Main Kit so I decided to pull out an old dotted stamp that I've probably had since I first started memory keeping back in 2002. You could replicate this look with a stencil or another pattern stamp. You could also stamp the days of the week or other sentiments on top. In addition to the stamping I also added the vellum phrase strips from the Mini Kit using red line tape. Each one of these is adhered to the days of the week transparency to start off each day.


SUPPLIES
Dotted Stamp from Savvy Stamps (super old) - a stencil could also achieve this look
VELLUM TAGS + WORD PHRASE STICKERS FROM MY STASH

I used the seven vellum tags from the kit to hold a fun collection of word/phrase stickers from my stash and used rolling adhesive to add them to some of the photo enlargements in my album.
SUPPLIES
Word/Phrase Stickers from my stash
DAILY KRAFT POCKETS
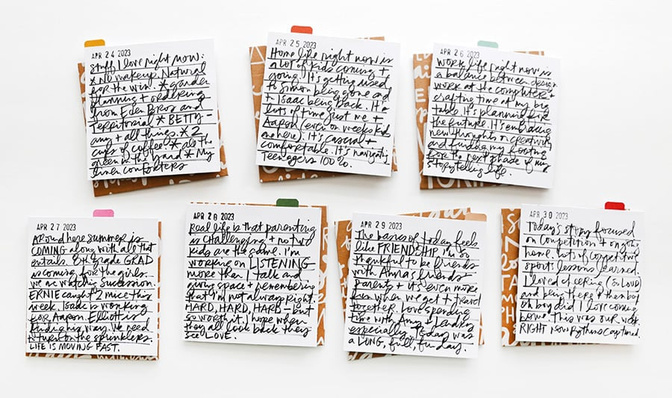
I used the small chipboard sentiments from the Main Kit as journaling prompts for my writing on the cards. I left the back side blank but you could easily add a photo or collage of photos if you were needing more homes for photos in your project.
I grabbed some puffy heart stickers from my stash to add to the plastic circles on the back of the craft pockets.
SUPPLIES
Puffy Hearts from stash
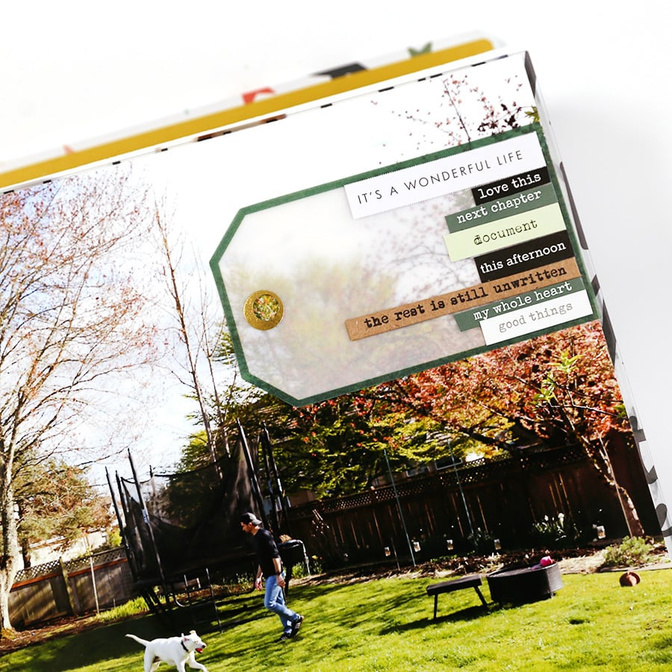
HIGHLIGHTS PAGE
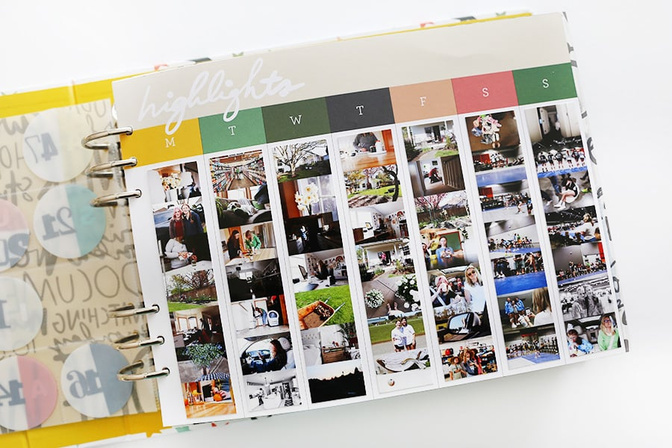
For the Highlights Page at the front of my album I decided to add photo strips to each day. These measure 1.25 inches x 6 inches. I love having this to begin the album.
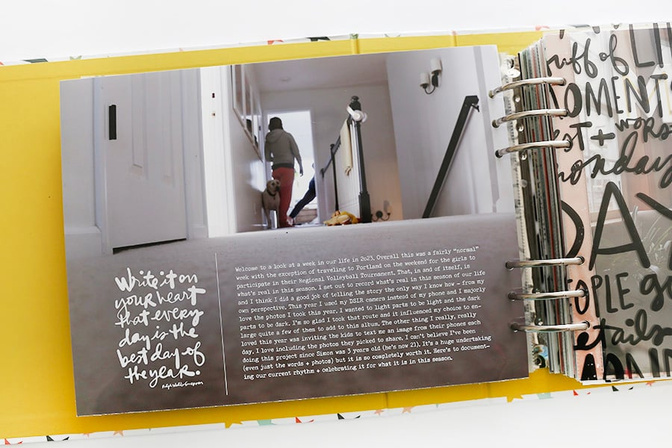
On the back of the Highlights Page I decided to add a full page photo with word art from the 10x8 Layered Template Set along with writing that's looking back at the project as a whole (written once I was almost done with the whole thing).
Thanks for visiting today! Tomorrow I'll share a full walkthrough of my almost-complete album.


Comments
Sign in or sign up to comment.
3 comments
Love how yours is coming together! Working on mine this week too. Thank you for sharing!
Replies to ahiggins83
Sign in or sign up to reply.
Love seeing all these embellishments! So fun! Especially love the big numbers with stamping and vellum phrases and the tags with word/phrase stickers. I wanted to do the photo strip idea on the Highlights page but I was at the end and done so I just added a large photo! Sometimes you reach that point! Excited to see the final flip-through.
Replies to Jeannew
Sign in or sign up to reply.
I am loving all of these ideas!!
Replies to justlisa
Sign in or sign up to reply.