December Daily® 2023 | Story 12
Tags: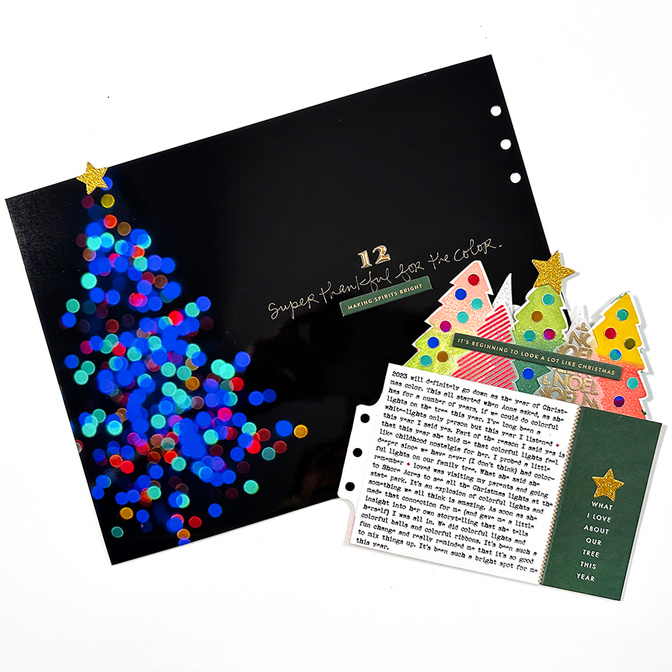
Welcome to Story 12 in my 2023 December Daily® album.
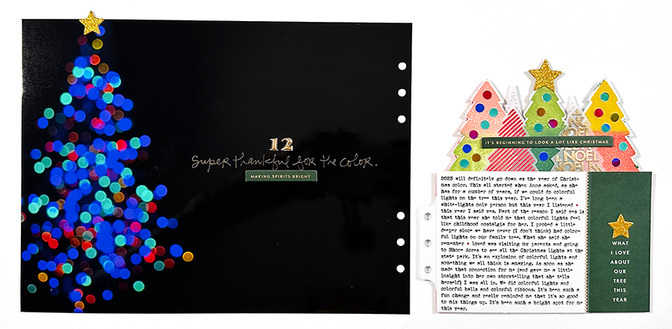
Today I'm telling the story of our colorful tree and how it came to be. In addition I'm trying out a Fine Tip Freestyle Foil Quill Pen for adding foil onto photos, embellishments, etc, and playing with sticker paper for getting my journaling onto my journal card. Today's video also includes a tutorial about how I extended this image to fit a full page outside the page protector (it was originally a vertical image).
Here's the post that includes the how-to for creating the stamped forest.
Let's dive in:
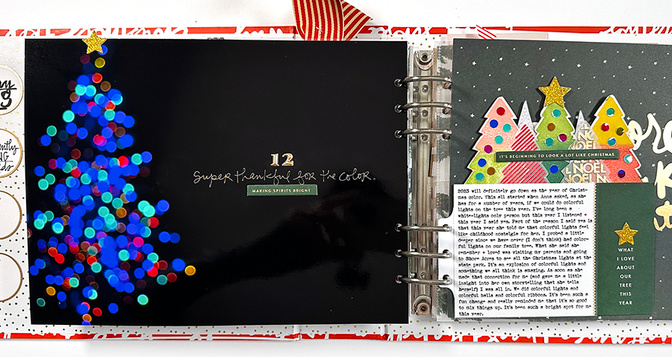
Full page photos forever and ever! This look is called "bokeh." Here's a tutorial you can watch on how to do it with an iPhone. If you don't have an iPhone just google "bokeh" and whatever camera you are using.
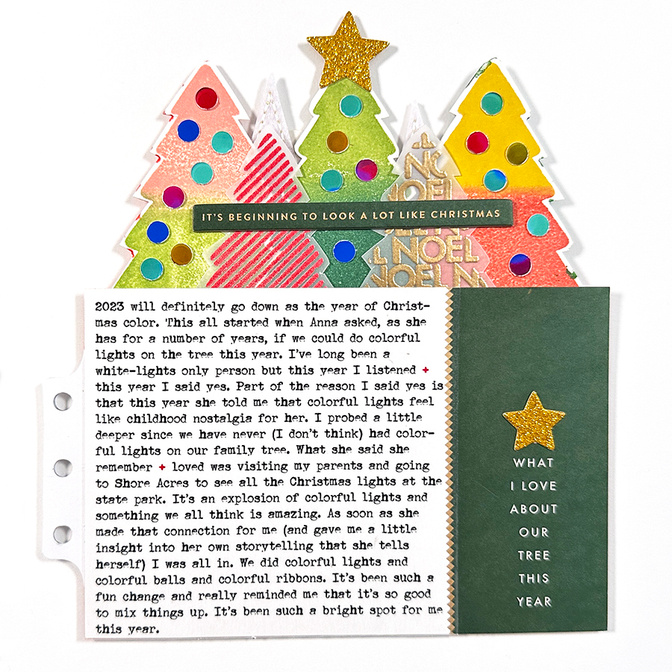
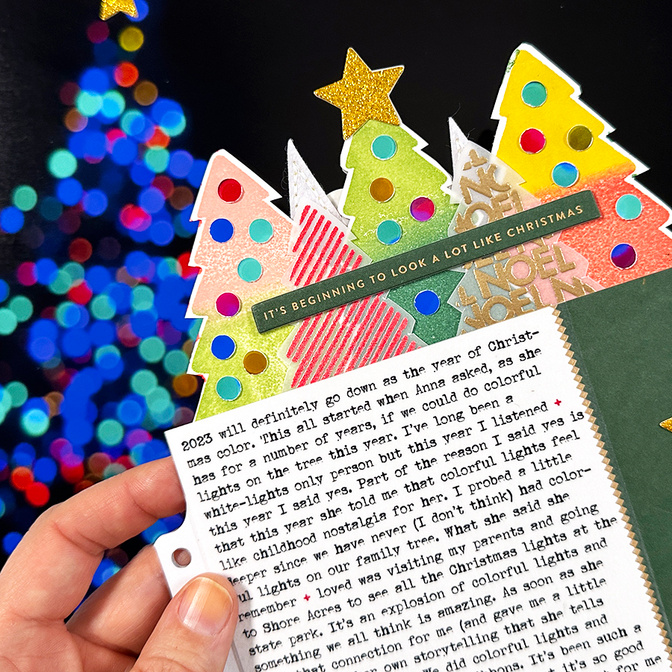
I especially love it paired with a super crafty little forest of stamped trees + my story about our colorful tree this year.
Originally I had a tree die cut insert paired with my little forest of stamped trees above my journal card. As I worked through this page I decided to take that out and just have it be the full page photo + the journaling and tree combo.
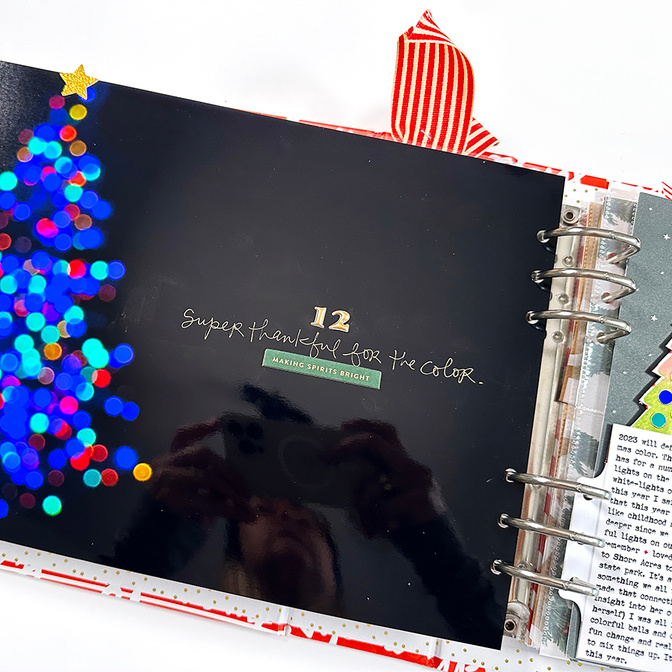
I tried out the Freestyle Foil Quill pen for the first time today and it was GREAT!
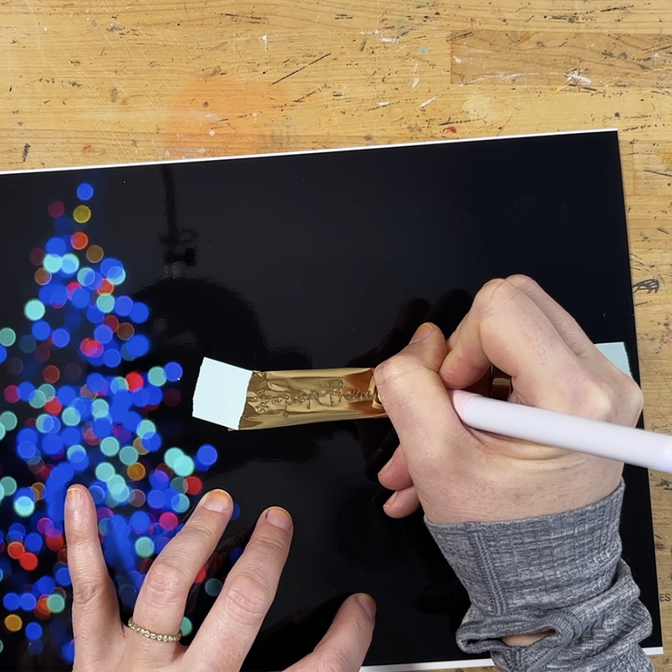
I have the fine tip version but now I definitely want to get the other ones. Such a fun way to add handwritten foil especially directly onto a photo. Above it I added the number 12 with the puffy numbers from the Main Kit and below I added a gold foil chipboard phrase.
Looks like they have a cordless version of the Freestyle Pen too.
As I was working through my story one of the things I decided I wanted to do was try to get some of the colors from the photo onto my little stamped + embossed forest.
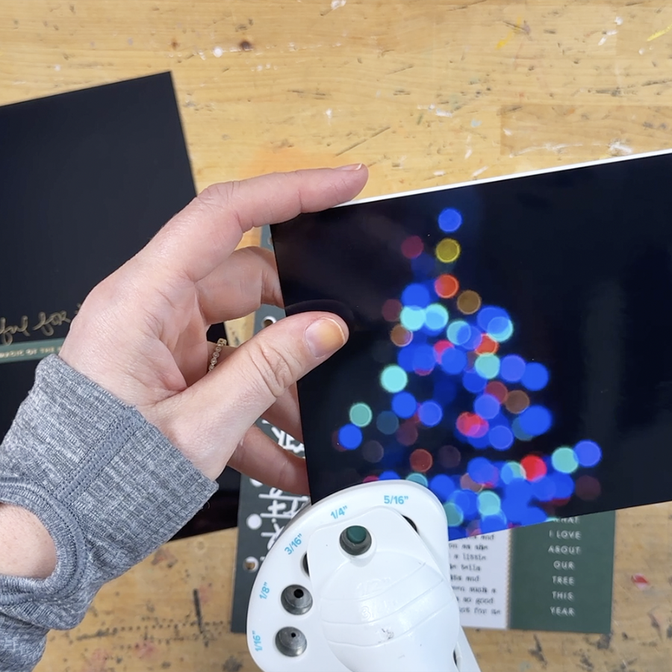
The way I decided to do that was by printing a second bokeh photo and using a hole punch to punch out some of the circles. This worked out really well as a way to bring the colors from my photo onto my journaling card gathering.
The other thing I wanted to try today was printing my journaling on Maco Sticker Paper and then adding it to my journal card. I measured out my journaling space and then set that up on my computer and printed it out. It also worked great!
SUPPLIES
December Daily® Specialty Journal Card Pack (digital available)
AED Inks: McKenzie (dark green), Willamette (light green), Redwoods (red), Rose Garden (pink), Honeyman (yellow)
Diary Of Belle Rose Sequin Mix (restock coming November 4th)


Comments
Sign in or sign up to comment.
15 comments
I think you can get a magnetic mat for the foil quill so you don’t have to use washi tape!
Replies to jdido
Yes that’s was what I was thinking! I have a cutting mat with magnetic..
Yes! I even have it already but wasn’t thinking about it - can’t wait to try it.
Sign in or sign up to reply.
Beautiful! Watching your videos are a lovely way to start each December day.
Replies to kylemiller3
I agree! Such a lovely addition to my morning routine!
Thank you!
Sign in or sign up to reply.
Thank you for sharing the video of how to use the clone tool to create the dark background. Always love bokeh!
Replies to lori2009
Sign in or sign up to reply.
I love using sticky paper for journaling. I shared that a few weeks ago on the december daily facebook page.
Dang it Ali, now I'm buying a freestyle pen! :)
Replies to kruth29
Sign in or sign up to reply.
My favorite of yours to date! Love this.
Replies to KarineC
Sign in or sign up to reply.
Love! The dots just pulled all together!
Replies to Jeannew
Sign in or sign up to reply.
Ali, I think this is one of my favorite layouts of yours so far. That quill pen! I have had a set of those (unopened) for at least 3 years! Definitely will start using them! Love the color dots on the trees and yes to sticker paper! Laura Wonski got me on to it!❤️
Replies to gr8scraps
Sign in or sign up to reply.
Ali, could you please share how you took the photo of the tree and kept such a black background. My tree still lights the room even if I have all the light off and no other lights. I think this photo is beautiful. thanks. Catherine A
Replies to cutler
Not Ali but I struggled with this too. My tree is in front of white wood blinds and no matter how dark I tried to make everything it just wasn't happening. I also don't get along well with the clone stamp tool and instead of just grabbing the black it was grabbing the whole picture. So I finally made a black canvas, used the object selection tool to grab only the tree and then copied it to the black canvas and it worked great!
Sign in or sign up to reply.
This is SO FUN!!! Love the look with the foil quill and the cute addition of the "lights" to the stamped trees! Great page!
Replies to ahiggins83
Sign in or sign up to reply.
You know I love the trick of expanding a photo to make space for text or embellishments. But, have you tried the new generative AI expand on photoshop? It's an option now to expand the photo and it will try to fill in what it thinks the remainder should be. It can fill in sky or a solid color easily like we've always done (like you do here) but also things with a repeating pattern... I used it to expand a portion of my table that has wood grain and it worked so well!
Replies to lindalovescreating
Sign in or sign up to reply.