December Daily® 2024 | Special Guest Jill Drangsholt
Tags:
Hello again! I'm excited to be back on the blog today with some ideas for ways to use the Scalloped Die Cut Tags. I always use a ton of tags in my December Daily projects, so this product (found in the embellishments section) was really fun for me to play with!
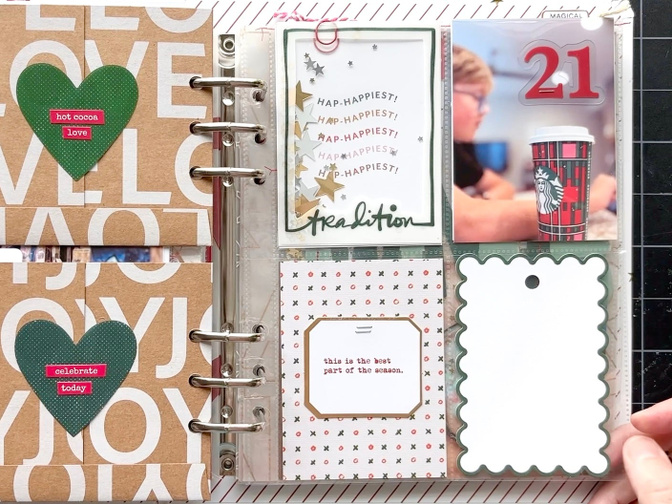
But before we get to that, I wanted to show you an example using last year's album of how cute they look when you simply slip them in a pocket. I love the contrast between the scalloped edges and the straight edges, and the little peek at the next page it gives you!
I have two projects for you today. One where I alter the tags themselves and another where I create cute pockets for them using the 3x8 vellum envelope.
PROJECT ONE
My first idea was to actually cut down the tags so that I could fit four on a 6x8 page. I love the look of just a hint of a scallop on the bottom of each tag. Watch the process video below to see how they come together and then check out a few photos of the project in process as well as the final layout.
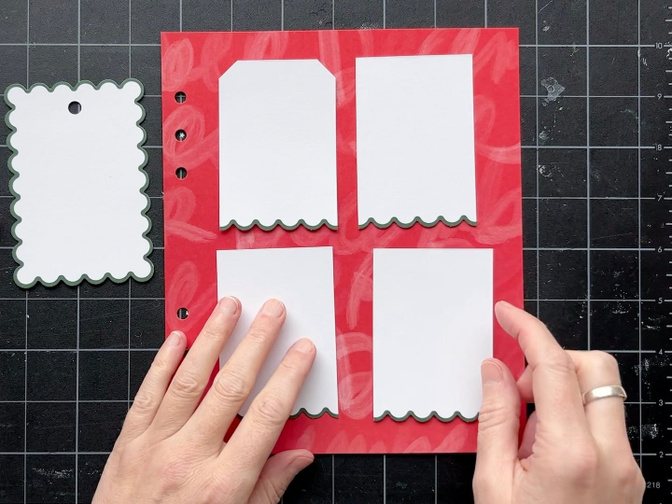
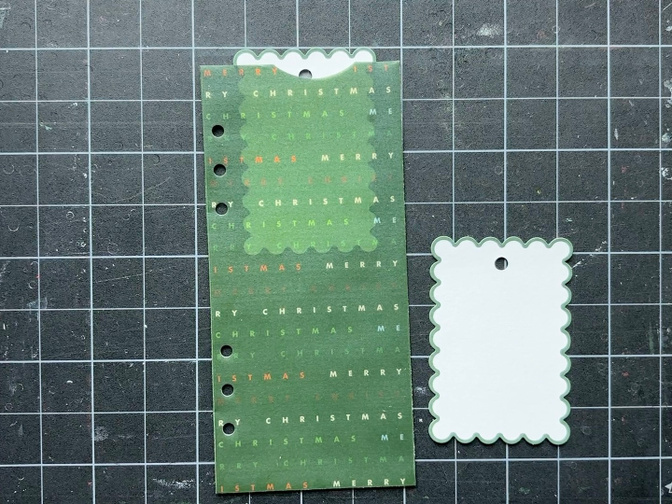
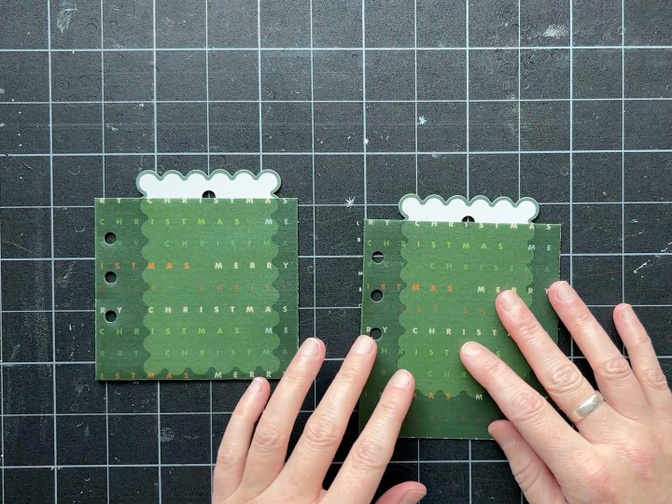
I really wanted to fit 4 tags on this layout, so I decided to cut down the tags to make them smaller. I cut off the scallops on both sides and cut the top off right below the hole. I love how they now have just a hint of scallop!
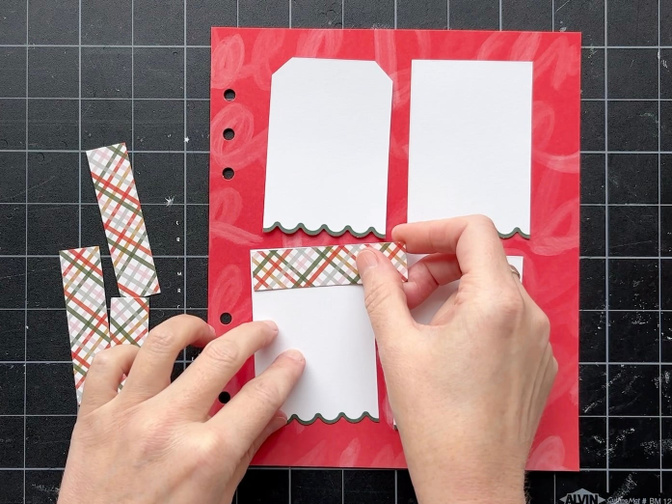
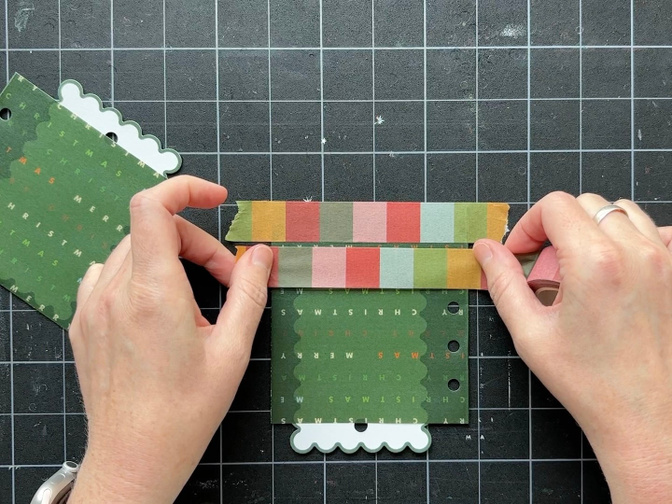
To further transform my tags, I added a .75 inch strip of patterned paper at the top. I chose to cut down this plaid 3x4 card from the mini kit because it had a small scale pattern and I love how colorful it is.
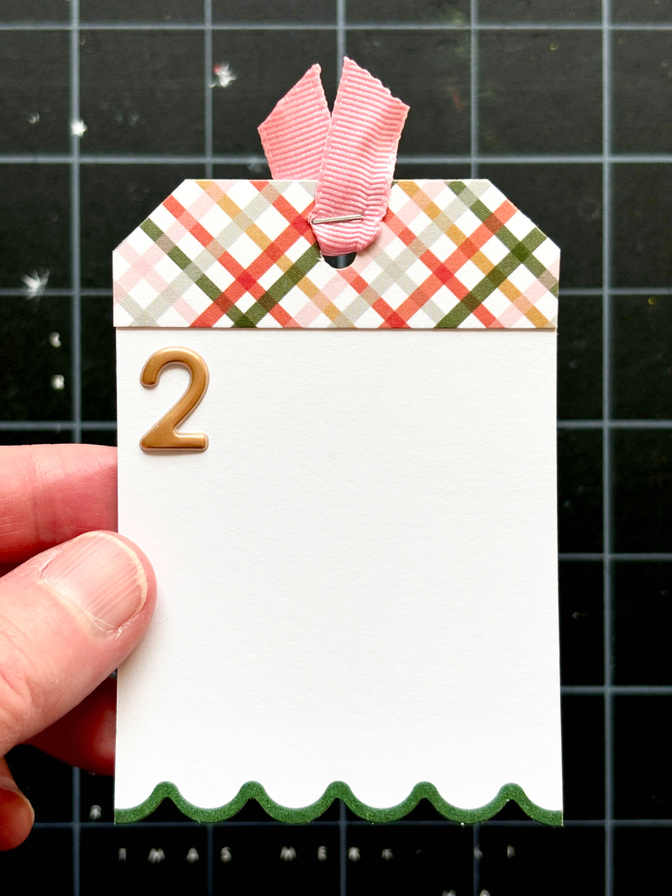
Then I used another tag as a template to cut down the corners, punched new holes at the top, and embellished with gold numbers a a pink ribbon.

I adhered my tags lightly to the background paper to give me flexibility later if I want to switch up the patterned paper or decide to put the tags on 3x4 cards instead.
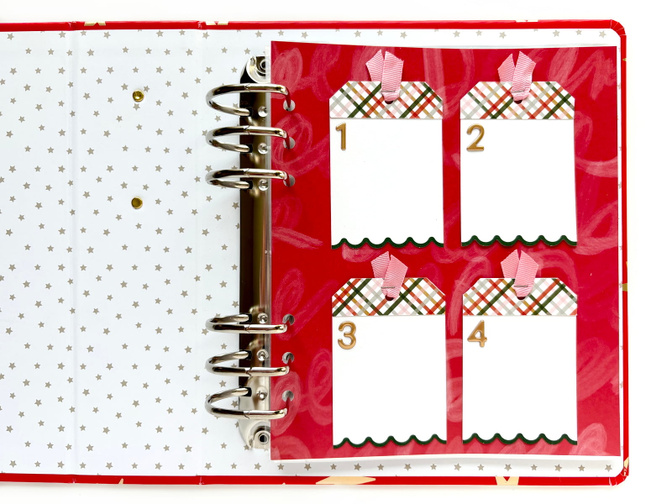
I'm excited to fill these cute tags with a story!
PROJECT TWO
For my second project, I really wanted to find or make a pocket for the scallops to peek out of. The only pocket I could find in this year's collection that fit this tag is the 3x8 vellum pocket from the envelope bundle. While these tags are way too short for that pocket, I really loved how they looked inside, so I decided to make it work by transforming it into two pockets!
Watch the process video below to see how I made that happen and then check out more photos of the process and the final project.
First, I cut off the bottom of the pocket right where I wanted the tag to peek out (left), then I trimmed off the top of the pocket to cut off the notch (right) and make it the same measurement above the hole punches as the other one. I used the text on the pattern as my guide because they are in the same location above both sets of hole punches.
Then I used washi tape to give myself a guide to stitch along the bottom of the top pocket and then trimmed off the excess. I ended up also stitching along the bottom of the other pocket just to make them match.
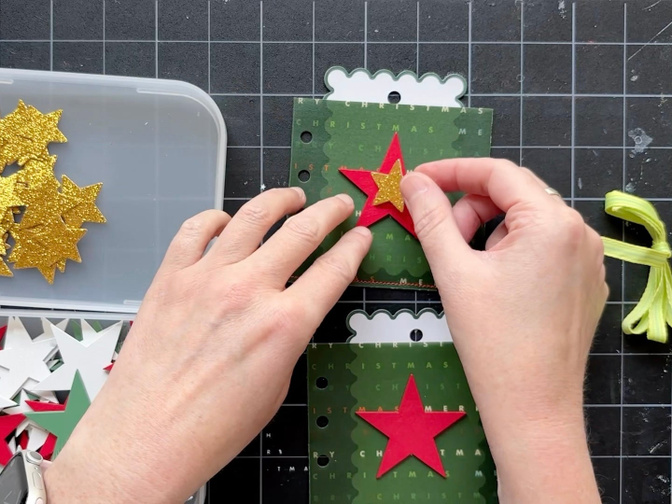
I embellished the pockets with some wood veneer stars, gold glitter stars, and a white puffy number. I also added a pop of bright green ribbon.


SUPPLIES
Main Kit
Paislee Press Mini Kit
I hope these two projects got you inspired to play with these tags and all of the other fun scallops in this year's collection!
I will see you again next week and in the meantime, you can find me on Instagram at @jill.drangsholt if you want to follow my December Daily journey and my other crafty adventures.


Comments
Sign in or sign up to comment.
13 comments
Thanks a lot Jill! Because of your CUTE ideas I added the tags to my box!!😆
Replies to laura_g_
LOL! I hope you have fun playing with them!
Sign in or sign up to reply.
Great ideas!
Replies to mrmama74
Sign in or sign up to reply.
Amazing ideas and terrific videos! Every time I watch one, I buy more product :) Thanks for sharing!
Replies to paperpicnic
Thank you!
Sign in or sign up to reply.
These are both such great ideas :) Thanks Jill!
Replies to jlutherdesigns
Sign in or sign up to reply.
Great ideas Jill, thanks for sharing! I love adding tags in pockets :)
Replies to asackr01
Sign in or sign up to reply.
Yeah, pretty sure I'm going to add these tags to my. box! Thank you Jill!
Replies to Kpadalik
Sign in or sign up to reply.
Loved the idea of making transforming an envelope into 2 pockets. (Would work great in the 4x6 album) Thanks for the idea!
Replies to rhondawilcox
That’s true! I forgot about that option. They would be so cute in the 4x6!
Sign in or sign up to reply.
Thank you Jill for these great ideas! I love the tags and love the way you made pockets with the envelope! So cute! I love your pup!
Replies to jackieb52
Sign in or sign up to reply.
Can I just BE you when I do my December Daily?? I swear, you can do no wrong. Your ideas are brilliant and your aesthetic is stunning. And Ali knew what she was doing with these previews... I know I added items to my December Daily box because of them! We are so lucky to be witness to your creativity! ⭐️⭐️⭐️⭐️⭐️
Replies to visualgirl
Sign in or sign up to reply.
Ahhh thank you! I have loved this opportunity to share my ideas on the blog. ☺️ Feel free to scrap lift any of my ideas!
Replies to Jill Drangsholt
Sign in or sign up to reply.