December Daily® 2018 | Days Five Through Nine Using A Travelers Notebook
Tags: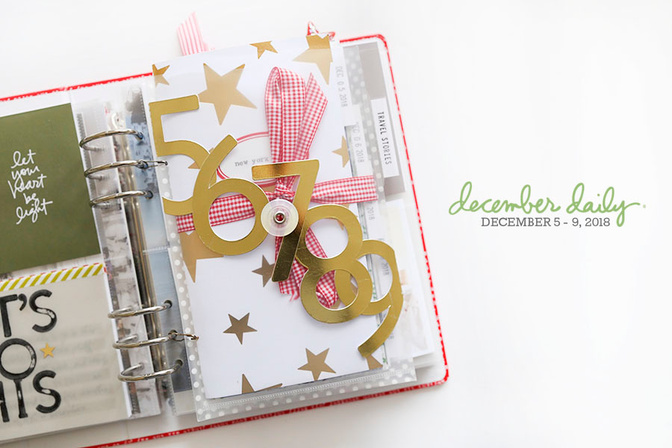
I'm super excited to finally share my December Daily® Days 5-9 from our trip earlier this month to New York City.
We ventured to NYC because it was Simon's choice for a 16 year old trip. He gave me a list of the things he wanted to do and see and we stuck pretty close to that with a few other things added in that the rest of the group was excited about as well. It was a family trip that included my Mom, my sister Jessica, my niece Gabrielle, Simon, Elliott, Katie and me. We had an awesome time seeing all that we could see over a couple days. Simon's favorite was seeing the Statue Of Liberty. Mine was seeing Hamilton.
I shared my initial idea and a walkthrough of this TN (travelers notebook) in my Foundation Pages post for 2018. This idea was an excellent solution for me to document this time we were traveling.
Here's my basic documenting method for this project:
Before Travel: Set up travelers notebook.
During Travel: Use the notebook to write down stories for each day day (basically a recap of what we did each day) while we were traveling, take photos, collect some ephemera that could be used in the project.
After Travel: Print full page vertical photos, add some ephemera, write up an "I want to remember" page, and add a few embellishments.
If you are interested in learning more about my approach generally to travel memory keeping I invite you to check out my Travel Product Play workshop.
I love how this turned out. The overview video below includes an in-depth look at the process I went through after we got home from the trip. I used the Canon Pixma MG7720 for printing all the photos used in this project.
Here's a look at how I brought it all together:
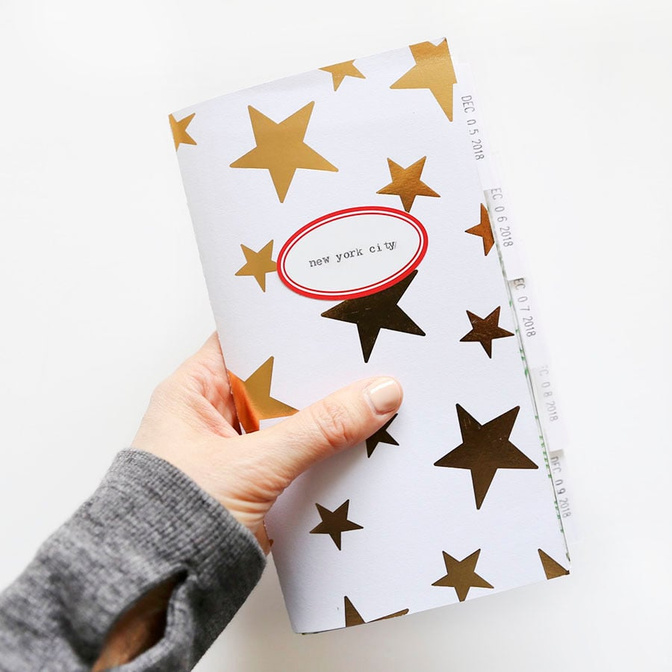
My MInd's Eye Starry Night Pattern Paper was used as the cover of my TN (travelers notebook). A red label sticker from the December Daily® Sticker Bundle was added on the outside.
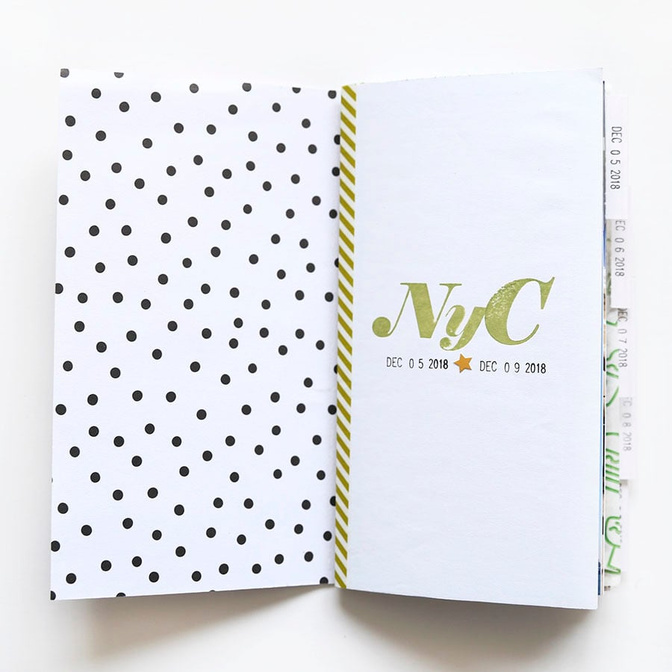
For the "NYC" I used my Mixed Alpha Stamp Set + green (Willamette) ink + a rolling date stamp below (this was all done before we left as part of my Foundation Pages for my 2018 album).
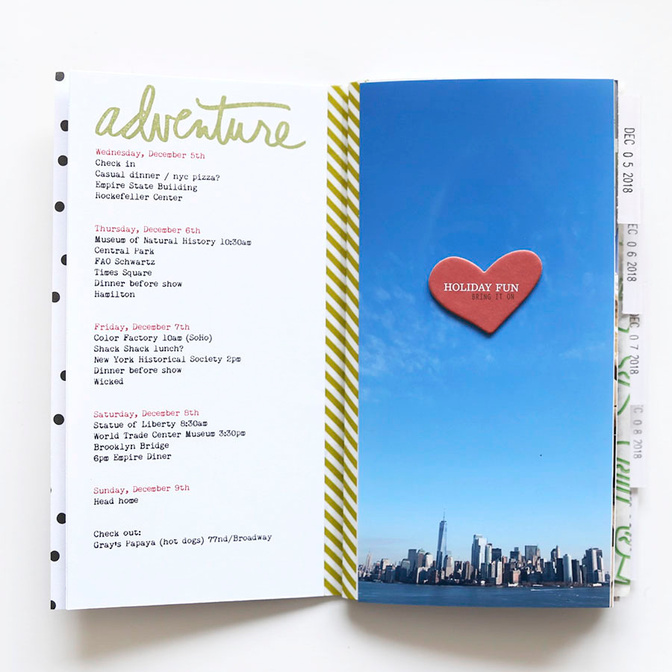
Before we left, but after I posted my Foundation Pages, I printed up this itinerary and added it to the album. I used the Large Travel Words 4x6 Stamp Set to add the word "adventure."
Make sure to check out the video at the bottom of this post to see the actual process I went through. Essentially I do all the words and photos first and then at the very end I add in a few embellishments. The chipboard heart here is from the Be Merry + Celebrate Chipboard Bundle.
Words + photos for the win. Setting up a place for words + photos in advance of the trip? Also winning.
My embellishment strategy was super simple: add word/phrase stickers to most of the photos. I love keeping it super simple like that and limiting the supplies I have access to when I'm finishing it all up.
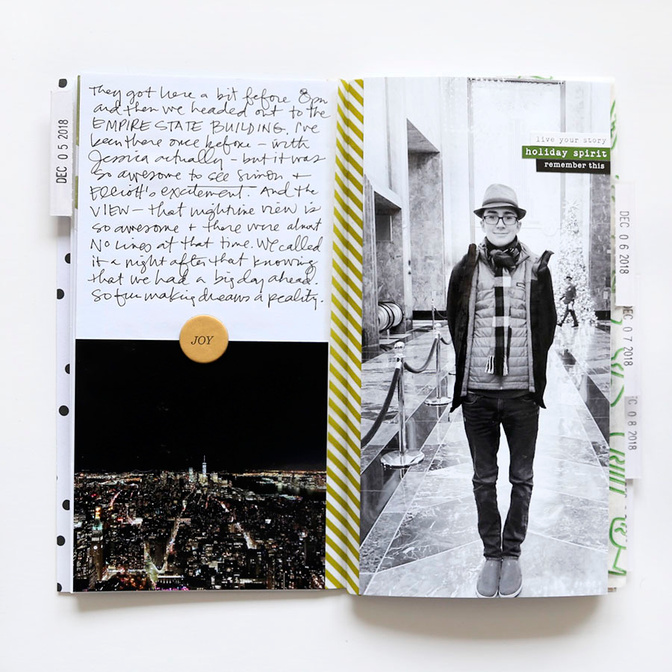
Joy chipboard circle is from the Be Merry + Celebrate Chipboard Bundle.
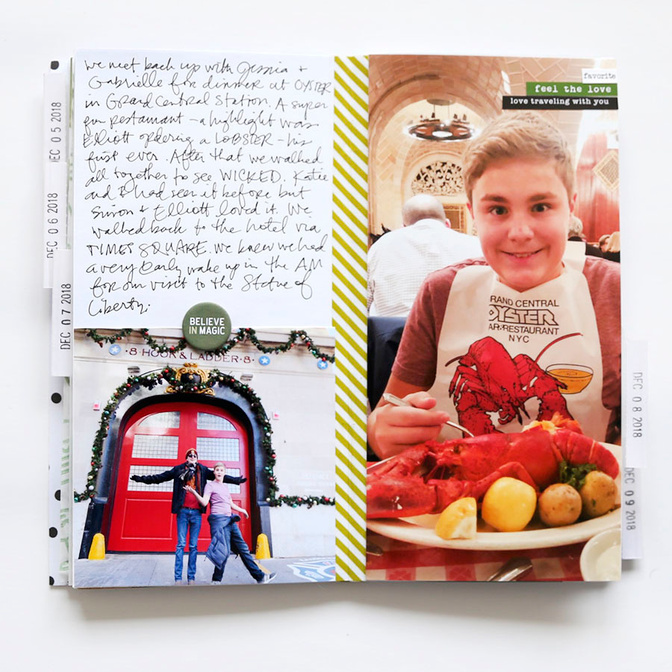
This trip was so awesome. All his favorite movies coming to life.
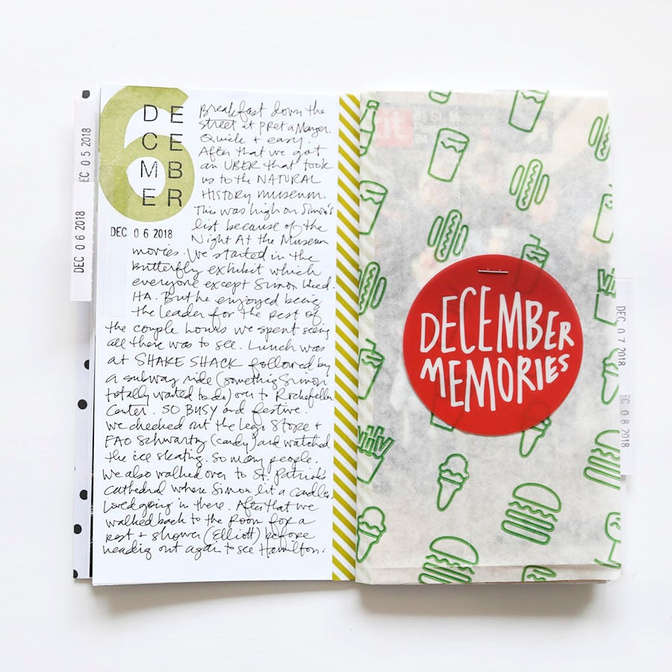
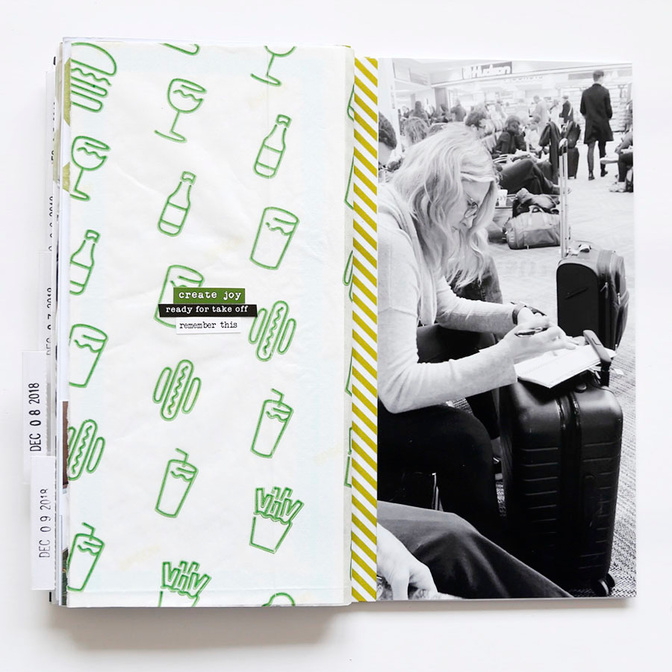
I loved incorporating things I picked up along the way like this sheet from Shake Shack. It's the liner they use on their trays and it worked great as another page in my album. I cut it to size and folded it in half and it became a page. Large plastic circle is in the December Daily® Main Kit.
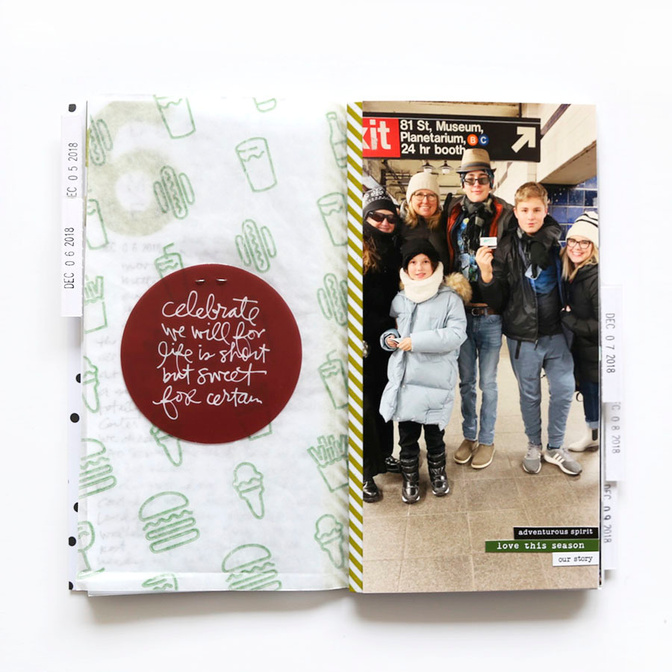
In the video you'll see my use a long-reach stapler to staple these two plastic circles in place.
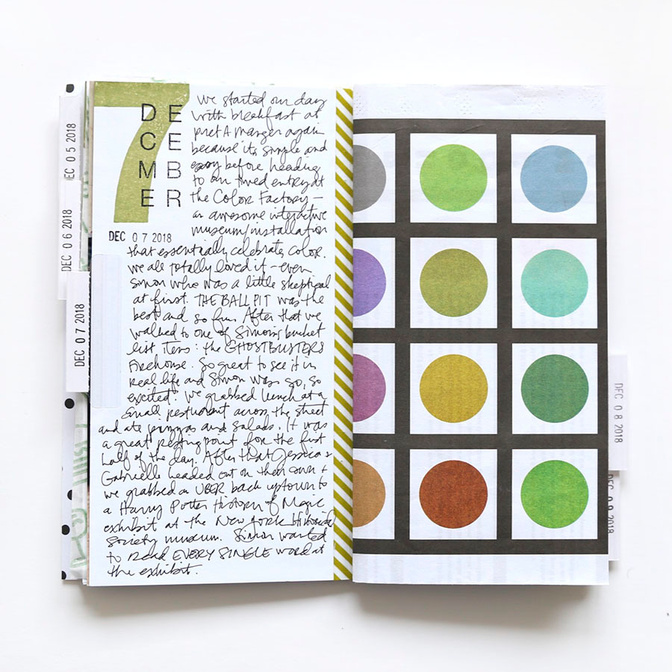
This paper was from The Color Factory which is an awesome temporary exhibit. If you are in or around NYC just go.
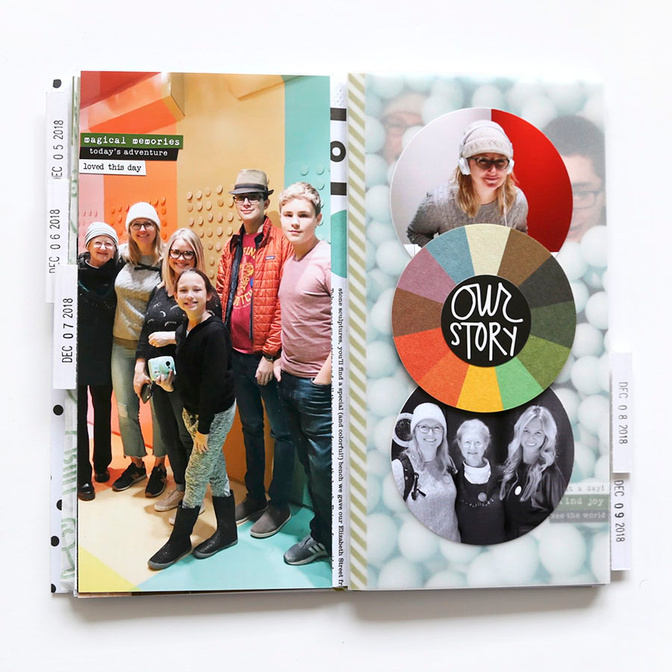
I added in a sheet of vellum to create another page. I seriously loved adding this vellum page and will definitely do that again in future TN projects. It was great as a home for a few additional photos that I punched using a 3 Inch Circle Punch. The "our story" circle sticker was from a past One Little Word® product collection.
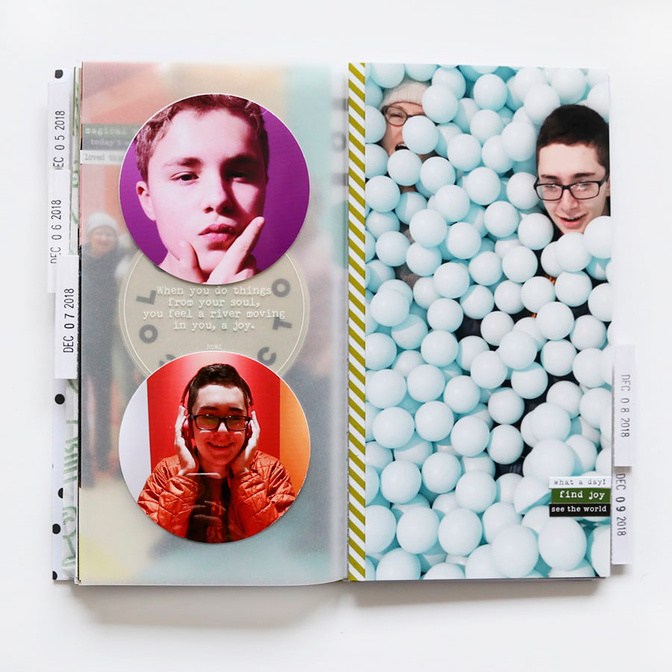
On the back I was able to repeat that same circle shape. I also added one of the clear plastic circles that were a recent Add On option for Story Kit™ subscribers.
Photos for the win.
For this page - which is the opposite side of the vellum - I cut out the bag I received when purchasing a book at the Statue Of Liberty. Super fun to cut that out and add it right onto the vellum.
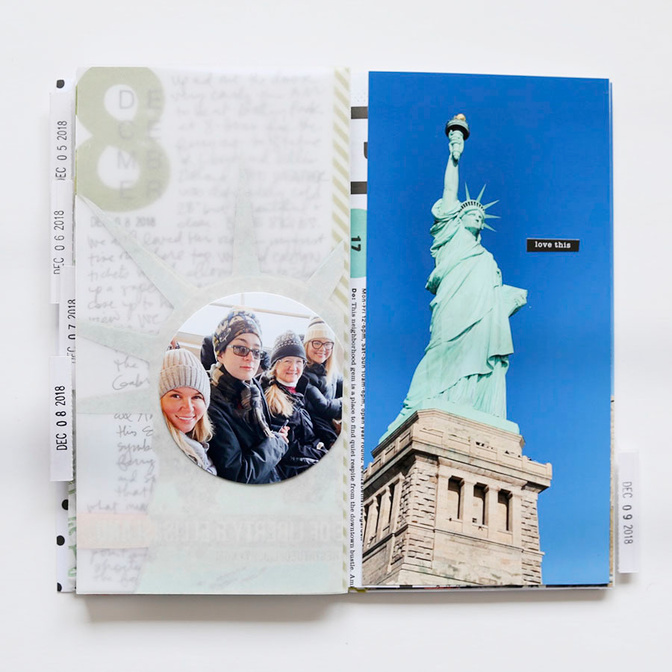
On the backside I used my 3 inch punch again for another photo of some of our group.
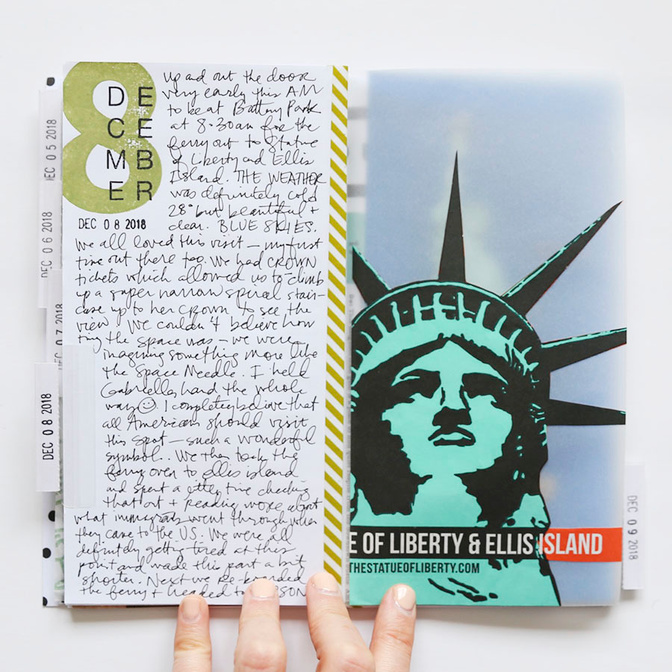
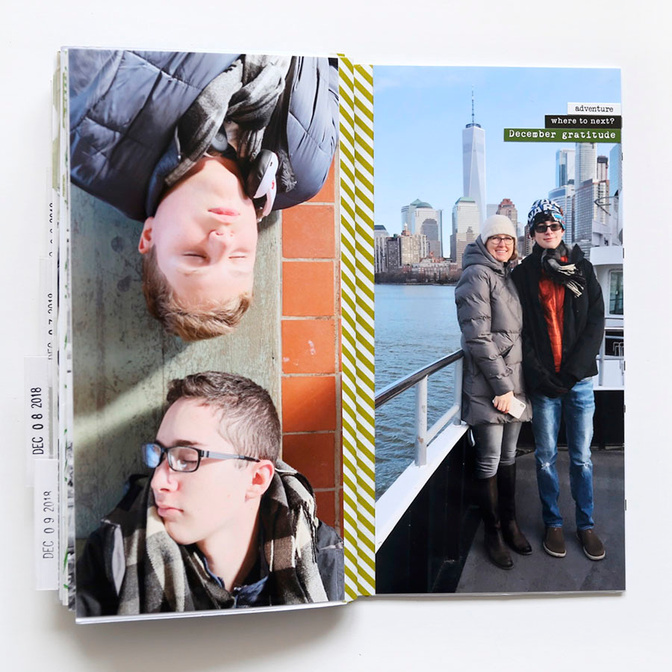
Seeing the Statue Of Liberty for the very first time in person was really moving. I would totally visit again.
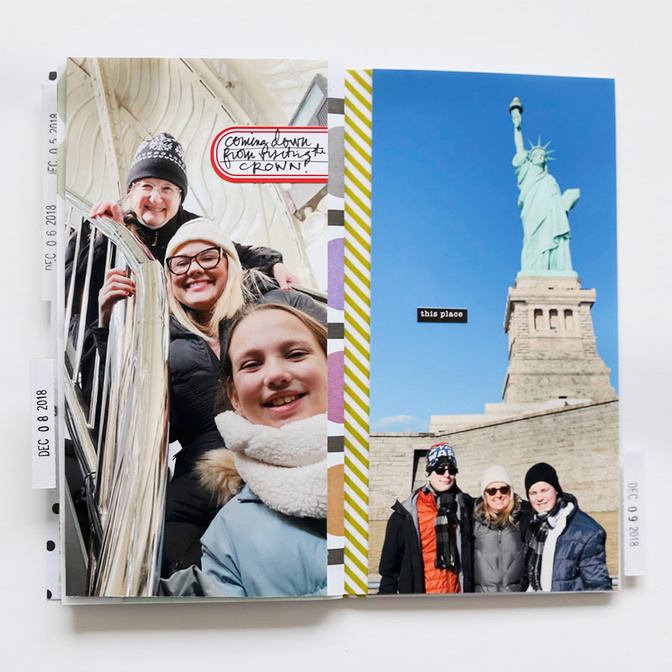
We made the climb up to the crown which is TINY. I had no idea how tiny it was. I held Gabrielle's hand the whole time - or maybe she was holding mine.
And the blue sky. Man. Hard to beat that.

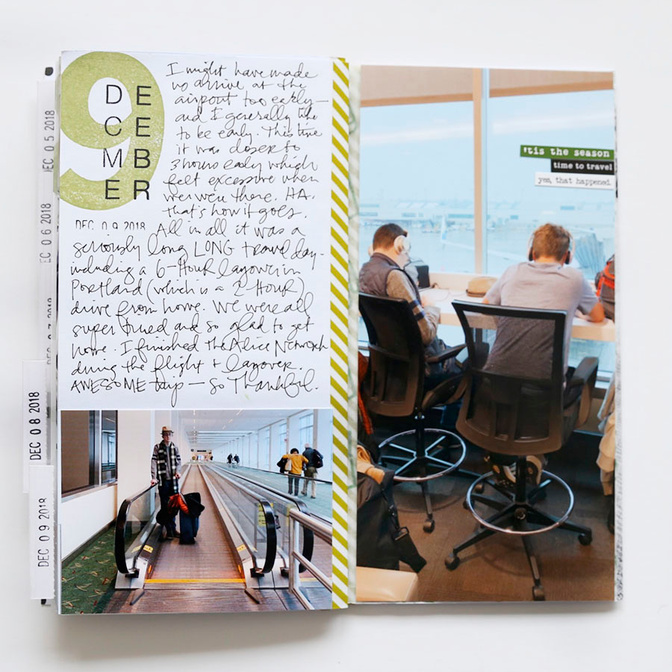
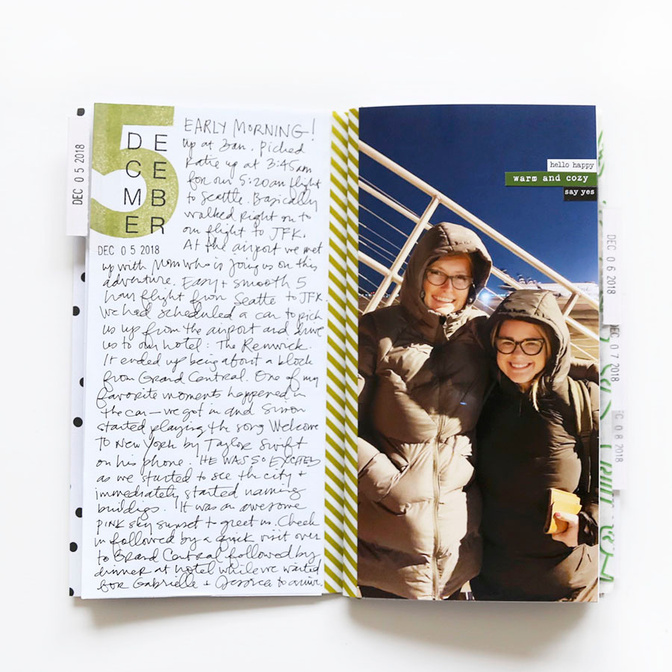
Definitely had to include a few photos at the airport. Our trip home was a super, super long day of hurrying up and then waiting.
I really loved taking just the little bit of time it took to jot down those initial handwritten fact-based pieces of our adventure.
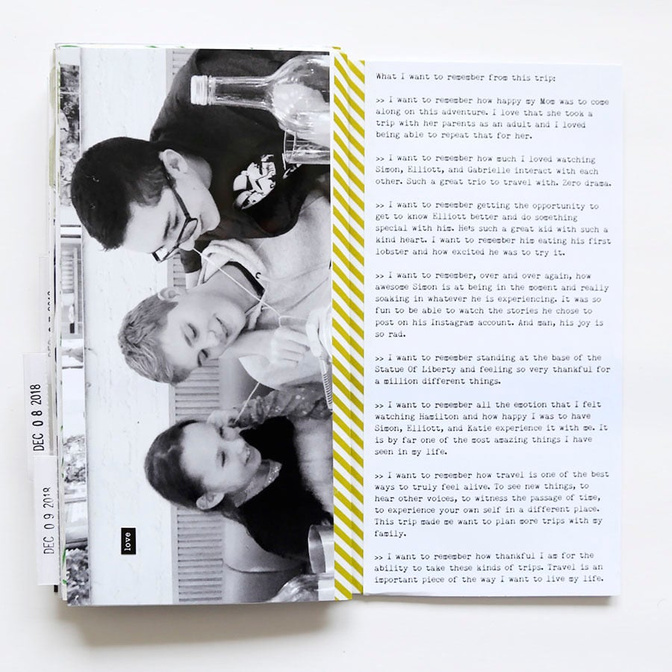
And I also loved coming back home and writing out a list of things "I want to remember" that are more from the heart reflections vs. facts about the trip. Having both these two styles of journaling within this one project makes the whole thing feel complete for me.
Love these guys.
Katie and I basically decided this should be an annual adventure and it should be our office Christmas party. Ha. I don't know if we will actually be able to make that happen but I love the idea. There is so much to see and do in NYC. This trip was really focused on the things that Simon wanted to see and do (his 16 year old trip) - which was just fine with all the rest of us. Also, we got our super puffy coats at Target (Champion brand) before we left and we LOVED them for the super color temperatures.
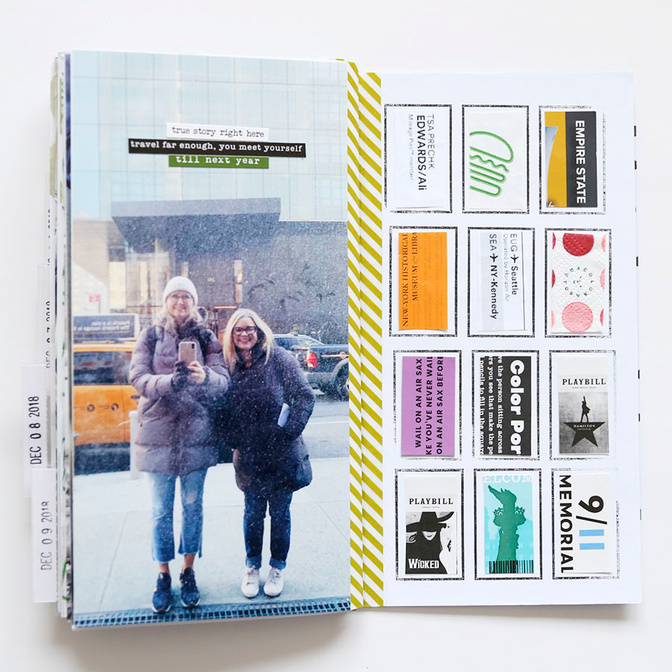
On this second to the last page I cut up little pieces of the ephemera I brought home to create this organized collage. Bits and pieces for the win.
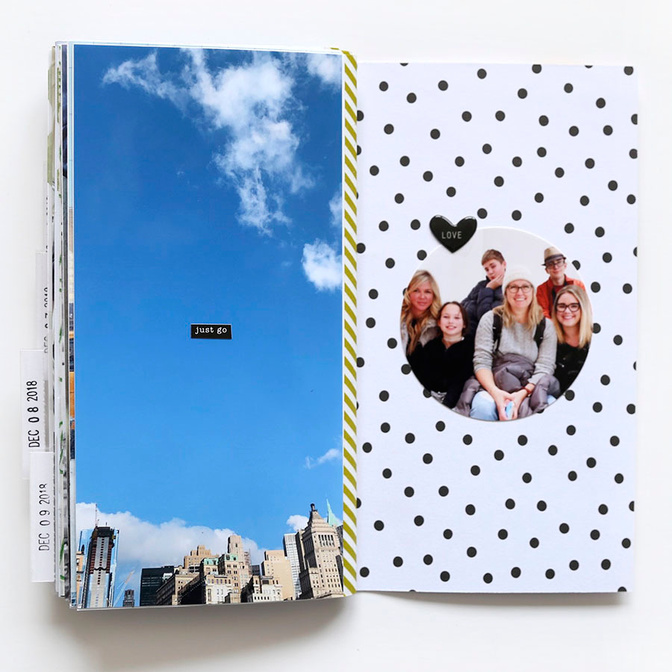
I finished up the album with another building/sky shot and a circle punched photo of our group taken by my Mom.
A couple things to note:
I initially thought I would be stapling the pages all together to create the binding. It ended up way too thick for that. At this time I'm just leaving it how it is as it seems to function fairly well when I flip through the pages (you can see that in the end of the video below as well).
Big thanks to my friend Jess for suggesting this as the way to tackle this piece of the month. I loved doing something different within the album and I loved being able to just experience the trip and have a plan in place for the storytelling when I got home.
I want to say a big thank you to the community for giving me the freedom to do something a little different within this project.
VIDEO OVERVIEW
SUPPLIES
Word Phrase Stickers from past Story Kits™ + other projects
Story Kit™ Envelope (to hold the TN in my album)
My Mind's Eye Joyful Collection Starry Night Pattern Paper (used for the TN cover)


Comments
Sign in or sign up to comment.
46 comments
Love, love, love this! We will be traveling the week between Christmas and New Years, and I am going to try this. idea for capturing that time. What I appreciate most is that you've made it so do-able... and done in a way that ensures you experience the moments instead of worrying about documenting all the time. That, to me, is priceless (and something I often need a reminder to do!). Thank you for this.
Replies to LynneGillis
Sign in or sign up to reply.
I love, love, love everything about this (and have bookmarked it for future reference) ... thanks, as always, for sharing!
And, blimey ... just how tall is Simon these days!!
I have Days 6-10 here: https://thiswestlondonlife.com/2018/12/14/december-daily-2018-days-6-10/
Replies to Maxpuppy
Sign in or sign up to reply.
When I clicked on your blog and saw this I might have screamed, "YES!"
I love this project (the DD) so much and all of the innovation you show us year after year, but this has been by far my favorite thing ever. I love the way you did the numbers on the envelope. I love how flexible this is. I like traveling during the holidays and I always have to really limit what I want to do, but this is perfect. I actually used an offshoot of this idea when I saw it on your site as I was finishing up my album from last year, and I will be doing something similar with a small journal I have for a trip we're taking to NY later this month.
This came out a million times better than i could have imagined, and my expectations were high on this one! Ha ha.
Replies to beriuqam
Sign in or sign up to reply.
Wow. Just wow. Thank you for sharing and for all you do for our “little” community of memory keepers. :)
Replies to cporter
Sign in or sign up to reply.
Love it! I have a theory that once you see Hamilton, every time you think about it you get a certain feeling. I call it the Hamilton experience.😊
Replies to Momany
Sign in or sign up to reply.
Loved it!
Replies to sparkle
Sign in or sign up to reply.
I love this Ali! Loved the papers you used, the pictures are stunning and glad everyone had a wonderful time!
BTW- when I click on your 3 inch circle punch link it takes me to some transparency sheets.
Replies to RhondaN
Thank you! I'll update that.
Sign in or sign up to reply.
Ali, you're an amazingly talented, organized and giving individual. You give us all inspiration in so many ways. Thank you for this memory keeping group and sharing so many creative ideas with us. I'm not sure how I'll use your TN idea in my album, but I definitely want to do something similar, I love it. And, sorry you came down with the sniffles during the holidays, but hope you and your family have a very peaceful and Merry Christmas!
Replies to Ruann
Sign in or sign up to reply.
I just LOVE this! And being to close to NYC (I'm in CT), I want to schedule a trip with my family. We've been several times but mostly to go to shows. We need to go as tourists and see the city that way! Thanks for the push and for sharing this awesome addition to your DD album.
Replies to hgauvin
Sign in or sign up to reply.
Really love how it all came together! I’m borrowing this idea for our trip to Texas Dec 27-31. Previously I know you said you didn’t punch holes in the story kit envelope as there wasn’t enough room. Did you just push the Tim Holtz pins through the plastic? Thanks!
Replies to ahiggins83
Pretty sure I used a paper piercer tool to get the holes in there first.
Makes sense! Thank you! <3
Sign in or sign up to reply.
Dang!!! I want to go somewhere for a few days just so I can do this!!! I love it Ali! It i fun and a GREAT addition to you DD.
Replies to ElenaFarinas
Sign in or sign up to reply.
This was so awesome Ali! I never thought I was a travelers notebook type of documenter but seeing the way you captured so much was really inspiring. Thank you for always sharing.
Replies to sobxgirl
I have felt like that before too. When I was working on it I really, really liked it for this kind of story.
Sign in or sign up to reply.
Ali, I appreciate all the effort it take to be able to share your process with us. I can honestly say looking at your blog and watching your videos is a highlight of my day in December. Work has prevented me (really busy at work) from finding leisure time with my own DD so I'm enjoying yours and those sharing on our awesome FB group.
Replies to tksbaskets
Sign in or sign up to reply.
I did the TN for a trip we took to SLC over 12/1-3. It worked great! Thanks for the idea. We are taking a trip to NYC right before the new year, so I'm thrilled to hear of someone else who went to Color Factory. It was on my list but I was on the fence. Now we are definitely going! Thx for sharing it.
Replies to erinnwenrich
We thought it was a really fun experience - something different.
Sign in or sign up to reply.
LOVELOVELOVELOVELOVE this, Ali!! And it makes me even more excited for my upcoming visit to NYC in January!! Now my head is spinning with ideas on how to capture that short (just 2 nights 😢) time along with the Kenya adventure! Thank you for all the inspiration!
Replies to tinka323
Sign in or sign up to reply.
Thanks for sharing your adventure...and your enthusiasm for capturing the story + photos in a TN! I’ve been wanting to try that medium and am now, after watching & experiencing your process, ready to give it a whirl for a trip I took to the PNW Sept 2017!
Happy Holidays and
Cheers~
Replies to Honore
Sign in or sign up to reply.
This rocks so much!!! I have been dying to see how you tackled this and it is just wonderful.
Sharing my current DD pages too:
https://avinashhecker.blogspot.com/2018/12/december-daily-day-12-trail-of-lights.html
Replies to nirupama01
Sign in or sign up to reply.
Ali, this is so cool. I've tried to make a TN for a couple of different trips because I like the idea of them, and I think your video made me realize what the missing link has been for me - setting up a design structure in advance! Love love love what you did here!
Replies to smultringunn
Sign in or sign up to reply.