December Daily® 2024 | Special Guest Jill Drangsholt
Tags: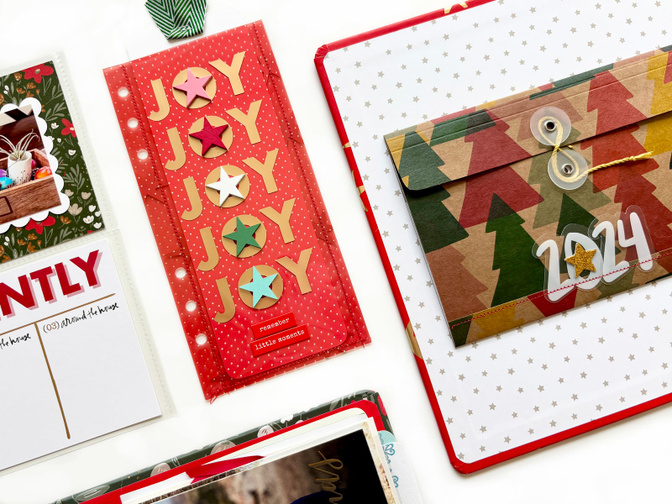
Hi friends! This week I have several ideas for you including creating a space for your reason why inside the craft tree envelope, a simple pocket page using the scallop cards, a pocket made out of the 3x8 transparencies, and as an added bonus I am showing you how I was able to fit 18 years of my Christmas cards into the 4x6 album!
PROJECT 1: REASON WHY
I have been thinking about how to use the colorful tree craft envelope in my album for several weeks and I am so excited to show you what I finally came up with! Of course, if you have the 10x8 album, you can just pop it in there and have a pocket read for your stories. But I'm using a 6x8 album, and didn't want to just attach it sideways because sideways trees just look weird!
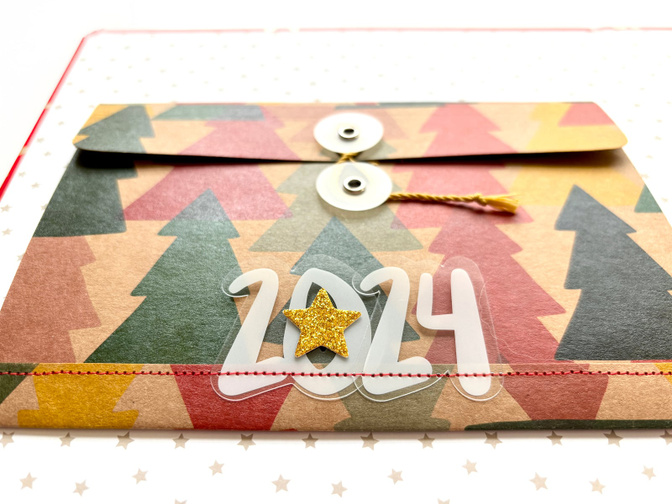
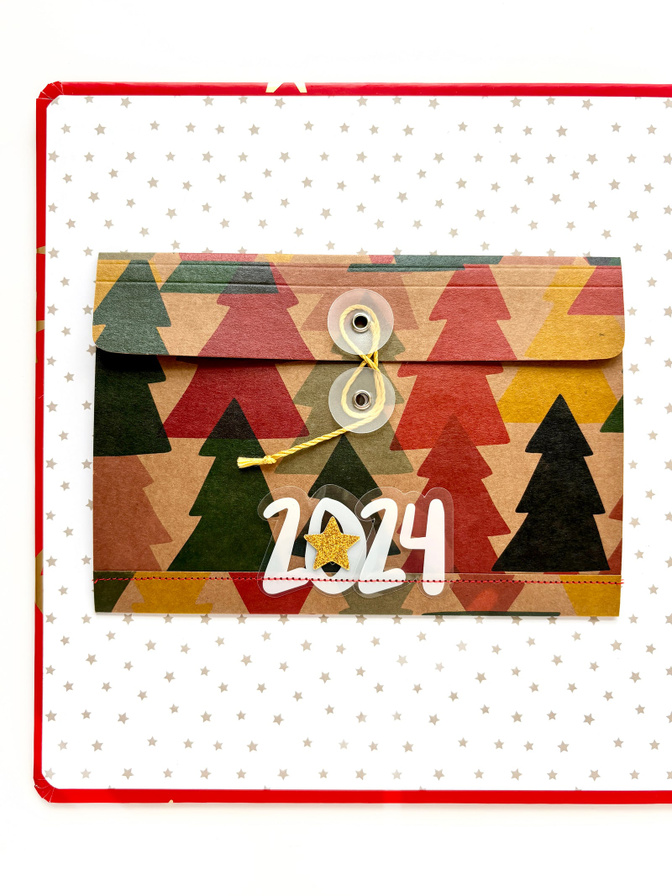
So I came up with two ideas. The first is to cut off both ends of the pocket so that it is 6 inches wide with the string enclosure in the middle and sew both sides back up with an attacher sticker sandwiched on the left side. That would give you a cute new envelope that fits in the 6x8!
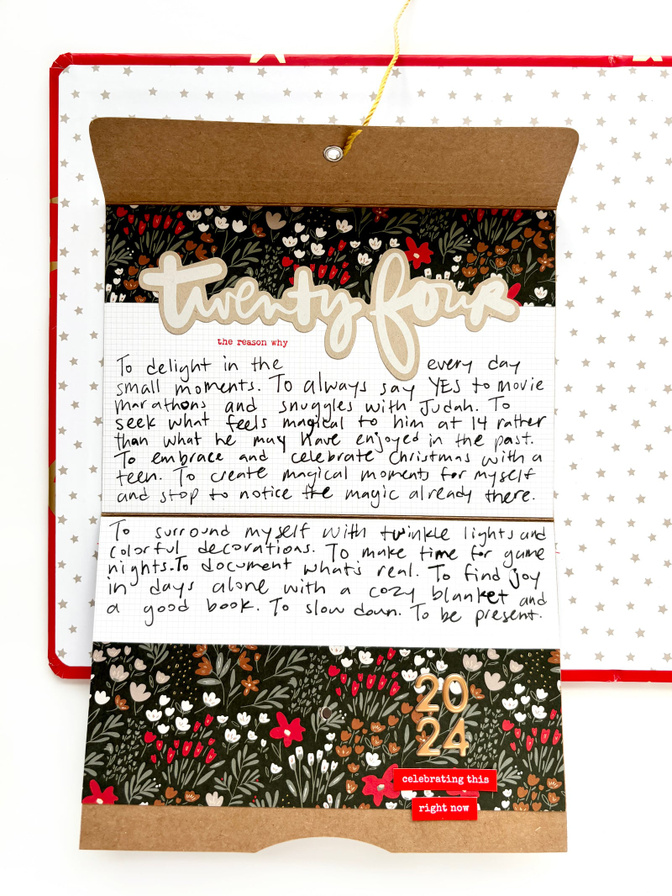
The second idea is for those of you without a sewing machine. You can skip sewing the sides and just leave it as a fold out element that you can tuck your photos and stories inside of. You can either add the attacher stickers like in the first idea OR you can do what I did and attach your new fold out piece onto the front cover of your album for your reason why! And if you are doing that, feel free to make it slightly bigger. I cut mine to be 7 inches wide.
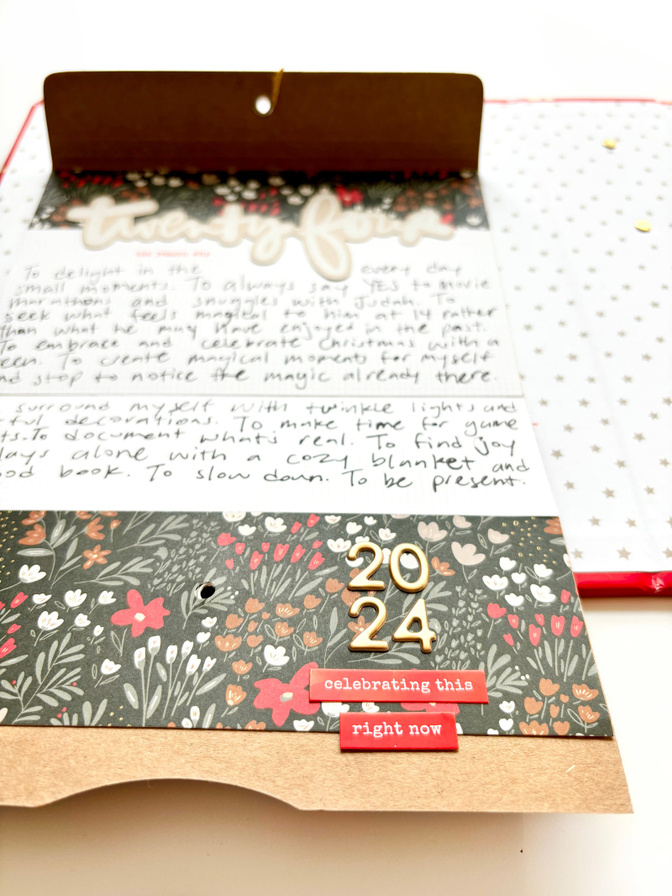
I love how cute this looks on the inside cover of my album! It would also look cute inside the 10x8 or the tree album. Check out the process video to see how it came together.
PROJECT 2: JOY POCKET
Another pocket?! Yes! I can never have enough pockets. LOL. I love this 3x8 transparency with the repeated JOY on it so much that I had to make something out of it. Last year I used a 3x8 pocket to do my Christmas day reflections, so I wanted to make a similar pocket this year. You could use the green one in the envelope pack, but I had cut mine up already last week so I made my own!
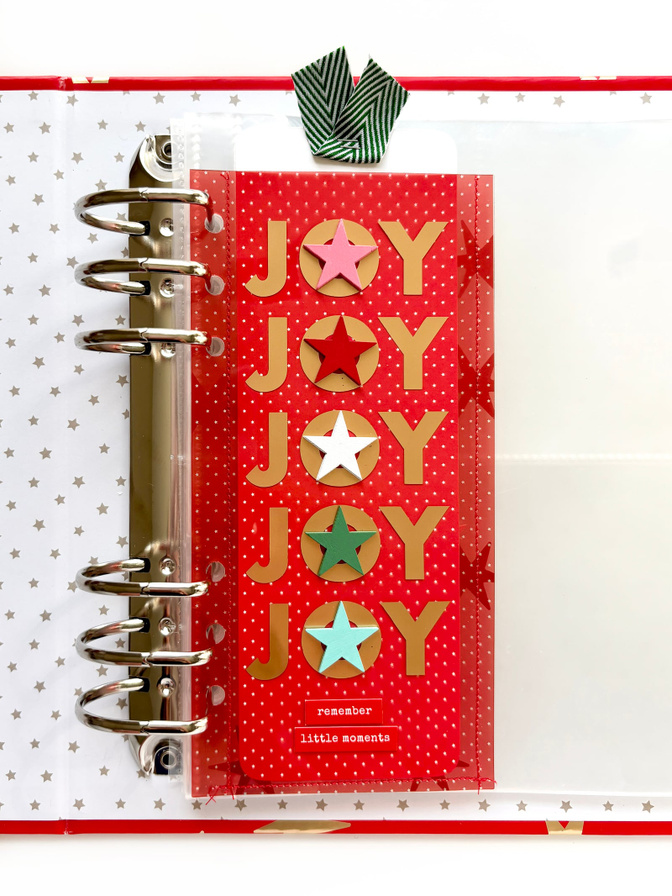
To embellish the pocket, I thought it would be cute to add the wood veneer stars in the O's of joy. But I really wanted 5 colors to go in the 5 joys and there are only red, green, and white stars. My solution was to paint two of the white stars pink and mint to match a few of the other colors in the collection. I love how they turned out!
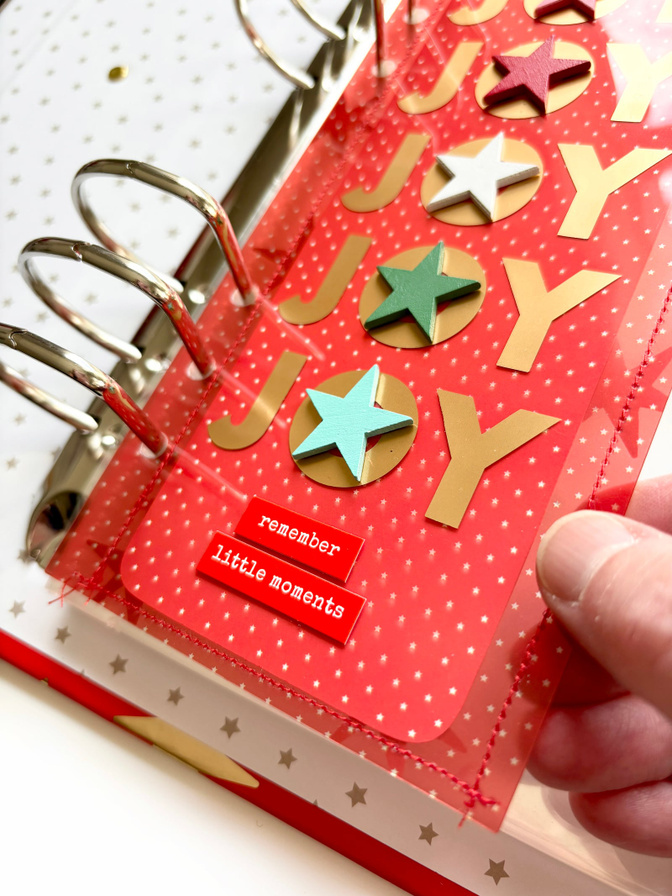
You'll have to watch the video to see my failed attempt at making a notch on the top that explains why the final pocket has the top of the transparency cut off with the tag sticking out of the top. Sometimes we just have to roll with it and I am still happy with my final product.
PROJECT 3: SCALLOP FRAME POCKET PAGE
For this easy pocket page idea, I wanted to show you that you can not only flip the scallop tags over to create a cute white scallop frame for your photos, but you can also layer multiple tags to make your frame even bigger!
If you have the 10x8 album, imagine how cute it would be to layer three of the scallop tags to make a really long frame for the 4x10 pocket pages?
Check out the process video to see how this came together.
PROJECT 4: CHRISTMAS CARDS IN THE 4X6 ALBUMSince I'm not using the 4x6 album for my project this year, I was determined to use it for something else. It's just so cute! So I decided to see if I could fit the last 18 years worth of my Christmas cards into it. The verdict is that YES with the help of the attacher stickers and some creative folding and hole punching, they all fit in there. Even the crazy big 6x8 card and the oddly shaped homemade ones.
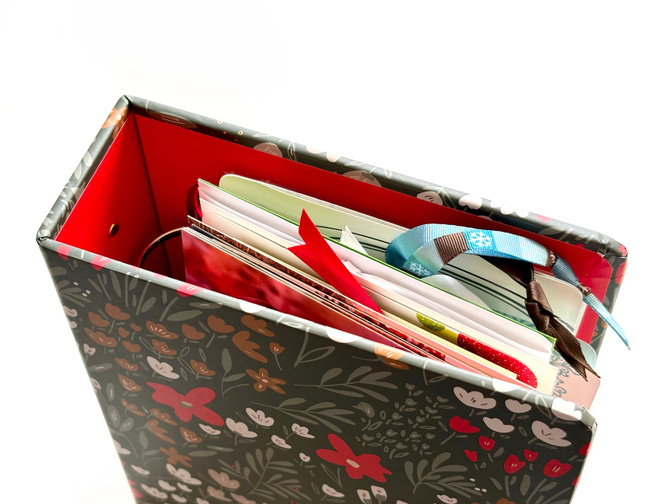
After doing this project, I really recommend the attacher stickers if you are using this album. The single hole ones work great for adding things into this ring configuration.
I think this would be such a great gift idea for a family member that may have been collecting all of the cards you've sent over the years. Mom, do you need one of these? 😉 Also, I got a little excited looking through all of my cards so this video turned into a bit more of a show and tell than I anticipated. Enjoy!
SUPPLIES
Paislee Press Mini Kit
December Routines Variety Die Cut Bundle
I will see you again next week and in the meantime, you can find me on Instagram at @jill.drangsholt if you want to follow my December Daily journey and my other crafty adventures.


Comments
Sign in or sign up to comment.
9 comments
Love your ideas as always. Your Christmas card album is so cute!
Replies to jillgaxiola
Thank you! I had fun this week!
Sign in or sign up to reply.
Love all of your inspiration Jill! Thanks for sharing with us!
Replies to reneemc63
Sign in or sign up to reply.
Thanks for sharing your ideas! I love the joy pocket with the stars.
Replies to asackr01
Sign in or sign up to reply.
Love the painted stars and the fold open envelope idea- thanks for sharing!
Replies to Julie_scraps
Sign in or sign up to reply.
I bought the same album to start book number 2 of my Christmas cards. This is year 33. I add stickers to the cards with the year and have also added fun Christmas items such as paper hand print cards etc that my children have made through the years. It is so fun to look back on the years! Now I’m adding my children’s Christmas cards to my album ❤️❤️❤️❤️.
Thank you for your inspiration!
Replies to KatieinOuray
Oh I love that you are on volume 2 of your card album! I’ll have to look at adding the years to mine.
Sign in or sign up to reply.
Thanks for sharing!
Replies to rhondawilcox
Sign in or sign up to reply.
For security, the app is fantastic, supporting features like biometric login (fingerprint/face ID), which is far more secure and convenient than typing in a password repeatedly. This added layer of protection ensures that my account is always safe from unauthorized access. Enhance your account security effortlessly by installing the app available at https://plinko-casino.pk/app/ and activate biometric access today. Knowing my funds and data are protected by modern security measures lets me focus entirely on enjoying my gaming.
Replies to User56073
Sign in or sign up to reply.