Weekend Creative : Love MiniBook/Card
Tags: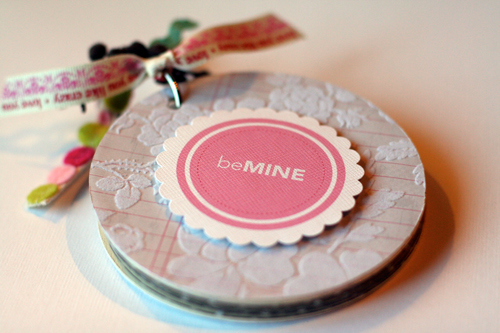
[ Jenni Bowlin Circle 4 inch Minibook; Creative Cafe Clear Sheet Dots; Little Yellow Bicycle Flocked Grey with White Floral Paper; Ali Edwards Love Circles; Ribbon: Narratives, random other pieces ]
Part card, part minibook this little circle creation is a great way to celebrate someone you love this Valentine's Day (or any day of course). This project uses my new Love Circle embellishments from Designer Digitals that you simply download and print (or use on digital projects). I showed a simple card idea with them last week here.
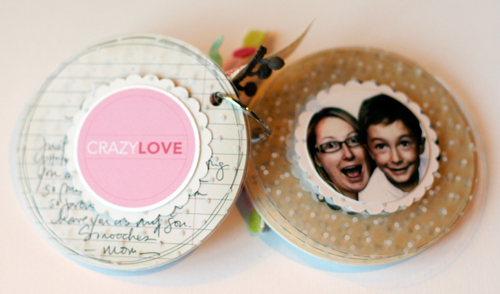
Here's a look at the interior:

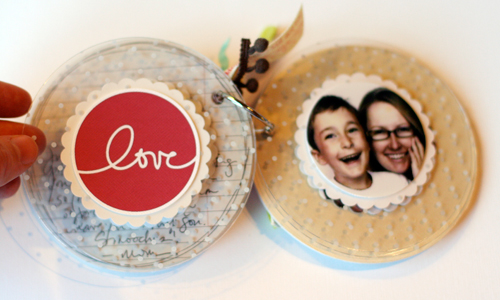
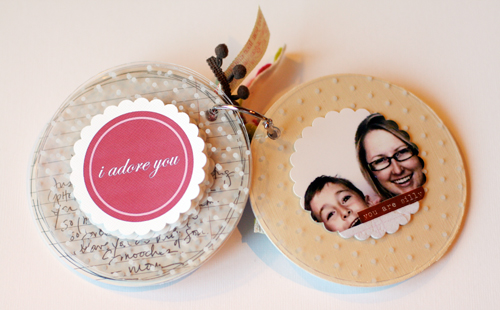
A short note opens the card/minibook with the following pages cut (using a Creative Memories circle template) from a thick transparency from Creative Cafe. Each transparent page has a photo on one side and one of my printed Love Circles from Designer Digitals on the other side.

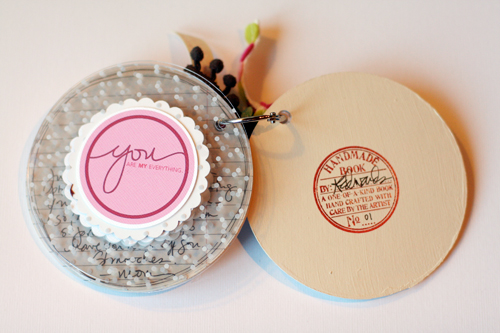
The great little "handmade book" stamp is from Cats Life Press. Ink is from StazOn.

 • Cover the Jenni Bowlin 4 inch circle chipboard minibook with Little Yellow Bicycle textured patterned paper on the front cover and the back cover and painted the interior chipboard covers with cream paint. I love the flocked texture paper for the covers of little books like this - gives it a nice soft feel (fabric would also be a great cover). I ended up not using the interior circle lined-pages for the minibook itself but will hang on to them to use them in a future project.
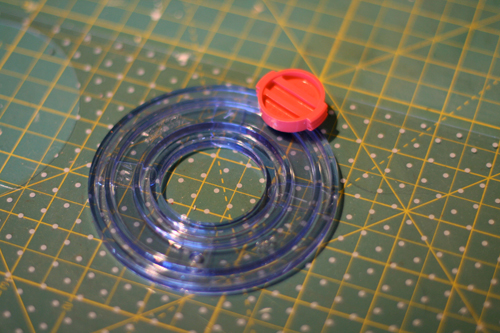
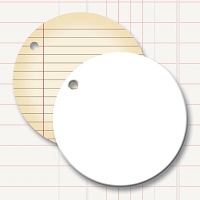
• Cut out 5 circles (or as many interior pages as you want for your book) from the Creative Cafe white dot transparency (I used this Creative Memories circle cutter). This is a very thick transparency which works great for interior pages of a minibook. I also love to use Hambly overlays for projects that really need a thicker sheet.
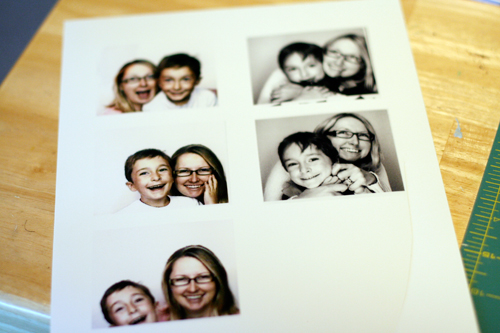
• Choose, scan, and print your photos. I scanned in some of my favorite photo booth pictures (I have used these in projects in the past) and organized them to print on one 8.5x11 sheet of photo paper. The photos were scanned (and enlarged) to be about 2.5 inches wide.
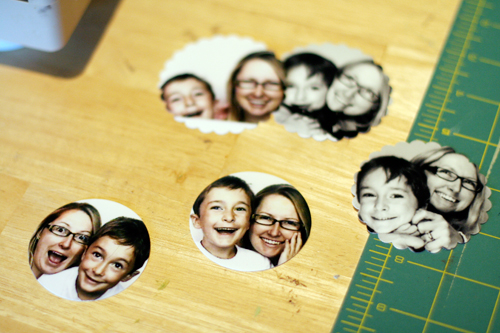
• Punch the photos using the Marvy Giga Scallop Circle Punch and a McGill circle punch. I wanted both regular and scalloped circles to work back to back with the Love Circles (available here):
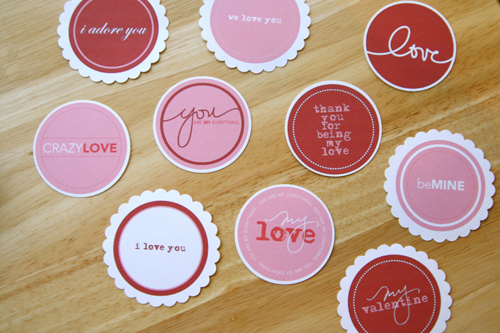
• After punching out my photos and the Love Circles I simply adhered them back to back on each of the interior pages. I chose to do photo on the front, Love Circle on the back. Very simple and quick to put together. I am planning to give this to Simon on Valentine's morning at breakfast with a couple other little goodies.
To finish off the book I added one circle to the cover and a gathering of ribbons on the metal ring that holds it all together.
Enjoy your weekend!

[ Past weekend creative projects can be found here. ]


Comments
Sign in or sign up to comment.
93 comments
That is so cute! I love your new circle/scallop circle designs!
Replies
Sign in or sign up to reply.
This is sooo cute and wouldn't take much time at all...instant gratification!!
-Sarah
Replies
Sign in or sign up to reply.
So pretty, Ali! One silly question.... Are those pics from "real" photobooth or using the photobooth feature on your mac? Just curious as I haven't done much with the photobooth feature on mac yet and wonder what the quality of the pics are. thanks!
Replies
Sign in or sign up to reply.
Love the mini-book and such a great idea to give to Simon on V-day morning. He will be so thrilled. I will have to use this when my kids get a little bigger.
Good luck with Baby A - sending healthy labor vibes your way!
Replies
Sign in or sign up to reply.
LOVE it!! So,so sweet.
Replies
Sign in or sign up to reply.
What a fun and creative mini album! I really like the idea of having "clear" pages for all of the interior pages of the album. I'm sure Simon will love this little treasure!
Replies
Sign in or sign up to reply.
This is so small and adorable! I made something like this for a book call. maybe you'll see it in there. Hey, good luck on the coming of baby #2 :)
Replies
Sign in or sign up to reply.
So cute. Such a great idea.
Replies
Sign in or sign up to reply.
always inspiring & awesome. love it. thank you for sharing.
Replies
Sign in or sign up to reply.
This is a great project. Love that it is simple and could be made quickly for many family members. I'm sure Simon will love it!
Replies
Sign in or sign up to reply.
Love it, think I will do one this weekend.
Replies
Sign in or sign up to reply.
Ali, I absolutely love this. I have two boys and was thinking about doing something like this for them individually. To show them that I love them both, the same, and differently. Thanks for the inspiration!
Replies
Sign in or sign up to reply.
Oh my gosh, so cute!
Replies
Sign in or sign up to reply.
Just love this idea, Ali! So CUTE!
I'm not one to make mini albums (I barely have enough time to work on my family's full-size albums!) but I've ordered some materials to make two of these for my sons...LOVE the idea! And they'll each love having an album all for themselves!
Take care,
PAM
Replies
Sign in or sign up to reply.
LOVE this. Sweet, sweet celebration.
Your minibooks are always so adorable and so doable!! Thanks for the inspiration, as always.
Replies
Sign in or sign up to reply.
LOVE IT!
I never though of cutting the transparency to make a mini-album page! Thanks for the inspiration!
Replies
Sign in or sign up to reply.
I love love love this!! I actually just finished sewing up your little red felt book project last night for my family (3 in total) But I will be keeping this archived for next year (or maybe just to say I love you...really do we have to save it for Valentines?) I'm new at this and still collecting all the gear but I love your ideas!
ps - my daughter's an "a" too! Hope yours comes soon!! You have definitely inspired me with all the initials. I feel a project coming on!!
Replies
Sign in or sign up to reply.
Very cute! I love that it is so simple and quick to make.
Replies
Sign in or sign up to reply.
ADorable!!! LOve the ribbon on the ring as well. SImon is a very lucky little guy.
Replies
Sign in or sign up to reply.
Ali - could you please share what you printed your digital circles on - Photo Matte Paper or standard cardstock? They look great!
Replies
Sign in or sign up to reply.