Weekend Creative : Love MiniBook/Card
Tags: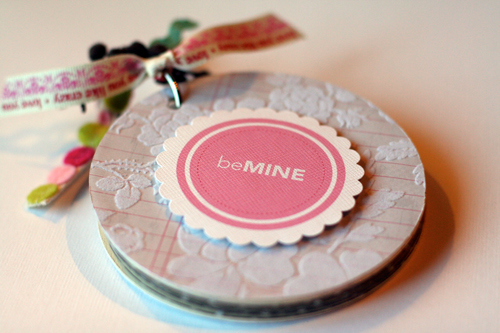
[ Jenni Bowlin Circle 4 inch Minibook; Creative Cafe Clear Sheet Dots; Little Yellow Bicycle Flocked Grey with White Floral Paper; Ali Edwards Love Circles; Ribbon: Narratives, random other pieces ]
Part card, part minibook this little circle creation is a great way to celebrate someone you love this Valentine's Day (or any day of course). This project uses my new Love Circle embellishments from Designer Digitals that you simply download and print (or use on digital projects). I showed a simple card idea with them last week here.
Here's a look at the interior:

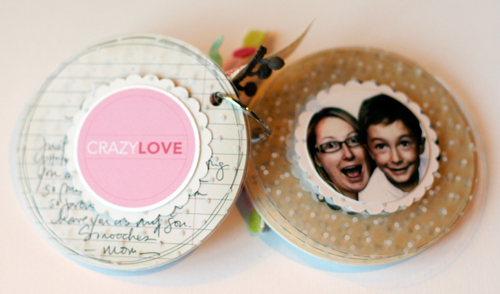
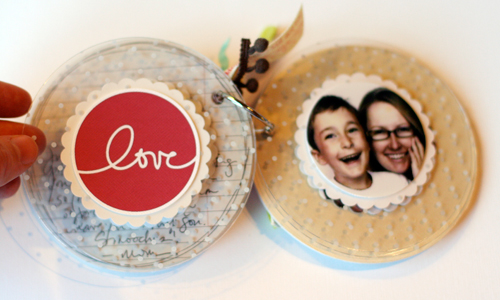
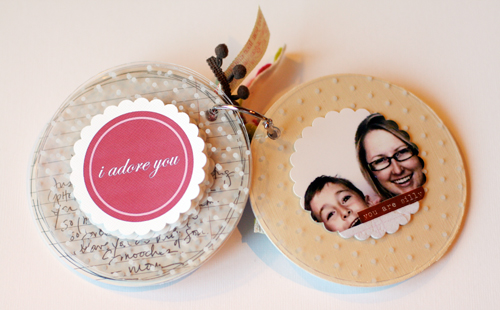
A short note opens the card/minibook with the following pages cut (using a Creative Memories circle template) from a thick transparency from Creative Cafe. Each transparent page has a photo on one side and one of my printed Love Circles from Designer Digitals on the other side.

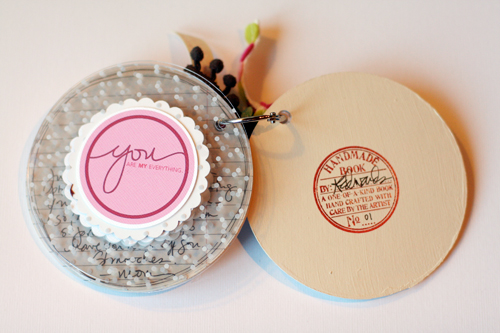
The great little "handmade book" stamp is from Cats Life Press. Ink is from StazOn.

 • Cover the Jenni Bowlin 4 inch circle chipboard minibook with Little Yellow Bicycle textured patterned paper on the front cover and the back cover and painted the interior chipboard covers with cream paint. I love the flocked texture paper for the covers of little books like this - gives it a nice soft feel (fabric would also be a great cover). I ended up not using the interior circle lined-pages for the minibook itself but will hang on to them to use them in a future project.
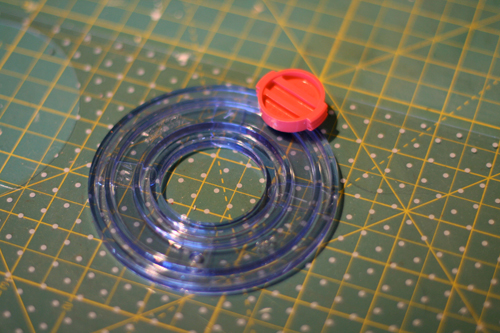
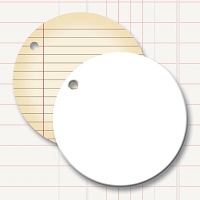
• Cut out 5 circles (or as many interior pages as you want for your book) from the Creative Cafe white dot transparency (I used this Creative Memories circle cutter). This is a very thick transparency which works great for interior pages of a minibook. I also love to use Hambly overlays for projects that really need a thicker sheet.
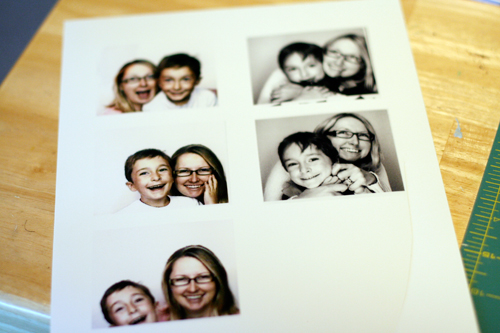
• Choose, scan, and print your photos. I scanned in some of my favorite photo booth pictures (I have used these in projects in the past) and organized them to print on one 8.5x11 sheet of photo paper. The photos were scanned (and enlarged) to be about 2.5 inches wide.
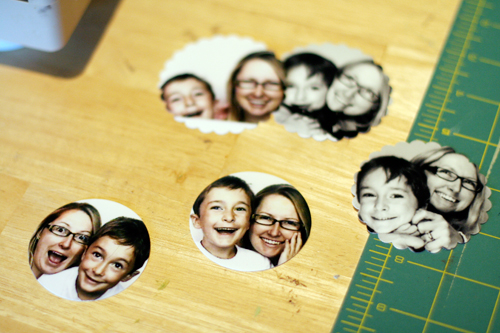
• Punch the photos using the Marvy Giga Scallop Circle Punch and a McGill circle punch. I wanted both regular and scalloped circles to work back to back with the Love Circles (available here):
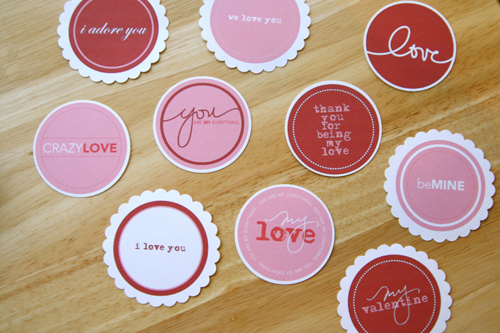
• After punching out my photos and the Love Circles I simply adhered them back to back on each of the interior pages. I chose to do photo on the front, Love Circle on the back. Very simple and quick to put together. I am planning to give this to Simon on Valentine's morning at breakfast with a couple other little goodies.
To finish off the book I added one circle to the cover and a gathering of ribbons on the metal ring that holds it all together.
Enjoy your weekend!

[ Past weekend creative projects can be found here. ]


Comments
Sign in or sign up to comment.
93 comments
Love the mini book! I have one of those little transparent mini books and as soon as I figure out how on earth to use it, I'm going to make one too!
Also, I noticed in your picture of the Creative Memories circle cutter, you're using only the bottom of the blade. To make it easier, you can place it, blade out, in the lid before you cut. It just gives you that much more to hold onto.
Replies
Sign in or sign up to reply.
I love this minibook. How fun! And I'm sure Simon is going to LOVE this on Vday morning. I think I might just use your ideas to come up with a minibook for my 4 year old boy too.
Replies
Sign in or sign up to reply.
Cute mini book!! I just bought and downloaded love circles. My question is do you have any other downloads on the designers digital site that are pdf and you don't have to have PSE to use? If that is the only one, please consider doing more for the non digital scrappers out there. Thanks
Replies
Sign in or sign up to reply.
Super cute book! I just bought the love circles and I love the .pdf. I tend to not use my computer when scrapbooking, so if you are going to be doing more products in the future like this, that would be so great. :)
Replies
Sign in or sign up to reply.
Totally cute !!!
Replies
Sign in or sign up to reply.
Hi Ali,
Very cute album. I noticed that you were using the old cutting blade for the Creative Memories cutting system...they have new cutting blades that are much easier to use, just a FYI.
Can't wait to see pictures of your beautiful baby girl when she gets here!
A fan,
Terry Enge, Central Point, OR
Replies
Sign in or sign up to reply.
I really like your little mini book. Ironically it a lot like one I made for my hubby in September. I used chipboard circles and covered them. Here are a couple of links if anyone would like to check it out. Thanks!
http://www.scrapbook.com/galleries/83709/view/1932013/-1/0/1.html
http://www.scrapbook.com/myplace/index.php?mod=galleries&u=83709&m=view&id=1931981&page=1
Replies
Sign in or sign up to reply.
Love it Ali - I truly love making mini-books now because of your inspiration. Finished off my Xmas book and just love it - it is already well loved by everyone in our house.
Have a great weekend.
Replies
Sign in or sign up to reply.
I have a sweet story to share with you regarding valentines mini books: I made ones for each of my children last year, titled 10 things I love about you. (A play on the teen movie of the OPPOSITE title...) I used tin gift card boxes and did little accordion folds. My oldest, whom I've told you so many times reminds me so much of Simon, loved his, and called me several times to tell me so, as I knew he would. What I did not expect though, was when I was helping him move into his new dorm room last month, we brought in the first armload of stuff and before he left the room to get another load, he walked over to the bedside table, pulled that little minibook out of his pocket and positioned it just so next to his bed. "I never go to bed at night without reminding myself how much you love me and I love you" he said.
*sigh*
Replies
Sign in or sign up to reply.
Ali- thanks again for another great idea that is also easy to create...and adorable. Simon is one lucky guy and baby A too! I keep looking each day hoping to hear some big news, and I must admit I can't wait to hear her name. Have a great weekend!
Replies
Sign in or sign up to reply.
*sigh* it's perfect!
Replies
Sign in or sign up to reply.
love it ali
you rock:)
Replies
Sign in or sign up to reply.
Is the baby almost here? WOW - time FLIES. Everything looks amazing from the latest mini-album to the baby's room. LOVE it all!
Replies
Sign in or sign up to reply.
Very cute and adorable. Thanks for sharing the project with us!
Kate
Replies
Sign in or sign up to reply.
I *love* projects like this! Thanks for sharing and for all the inspiration! Simon is a very lucky boy to receive the book. Have a good weekend.
Replies
Sign in or sign up to reply.
LOVE the project Ali. I've got lots of photo booth pics as I'm obsessed with them too!! Have a great weekend!!
Replies
Sign in or sign up to reply.
Thanks for yet another great idea!
http://www.lazymoms.com
Replies
Sign in or sign up to reply.
So so cute and sweet! thanks for all the inspiration.
wishing you all the best when you new addition arrives!
Replies
Sign in or sign up to reply.
how adorable!! looks qick and easy, too! i'm thinking this would make a great gift!!
thanks for sharing! have a marvelous weekend!
Replies
Sign in or sign up to reply.
Oh, this is so cute! This would be a perfect little gift to stuff in my (sailor) husband's seabag when he goes on deployment. Thanks, Ali! Loving the "How-to" format in your blog, too!
Replies
Sign in or sign up to reply.