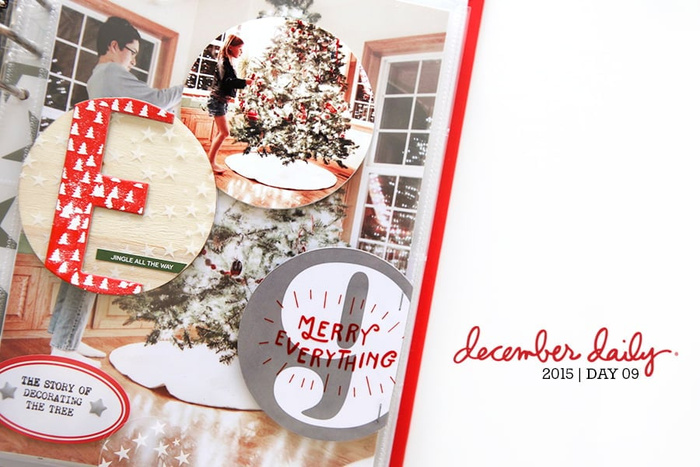
December Daily 2010 | Working With The 6x8 Printable Overlays (+ Video Tutorial)
Tags:![]()
One of the key elements of my 2010 December Daily are these 6x8 overlays available through Designer Digitals. Below I've included a few different ways to work with these overlays including information on how to open and print the PDF file, how to open and recolor PNG files in Word, and an 8 minute video tutorial on working with the PNG file in Photoshop Elements (includes recoloring and photo-cropping information if you want to add the overlay onto a photo before printing).
When you purchase and download this package from Designer Digitals you will find that it includes the following:
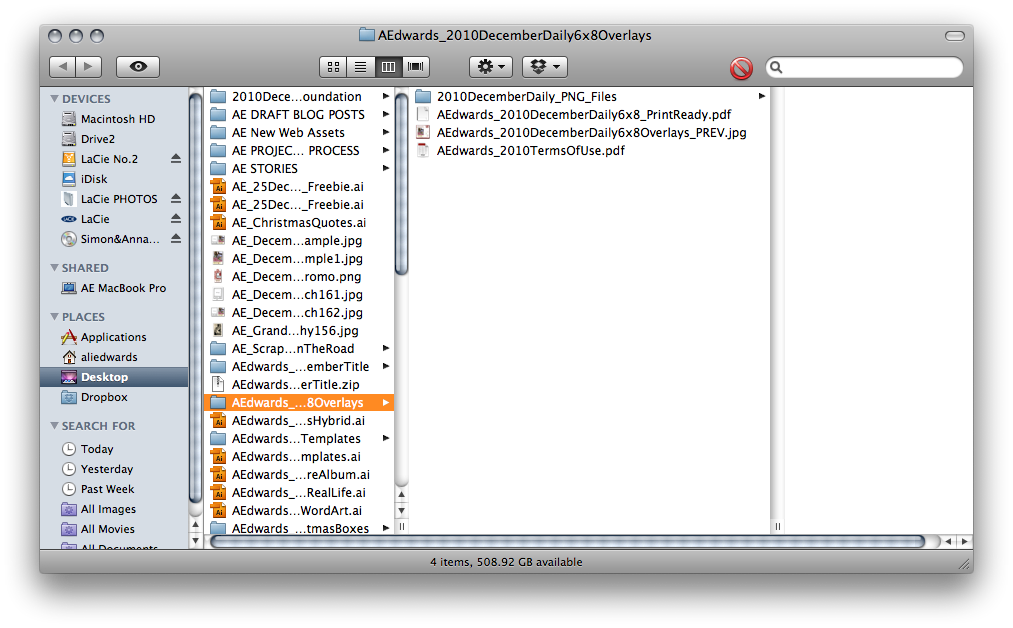
1. A folder of the daily PNG files sized to 6x8 (December 1 through December 31).
2. A print-ready PDF file.
3. A preview file.
4. My terms of use (personal use only).
PDF FILE
Let's start with what's most likely the simplest way to get these files printed: the PDF file.
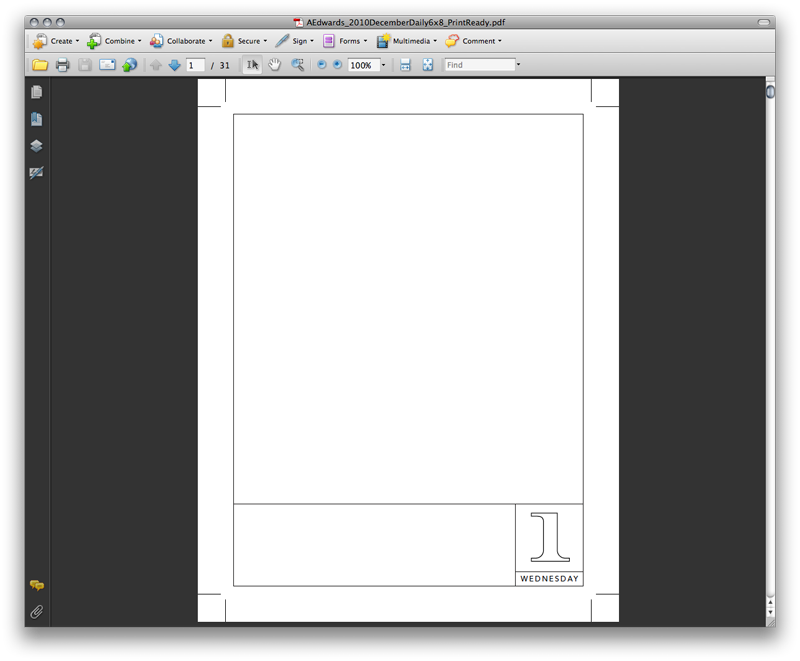
Double click on the print-ready PDF file to open - for most people it will open in Adobe Reader. If for some reason you don't have Adobe Reader on your computer already you can download it free here.
The PDF pages include "crop-marks" that will help you trim these pages to the exact 6 inch x 8 inch size. Go to file/print and your print dialog box should pop-up.
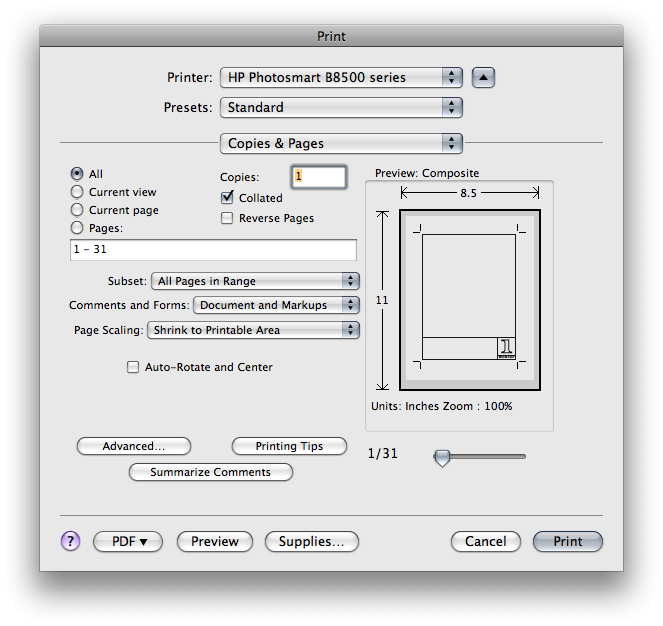
IMPORTANT NOTE: When printing the PDF file, make sure that you have selected "shrink to printable area" rather than "fit to printable area" under Page Scaling. This will position the overlay and crop marks in the middle of the page at the correct size. If you select "fit to printable area" it will stretch the overlay and it will end up printing larger.
I printed all my overlays on Bazzill Cream Puff cardstock using my HP Photosmart B8550 
PNG FILES
If you'd like more control over how the overlays look, or want to place one on a photo, or want to make any other adjustments, you'll want to use the PNG file.
RECOLORING A PNG FILE IN WORD
You do not need to have Photoshop Elements to recolor or print a PNG file. Here's how to do it with Microsoft Word:
1. Open a new Word file.
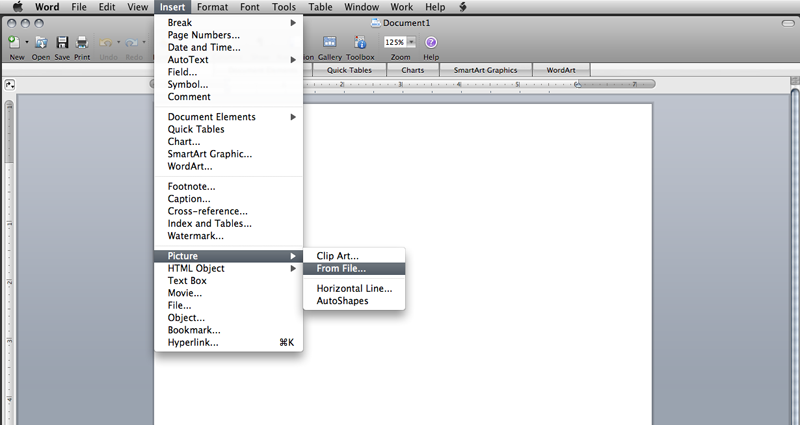
2. Go to Insert/Picture/From File and navigate to the PNG file you downloaded to your computer and select the day you want to work with.

Here's what the PNG file looks like when it opens in Word.

3. To recolor the lines of the overlay, go to View and select the Formatting Palette (I'm working in Word for Mac 2008). Click the Recolor icon near the top and select More Options at the bottom of the menu to choose a color. Click the color and the overlay should automatically change to that color.
4. Print on cardstock.
RECOLORING AND ADDING OVERLAY TO A PHOTO IN ELEMENTS
I've put together a quick video tutorial for those of you who might be interested in learning how to recolor or add an overlay to a photo in Photoshop Elements. You can download a free trial version of Elements here. If you'd like written step by step directions for recoloring PNG files in Elements, go here.
Ali Edwards' 2010 December Daily 6x8 Overlay Tutorial from Ali Edwards on Vimeo.

One thing to keep in mind with the overlays is that in addition to being printed directly on cardstock, they also work great layered on top of a photo. More information on that is included with the video above. Depending on what photo you choose to use they might offer a great spot for journaling as well.
Please let me know in the comments if you have any additional questions on working with these overlays.
More information on the December Daily project can be found here.


Comments
Sign in or sign up to comment.
90 comments
Thank you for answering my question. Yay!!! I'm so getting these.
Replies
Sign in or sign up to reply.
Thank you for all of the great ideas and tips for my December Daily album! I was also SO excited to see your article in my new Scrapbooks etc. magazine!! Loved it. I think I may actually get my entire DD album done this year. :) Thanks again.
Replies
Thanks Shelbie! I was excited that they wanted to feature the album!
Sign in or sign up to reply.
thank you for including a PDF printable file for those of us who might not be using PSE.
Replies
You are more than welcome Sheri.
Sign in or sign up to reply.
Thank you for sharing so much information! While I probably wont be able to do the December Daily, it has inspired me to add some creative touches to christmas card holders I have created as gifts. (http://www.thomas-brown68.com/Thomas_Brown/2010_Blog/Entries/2010/1/9_Christmas_Photo_Cards.html) I'd like a tag that is 2x3 that I could add to the inside. Do you have such an item (i like the look of your pages for the December Daily.)
THANKS!
Replies
Sign in or sign up to reply.
I have a question about resizing the photo... is there a reason why you resize down before you crop rather than just grabbing the crop tool, entering your 6x8 @300 dpi size and cropping the original? I think I've seen you do this on a tutorial before and wonder about the difference between the two methods.
Thanks!
Replies
There is a reason I do it this way - if you have the proportions of the photo locked you can't enter 6x8 because that's not the same proportion as the original photo. If you look at the width + height area under Image Size you'll see a little "locked" icon - that icon keeps the proportions correct (and that's why I just enter one number and then crop).
All that said, as I looked at this again in Photoshop you can grab the Crop tool and enter 6x8, 300 dpi in the toolbar to achieve the same effect. COOL - I don't think I've done it that way before. Thank you!!!!
Sign in or sign up to reply.
Great video Ali - as always. I'm doing mine as 5x7 as I just got a few of the Heidi Swapp mirrored albums. The timing was perfect!
I can also see using those overlays for printed travel cards in the future with the dates changed. Sadly not with Depot unless I do a lot of fiddling with your overlays!
Replies
Cool Maureen. You can always leave the dates and just change the days of the week :). I used Avenir for the days of the week but you could use any font you like for that.
Sign in or sign up to reply.
Since you have an Epson printer, and you use Ilford paper, I assume you are happy with the quality? I tried other brands besides Epson in the past and was very disappointed, but my supplier frequently has good deals on Ilford papers. (Atlex.com) Sometime can you do a post on printers and paper?
Replies
Yep - happy with the quality of the Ilford + HP printer :).
Sign in or sign up to reply.
Oops! Just went back and saw you use an HP printer, not Epson. Where did I get that idea?!
Replies
Sign in or sign up to reply.
I love the idea of Daily Dec and tried very hard last year to play along. While I didn't get far ( only managed 4 all digital pages), I loved all 4 and am thinking I am going to hop on board again this year, love whatever I do and just make this a December Magic album with multi years. Ali thank you for all your inspiration. You really do rock the scrapping world(+:
Replies
Sign in or sign up to reply.
I have not purchased the overlays (yet) because I have not been brave enough to venture into digi as of now. However, your tutorial here makes me think this would be a great opportunity to learn and play a "simple" layout. One question I have is can you change the color of the different areas (encased by the lines)? For example, in the picture you printed with the overlay on top of the photo (all digi), the long rectangle box on the bottom left is 'clear'. If I wanted to fill the box in (say in white) so I could use black or another color font for journaling, can this be done? Thanks!
Replies
Hi Elizabeth - yes, you can do that. Select the color you want and then use the Paintbucket tool to drop color into that area.
I thought so, but thought I'd check as well. Thanks!
Sign in or sign up to reply.
I love the overlays! This year's album is a very simple, elegant concept and was just what I needed. I resized my overlays to 5.25x7" so that I could get 2 on each 8.5x11" sheet.
Replies
Great tip Lynne!
I had the same thought, was that easy to do? I am a novice at photo shop elements.
Sign in or sign up to reply.
This year's standard 6x8 format is wonderful! In the past when I've wanted to do DD, the fact that your examples use different sized pages always stopped me cold. It looks incredible the way you mix and match, but my brain just will *not* wrap around that concept for this particular project. LOL
When I saw your concept this year with the overlays and the cover and the standard size, I knew I could do it. It's so easy to assemble it all ahead of time! Thanks for sharing your time and talent! And for the link to the font site...wow, I forsee a lot of my discressionary "allowance" going to those people, lol!!
Cheers,
Steph
Replies
Sign in or sign up to reply.
I am very excited about the daily page templates you've designed - what a great and simple foundation to build from! I'm looking forward to printing and working with these, and as a few others have said, I appreciate the PDF option being available (for those of us who still haven't ventured into the Photoshop world).
Thanks for the inspiration!! =)
Replies
Sign in or sign up to reply.
I love your step by step videos. I watch it, stop, and try it on my own photo along with you. Thank you so much for taking the time to educate!
Question: Your photo was nicely composed where you only cropped out from the left and right, if I want to crop from top and bottom as well should I do that before or after cropping it to the 6x8 size? Not sure if my question is clear.
Thanks again for your amazing inspiration and education!
Replies
Sign in or sign up to reply.
*sigh* I have yet to venture very far into the dehi world of scrapbooking. I use my printer to print my journaling and sometimes make a cute little template around the journaling in Word. I have little time to work on learning this stuff and scrap during nap times and after bed times. I'm afraid to even start!
I love the template and would love to use it - any tips, or helpful words to get me started?
Replies
Hi Rebekah - the PDF file is really simple to use. Just open and print on cardstock just like you were printing out your journaling. That's really all there is to it - no need to fear!
Sign in or sign up to reply.
[...] | How to create your own professional mini site designs in just minutes. Related Links:December Daily 2010 | Working With The 68 Printable Overlays (+ ...Why I Switched to SmugMug for Photo [...]
Replies
Sign in or sign up to reply.
Hopefully, these are quick questions. I have 2 questions about the size 6x8 (which I absolutely love). 1) Using a 12x12 sheet of cardstock, you can get 2 6x8 pages out of it...how can I do this while using my printer and the PDF file? I can feed a 6x12 sheet through, but how do I resize the pdf so it doesn't mess up the sizing...I know, beginner question. 2) I am super new to PSE8, just scraping the surface...I need to print pics at like Costco...they don't print a 6x8 or 5.5x6.25...I would like to be able to make a print...say 8x12, with a bunch of my pics the right size...could you point me in the right direction?
Thanks for all the info on your album! I am super excited to start.
Replies
Sign in or sign up to reply.
No questions, just a comment...this will be my third or fourth year doing the December daily and my books are always totally different from yours but inspired by your ideas. This year, thanks for posting about your album so early...I'm actually going to do mine just like yours this year. Transparencies and your digi overlays. Love that! Keeping it simple and streamlined for an easy Christmas season! Thanks Ali!
Replies
Sign in or sign up to reply.
Ali, I just wanted to thank you so much for the tutorials you publish on your site. I have been pulling my hair out trying to figure out how to make the overlays and templates work from last year's December Daily and I finally had time to really dig into it last weekend. I watched your "Remember This" template tutorial and it really answered a lot of the questions I had. It was so helpful and I really appreciate it. Now I am excited to take on this year's album!
Replies
Cool! Happy to help!
Sign in or sign up to reply.
I have a question about printing the PNG overlays. Did you cut your paper down to 6x8 before printing? Or did you leave wider margins? I just noticed how all your margins appear to be exactly the same on each page and wondered how you did it; I'm also trying to get the most out of my 12x12 cardstock. :) (My printer does do borderless prints, by the way.) Thanks for the help - and the inspiration, as always! :)
Replies
I didn't cut them down in advance - just printed on 8.5x11 and then cut with my trimmer. To be honest I "eye-balled" it and if you were to see it in person you'd see that they aren't perfect or exact but good enough :). If you have a 12x12 printer you could print two at once. Change the canvas size of one of the png files to 12x12 (or so) and open up another png file. Using the move tool, move the new png over on to the first one and print.
Thank you Ali! I think I'm going to try one page each way and see what turns out best.
Sign in or sign up to reply.