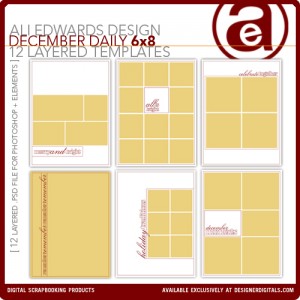
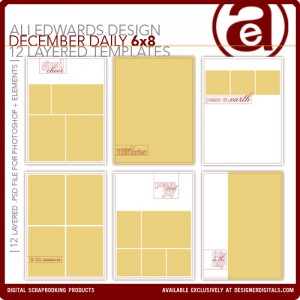
December Daily 2010 | Ideas For Using The 6x8 Layered Templates (+ Video Walk-Through & Tutorial)
Tags: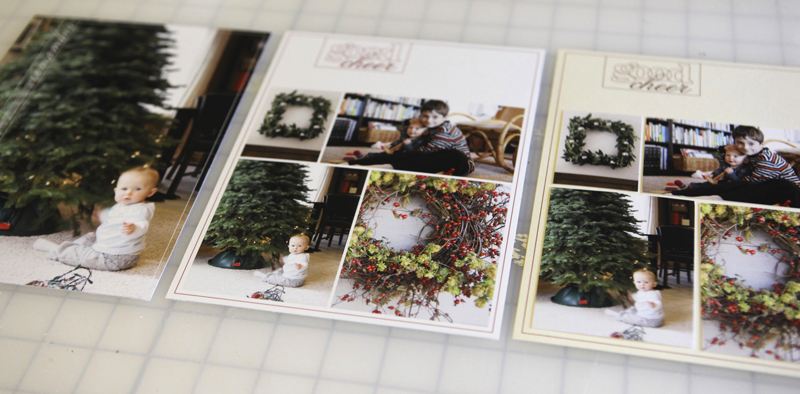
First off I wanted to say thank you to those of you that requested these 6x8 layered templates. After playing with them today in preparation for this post I can definitely see them coming in very-handy for my album.
Today's post includes two videos. This first is a walk-through of the ways I plan to use these 6x8 layered templates and the second is step-by-step instruction in Photoshop Elements.
Let's start with a little walk-through video:
Ali Edwards | December Daily 6x8 Template Walk-Through from Ali Edwards on Vimeo.
And here's a video that walks you through using the templates in Photoshop Elements:
Ali Edwards | 6x8 December Daily Layered Template Tutorial from Ali Edwards on Vimeo.
Here's a look at the ideas I covered in the above videos:
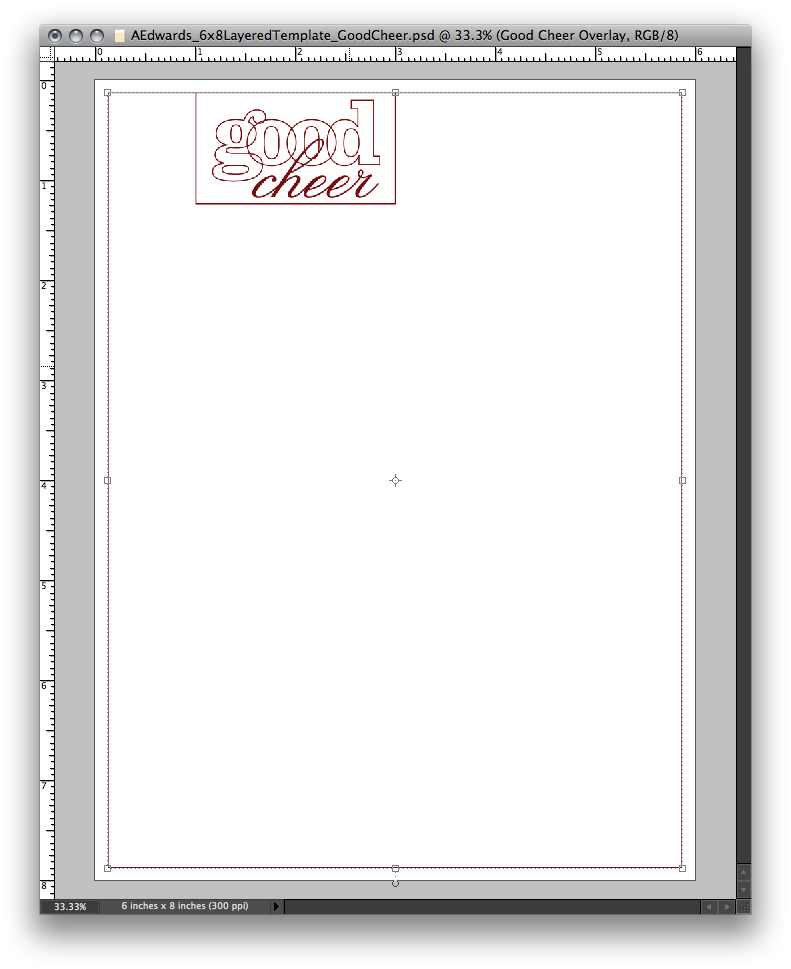
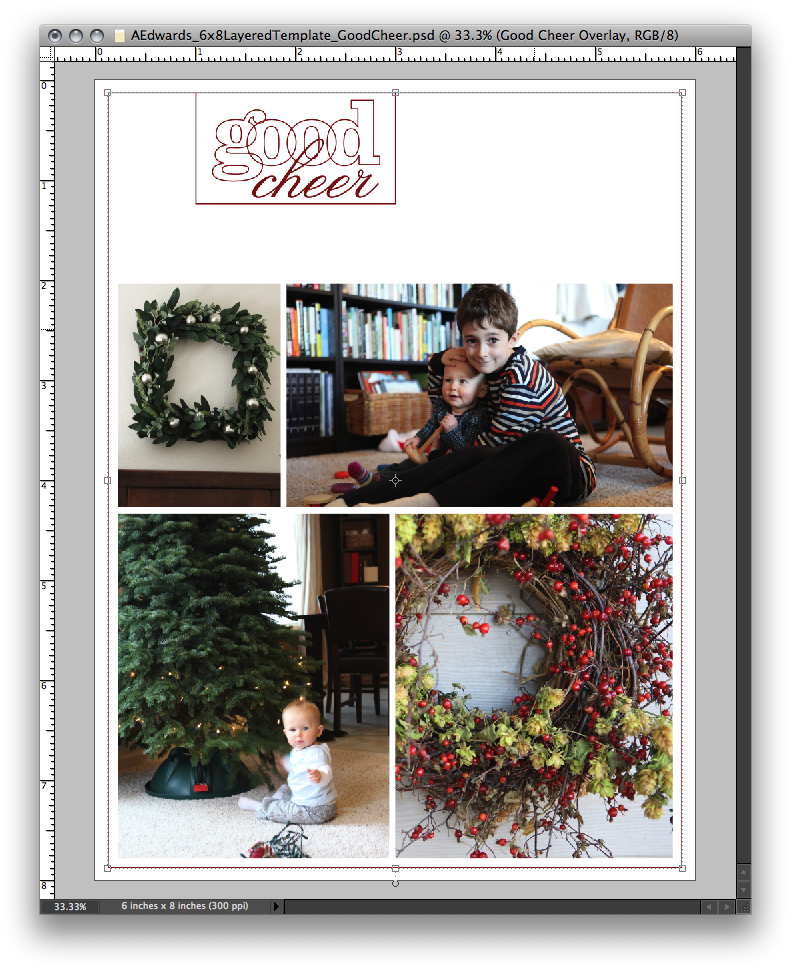
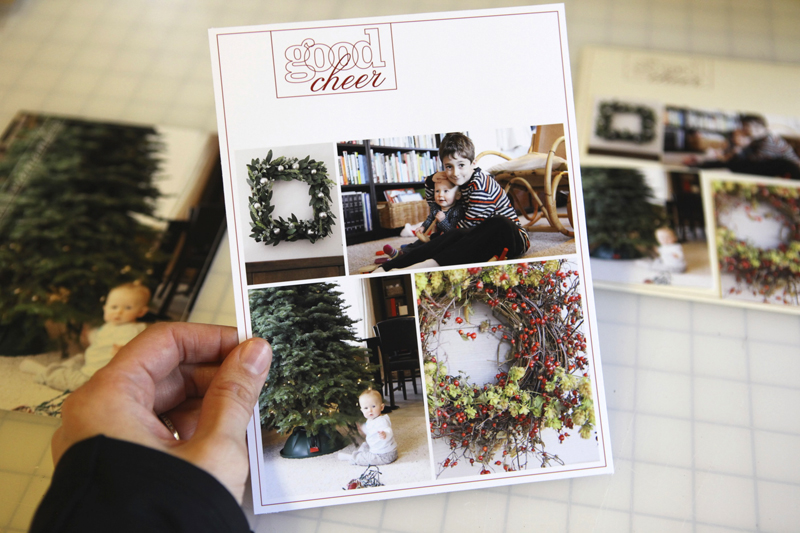
IDEA #1. Use as an overlay on a full page photo.

Inside the layered template package there are two pages that are designed specifically to use for full-page photos. Any of the others could also be used by hiding/removing the image boxes (the yellow photo boxes).
Here's what this one looks like after printing and cropping from the 8.5x11 sheet of photo paper:
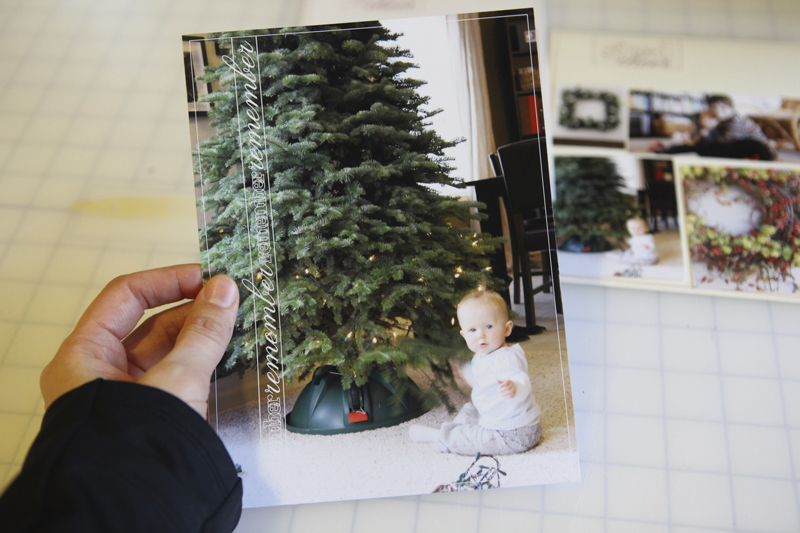
And as a spread with the 2010 date overlays:

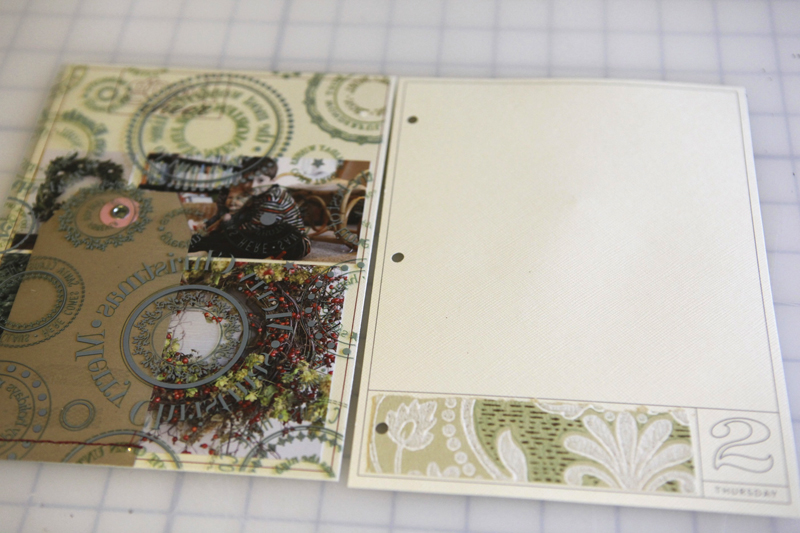
The page with the #2/right-hand side of the spread might include:
another photo or more than one photo
handwritten journaling
journaling from my typewriter
something that came in the mail or other little pieces of paper from the day
a photo with journaling
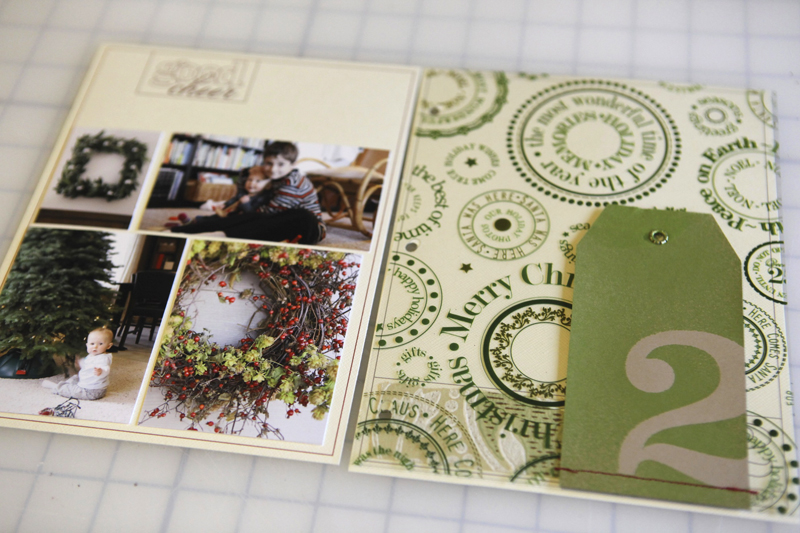
IDEA #2. Print the photos on photo paper + print the frame on cardstock.

Use the layered template to just print photos. Mask your photos (command G on a Mac or control G on a PC) into each of the squares and print on photo-paper (turn off the overlay layer before printing by clicking on the "eye" next to the layer in the layers palette).
Turn the overlay layer back on (and turn off your photo layers) and print on cardstock. Crop images from photo paper and adhere onto cardstock background.
Here's what this one looks like after cropping and before adhering the photos on the cardstock:
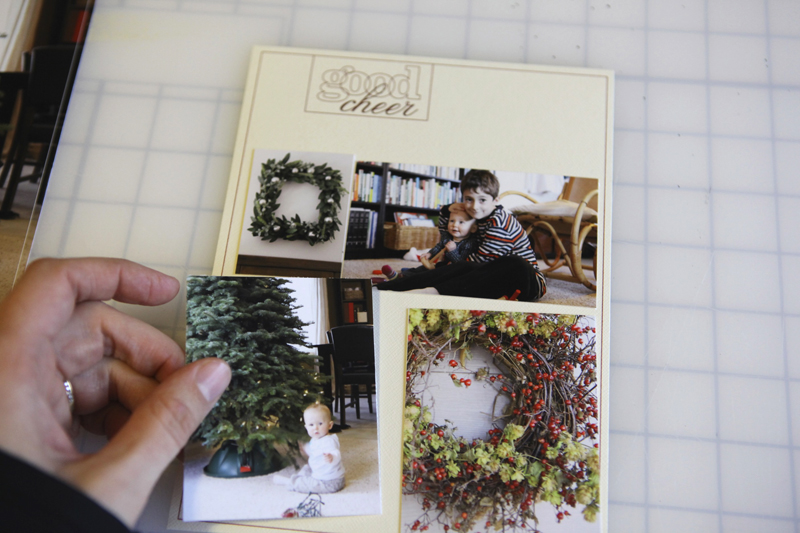
This is a really great option if you want to add more dimension to your album. Use foam dots under the photos to have them stick up off the page. There's lots of possibilities with this option. The best part is that the basic design is already decided allowing you to focus more on the images and the story.
Here's what it looks like as part of a spread with the transparent page in-between:
IDEA #3. Print the frame and photos on photo paper.
The super quick and simple option is to just mask your photos and print on photo paper. Add other digital elements or not. Add traditional embellishments after printing or not.
Here's what it looks like after being cropped from the 8.5x11 photo paper:
And a look at this one in the spread:

Want more information or additional video tutorials on digital and hybrid scrapbooking? Click here to access my Getting Started With Digital Scrapbooking tutorials.
ADDITIONAL SUPPLY INFORMATION
Photo Paper | Ilford Galerie Smooth Pearl 8 1/2 x 11
Printer is a | HP Photosmart B8550
Trimmer | Fiskars Desktop Rotary Trimmer
If you've got any questions about this process let me know in the comments. I hope you're getting excited!
For more on December Daily go here.


Comments
Sign in or sign up to comment.
107 comments
Okay, I just finished watching both videos and I even used one of the overlays with the Christmas photo I took of the kids this year. I have one question--if we want to send this off to be printed, how would we do it? I used Costco and they try to fit the image to a certain print size, which would mess up the 6x8 dimensions of my album. Do I have to put this on another 8x10 canvas so that Costco will print it on an 8x10 photo sheet, or is there a shorter way? Any help would be appreciated. Thanks!
Replies
Hi Melanie - my guess, unless someone else has another suggestion - is that you would upload them onto an 8x10 for printing online.
I don't know about Costco, but the site where I have my photos developed does 6x9, so that's the size of my canvas. I'll trim the extra inch off before I put them in my album. The site is www.mpix.com
Sign in or sign up to reply.
I love these tutorials!!! I was holding off on buying the templates until I saw this tutorial, guess I am buying them sometime this week. :)
Replies
Sign in or sign up to reply.
Soooo helpful. . .Thank you. I watch all of your tutorials and try to digest each tid-bit of information you provide. They never get old, mainly because my confidence level when working with templates is still a 2 out of 10. Each time I try to create something digitally I am comforted by knowing I can find a tutorial here on your blog/website that will walk me through it. Thank you so much for taking the time to put these together. It is reeeeaaallly appreciated. :)
Replies
Sign in or sign up to reply.
oh I Love this! Thank you!!!
Replies
Sign in or sign up to reply.
Thank you so much! I love the PS walk throughs. They help me "get it" so much quicker! Thank you again for all the inspiration!
Replies
Sign in or sign up to reply.
Hi Ali - I love your templates. I wish I could use them but I don't have PS. I have a question about Idea #1. If you use a photo for the whole page, what do you put on the other side of it? Do you adhere a main page for the previous day or card stock to it? Any suggestions/ideas would be great. :)
Replies
The back of the whole page photo will be the back of the previous day (date page). I just glue them back to back. I'm going to add one page to the front too.
Sign in or sign up to reply.
Great tutorial, thank you!! For the right side pages, if you put a photo on there, would you print out on the photo paper or directly on the paper?
Replies
That's my plan Shana - I would print it out on photopaper and then adhere it to the cardstock (I would give myself a little room inside the border).
Sign in or sign up to reply.
Thanks Ali for your inspiration and great ideas! I love the look, and hope to be able to use them in my first DD :o) So excited about the book!
Replies
Sign in or sign up to reply.
I love using page layered page templates for theme albums like this. It is so easy to turn the layers on or off and tinker with a layout to print out photos for a hybrid page as in your second example. I did a huge (HUGE) retirement album last year by doing just this and using several of your 12x12 layered templates as a base. Thanks for sharing the templates and your instructions. I think I need to go shopping--again! I really like this set.
Replies
Sign in or sign up to reply.
Hi Ali! I'm pretty sure I'm using your templates this year. They're gorgeous (of course) and I have so very little time to each day now that I'm working full time. I just want to drop my photos and words in place and call it good. Know what I mean?
Replies
Yes, I know exactly what you mean :).
Sign in or sign up to reply.
I'm excited to start my DD as well! :)
I just want to mention that for those who don't want to print out all the photos themselves, that a different option is to open an 8 x 10 document in Photoshop Elements and then squeeze as many of the little photos (from the templates) onto the 8 x 10 sheet for printing. I did this for the Week in the Life project and it turned out great - and cost less than replacing all my ink cartridges would have.
I have two suggestions, though. First, the way to do this using the templates would be to mask your photos onto the different sizes in each template (I'm guessing you show this process in the 2nd video you shared today.) and then, merging the two masked layers together, drag the photo(s) onto the 8x10 document. Just be sure to NOT save the changes to the original templates, so you can use them as masks over and over.
Second, once you have an 8x10 doc filled with as many photos as you can squeeze on there, print out a copy in "fast draft" mode and then write over each photo as to what day/placement you want them to have in your actual book once you get the photos back from the printers. It's easy to forget! THEN, be sure to save your 8x10 sheet as a new, hi-res jpg each time you fill one up. These will be the jpg's you upload to your online printer. Name them wisely. Of course, you can print out these 8x10 docs on a piece of 8.5x11 photo paper instead of uploading them to an online printer, if you want. That would still conserve paper and ink more than printing out each days' photos individually.
Hope that helps! :)
Replies
If I were a Teenage Mutant Ninja Turtle, now I'd say "Knoabuwga, dude!"
Sign in or sign up to reply.
Hi Ali! I love both the templates and the overlays. I'm wondering if the overlays designed at 6x8 can be enlarged and still keep their proportions if used at 8 x 10? My album is an 8.5 x 11 album this year but I'd like to use the overlays. Any suggestions?
Replies
Hi Ali, I was just reading through the comments to see if anyone else had asked this. I have also created an 8.5 x 11 album, but am interested in using the templates. I am thinking the answer is yes, but would like to be sure before buying the digital templates. Thanks!
For the PNG overlays (the ones with the numbers on them): The margins around the outside edge won't be exactly the same (there will be a bit more room on the left + right edges), but it looks fine.
I think the same is true for the layered PSD file but I'm checking with someone who knows more first to be sure.
Here's what my go-to expert (Katie Pertiet) says: "enlarging 150% is safe without losing quality. Sometimes even 175% so 6x8 > 12x16 is totally safe making what they are wanting to do just fine!"
Hmmmm. Can I assume then that I could reduce my 12x12 templates to something like 10x10 or 8x8? I bought the 12x12 last year and would like to add more templates this year but would like to keep all templates the same size.
Heather - you can ALWAYS reduce the size :).
Okay - new to digital stuff.. so, I want to buy the 12x12 and can reduce to 8X8.. BUT.. how do I do that? do I do that in the initial screen where it asks pixels etc?? or do I do it when I'm printing???
Angie - here's what I do: create the layout in the 12x12 size. When you are all done save the PSD file and then do a Save As to save a copy. Using the copy, flatten all the layers, and then go to Image Size and change to 8x8. Save that file as a JPG to print/upload to your printing service.
Sweeeet! I totally know what I'm doing now!!! Yay. Thanks, Ali.
Sign in or sign up to reply.
Hi Ali,
Possibly a daft question but do you need PSE to use these overlays? I don't have PSE but they look great so I'm wondering how else I could use them?
(Maybe I need to add PSE to my Christmas list?!?)
Thanks,
Lou
Replies
To do the masking with the photos you do need Photoshop or Elements because there are layers involved and the files are all PSD ("photoshop") files. You can use the overlays (which are PNG files) that come in this package (http://www.designerdigitals.com/digital-scrapbooking/supplies/product_info.php/products_id/10662) in Word.
Also Lou - Adobe has a free trial you can download to check it out. http://www.adobe.com/products/photoshopel/
Thanks. I have the 6x8 downloads already and I've printed these out onto my cardstock (similar to how yours look).
I'll check out the free trial now.
Sign in or sign up to reply.
You really made my Dec daily something i am so looking forward to this year, I am so glad i followed your size ad have all your templates! The ease and no stress of me figuring it all out is great. I did it last yr but did just to much that it somewhat overwhelmed me. I bought Elf on the shelf this yr too so cat wait for him to make his debut this yr I have so many ideas for him! He will have 2 page spread, one question are you always starting a new day on a front page I assume meaning you would not adhere day 2 to 1, but I think you said you will adhere to the back of day 1 more day 1, and do you do sometimes more than 2 LO for a day? Oh and I love the Starbucks cozy I ran in the other day ( since I dont buy form there, not a coffee drinker!) Anyway I feel blessed that you are here to guide us so this holiday season in addition to my family I am thankful for you. Its not just about the scrapbooking i realy believe you make all of us take time with our familes to do this great things and that is what is most impt.
Replies
I've definitely added more pages in the past - just depends on the story.
I'm not sure I understand the other question about the spreads for the days. If you look at the last photo above...if I turn over the page with the "2" on it you would see the beginning of day three.
Sign in or sign up to reply.
Kinda thought this out and realized thankfully before hole punching all that i may have hole punchedthe wrong side for some days b/c i may want it on the other side...
Replies
Sign in or sign up to reply.
just finished watching both of your videos. i practiced for the first time using your last years dec. daily templates in photoshop elements and... BINGO, it was a success. a jump-up-and-down victory for a digital newbee. i strongly recommend anyone who hasn't tried to complete a digital page and wants to attempt a digital album for the first time, to please take the time to watch these two videos. it's super simple and i love that. bring on DECEMBER!
Replies
Thanks Libbi - enjoy!
Sign in or sign up to reply.
Ali, you mentioned briefly what brand photo paper you use, could you mention it again in more detail. thanks...loving DD! Thanks.
Replies
Sure. It's called Illford Gallerie Smooth and I order it from Amazon: http://www.amazon.com/gp/product/B00006I5C3?ie=UTF8&tag=aliedwardsdes-20&linkCode=as2&camp=1789&creative=390957&creativeASIN=B00006I5C3. I started using it after Cathy Zielske recommended it to me - before that I had always used whatever brand of printer I was using (matching the paper to the printer). I've been using this one for a year or so now and have been really happy with it.
Sign in or sign up to reply.
I think I have to do this digitally because I will not have a printer where I will be and will have to print when I get home after my holiday. What I want to know is do you have any idea as to how to photography to make a meaningful, but semi artistic theme. A lot of my effort will be going in to the photography, but I do not have that much back ground about maying a group of photos cohesive. For example: I could shoot one day and black and white, and others with a Helga type print. Do you have links or examples of the way to photograph when you have a whole album in mind.
Replies
The way I look at it, the fact that "you" are taking photos that captures "your" holiday season is what makes it cohesive. You could totally do all black and white, or all close-ups, or find a santa to photograph everyday, or do a ABC's of Christmas if you wanted a really literal connection between the days, but I tend to think that just looking around and shooting what you see over the course of the season is enough cohesion. Don't make it more complicated than it needs to be -
Sign in or sign up to reply.
Looking over black Friday sale ads and wondering what your thoughts are on the cravat machines. Thanks to your tutorials I have a basic grasp of Photoshop elements and am planning to use the 6x8 layered templates in my dec daily. Just wanted your take on the cuttter. Do you have one? Use a lot? Appreciate your viewpoint. Thanks
Replies
Meant the cricut machines.
Hi Robyn - I don't use a Cricut machine or any other cutter at this time.
Sign in or sign up to reply.
I love the digital goodies, though I've never experimented with it. i don't have Photoshop yet, though I'm planning on getting it soon. I am wondering if I would have the ability to change/switch around the 6x8 overlay colors of the number and day of the week? I would love to make a book with a similar concept for our trip to Disney in January, and want to make a 6x8 book "Disney Daily" for it :) (I have my December Daily ready to go, and may incorporate some of the digital elements in it yet!) Thanks!
Replies
Hi Elizabeth - yes, you can do that. The package includes both printer ready (PDF) and png files. You can change the color and move the days of the week around on the PNG files. To change the days of the week you would need to cut and paste from one file to another - not super hard at all :).
Sign in or sign up to reply.