December Daily® 2024 | Special Guest Linda Jordan
Tags:
Hi everyone, it’s Linda and I’m so excited that it’s December Daily season again! Even though we still have a few months until the actual project, there is still a lot you can do now to get ready for December. Here are my top 10 tips to do before December rolls around to make this a fun + manageable project (plus to dig in when you’re so excited from the release!).
10 THINGS TO GET READY FOR DECEMBER DAILY
Look back on your old albums.
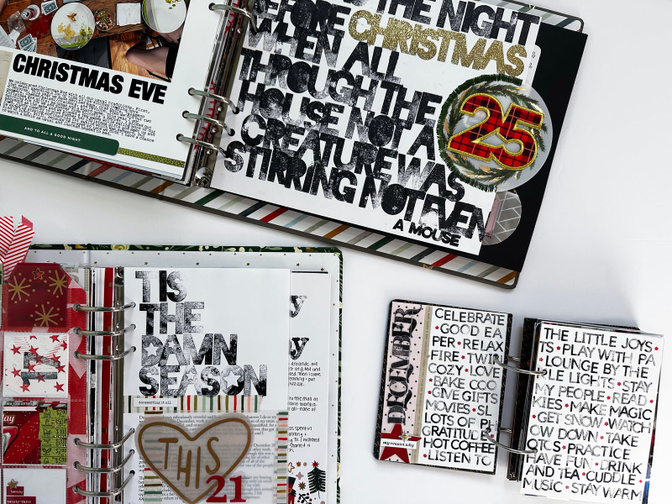
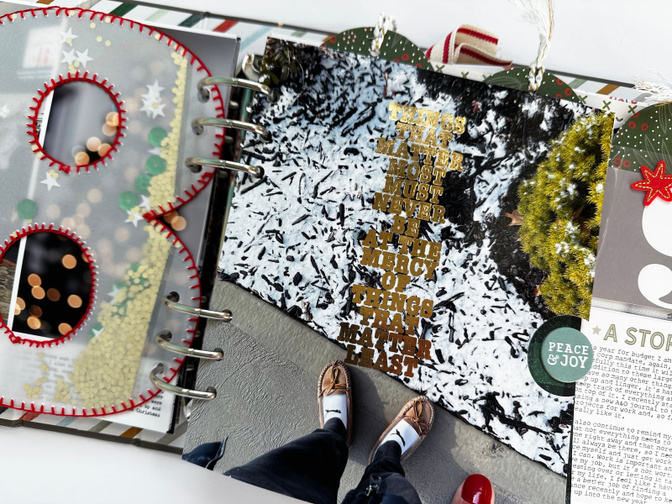
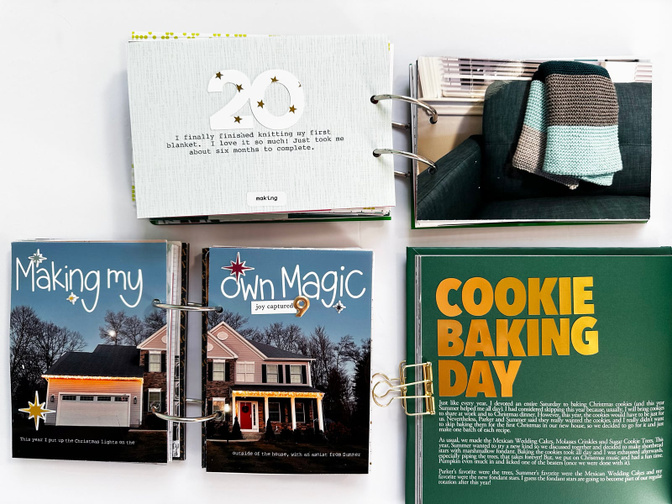
One of my favorite tips for this time of year, is to pull out your old albums and flip through them. Not only is it fun looking through the memories and a great way to get you in the mood for the season, looking back on your old albums can give you tons of ideas for the upcoming season.
When looking through your albums think about the stories + photos + products that worked for you in the past. What would you like to bring into this year’s album? What didn’t work for you in the past that you want to move on from?
Last year I shared a detailed look through some of my old albums + thoughts. I encourage you to check out that post for more ideas in looking through your albums, you can find it here.
Finish other projects.
December Daily is one of my absolute favorite projects, but it is very time consuming and pretty much takes over my crafting during the month of December (and maybe a little of November and January too!). As scrapbookers, we often have other projects that we like to work on so now is a great time to focus on making extra space for December Daily by finishing up those other projects.
This might look like: finishing old December Daily albums (check out the hashtag #donebydecember for lots of inspiration!), catching up on Project Life, working through travel albums, or putting together story kit projects to clear up space on your desk.
For me, I am going to work on putting together a travel album for my recent summer adventure, finishing a few of the recent story kits + being all caught up on Project Life so that, going into December, I can prioritize this project.

Stock up on basics.
Now is a great time to stock up on basic supplies + other things that you will use for this project. For me, this means making sure I have enough photo paper + ink for my printer (I print my photos at home), adhesives, and pens.
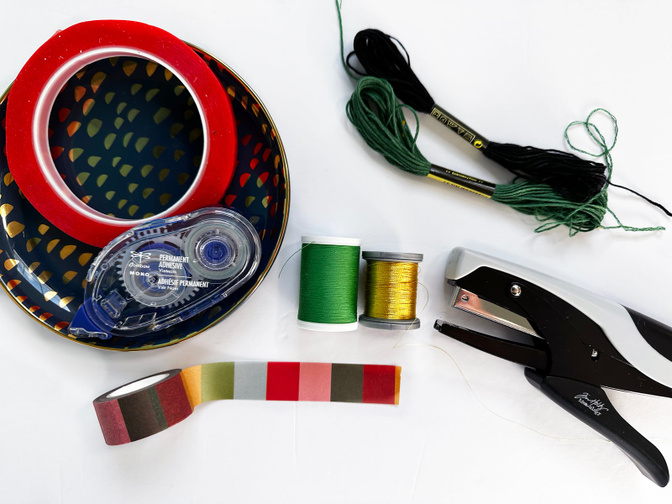
My favorite adhesives for December Daily:
Tombow rolling adhesive. This is my go to for most items.
Red line tape. I use this for bulkier items that aren’t made of paper, such as the velvet trim pack + the painted wood veneer stars from this year’s collection.
Tiny attacher refills. These are for my Tim Holtz tiny attacher stapler which is a go to in most of my projects, including December Daily. I love these to add a little extra dimension + adhere down transparent elements like the christmas magic large vellum pieces or the scalloped plastic squares from this year’s collection.
Embroidery floss. This is a super fun (but time consuming) way to add some decorative thread to your page. This is a fun way to add decor, but also can be a functional way to adhere something down, especially a transparent element.
Washi tape. The main kit this year comes with two gorgeous rolls of washi tape, but I also like to supplement that with a few basics, such as solid white or gold. This can be a great way to adhere down elements, or create a flip up pocket.
Sewing machine. Finally, I love running things through my sewing machine. This is a great way to adhere items down or just add a bit more texture. I usually use white thread, but I also have gold, red, and green for this project.
Adding text for December Daily:
Sarasa Mark-On 0.5. This is my go to pen for all my writing. Using the same journaling pen across your album can help create a unifying look.
Sharpie Creative Markers. These are new to my collection this year, but I love the bold paint pen look. I have the bullet point markers from this set and they work well on vellum, photos + paper. I plan to use these in my album to add some fun text or doodles.
Typed journaling. I also like to type some of my journaling using photoshop, but you can do this using free software as well, such as Canva. I recommend selecting one font ahead of time to use throughout your album for any typed pages to help give your album a cohesive look.
Typewriter. I have a typewriter that I have used in the past in many of my projects. I like to decide in advance if I’m going to use this in my album so that I can use it on a few pages to create a more uniform style across the album.
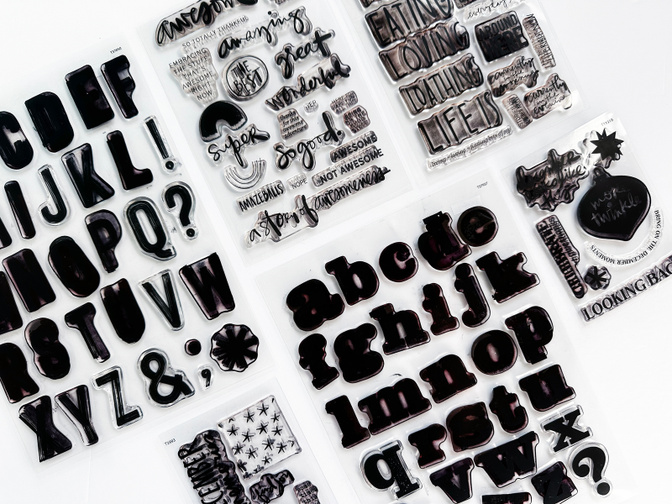
Stamped alphas. I am obsessed with stamping words in my albums + I love all the alphas are awesome stamps for this. If you also want to stamp in your album, I highly recommend selecting a few alpha stamps in advance. That will cut down on your options during the month of December and help create a cohesive album. And don’t forget to pick up ink!
Learn how to use those fancy tools.
December Daily is a time to play with products! This is the time of the year that I see the most inspiring creations using all sorts of fancy tools. I want to disclaimer this post by saying, please do not go out and buy all these expensive tools for this project! You don’t need them! Take this time to watch the inspiration that is out there and consider what tools you might want to invest in in the future.
But, I know lots of us have invested in tools over the years, whether it’s a Cricut, a sewing machine, or a Minc, and then we haven’t used them because they do take time to learn! So, if that is you, take this as a push to go figure out how to use what you have BEFORE December rolls around so you are ready to use these supplies in your album. Maybe make a few embellishments or foundation pages to use during December, or just learn the basics of your tools so that when December is here you can easily pull it out and play.
I also wanted to mention that some of these tools can be a good way to use the digitals from the December Daily collection. You can use a silhouette or cricut to cut out the die cuts or use a foil quill or minc to add gold to printed out digitals. There is also so much to do with digital products in various programs such as Photoshop or Procreate. Depending on what tools you have, you might want to consider picking up digitals when they go on sale and creating your own physical versions of the products.
I have had a lot of fun in the past with my silhouette, my foil quill, my sewing machine, my typewriter, heat embossing, and using my apple pencil in procreate in my album. These are all so much fun! But, they are time consuming to learn and to use, and they can be expensive, so I highly recommend that you pick just ONE new thing to add to your toolbox for this year.
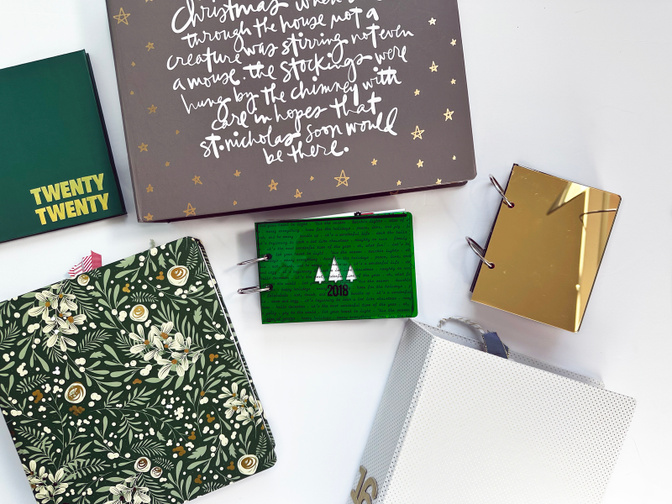
Select your album.
Many of us already placed our orders, but most of the albums are still available in the shop + you might have a selected more than one (or have some in your stash) and are still deciding which album is the “right” one for you this year.
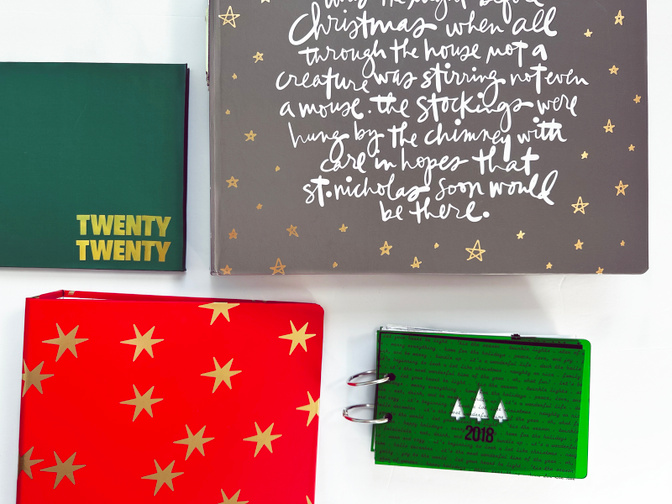
After a lot of debate, I decided to go with the red 6x8 album for this year. I have done various sizes in the past from 4x6 to 10x8 and they all have pros/cons. You might have your own list/considerations, but here are a few thoughts I had when considering what album size to use.
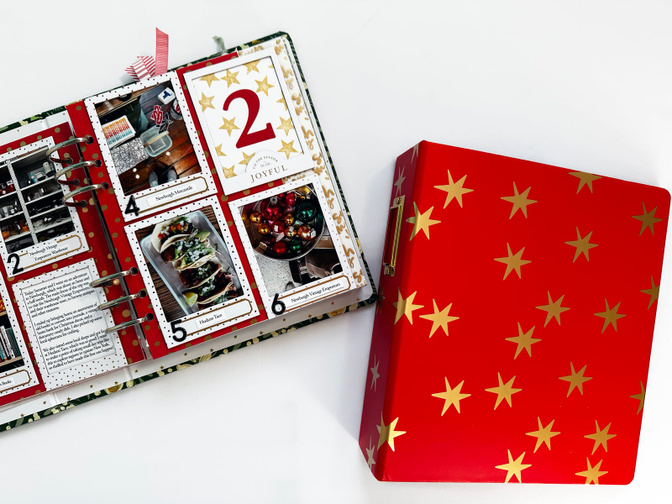
6x8 Album
I have used this size many times, and am going to use it again this year. Here were my observations that could help you decide if this is the right size for you.
Good For:
Lots of Inspiration. This feels like the most common size in the community (at least from those who share online) and has been around the longest, so there is a lot of inspiration out there for using this size.
Page protector variety. Although there is a new page protector style of 10x8 this year, and a few fun ones for 4x6, 6x8 albums have been around for awhile so there are lots of configurations out there if you like to mix it up and work inside of page protectors.
Best for 3x4 cards. If you like to use a lot of 3x4 cards in pockets, this is the best size for you because 6x8 divides evenly by 3x4, so you can fit these cards in many of the page protector styles.
Vertical photos. If you take a lot of vertical photos, this album is great because you can print those as a full 6x8 to take up a page.
Printing at home. Unless you have an oversized photo printer, this album is a good size where you can easily print at home on a standard size photo printer, or even a smaller one.
Bad For:
Uniqueness. 6x8 albums are most common, which means that your album will look more similar to others. Also, if you’ve been doing this project for a long time, your albums can start to look the same over time if you always use this size (but, you might also love that uniformity!).
A ton of content. If you struggle to narrow down your photos + stories, you might have trouble fitting everything into one 6x8 album.
Bottom Line: 6x8 is a perfect middle of the road album. It’s big enough to fit most embellishments + give you a lot of options, but doesn’t feel overwhelming with choice. It’s a good album for newbies.
10x8 Album
I used a 10x8 album in 2021 and I had a lot of fun with it. Here were my observations that could help you decide if this is the right size for you.
Good For:
Large HORIZONTAL photos. If you are someone who takes a lot of horizontal photos and likes to blow your photos up (and has the ability to print that size easily), this is a great album.
Including a lot of photos. You just have more space in this size, so you can easily include a lot of photos in one spread, especially if you use layered templates, divided page protectors, or flip ups.
Large scale supplies/embellishments. Do you like the super bold statements? Huge text? Large die cuts + pieces? This album is great for those larger scale supplies.
Lots of supplies. If you have a lot of supplies you want to use, having a larger album just gives you more real estate to include more stuff.
Lots of text. If you want to include some longer stories, you can really fit A TON in one spread in the 10x8 size.
Varied page sizes. Just because the album is 10x8, doesn't mean all your pages need to be! You can include a range of page sizes which gives you a lot more options when creating your spread.
Bad For:
More time consuming. Because the pages are bigger, it just takes more time to put an album of this size together. Consider if you have the time/bandwidth for this prior to diving into 10x8.
More options. Yes, this is listed in the pros above, but more options can also be a bad thing. You have more options for page size/style and can include more photos, more supplies, and more words, all of which means more choices. If you struggle with narrowing down your choices, this might not be the album for you.
Vertical photo takers. I am someone who takes 90% of my photos vertically because I am addicted to Instagram stories. This shape just doesn’t work great for the 10x8 format. Yes, you can include some 6x8 pages to add in vertical photos, but if those are all of your photos, it becomes a little more difficult.
Bottom Line: 10x8 is perfect if you want to include all the photos + words + products and have extra space to play and get crafty!
4x6 Album
This is a super fun, mini size and I was so excited to see Ali offer this as an option this year. I used a vertical 4x6 in 2022 and used a horizontal 4x6 in 2017.
Good For:
Quick. A smaller album, means less choices + less “work” to put it together. If you find yourself pressed for time this season or worried you won’t finish, this is a great option to make this project really manageable.
One photo per day. If you struggle to take a lot of photos or have photos that you love, this size is perfect for including only one photo (or no photos!) on a spread.
Specific orientation. If you work in a vertical 4x6 album (like the one in this year’s collection) this album is great for vertical photos, if you work in a horizontal 4x6 album, then it is great for horizontal photos.
Minimalist design. If you want to work from less products or keep a very minimalist style, this album size works great.
Printing at home. If you don’t have a large size printer, this album size is great for printing small.
Bad for:
Lots of photos/stories. If you struggle to narrow down your photos/content per day, this album size might be difficult to work with.
Larger embellishments. Some of the products in the collection this year are big + bold! Many of those can be fit into this album if you get creative, but a few of them just won’t work. It’s important to keep that in mind when selecting products to work with a smaller album.
Lots of stash. If you have a large stash of products or picked up a lot from this year’s collection, this might not be the best album for you because you just won’t be able to fit as much into this album as you would in a larger size.
Bottom Line: 4x6 is perfect if you want to include only a few photos + supplies and get this project done quicker.
Other
Although only the above sizes are part of this year’s collection, there are endless types of albums out there! You could use a different size, include your December Daily project within a larger project (like project life), or use something else entirely, such as a traveler’s notebook, a journal or an altered book. The possibilities are endless.
Bottom Line: Doing something else is perfect if you want to mix it up + get creative + think outside of the box!
Pull out your stash supplies.
If you have done December Daily in the past, you most likely have some supplies from older years. Now is a good time to pull out those supplies and go through them. Decide what will coordinate with the supplies you picked up this year + what supplies will fit with your album selection.
Now is a great time to purge those older supplies that are no longer your style or you know you’re never going to use. It’s also a great time to take stock of what you have and what you might want more of (or what you definitely don’t need more of!).
In addition to December Daily supplies, consider supplies that are not December Daily focused but might work for this project.
General supplies to use in this project:
Stamps. Lots of our regular stamps work great for this project. Definitely alpha stamps + basic shapes, but also consider what other stamps you might have. Lots of sentiment stamps would be great, such as common sentiments like “loving” or “remember this,” plus prompt stamps such as “currently eating” and “currently enjoying.” Shapes such as stars + frames are always great as well.
Alpha stickers. The December Daily collection this year had some great gold alphas + numbers, but there are lots of other colors that would work with this collection, plus neutrals work with everything. Consider if you want to pull out some basics such as black alphas or red numbers from your stash.
Story kits. I love the story kits for prompted story telling, but these can work well in this project too! For example, the recent “quiet” theme would work well to tell the story of a cozy evening by the tree or “collect” could work well to tell the story of your ornament collection.
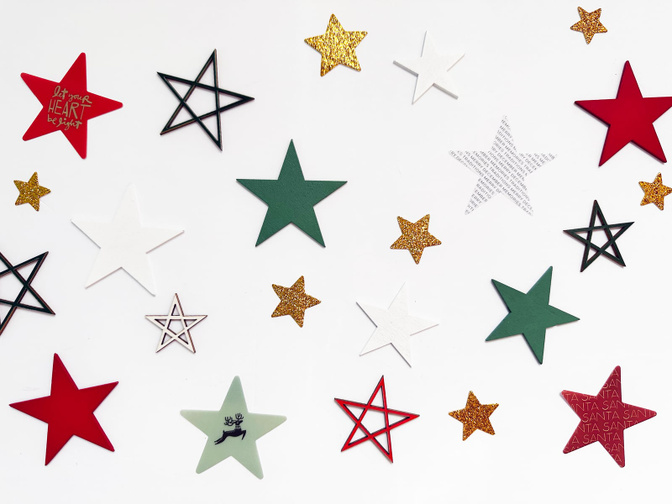
Specific shapes. There are lots of shapes that work well in December Daily that we collect year round, from stars to hearts to circles. Consider going through your stash of these shapes to see what embellishments you have that coordinate with this year’s collection.
Labels & tags. I have so many of these in my stash + they are perfect to use in this project. See if you have anything in your stash that coordinates with your supplies or is a neutral shade that would work well with your project.
Organize your supplies for this year.
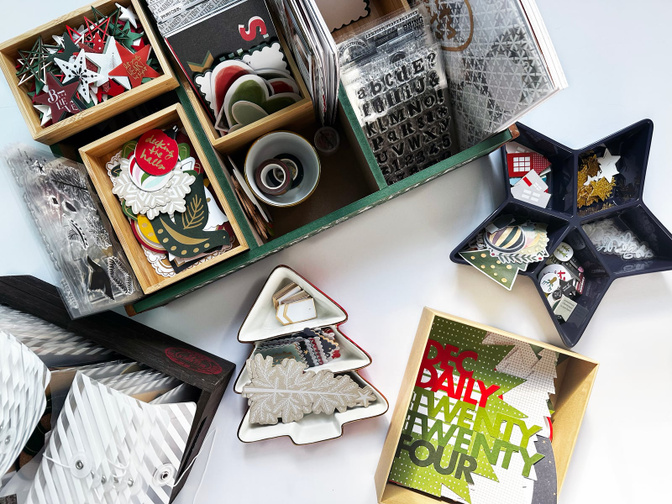
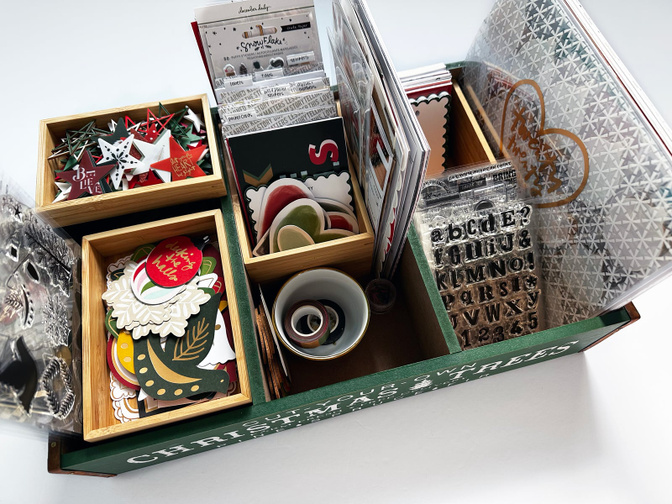
Once your supplies arrive, dive in and organize them! Getting everything set up in a format where you can see what you have and access it during the month is key to keeping up with this project. For me, I like to keep my products out on my desk in an organized tray during the month of December. In the video below, I walk you through setting up my supplies for this year + working in some of my stash products.
Some things to keep in mind when organizing your supplies:
Out of sight, out of mind. For most people, if you can’t see it, you forget you have it and you won’t use it. I highly recommend creating a set up where you can see what you have and leave it out, if possible. If this isn’t feasible because you have small children, pets, or your craft space doubles as another space, consider using clear organizers or a tray that can easily be moved.
Album size. Hopefully you’ve already chosen an album size (and if not, this could help you commit!). Some supplies just don’t work well with certain album sizes, whereas other supplies really shine. Consider what size album you’re working with and select supplies that will pair nicely with it.
Keep your style in mind. There are so many different styles that people use in this project and they are all so beautiful. I absolutely love the mixed media albums and the minimalistic albums with clean lines! But, sometimes you can love the way something looks and know it’s not for you and your album (at least not at this point in time!). Keep in mind what products you actually use + how you intend to create your album this year when selecting what to purchase + keep in your organizer.
Be realistic about how much you can use. There are SO MANY beautiful products out there for this project, the entire collection this year from Ali Edwards blew me away, and that isn’t even taking into account other manufacturers or older products. It is impossible to use it all in one album. That doesn’t mean you don’t like it or you won’t use it in the future. Having choices is good, but too much choice can be paralyzing. Consider limiting yourself to the supplies that fit in a certain tray or organizer and put the rest away for another time.
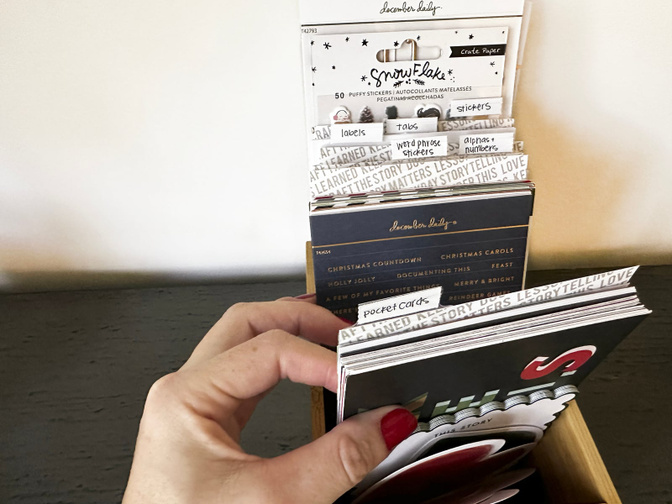
Make sure you can find what you need. This year in organizing my supplies, I created some simple tabbed dividers using avery index tabs + the packaging from stamp sets to help keep my 4x6 cards, stickers + other sheets of embellishments organized. Just because December Daily supplies only come out one per year doesn’t mean they don’t need a clear organization system like the rest of your stash. Consider what organizational tools you use year round that could be adapted for December Daily (think about what Ali talked about in the stash class!). These tabbed dividers will get stored at the end of the season with the rest of my supplies so I can use them again next year.
Review inspiration.
Now is a great time to review all the inspiration for this project! In addition to the new content on the blog this year + the classes that are coming soon, take some time to revisit older December Daily classes + inspiration. There is so much to see here on the blog if you look under the tag December Daily. If you’ve never taken Ali’s older class called Storytelling with December Daily I highly recommend, I look back on it each year. You can purchase it here.
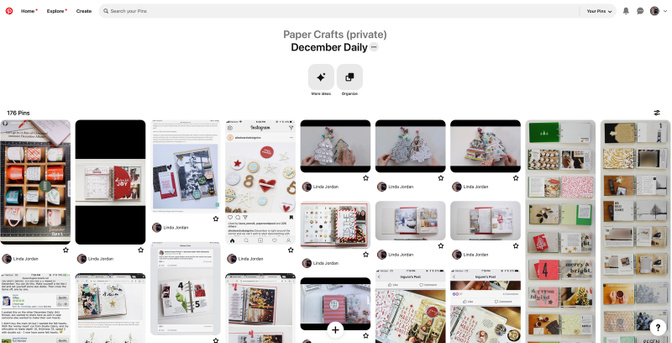
I also love instagram + Pinterest for searching for inspiration. I save projects that I love to refer back to as inspiration for my project. I also love just looking through the products and seeing what ideas are sparked, now is the time to just think of all the ideas!
In addition to looking at other people’s December Daily projects, I like to expand my search to include other things that could inspire my project. Some of the things that I look at: holiday decor, Christmas graphic design, holiday card designs, magazine spreads, or other types of crafts, such as art journal spreads.
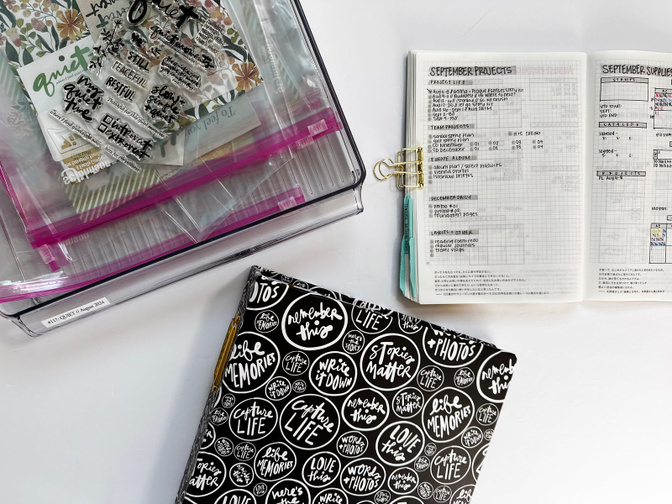
Organize your ideas for this year.
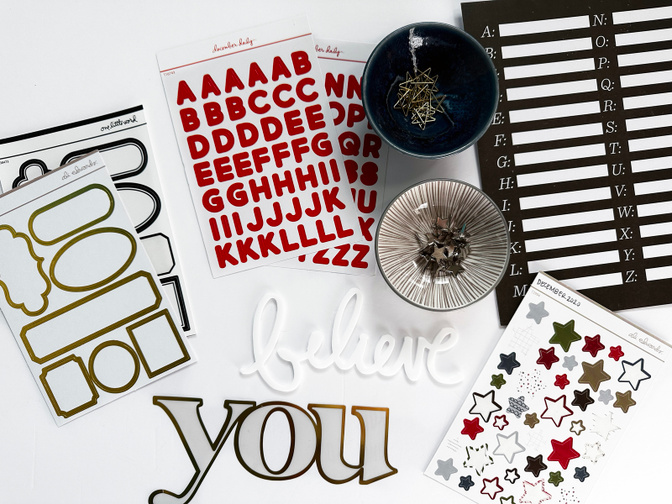
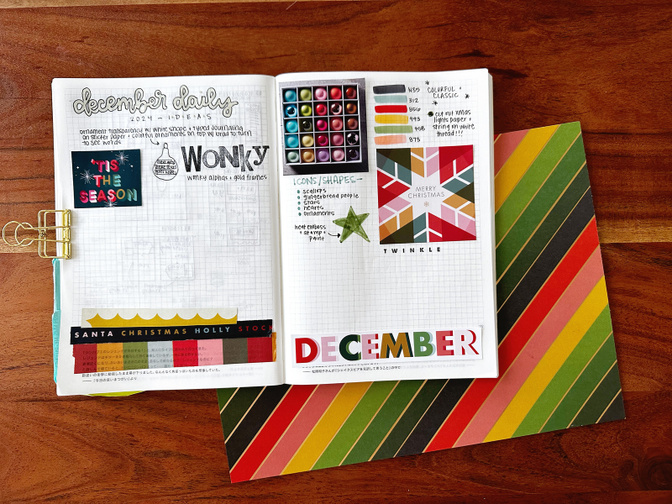
Don’t just review inspiration, but come up with a way to collect it. I absolutely love paper, so for me, this means printing out some of my favorite inspirational pieces + making notes/sketches in my craft planner. See above for my collection so far this year! But you could definitely do this digitally. Both instagram + pinterest have great options for saving inspiration.
Also note, though, that my notes don’t include any photos of other people’s projects (although you can definitely include that + I’m sure I will once I start seeing people working with this year’s collection). I have expanded my inspiration to include other types of images + sketched out some notes/ideas that were sparked looking at the products + inspirational content. I also added in a few swatches of washi + of a magazine page + some markers to find my color scheme/help coordinate my style for this year’s album.
If you are someone who frequently screenshots inspiration and find it is just getting lost in your camera roll, consider using Pinterest to catalog it! You can create a private pinterest board (since it won’t link back to original sources) and upload your screenshots to that board to view later. Then, they’ll all be in one place, and you can delete them from your phone!
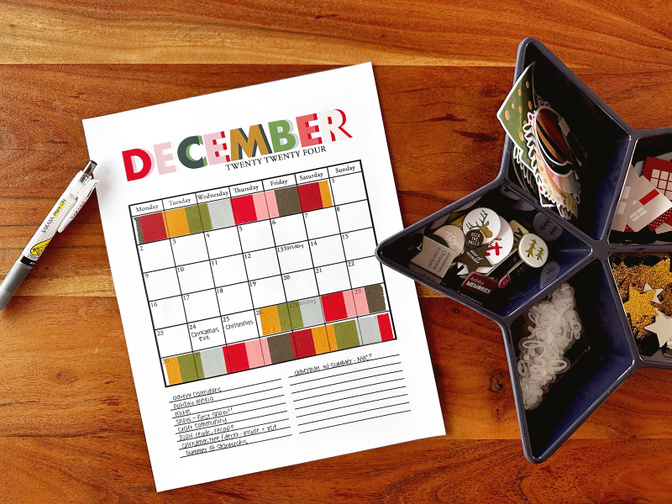
Download & print a planning calendar.
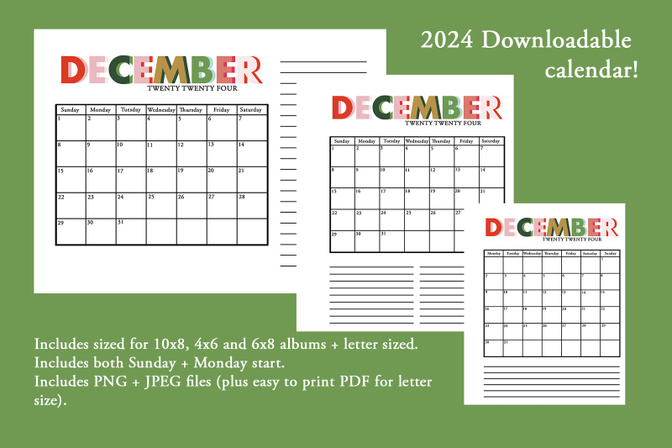
The last few years I have created and shared a planning calendar here + I am doing it again because it is so helpful to me (and I hope to you too). In the video below I am setting up my calendar for this year + sharing how I use it.
In addition to using this calendar for planning, a lot of you used it last year as part of your album (or kept the planning one with your album) so this year I made it coordinate with the collection. I have created it in sizes for the 3 albums from Ali Edwards 2024 collection + standard letter paper to make it easy to print at home. I also have created a Monday start and a Sunday start for each size.
Note: The calendars are sized to fit OUTSIDE the page protector, but the calendar itself should be small enough if you want to trim the page down to fit it inside the page protector. Please tag me on instagram if you share how you’re using your calendar so I can see + share it with the community!
I hope this post helped get you started in prepping for the upcoming season!! I will be back later this month to share more tips for staying on top of this project during the month of December.


Comments
Sign in or sign up to comment.
30 comments
This is such great info, Linda! I’m so excited to get started!
Replies to jenwong
Sign in or sign up to reply.
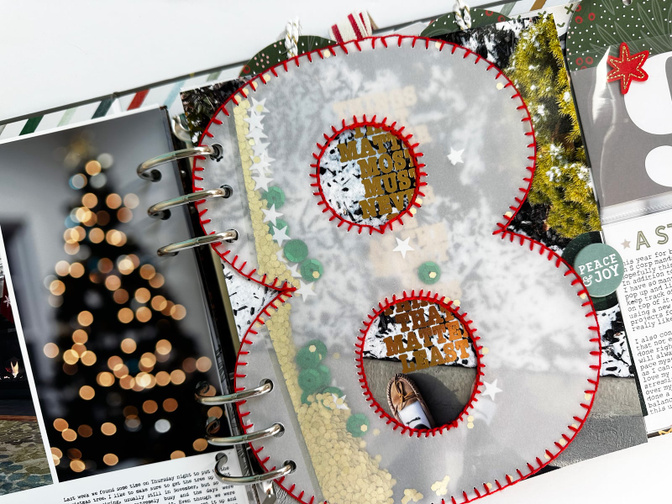
Always love your planning posts, good stuff to think about now! The album with the big 8, do you have a video for how you made it?
Replies to BrendaWeschke
Sign in or sign up to reply.
Thank you for sharing your planning calendar. I love it and all of your ideas! Do you happen to know where you got your navy-blue star divider bowl?
Replies to jillzeiger
Yes! I would love to know where the bowl is from, also!
Sign in or sign up to reply.
Thank you dear.... So So inspiring to see your process. And thank you so much for the downloadable file. Much appreciated. Honestly, I look at your stash and I feel overwhelmed already LOL...
You are doing an amazing job to break it down for people like me who do get overwhelmed way to easily. Thank you for that from the bottom of my heart. Ofcourse, everyone on the designteam. You all are an inspiration. Thank you Ali too.
I also HIGHLY recommend the Storytelling with December Daily Class. It's a perfect class I come back to every year, get inspired to tell stories. Yet I didn't do any DD project.
I want to, this year after so long watching on the sidelines.
This class is my go to. Always. I am stuggling with my mental health, it won't be easy, I just hope if someone reading this, feeling all alone, no family, no presents under the Christmas tree. Still can participate in this project.
You are worth to document your december. Your feelings, How you curl up on the couch with a hot cocoa, watching Xmas movies (even if you don't feel like it). Next year you might look back at your album and see your progress. Your growth. Especially in the mitst of Heartbreack, Struggling with a mental illness like: (C-) PTSD, Grief, Depression and Loneliness, YOU HAVE MORE TO SHARE, which is so powerfull in your healing process. Art is a form of Therapy, Your purest form of expression. All you need is a pen and paper. You got this. We got this. I got this. Sending you ALL MY LOVE... From my Heart to Yours....
Replies to Eminepala1
Sign in or sign up to reply.
Linda advises choosing an album size that suits your style and the amount of content you plan to include. She has used various sizes, including 6x8 and 10x8, and recommends considering what works best for your project.
https://sprunkedgame.org/
Replies to herrylauu
Sign in or sign up to reply.