Week In The Life™ 2025 | Special Guest Jill Drangsholt
Tags: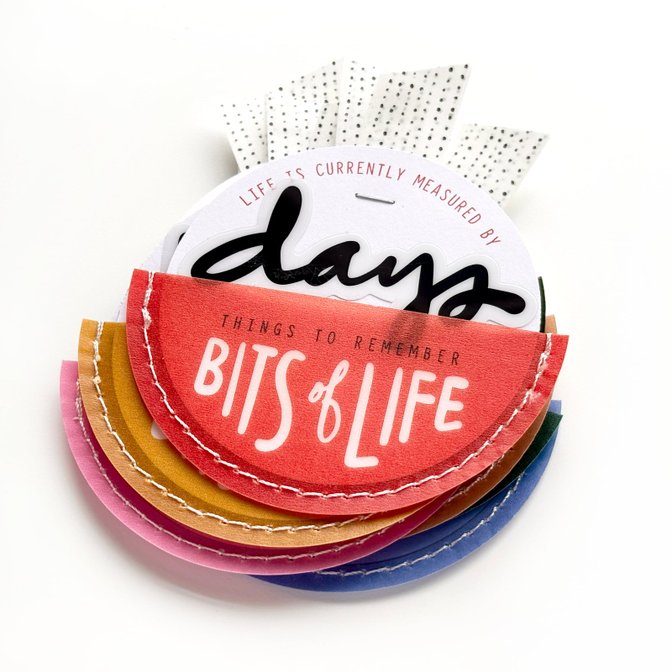
Hey friends! Today I'm excited to share with you a bit of my Week in the Life set up. I actually decided to jump right into my documenting after I set this up, so I am in the midst of my documenting week right now. I will share more of that soon, but for now let's look at my foundation pages!
Here's a walk through of how I have set up my album and how I plan to use some of the products:
And here are some photos of some of ways I am using the products:
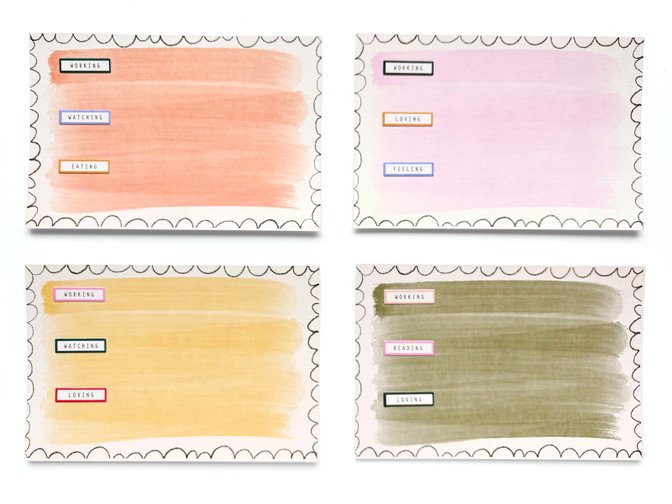
I loved using the sticker sheet in the main set to customize some "ing" word cards for each day. Don't these stickers look so cute on the 4x6 cards from the paper pack? I was able to just use the words that are relevant for my life and for each particular day. For example, I only needed one "reading" sticker for the whole week, but I wanted to sprinkle the "watching" ones throughout, knowing I'd be watching multiple different things.
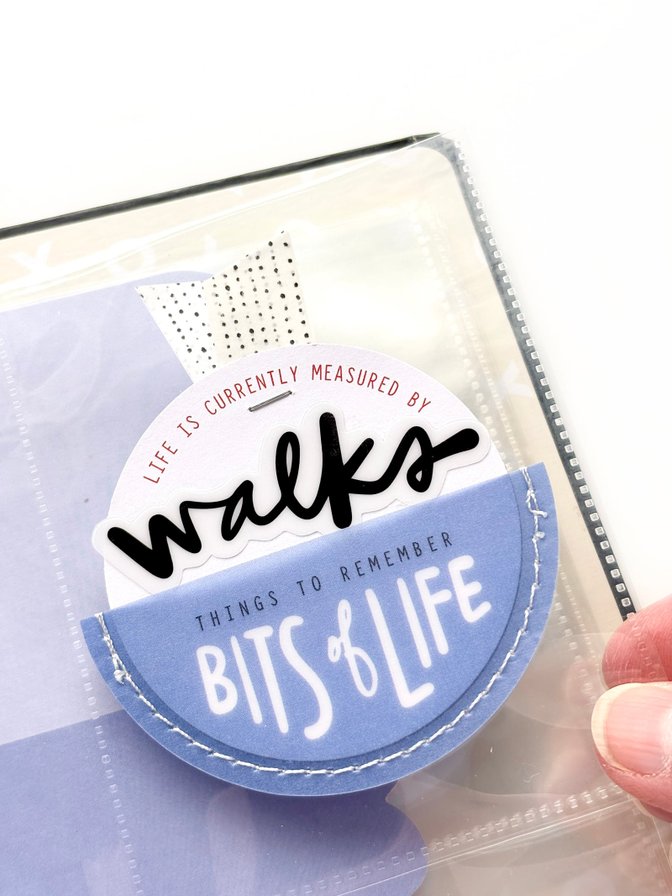
I decided that I wanted to fill the vellum pockets with circles instead of the scalloped ovals they came with, and I was very excited that the 2.5 inch circles on the Numbers Kit paper fit perfectly in the pockets! Since there are only 5 circles on that sheet, I used the digital to print out two more. I used a 2.5 inch circle punch to cut these out, but you can also hand cut them.
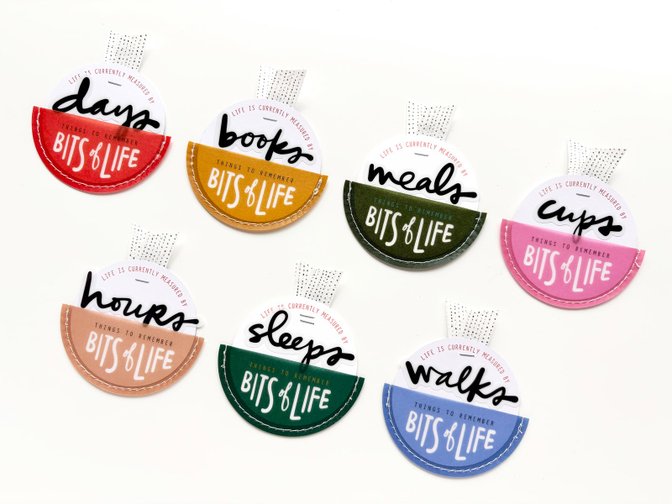
With the prompt of "life is currently measured by" on the circles, I decided they would be a great place to do some simple numbers based documenting with the Numbers Kit. I was feeling a bit overwhelmed by the prospect of the extra work to keep track of things during my week, so I looked for some simple things to count. Luckily, the plastic words in the kit not only lend themselves to some simple documeting, but they also fit perfectly on top of the circles! I glued mine down with permanent Scotch glue sticks and they seem to be holding really well. I also topped my circles with a washi tape faux ribbon. You can check out the video for how I created those.
Here is how I plan to use those plastic words:
DAYS: how many days in the week my son is with me and how many he is with his dad
BOOKS: how many books I have check out at the library and how many I have on hold
MEALS: how many meals I cooked, how many nights of leftovers, and how many dinners eaten out
CUPS: how many cups of tea, coffee, fizzy water I drink in a day
HOURS: how many hours I worked that week
SLEEPS: how many hours I typically sleep right now and what time I go to bed and wake up
WALKS: how many walks to the river and walks to my son's bus stop
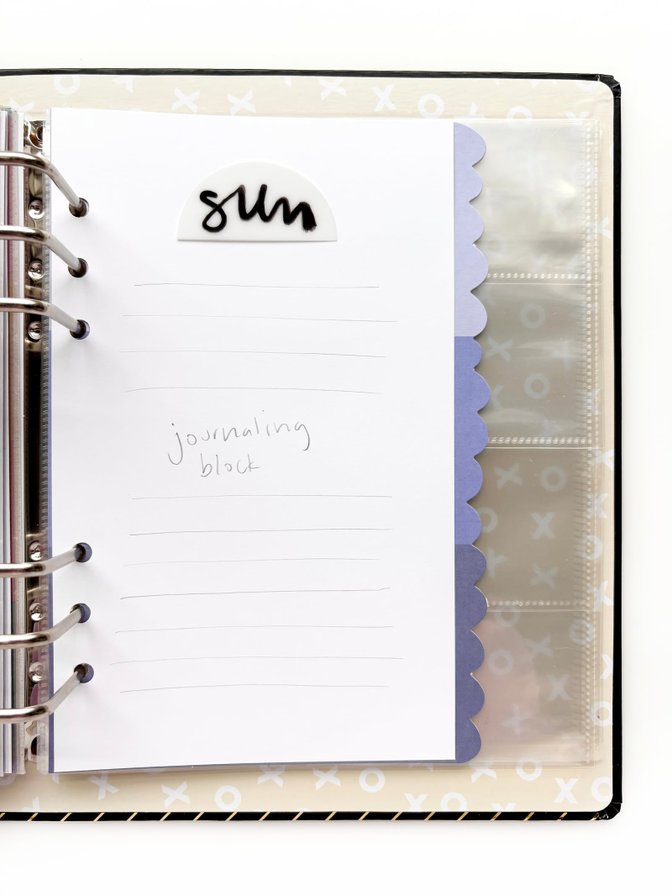
I decided to use the color blocked scalloped dividers for my main journaling spot with the front page news on the back. I cut mine to 5.5 inches wide so that there is a bit peeking out from the next page. I love how covering most of the page with a white sheet of journaling leaves a cute pop of scalloped color.
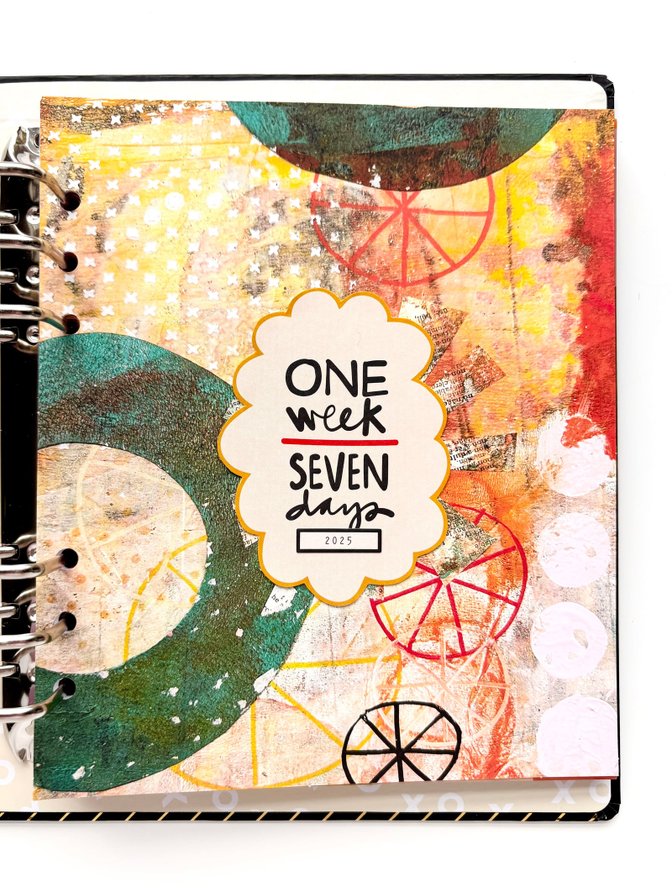
My title page is very similar to Ali's, except I used a paper from the Grit Story Kit.
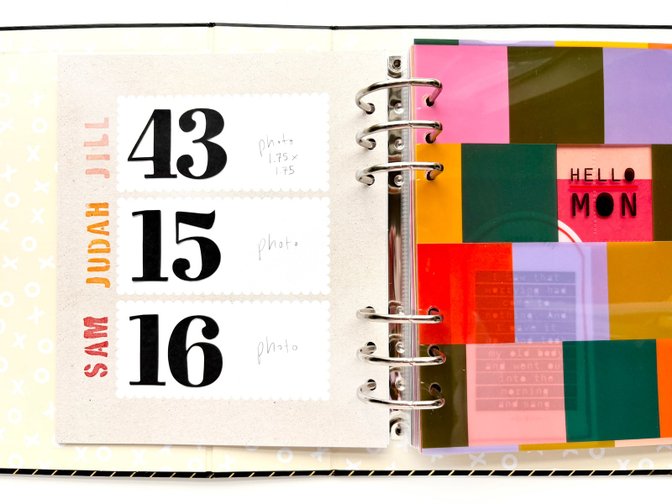
On the back of my title page, I am including a simple page to identify the main characters in my documenting week along with our ages and photos. I used a paper from the Fun Storyteller Kit as my base paired with the paper numbers from the Numbers kit and stamped names using the new stencil alpha stamp. I will add photos after the documeting week is over.
I hope you enjoyed this peek into my setup! I also think I may add a few of the 2x2 page protectors, but I was waiting to see if I have enough photos for that. My goal is to get my album all put together by the end of the community documenting week so that I can share how it looks just as everyone is ready to put theirs together. See you back here soon!
You can follow along with my other crafting adventures on Instagram (@jill.drangsholt).


Comments
Sign in or sign up to comment.
13 comments
Loved this Jill 😍 some great ideas there.
Replies to Snowflake15
Sign in or sign up to reply.
Thanks for sharing, Jill! Love how you make the supplies work for you.
Replies to ScrappySaraJane
Sign in or sign up to reply.
Love this! That is a great washi tape as faux ribbon tip - thank you! I also love how you mix up the supplies to make them work for you. Thanks for sharing.
Replies to Julie_scraps
Sign in or sign up to reply.
Hi Jill,
Is there a trick to get that clean format of the daily USA today paper just like you have? I love that idea of including in the project. Thanks for sharing.
Replies to User46340
I used Today's Front Pages app in the past, but my local paper (and USA Today is not there) anymore. I'm interested in what Jill used too.
Sign in or sign up to reply.
Thanks for sharing your album setup. Loving your ideas and how you have set up your album. The counting one, making it real simple love that.
Replies to Aroui
Sign in or sign up to reply.
Great ideas! I love how the products can be used in so many different ways!
Replies to Stacy16
Sign in or sign up to reply.
Jill- I love your approach to the kit and how you are using the various supplies and altering them a bit. Always love your approach to scrapbooking.
Replies to cjflynn09
Sign in or sign up to reply.
so many great ideas <3 Thank you for sharing.
Replies to michigirl74
Sign in or sign up to reply.
Love your set-up! Lots of inspiration. Love the circle pockets! Now I’m wishing I got the numbers mini kit.
Replies to Jeannew
Sign in or sign up to reply.
Lots of great inspiration. Thanks!
Replies to lisasproul
Sign in or sign up to reply.
This is the biggest "a-ha" moments I've had watching an album prep video. Your video clicked something for me that's never happened before and I can't tell you how much I appreciate it! Thank you for sharing your album prep! I cannot wait to see the final book!
Replies to cascrappinjenn
Sign in or sign up to reply.
So much inspiration Jill! Going to use lots of these ideas in my album, thanks so much for sharing.
Replies to z0eK
Sign in or sign up to reply.