Week in the Life : Album Creation Part One
Tags:
I definitely felt like something was missing yesterday. Having a camera attached for seven full days and then taking it away definitely made for a different sort of day.
One of the things I hoped for in doing this project again was to get back into the groove of taking daily photos. It has been awhile since I felt that desire or excitement related to using my camera daily. It definitely renewed my spark and appreciation for the everyday.
This past week I took 247 photos. That is quite a few less than when I have done this project in the past. Monday had the most photos with 83 and Sunday had the least with 14.
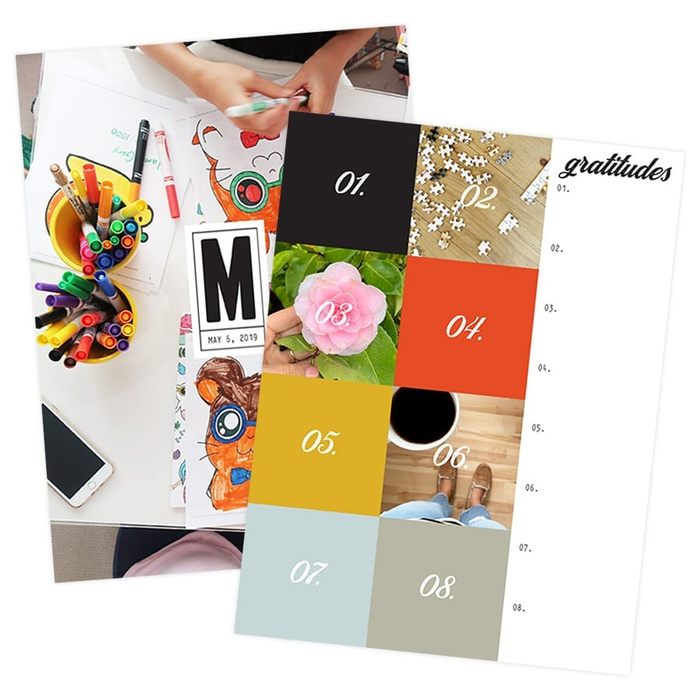
I spent most of my working day yesterday figuring out my formula for this album. Here's what I ended up with: two 8.5x11's (also called a spread) with one baseball card divided page protector sheet sandwiched in between. So far I have just completed the basics and plan to do a bit more embellishing (especially on the patterned paper rectangles as the week goes along) - process details to follow below:
NOTE: A lot of information follows. Take a deep breath, read through, and adopt the pieces (if you want) that make sense for how you want to put your album together. This is my album and the way I approach the process is what makes sense to me :) - everyone will be different.
Also, I work fast. Once I get going and decide on a formula I just go for it and don't spend a lot of time wondering if this is the "right" way or if I should be adding this or that. I want to get it done :). This approach is not hard, there are just steps to go through along the way.
MONDAY
[ album: Corduroy American Crafts 8.5x11 (ended up with chestnut); page protectors: Avery Baseball Card Protectors; cardstock: Bazzill Lily White ]
TUESDAY
THE PROCESS
When attacking a project like this I prefer to do "like" things all at the same time. It's basically working in production-mode: doing things that are the same from one spread to the next all at the same time rather than finding yourself jumping back and forth.
Here's my process:
1. Print out all the daily templates (I am using the 8.5x11 Story of Today templates. A 12x12 version - that could be adjusted to 8x8 for printing at home - is also available). I added my journaling to my templates before printing them out. I simply copied and pasted from my Word document and adjusted the font/spacing/etc.
ADJUSTING THE TITLE TO MAKE ROOM FOR JOURNALING
As you will see, some pages have much more words than others. For these pages I adjusted the height of the title on the Story of Today template to make room for the journaling (this means my photos on these pages will be smaller).
Here's a look at how to change the height of the title to adjust for your journaling (images are from Photoshop CS3):
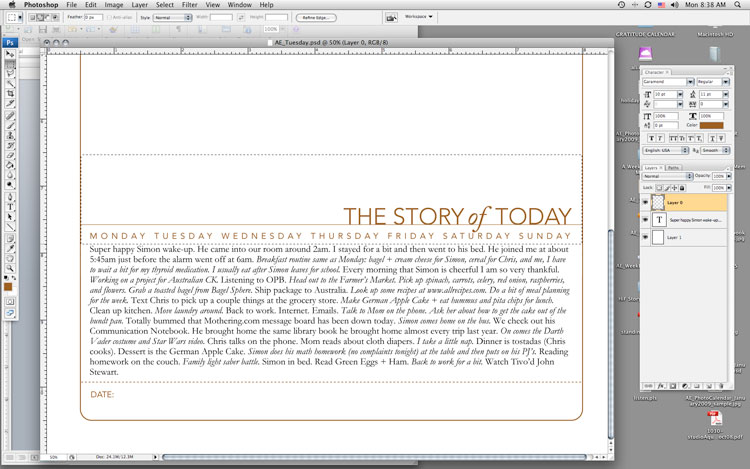
1. Type or copy and paste your journaling on a new layer (on top of the template).
2. Select/activate the template layer. Using the rectangular marquee tool, draw a box around the title, line, and days of the week. Be careful not to cut into the border as you are selecting this area.
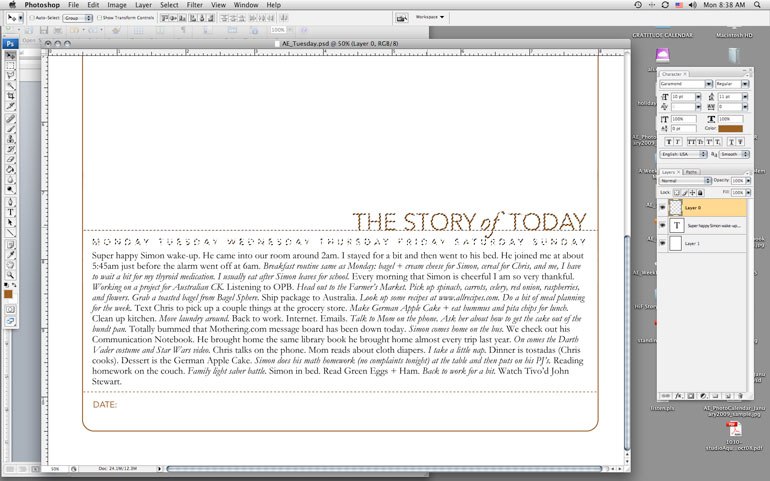
3. Switch to the Move Tool (the black arrow) and the selected area should just include the title, line, and days of the week. Use the up arrow key to move the entire piece farther up the page to accommodate your journaling.
4. Print.
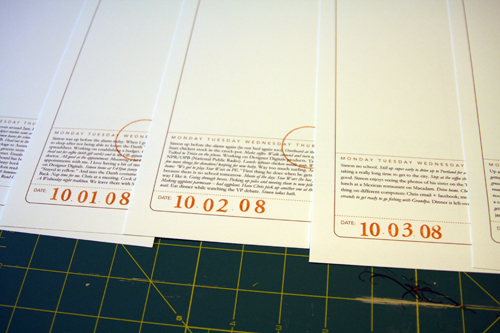
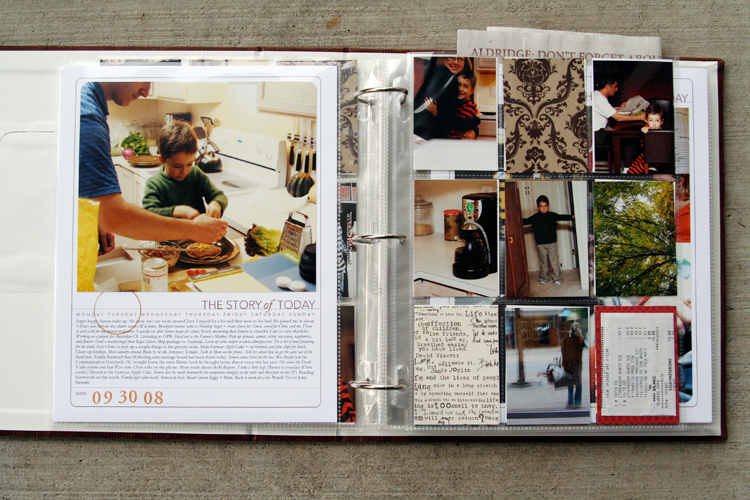
2. Add a stamped date and circle the day of the week on each of the
first page templates. Circle stamp from savvy stamps. Letter stamps are
unknown. Ink is from Stampin Up.
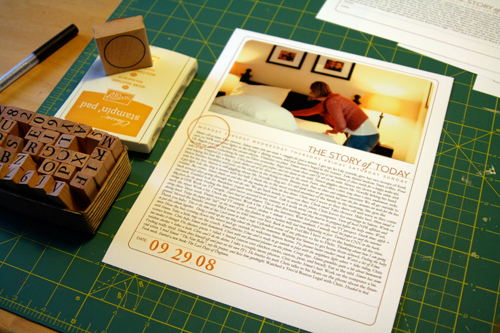
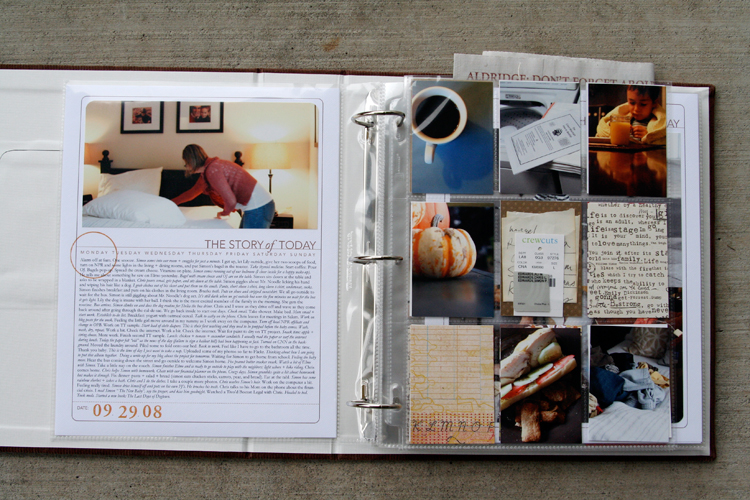
3. Order photos or print out at home. I ended up printing all mine at home today once I established my design formula. I printed photos for the opening page of each day. If you are using the 8.5x11 templates the width of my photos were 7.25 inches (the height varied by the amount of journaling - Monday had the most).
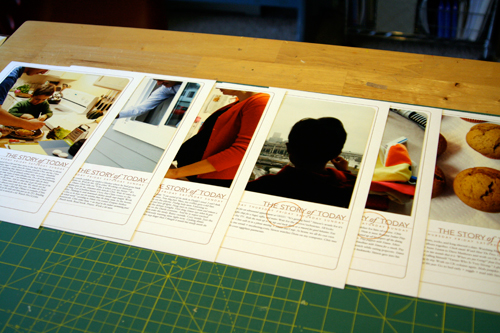
Before adhering I rounded the corners of the photos on the top to mimic the frame from the template.
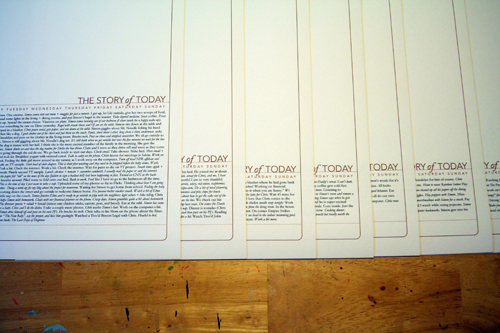
There's seven pages finished (six are shown - the seventh is in the album already).
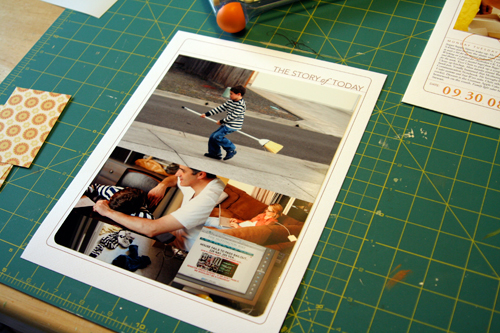
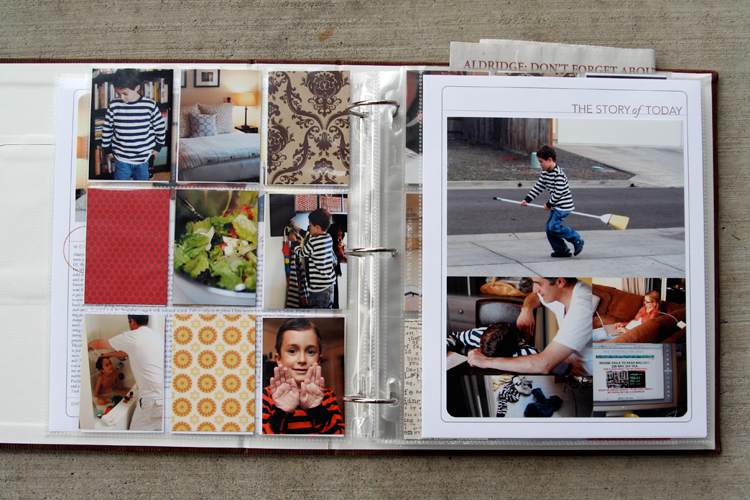
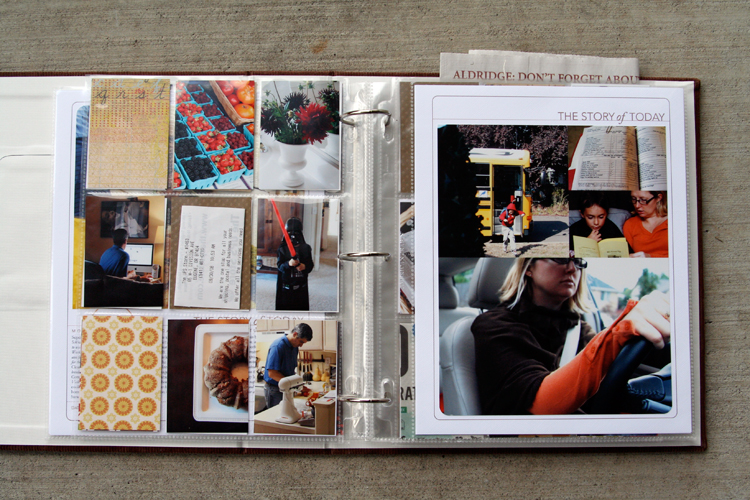
4. For the other full-page part of my spread I decided to do a gathering of photos that would fit into the same Story of Today template frame as the first page. Again, I followed the steps above to move the title to the top of the page (I removed the line and date at the bottom and the days of the week). I printed out seven of those onto white cardstock.
My photo gathering (created in Photoshop but could be easily done by cropping and arranging printed photos) is 7.25 inches wide by almost 9 inches tall. I varied the placement of the photos (large vs. small, etc) from one day to the next depending on the number of photos. Print, trim, corner round the bottom edge, and adhere to the white cardstock.
14 pages done and in page protectors (even though I plan to go back in and add a few embellishments - most likely word stickers, felt pieces, etc).
DIVIDED PAGE PROTECTOR PAGES
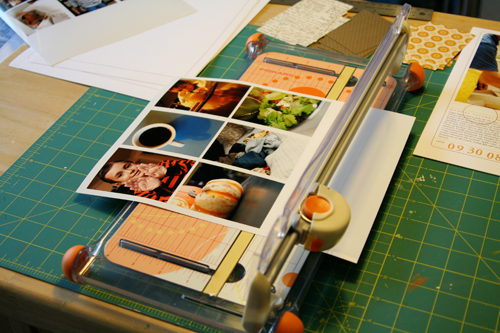
1. Print photos 2.5 inches wide x 3.5 inches tall. I chose to go with twelve of these size photos for each day - six for the front of the page protector and six for the back. The other pockets are filled with patterned paper (see below) or pieces of stuff cut to 2.5 inches x 3.5 inches.
Here's a look at the canvas of photos in Photoshop:
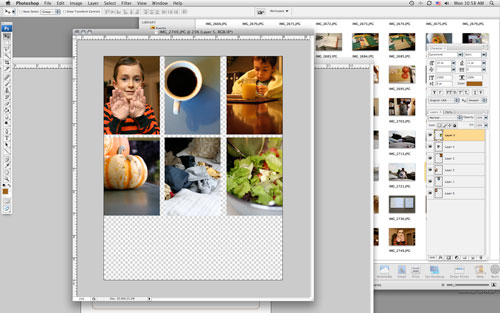
To do this and any other sort of gathering I create a new canvas (usually something like 8 inches x 10 inches at 300 dpi) and then open photos I want to use. Each photo is re-sized before adding to the canvas: in this case to 2.5 inches x 3.5 inches (which requires portions of the image to be cropped). I usually set my photo to 3.5 inches tall first which gives me a width of over 5 inches (if you have the proportion lock checked).
From there I use the crop tool to crop the image to 2.5 inches wide. I get to keep a lot of the image that way. After sizing the image I drag and drop it onto the new canvas and print after filling it up.
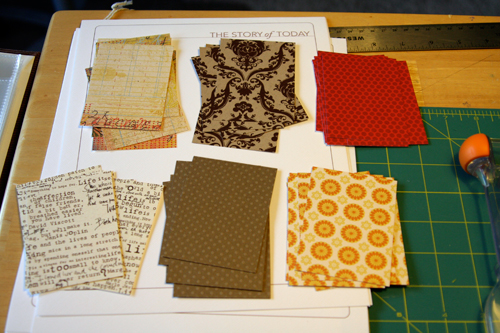
2. Cut up patterned paper rectangles for the divided page protectors: 2.5 inches x 3.5 inches. I cut seven of each pattern. Here's what I went with (from top left: Basic Grey Recess, Hambly Studios, Scenic Route Claudia Street (this one has big numbers on the back), 7gypsies Life Creme, Bazzill Basics Dotted Swiss Cardstock, and Scenic Route Sonoma Napa Street. Any six papers you have at home will work.
3. Slip a combination of photos and patterned papers into the divided page protector pockets. If you have many more photos you could skip the patterns and go with all photos or if you have a lot of stuff cut up pieces of those things to 2.5 inches x 3.5 inches to fit. Consider adding more pages if you need more pockets.
Some days I had less than 9 photos to crop after doing the photo gathering for the second page. For those places I will be adding more stuff/patterned paper rectangles.
These patterned paper rectangles will be embellished over the next few days.
Make this project as simple as you can for yourself so you will actually DO IT! You have already done so much work in taking photos, gathering stuff, and documenting life. Give it a home.

The pumpkin muffin recipe can be found here at allrecipes.com.

A complete list of posts related to the week in the life project can be found here.


Comments
Sign in or sign up to comment.
157 comments
Thank you for all of the wonderful detail. I took your Day in a Life class several years ago & loved it. This post has really got me ready to do another. Thank you again for being such a generous and sharing soul ...
Replies
Sign in or sign up to reply.
Great project. My mother in law was in town when this started, so I'll have to start next week sometime. Saw your ad in Paper Crafts, wish I would have seen it sooner! Have a great day!
Replies
Sign in or sign up to reply.
Ali,
love this!!!!!!!! I'm waiting on my album so that I may start. Thanks for all of the great info on resizing and moving the title. I'm probably going to follow your format, love it!!!!!! WOW you do work fast!!!
Annette
Replies
Sign in or sign up to reply.
thanks, Ali for the step by step guide on creating the album. Love the details and also a great way to document the daily life. I must really do one for myself and I admire you for the energy you have during this stage of pregnancy. :) Take care and God Bless.
Replies
Sign in or sign up to reply.
Love, love how your project turned out!! How would you do this project if you did not have Photoshop? I am thinking that you can just print the templates, handwrite your journaling and mount along with photos? Don't you have a book similar through Shutterfly where I could just upload my photos to that? Thanks for all of your inspiration! You're amazing!
Replies
Sign in or sign up to reply.
Love what you did with yours...can't wait to get mine going, hopefully tonight! =)
Thanks again for doing this as a group thing Ali!
Jen Davis
Replies
Sign in or sign up to reply.
The way you broke down the process and explained it makes it so less overwhelming. THANK YOU! Today is day 2 of photos and words for me!
Replies
Sign in or sign up to reply.
I have been thinking about doing more "hybrid" scrapbooking because I'm hardly ever home, but usually have a computer. I love the way your book turned out. And you still get do to the fun stuff - embellishing. Thanks for the inspiration.
Replies
Sign in or sign up to reply.
Ali, you're my hero!
I love your work. Thanks for the inspiration.
Replies
Sign in or sign up to reply.
Hi Ali,
I am going to use the 8.5 x 11 Story of Today templates for my album also. I am just learning how to use Photoshop and I cannot figure out how to change the color of the text and lines on the templates. Can you provide a how-to on that? Thanks so much.
Replies
Sign in or sign up to reply.
I confess I am not participating in your Week In the Life exercise, though I do plan to at some point within the next six months.
But I did want to thank you for the "growth chart" photo you took on Sunday. Seeing that made me think that maybe I should mark Jackson's height at times other than just his birthdays. (He is almost 15 months old.) Lo and behold, he has grown over an inch in the past 2 months! Thanks for that reminder that we can do things "just because we want to" and not because "it's time".
Replies
Sign in or sign up to reply.
I can't get the 8.5x11 Story of Today link to work. Is it my computer? I'm totally in love with you album. Love the clean lines and the simple-ness of it & everything. Thanks for the inspiration.
Replies
Sign in or sign up to reply.
Ali, you must hear this 24/7, but you seriously rock my world. I love how generous you are with your process. I learn so much from you!
Thank you so much.
Replies
Sign in or sign up to reply.
Ali,
your "Just do it" message is really inspiring! I'm hoping my pix are in my mailbox today, and your post will give me some real motivation to finish the project quickly. I've done some quick minialbums with Shimelle, and I think I need to channel that energy here, too.
Thanks again!
Rinda
Replies
Sign in or sign up to reply.
This project has totally inspired me to do something similar for my daughter's first year album! She's almost 2 (gulp) now and I've been struggling with how to document her first year. I think this will be perfect! Thank you SO much!
Replies
Sign in or sign up to reply.
You AMAZE me that you are already (almost) done!
I am starting my 12 Days of Christmas album with circles cut from 12''x 5-1/2" pieces of soft olive green paper I have left over from another project... I'm making a 5" circular album with a tab~( from cereal boxes glued together to make my own chipboard), and I will punch out photos that I take every day and stick them on the solid cardstock pages and then hand journal and stamp/embellish afterwards. The tab will be where the holes for the ring are punched, and hopefully it will look like a ball tree ornament when I hang it up to display it!
Thank you for your inspiration!
Replies
Sign in or sign up to reply.
Hi Ali!
I just started to read your Blog!!! Fine stuff! The album is really great. I love your clean and simple style!. I hope I can find the time to do this album soon!
Bianca from Germany!
Replies
Sign in or sign up to reply.
ali, your album looks fabulous!..i think i am going to use the baseball card pages as part of my album...it is a great way to get a bunch of pics in!....
thanks for the inspiration!...
Replies
Sign in or sign up to reply.
Darn you, Ali. ;) I've ordered an album to do mine in, but I really, really adore the simplicity of yours. So now I'm thinking I should change my format, I'm worried that I'm making it far too complicated and it will never, ever get done. I can't print 12x12's at home, so I may just have to change it up to 8.5x11. Hmmmmm. Off to think........
Replies
Sign in or sign up to reply.
This is an awesome IDEA!
Replies
Sign in or sign up to reply.