Week In The Life™ 2024 | Special Guest Linda Jordan
Tags: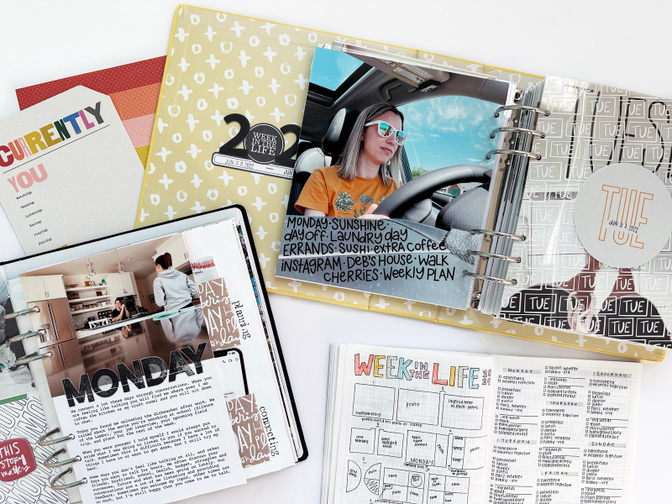
Hi everyone! It’s Linda and I’m so excited that it’s Week in the Life season again. I have documented this project every year since 2015, so this will be my 10th year of documenting a week in my life. This project is one of my favorites, but it is a big project! Over the years I have found a rhythm that works for me in this project. Hopefully some of these tips help you feel ready to dive in this year!
Tip 01: Start by looking back
Take some time before the documenting week to look back through your older Week in the Life albums. If this is your first year, no worries, look back on other’s albums online. Ali has shared all of her’s here on the blog, I have a few of mine on my youtube, and lots of others in the community have shared album walk-throughs.
When looking back on older albums, take notes of what worked and what didn’t work. What do you love about those albums? What did you document that you are so happy to see recorded? What is missing that you wish you had captured? Keep these things in mind when developing your plan for this year’s project.
Tip 02: Come up with an album plan before the documenting week, but then put it all away during the week
When I first started this project, I didn’t touch my products until after the documenting week. I liked to go in fresh, capture my stories, and then put it all together afterwards. However, I found that I collected too much in one area and not enough in another. I also struggled to put my albums together because I would lose momentum and excitement for this project. A few of my albums got put away, unfinished, and were finished years later. And that is totally fine!
But, for me, I really want to finish this project soon after the documenting week. I’ve found the best way to do this is to come up with an album plan ahead of time. This helps guide your documenting week and it lets you play with those products when you’re excited about them! For the past few years, I have laid out an album formula ahead of time and started to put my album together. I’ve slipped things into the pockets, added larger pieces into my album, and even created some custom pieces ahead of time. This definitely helps cut down on the work that is needed to finish the album afterwards.
That said, as much as I love playing with the products early and having a plan, it really helps me to put the album away during the week and focus on collecting the words + photos. It’s really easy to get overwhelmed with a project of this size and breaking these pieces apart into separate steps really helps keep it manageable.
Tip 03: Create a scavenger hunt list of items to seek out during the week
One of my favorite ways to approach this project is to create a scavenger hunt list of things I want to search for during the week. This is especially helpful if you are concerned about your photos being boring or all over the place. To do this, I look through my album plan and come up with some ideas for filling specific spaces in my formula. Having a scavenger hunt helps keep me on the lookout to take photos during the week and makes the documenting process fun! When creating scavenger hunt list items I have 3 different type of things I search for: (1) something that I look for every day; (2) something I look to capture once per the week; and (3) something that I look for 7 of, but they are necessarily on specific days.
Here are some “scavenger hunt” list items I am using this year or have used in the past.
Daily items:
The weather, either a screenshot of the app or a photo that depicts the weather
My outfit
My desk Breakfast, coffee, lunch, and/or dinner
Something circular
From where I stand (looking down at my feet)
Specific items prompted by products in the kit (e.g. one year there were large words representing times of day and I did one for each day)
A relationship (I looked for a photo of my daughter + I interacting each day)
Screenshots of what I’m doing on my phone
Daily news (I use the front page app)
My planner
Something I’m grateful for A specific color of the day
Items to capture once:
A full family photo
A photo of each family member
A photo of the front of my house
Currently items (reading, watching, listening, etc.)
Morning routine/evening routine
Items to capture 7 of:
spaces in my home/life
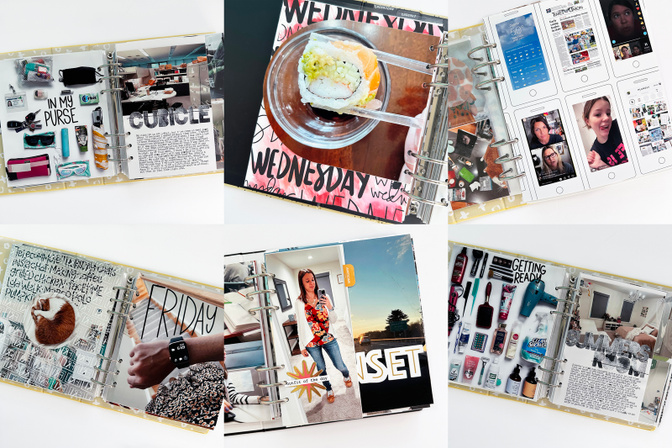
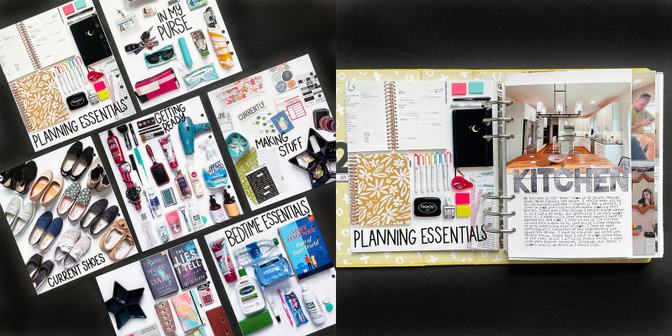
Flat lays of various items (see photos for examples)
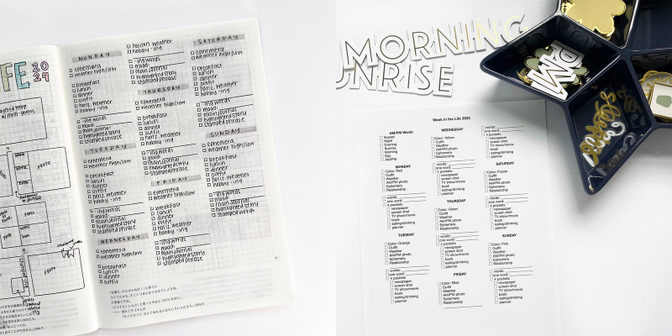
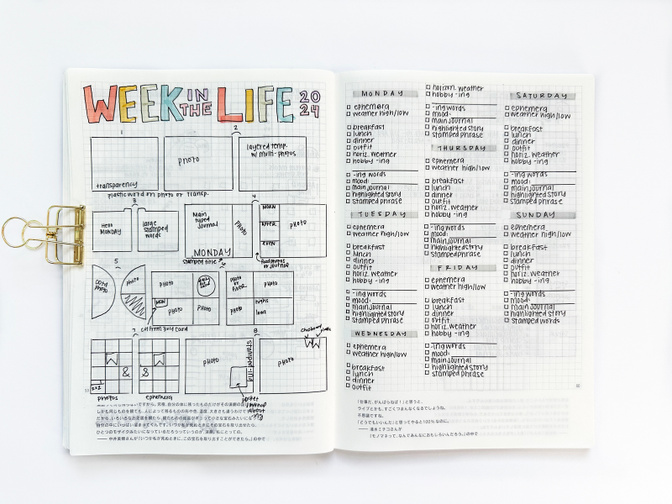
Tip 04: Create a checklist of items to collect and keep it visible
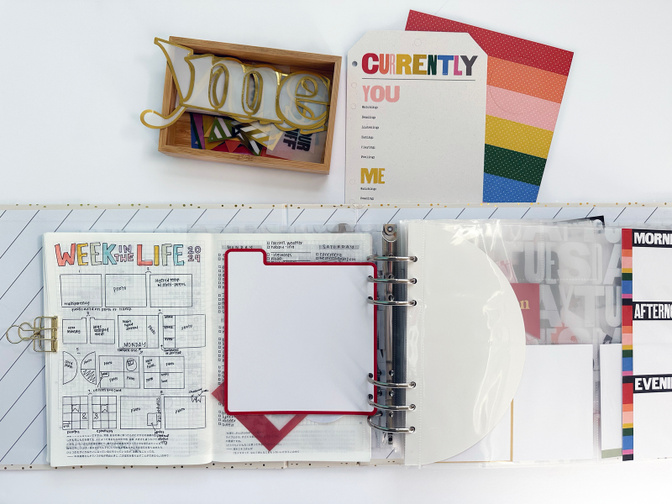
Once I have an album formula + scavenger hunt in mind, I create a checklist of the items I want to collect every day and over the course of the week. For me, the best place to keep this checklist is out on my desk, but it might work better for you in your bag, on your phone, or on your computer. In addition to my scavenger hunt items, I might add other items I want to collect to my list. Pictured are my 2024 list (left) and my 2023 list (right).
Some additional items to collect:
A quote per day
A word that summarizes the day
A phrase to stamp out large
Ephemera
Tip 05: Keep your plan realistic
This brings me to my next tip, though, keep your plan realistic! It’s easy to get caught up in all the ideas of things you want to collect and make a list that’s unmanageable. Once you’ve made your list of all of the things you want to collect, you might want to consider narrowing it down a bit to make sure it’s something you can collect and use in an album.
I want to keep my project to one album per year which means, at most, 8 pages per day (and that’s tight). If you have a tendency to take too many photos, you might want to sketch out your album in advance and give yourself a realistic list of how many photos you can include per day. If you tend to not take enough photos, you might want to come up with a plan that allows you to include fewer photos and set up reminders for yourself so you don’t forget to capture the week.
While a scavenger hunt list is fun, you also want to leave some room to capture the details of life as it happens! I aim to have only a few scavenger hunt list items per day and the rest of the pockets will be filled with whatever I capture from the day. I also know that this is super manageable for me because I’ve done this project many times in the past. If you are concerned with falling off this project, maybe pick one scavenger hunt list item to seek out per day and fill in the rest with whatever you happen to capture.
Tip 06: Be the star of your own story
Making yourself the star of your album is probably the most important piece of advice I have for this project. It’s easy to get caught up in expectations about capturing your family’s story but it rarely works out that everyone cooperates the way you’d like. You can’t follow each of your family members around paparazzi style and everyone comes to the table with different opinions, interest levels, and skill levels for capturing photos.
I find that this project is most successful when I focus on myself and this project as a week in MY life and view others in my life as supporting characters. I try to capture my daughter and significant other throughout the week and include them in my album, because they are important pieces of my life. This year my daughter lives away at college and I will definitely ask her to send me photos + details each day.
But, if they don’t cooperate, don’t want to be pictured that often, or they forget to take photos when they’re off doing their own thing, that’s okay. I would put the odds at my daughter sending me something to be about 50/50 on any given day. If she does, that’s great, and I’ll include it. If not, that’s okay too. This is my album and my story, and that’s totally worth documenting on its own. The rest is just extra!
Tip 07: Have a plan to collect your words
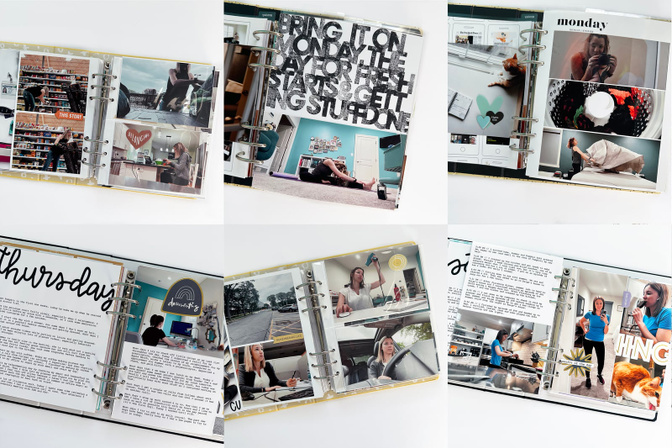
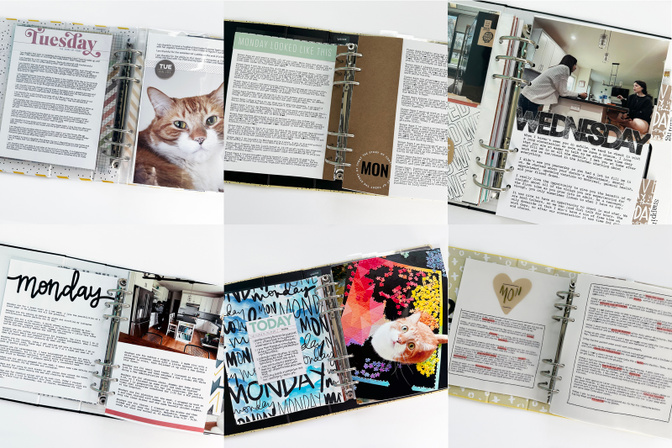
When I first started this project, I journaled what happened each day in chronological order and then tried to pair it with photos in my albums. I found that these were super time consuming to put together and, honestly, are somewhat boring to read when I’m looking back. When I flip through those earlier albums I tend to gloss over the words and look at the photos.
Since then, I have evolved to use prompted writing for my main journaling each day. This helps me guide my storytelling and make it more interesting. I will probably follow this same format this year. Some of the prompts I’ve used in the past:
Around here
Some days/most days
Mondays are for…
Real life right now means…
Today I…
I want to remember…
Time stamps I am thankful for…
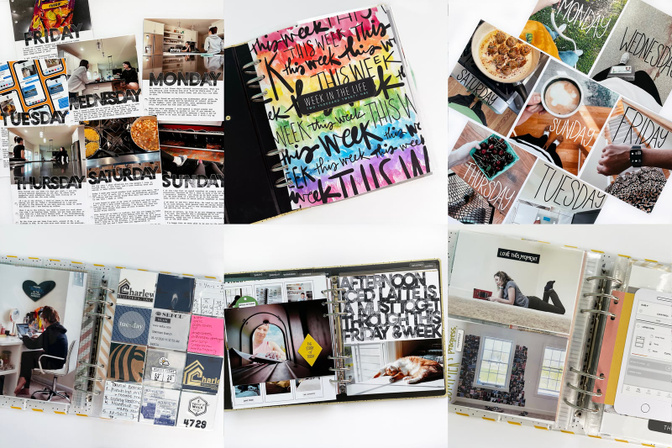
I also have added shorter prompts in the past few years to add some additional words throughout the album. For example, last year, I focused on capturing my relationship with my daughter because it was her last year at home before college (see top right photo for example). Each day I would write something about our interactions at that point in time, including both facts and feelings. I love having these to look back on! This year I’m focusing on capturing words + photos about my hobbies each day.
Once you have a plan for your words, I highly recommend taking the time to write them down during the documenting week. For me, I use a word document on my ipad/phone and add to it each evening. You could also use a physical journal, your planner, or a specific app designed for journaling like Day One.
Tip 08: Select & edit your photos daily on your phone
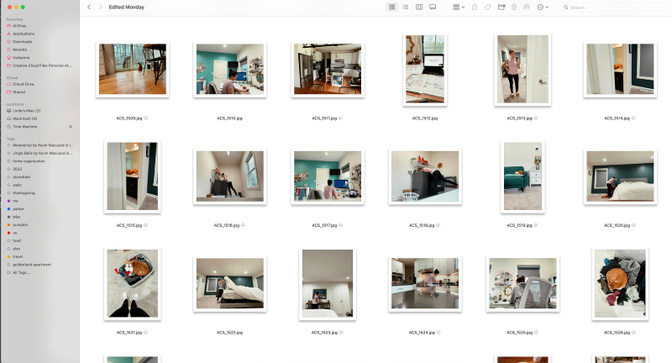
One of the hardest pieces of this project, for me, is narrowing down my photos. I tend to take way too many photos and have many attempts at the same shot. A couple of years ago, I realized that I could make this project much more manageable by taking some time each evening to delete the duplicates/ones I dislike on my phone (or favorite the ones I do want to use) and then use an app to edit them. My favorite is A Color Story. Then I add them to specific folders for each day on my phone, and ultimately dragged to my computer, and this helps me when I’m ready to put my album together. It also gives me some photos to share of my day on instagram to connect with the community and keep up the momentum for the project.
The photo above shows my folder of edited photos for this project from Monday last year. Did every single one of these end up in my album? No. But, when it came time to put my album together I had fewer photos to choose from and they were already edited so all I had to do was crop to the size I wanted + print.
Tip 09: It’s okay to fudge the details
This is one I always need to remind myself of, because I’m such a perfectionist. But, it’s okay to fudge the details. If you forget to take a photo of something one day, that’s okay, you can use something from the following day, or week, or even month! The point is to capture your life at this point in time, and when you look back on “a week in 2024” it won’t really matter if your photos are a little off.
If you know going into this project you are likely to miss photos, don’t put pressure on yourself to capture things on specific days. Instead, focus on capturing details over the course of the week. In 2022, rather than focusing on capturing specific items on each day, I focused on capturing photos of specific places in my life + flat lays of specific items. I did not take these photos one per day, instead I just took 7 photos during the week (I believe most were taken on the Saturday) and then I added one to each day in my album.
It’s also okay to skip something. If you set out to capture a photo of your outfit everyday and you only get six of them, you can just put something else in that spot on the seventh day. Photos of six of your outfits over the course of a week will still be really great to look back on!
Tip 10: Take a break before putting together your album
Finally, after the documenting week, I find it’s easiest to put everything down for a bit. Maybe finish editing up your photos and drafting your words, but then let it sit for a few days. Think about what you captured, relax after the documenting week (it’s a lot!), and then dive back in with fresh eyes a few days later.
I hope my tips help get you ready for this project. Above all else, though, keep it fun! We’re doing this because we enjoy the process… don’t forget that, so make sure you’re enjoying it. And, if you’re not, change it up.
I am sharing my set up and plan for this year over on youtube, you can find my video here.
You can find walk-throughs of some of my completed WITL albums here.
You can also find me over on instagram: @lindalovescreating


Comments
Sign in or sign up to comment.
11 comments
These are really great tips Linda!
Replies to jlutherdesigns
Sign in or sign up to reply.
Great blog post! Lots of good tips to think about :)
Replies to sunday__plans
Sign in or sign up to reply.
This is awesome Linda! Thanks so much :)
Replies to mscholes
Sign in or sign up to reply.
Love this. Thanks so much.
Replies to minkaclark
Sign in or sign up to reply.
Love these tips!
Replies to Natalie_Johnson
Sign in or sign up to reply.
Great post, thanks!
Replies to carrieW
Sign in or sign up to reply.
Great advice Linda!
Replies to Minoone
Sign in or sign up to reply.
Great post Linda. I really like #3- that bridged a gap for me. The breakdown of Daily/ 7 items/ 1 of is such a great idea.
Replies to MrsKnight
Sign in or sign up to reply.
Thank you! Thank you! Thank you! Great inspiration here. I love your style. Great tips!
Replies to shastamp
Sign in or sign up to reply.
Love these tips, Linda! Thank you for sharing!!
Replies to ahiggins83
Sign in or sign up to reply.
Hi Linda. Great tips as ever. I love your pragmatic and structured approach. I got colour story based on your recommendation in PPP course. However I am totally overwhelmed with the filters. Ae there a few that you use often? Any tips for favorites?
Replies to ellaandjack
Sign in or sign up to reply.