Let's Do This | Pocket Storytelling
Tags: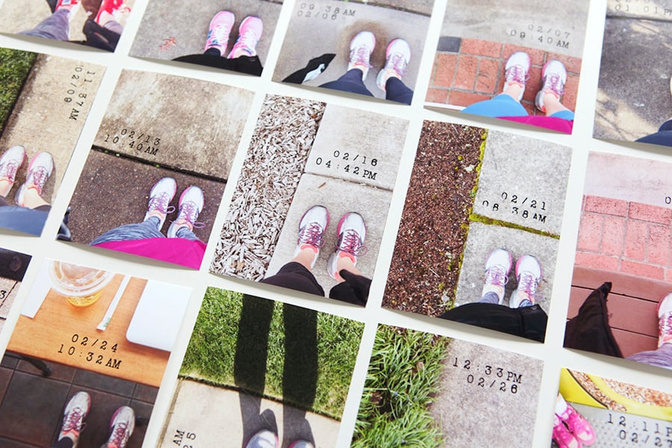
Last month in the February One Little Word® classroom the prompt was to "practice" something each day over the course of the month.
I decided that my daily practice was going to be walking one mile. Over the course of the month I took photos of my feet each time I walked, knowing that I wanted to visually tell the story of connecting with my word in this way. I love that over the course of the month I literally crafted a story - a story of building a habit one day at a time.
There's still time to join us in the One Little Word® workshop as we work together to make our words visible each month via creative prompts. We generally close this classroom in the late Spring and class runs through December.
To tell this story I decided to print all my photos at 3x4 and use a Project Life® Design F Page Protector to hold the photos and words. This story will go into my yearly 12x12 album but you could easily add a story like this to Project Life®.
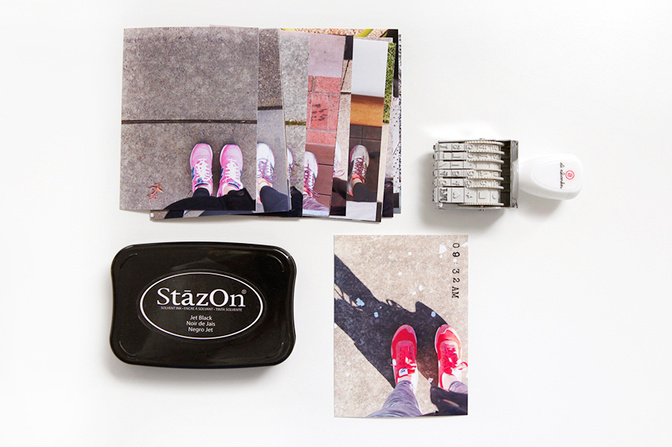
After printing out each of my photos (all printed 3x4) I used the rolling time stamp from the Day In The Life™ kit to add the time and the date using Black Staz On.
All these photos were taken with my iPhone. I'm currently still using Aperture for my photo management and it, like most photo management programs, holds the "metadata" for your photos. That information includes the time and date the photos were taken which made it super easy for me to go back when I was ready to document these and stamp the real-life times directly onto the photos. YES! Go technology. Noell at Paperclipping.com has written more indepth information about metadata if you'd like to learn more here.
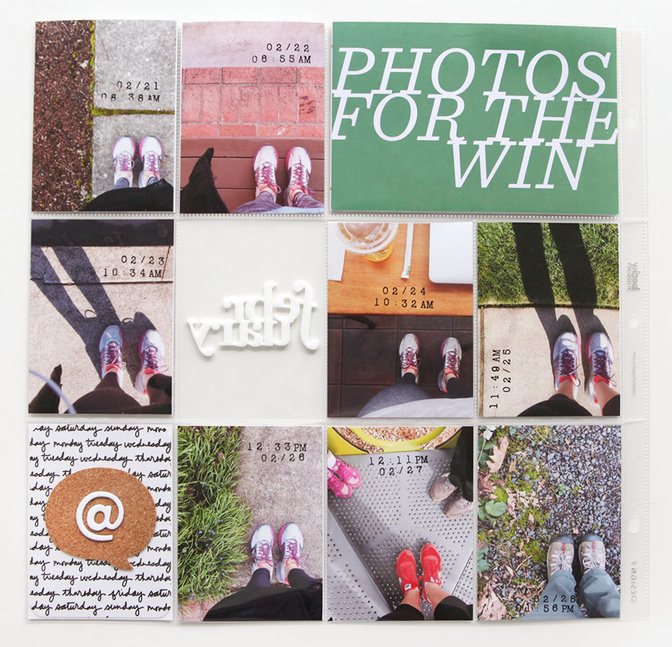
Here's a look at how it all came together on the front and back of a Design F page protector:

And the other side:
A few things to note:
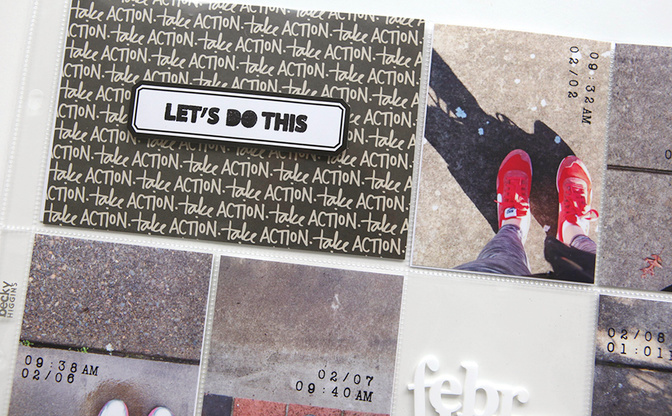
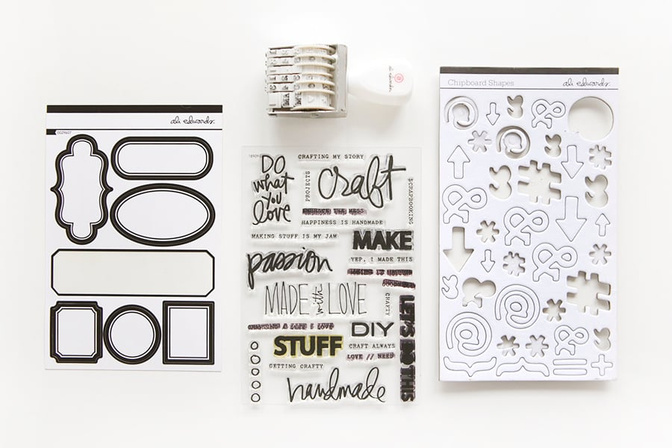
For the title card I used a 4x6 card from my Sparks Story Kit™ + the "let's do this" stamp (part of the Craft Story Stamp™ that you can still grab between now and March 14th - there is also a digital version of this stamp set available without a subscription here) + a black label from my package of label stickers.
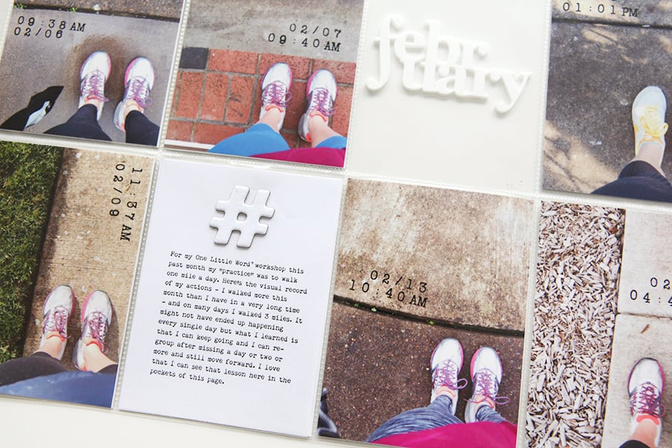
For my journaling I printed out a short reflection (I also included more about this in my One Little Word® album which is part of the workshop content) and paired that with a "hashtag" chipboard piece from my AED Cascade Chipboard set.
The rubber "February," which I just slid into the pocket, was included in the SC Savannah Scrapbook kit.
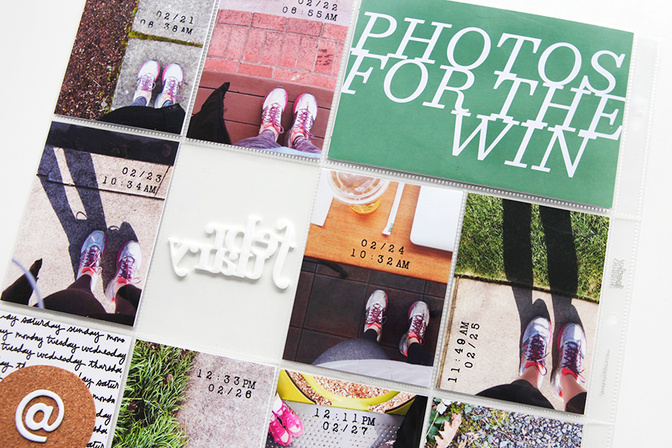
The "photos for the win" card was from the Click Story Kit.™
In the bottom corner pocket I included a card from the Everyday Core Kit + a cork speech bubble from Freckled Fawn + an "@" symbol from the Cascade Chipboard set.
SUPPLIES
AED Rolling Time Stamp (included with the Day In The Life™ kit)
Craft Story Kit™ (available via subscription through March 14th)
Sparks Story Kit™
Click Story Kit™
Project Life® Design F Page Protector (or available in the Big Variety Pack here)
SC Savannah Scrapbook Kit (February word)


Comments
Sign in or sign up to comment.
32 comments
I would give my eye teeth to know how to print 3x4" photos. Ever since my iMac was updated to include the stupid Photo thingy not even iPhoto will work the same anymore :(
If anyone in Canada can throw me a bone about where to get photos printed, please share. There is lots of outfits in the States, but the exchange is killing me. And to make it worth my while, I have to wait until I have a whole whack of photos to print. Walmart does not offer an on-line ordering system anymore and Photo.ca through the Loblaws platform just does not seem to work with my iMac for some reason. I have tried the print option through my iMac and the photos are not always what I cropped them to be.
I'm about to loose my mind. Kindly intervene?
t.
Replies to Taryn411
I think I may be of the EXTREME minority these days - and this might not be an option for you.....but I print my pics by physically going to Walmart and using the Kodak kiosk in the store. Selecting the Collage option will allow you to select mini prints and you will get two 3x4's printed on one 4x6 print. I live in New Brunswick.
If you have a Costco near you, they print as well, and have an upload online option (I work there). I use Photosheet, a free program you can download at www.photosheet.com. You choose the finish size (in this case 4x6), pick the template (you have to scroll UP for 3x4), drag your photos in, pick where you want it to save, and voila, done. This is how I batch process all my 2x2's as well.
If you have any questions let me know, I would be happy to answer them.
Do you happen to have Photoshop? If you do here's a tutorial on how to put two, 3x4's on a 4x6 before printing (either sending to a service or printing at home): http://aliedwards.com/2012/01/video-tutorial-printing-two-3x4-images-on-a-4x6
I do it the AliEdwards way above in photoshop. This way all the work is done at home. When I bring my usb stick to Costco, I then only have to chose 4x6 (because you have saved your 2 3x4's on your 4x6 canvas. .. this way usually cheaper at .10 a print. of course when you get home you will need to cut down the middle to get your 2 3x4's.
You can also use Pic Monkey (online and free) to make 2 (3x4s) on a 4x6 canvas then print wherever you normally do.
I have a new Mac with Photos. On the print page if you select paper size 4x6 then choose "custom" from the size choices you can put in your size of choice at the bottom of the screen. Doing this prints one 3x4 in the middle of the 4x6 photo paper.
It's wasteful but when I'm short on time I do it this way rather than going to Photoshop to put two photos in the 4x6 template. Hope that helps!
The Project Life app also has a collage option for 2 3x4's on a 4x6. Since I take most of my photos with my phone, this is how I do it. I export it and get it printed normally where I print all my photos (I currently do Walmart due to ease and convenience.
I'm in Canada and I use Persnickety Prints. The prints are very high quality/archival/waterproof and they frequently have deals where you can buy a bundle of 200 4x6 prints for 40% off (once purchased, it never expires, and you can choose to use as many as you want per order). For 3x4s, you can either (1) put two on a 4x6 (I use lightroom print module for this) then cut in half, or (2) Persnickety has a 3x4 size option, which is how I print most of my 3x4s.
I'm in Canada, have walked in to use both Walmart (same as above commenter) and Superstore (Collage>Mini Print option). Mostly thought I use the PicFrame app on my Android phone. Click Ratio 4:3 or 3:4 and click the template. Then just tap the side of the screen and pic your photo from your gallery. For me, since most of my photos are from my phone, this works. And now I upload to Costco app which is super fast now that they fixed it.
If I have to format in my computer, I still struggle with Photoshop to do it, even after the great tutorial Ali mentioned....worked a few times and then I somehow screwed it up. PicMonkey is good too.
I hear you on this one! I used to use Black's when they had stores, but I haven't tried them since they were bought and went to mail service. Currently I use London Drugs. It's pricey, but they have the best quality prints that I know of in Canada for in-store prints. That said, their 4X6 maybe pricey, but the 5X7 and 6X8 are well priced.
Thank you, dear friends...I heart this community :)
Sign in or sign up to reply.
I have never done any layouts with any sort of focus on "time". I love how this layout captures that and I am looking forward to trying my new rolling time stamp this weekend!
Replies to carri
Sign in or sign up to reply.
Hi. If you use the PL app you can create a 4x6 photo that contains 2 3x4 photos. You can then get these printed (or print yourself as I do) quite easily. Hope this helps .
Replies to Jnstclff
Sign in or sign up to reply.
Love how it all came together, Ali! Very cool! I love how you stamped the time on each photo! That date stamp is THE COOLEST! :)
Replies to KProffitt
Sign in or sign up to reply.
love how this looks!! definitely something to "scrap-lift" for many reoccurring types of photos I seem to take! thank you so much for the ongoing inspiration. #AlifortheWIN
Replies to cruisin_ali
Sign in or sign up to reply.
Such a cool way to document your practice(no such thing as "too many" feet photos ;) )
Replies to Carolly
Sign in or sign up to reply.
I love this, Ali!! I really love how the photo is 'the same' but there is so much contrast between them. Especially the different lines throughout the photos (some vertical, others horizontal). Now I have to think of something like this that I could document!
Replies to nicolemann9
Sign in or sign up to reply.
I adore these types of photos...I always try and do something similar (I tried to take a photo a day in the same spot on my walks last Spring but lost interest after a few days). I may have to try again soon.
Replies to abragg79
Sign in or sign up to reply.
Hi Ali!
Love this - glad I got the stamp! I'm sure I missed this somewhere, but what is the difference between your yearly album and your project life book? You state above "This story will go into my yearly 12x12 album but you could easily add a story like this to Project Life®."
Replies to ileanais
I am VERY curious about this, as well! :)
I have Project Life® and then I have a 12x12 album to hold my traditional layouts for the year (most of those get shared currently in the classrooms for the Story Kits™). I don't combine the two together.
Sign in or sign up to reply.
Hey Ali!Cute,even though the photos are repetitive it is interesting!
Replies to UshaMuthiah
Sign in or sign up to reply.
Love this idea of documenting a daily activity. Wheels are turning...
Replies to craftyjenschow
Sign in or sign up to reply.
This is will be my first One Little Word class. Can you let me know when the class will start?
http://bouncingballsgame.com ; https://red-ball4.com
Replies to kenkoiii
Sign in or sign up to reply.
The forum content that you shared with me has provided me with a significant amount of knowledge that is useful. I really hope you'll start posting updates more frequently. https://stumbleguys2.net/
Replies to timeline
Sign in or sign up to reply.
Sometimes, certain settings can be modified through configuration files outside of the game. Look for the game's configuration files (usually located in the game's installation directory) foodle and see if you can make changes directly there. https://wordwipegame.net
Replies to timeline
Sign in or sign up to reply.
Using photos of your feet to capture the daily habit of walking a mile is a creative and meaningful approach. It not only shows progress over time but also connects deeply with your personal experience https://retrobowlonline.io
Replies to timothyferriss
Sign in or sign up to reply.
The article is a captivating blend of creativity and information, leaving readers both enlightened and entertained. https://papaspizzeriagame.com
Replies to LauraWanye
Sign in or sign up to reply.