Day In The Life™ 2021 | Special Guest CJ Flynn
Tags:Hi everyone. I’m CJ! I am thrilled to share my Day in the Life™ album along with how I approached this project. First off, I want to thank Ali and her team for asking me to share here but more importantly for creating amazing products to document life.
Reason Why
2020 was my first full year of documenting my life chronologically. While my approach was similar to the Project Life® style, most of my memory keeping focused on specific moments throughout each month. I decided to participate in Day in the Life™ as it offered a completely new approach in documenting one single day. There is a beauty in capturing every day details paired with the feelings and memories that come from these moments. I think my completed album will gain more meaning as life evolves and I will be able to flip back through years from now.
My Process (step-by-step)
In early January, I made a list of projects that I wanted to participate and invest in. I decided to give Day in the Life™ a try this year. Here are the steps that I took to make this album.
Step 1: Research
I first visited Ali’s blog to view previous product offerings and her completed projects
I then went to Instagram and searched the hashtag #aedayinthelife to get more ideas
I also watched Ali’s YouTube videos and fell in love with her Day In The Life™ 2020 album – I was inspired by her design formula using patterned paper
I tend to work in smaller albums as they seem to work better for me to complete projects. My time is limited so I often only document on the weekend. I had originally planned to use a 4x4 album from my stash, but when Ali shared the 4x6 album bundle I changed my mind.
Step 2: Set a reminder to order product the day it hits the shop To ensure that I would get the products that I wanted, I set reminders on both my phone and in Google calendar. This is extremely important as some items can go fast!
Step 3: Before the new products arrived, I put together an initial design plan With all new projects, I create a base template in Adobe InDesign that mimics the page sizes of the album. Since I planned to work outside the page protector, I set up a 7.125” x 4.25” template so I could pull in previously purchased digitals and “comps.” “Comps” are photos I save of physical or digital products before I purchase them or before the physical product arrives.
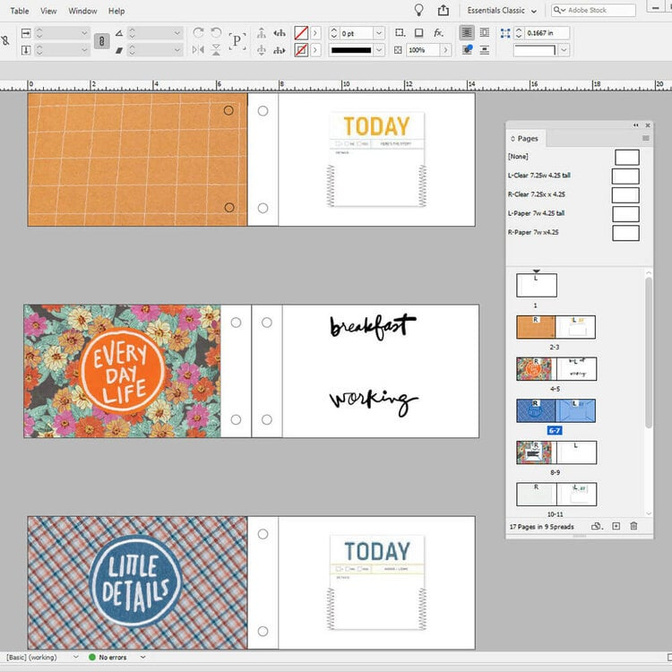
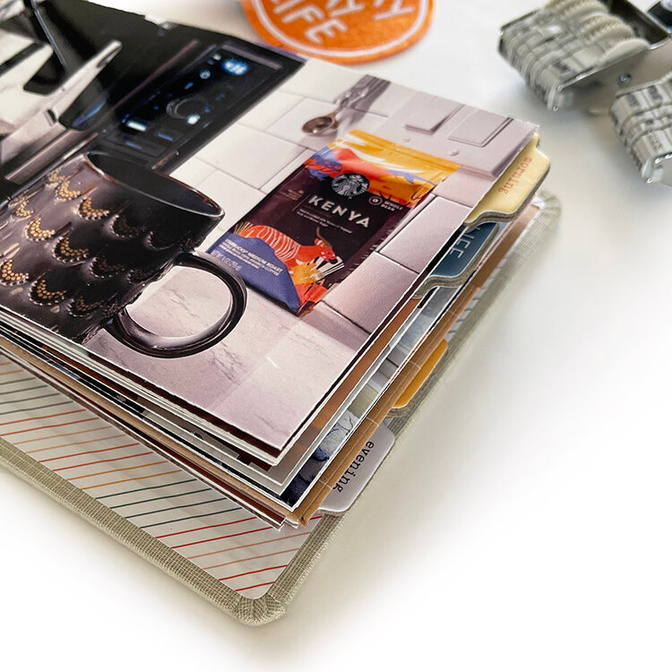
By putting together this template, I am able to arrange spreads to see how my album might come together. I also went through my digital and physical stash for what might work (patterned paper from Studio Calico shown above). My plan was to cut down the 3x4 “TODAY” cards into squares, add handwritten journaling, and zigzag stitch to the clear page protectors.
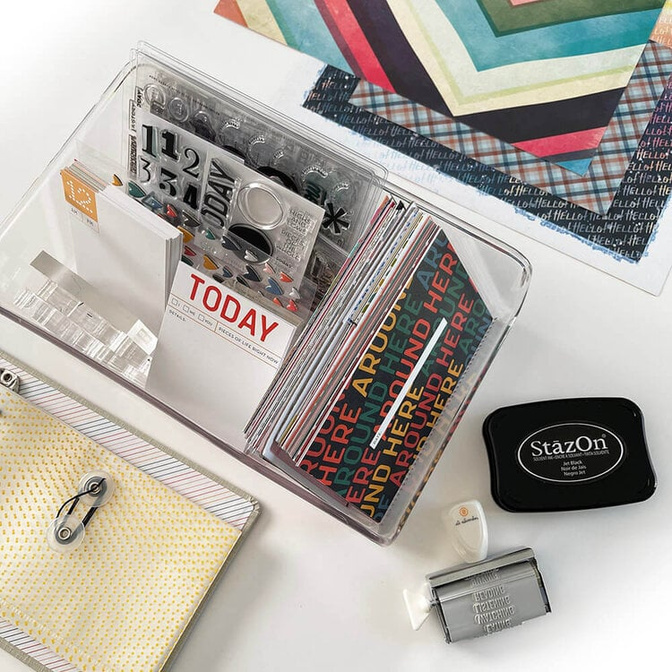
Step 4: New product arrives Once my kit and new products arrived, I organized them into a container together with any other items in my stash including patterned paper that I thought might work. I also ordered the Day in the Life™ June 2017 Spring Release Kit that was offered as an add-on to my March Ali Edwards Stories By The Month™ kit subscription. [Patterned paper from scrapbook.com and Studio Calico shown below.]
Step 5: Take photos Because I had a huge project launching at work in March, I opted to take photos in February.
Camera: I used my iPhone 12 Pro Max to take all my photos for this project.
Photo App: Every photo on my phone uploads to my Shutterfly account via an app.
Selecting photos: At my computer, I logged into my Shutterfly account and ran through all the possible photos I might like to use. I download them into a folder saved on my computer for my Day in the Life™ project.
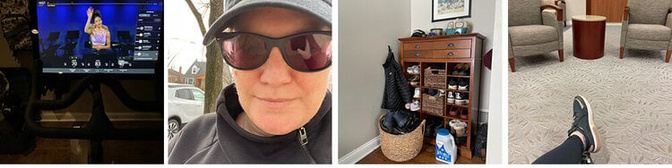
Here are a few images that didn’t make the cut:
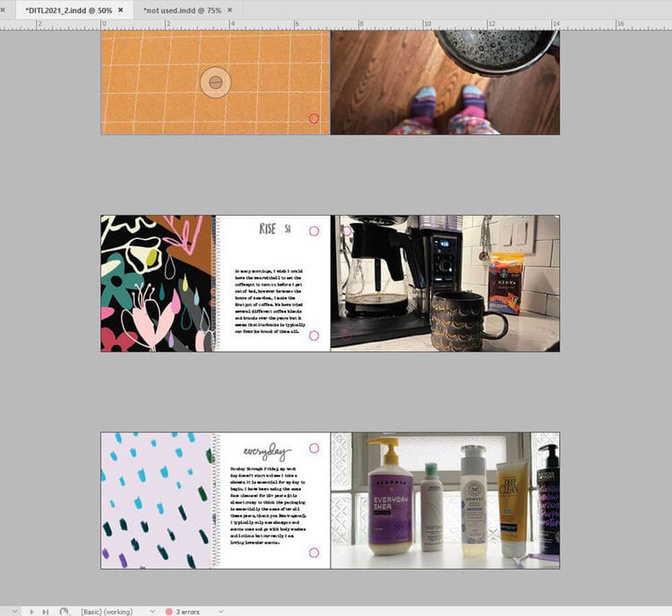
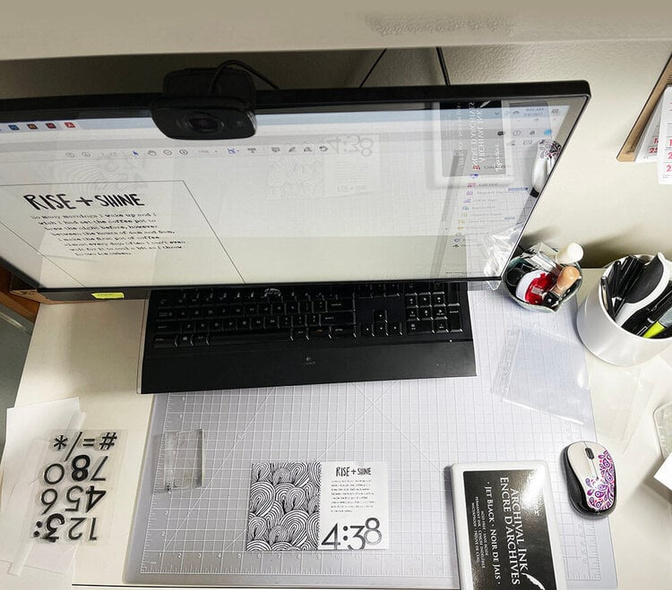
Step 6: Begin digital layout Now that I had several photos taken and downloaded, I started working in my template that I created. I pulled in photos, digital papers, and started typing my journaling.
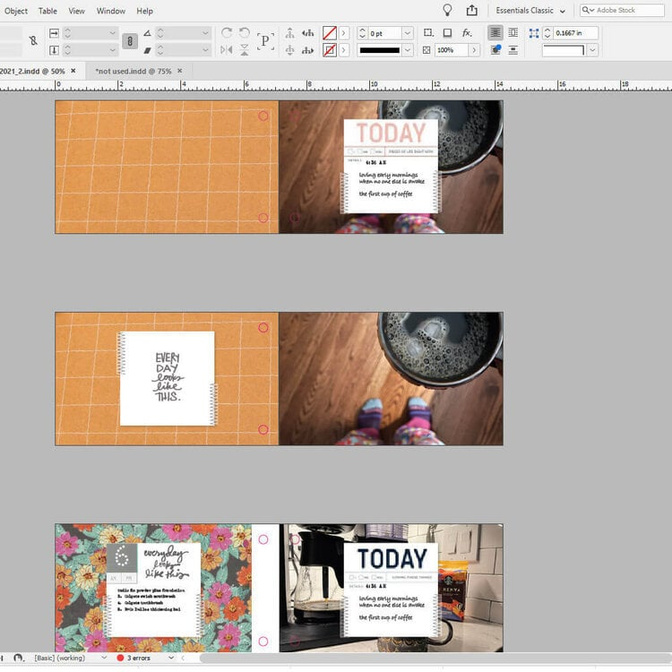
I also tested my plan to cut down 3x4 cards into squares and sew to clear page protectors. Here is the prototype using Day in the Life™ June 2017 Spring Release Mini Kit cards.
At this point, I decided that I didn’t want to use the clear page protectors in this way and changed my plan to use the left side of my spread for patterned paper and journaling that I could type out and print on white paper. I still wanted to use a zigzag stitch for added texture. I thought the best way to incorporate this texture was to stitch together the patterned paper and the journaling cards. [Digital pattern paper in this draft layout is from Push Print Studio]
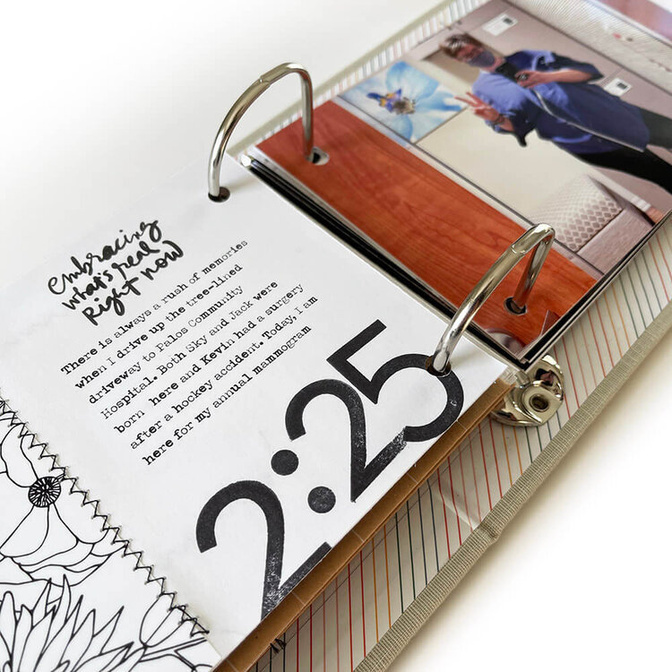
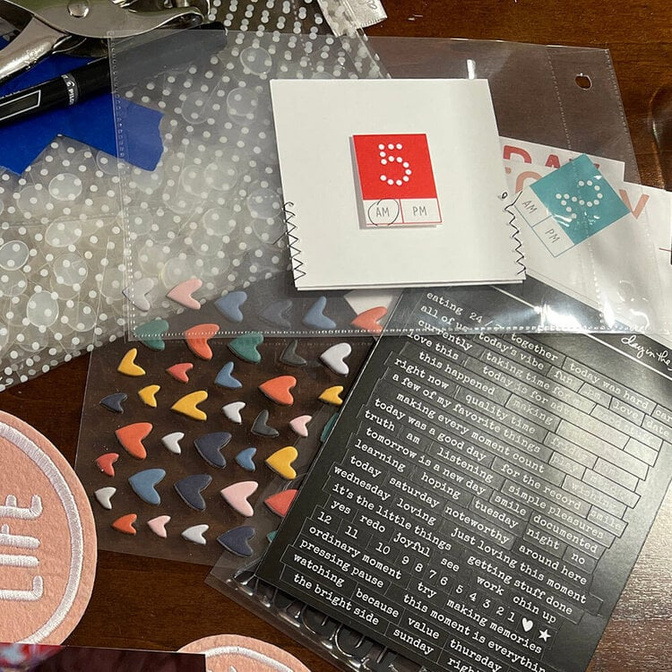
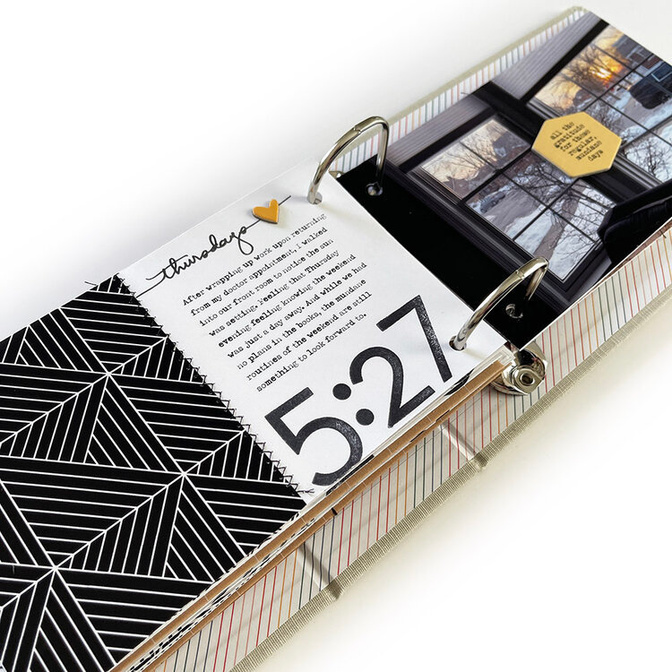
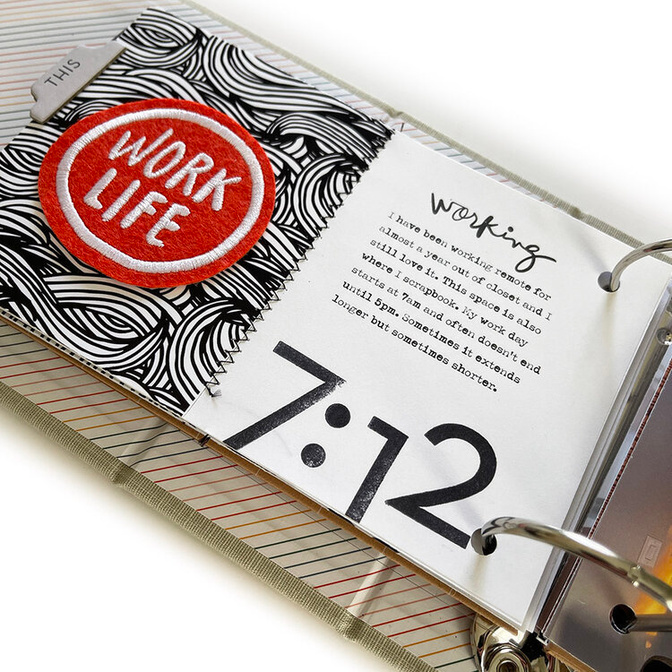
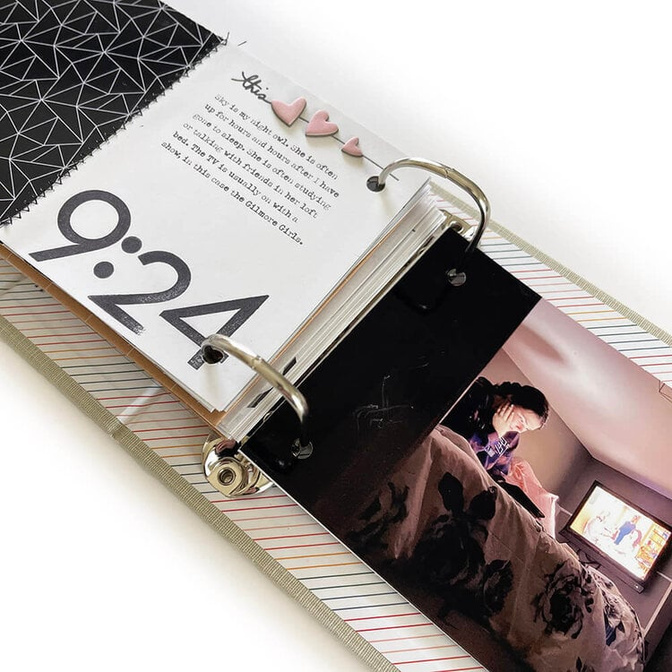
Step 7: Finalizing my design formula Since I opted not to use the 3x4 “time cards”, my next step was to figure out how to include the time for each spread. I opted to stamp the times on with black ink using the Day in the Life™ January 2021 4x6 Number Stamp Set.
My next consideration was how to incorporate the colorful Day in the Life™ felt messy circles which seemed too busy when combined with the color patterned paper. At this point, I opted for black and white bold patterns. This is where my design formula came together.
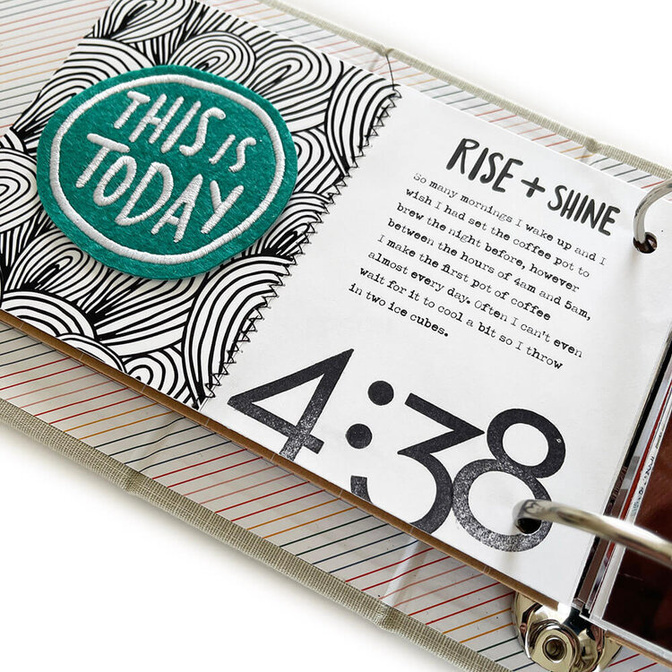
Black & White Patterns // I went through my stash of black and white digitals and found one from Studio Calico [11:25am] and one from LifeLovePaper [12:30pm]. For the remainder, I purchased from Youandigraphics .
Journaling & Sentiments // For the journaling cards, I selected digital sentiments from previous purchases from Ali’s shop to add to the top of each card. I typed my journaling using the Adobe Typeka font.
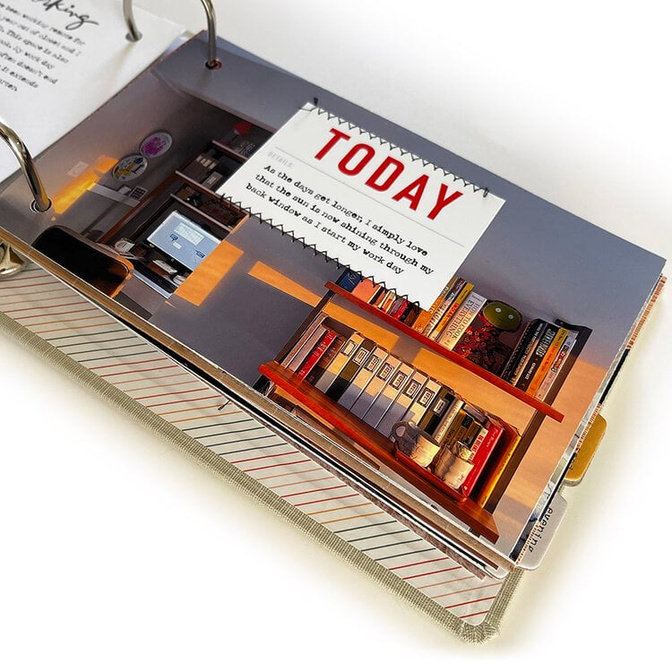
2x3 “TODAY” cards // Mimicking Ali’s cards that came with the kit, I created my own as I needed them to be smaller. I also wanted to type my journaling vs. handwrite it.
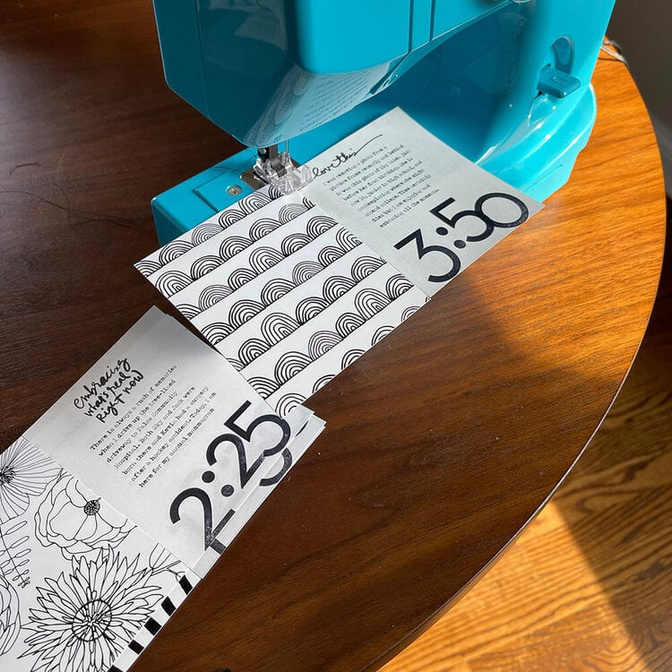
Printers // The patterns and photos were printed using my Epson PictureMate PM400 on photo paper. My black and white journaling cards were then printed using my laser printer on standard every day paper. I knew that I would be stamping the times on the bottom and then adhering to the photo from the previous time so there would be enough paper thickness.
Once I had my black and white journaling cards and digital patterns printed, I went into production mode and pulled out my sewing machine to stitch together the left side panels. I used a Janome New Home Turbo Teal Sewing Machine. (To thread it, I watched this Stitchless Tv YouTube video).
For adhering pages back to back, I used a Scotch Adhesive Dot Roller. To adhere felt messy circles to the patterned paper, I used Two-Sided Adhesive Tape. Once everything was sewn or and adhered together, it was time to embellish. (My favorite part!) Featured below are the chipboard tabs.
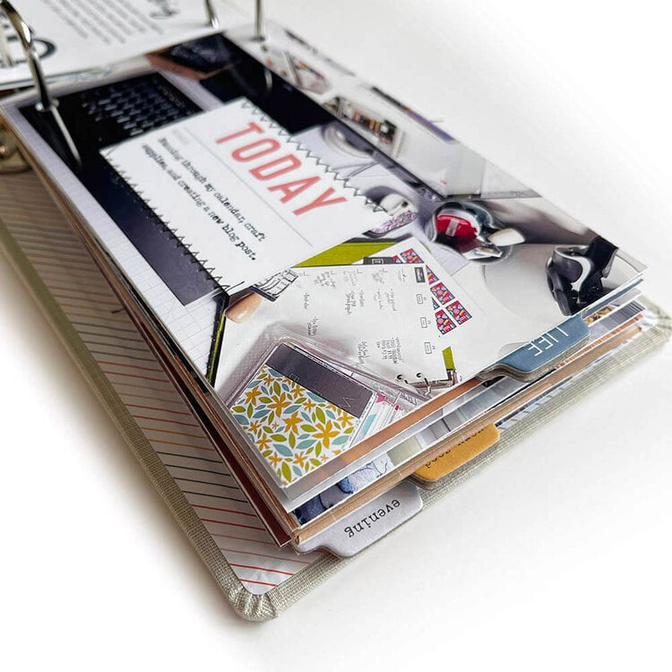
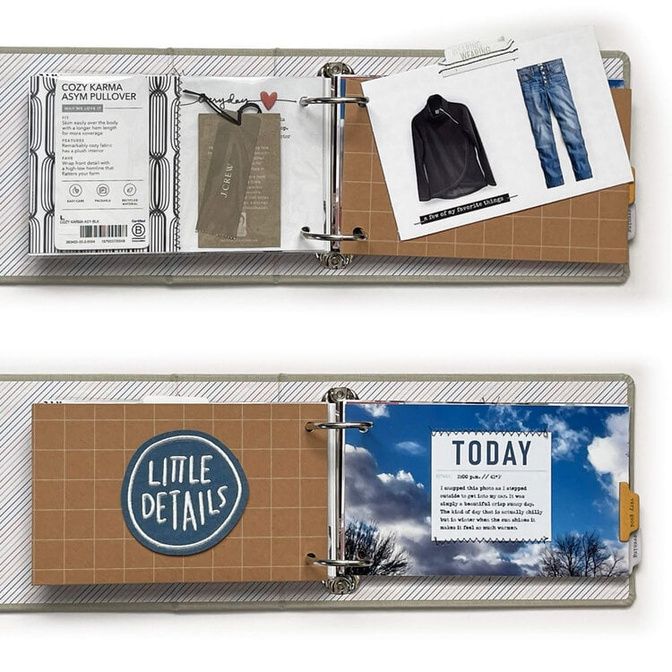
A favorite combination for me is wonky chipboard hearts with Ali’s messy life line digitals as shown below. I also included a chipboard piece from the February 2021 Stories By The Month™ kit with the perfect sentiment: all the gratitude for these regular, mundane days.
This was the only spread that included a page protector which holds two clothing tags. I also used a stitched tab from Whimsy Fox Crafts and stamped the word “WEARING” using the 2017 Day in the Life™ Daily Phrases Roller Stamp.
Here are a few more detailed photos:
Thanks for taking a look. You can find me on Instagram @cjflynn09design or visit my website at cjflynn09design.com


Comments
Sign in or sign up to comment.
6 comments
LOVE this. For real. Its such a balanced mix of product and story.
Replies to kategm47
Sign in or sign up to reply.
I love it too! Especially seeing how you created your digital design and how you used stitching.
Replies to starrsstripes
Sign in or sign up to reply.
Great album. I love it! It was nice to see how you put it together. What first caught my eye
was the journaling about Palos Community Hospital. (born and raised in Palos Heights- I know that hospital well!)
Replies to runner
Sign in or sign up to reply.
Love your album and learning about your process!
Replies to Jeannew
Sign in or sign up to reply.
I love any opportunity to use patterned paper! I have so much of it! This is a great formula for any kind of album. Thanks for sharing!
Replies to achaffin39
Sign in or sign up to reply.
love this! you have inspired me- your project turned out amazing!
Replies to seakin
Sign in or sign up to reply.