A Summer Story + How To Make Your Own Layered Template In Photoshop
Tags: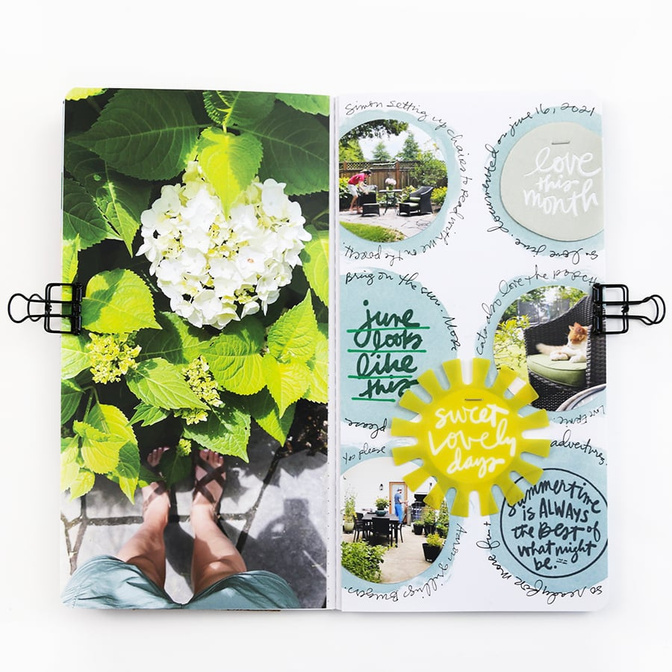
In today's Craft The Story video (Episode 24) I’m sharing a look at how I put together a spread in my Stories Of Summer Notebook and also includes a short tutorial on creating your own layered templates in Photoshop.
Also a quick reminder that tomorrow, Saturday, June 19th, is our first $5 Stamp Your Story Community Day hosted by Laura Wonsik. Laura's planned a full day of education, inspiration, and tips all focused on using stamps in your memory keeping projects. This should be great content for beginners + a fun refresh for those of you who love to stamp. I'll be there hanging out all day + playing along as well as sharing a new process video during hour #9. As with all our community event days all the content will be recorded + archived for future viewing so no worries if you don't want to have your face stuck in a screen all day. You can also pop in and out when it makes sense for your own schedule. Get all the details + register here.
Let's dive in:
SUPPLIES
Fabric Circle Add On (from a previous month)


Comments
Sign in or sign up to comment.
6 comments
Linda (creative team member?) shared a layout with the June SBTM kit using a template with sun rays. Any chance that that template could be shared here?
Replies to Pannekoek1
Sign in or sign up to reply.
Hi Ali, thanks so much for the video on how to create your own template. Sadly it lost me. I've been a fan & customer since around 2003 & this is something I've always wanted to know how to do. As an elements user you completely lost me on the video. (No doubt my fault not yours). I would so, so love it if you would do this for elements and talk & move very slowly through it (and include circles, my go to shape). It's late on a Friday night, after a big week, so I'll give this another go tomorrow but suspect the screen looks so unfamiliar that it still won't work for me. Thanks so much for all of the inspiration & guidance, and sorry to ask for more. D
Replies to delia
Hi! I'd recommend checking out my Hybrid workshop which starts with the basics goes into more detail + uses Photoshop Elements for many of the tutorials (much more thorough than the video shared today): https://www.aliedwards.com/shop/classes/hybrid-self-paced. I also have older videos that teach basics you could check out here via my blog: https://www.aliedwards.com/blog?utf8=✓&search=scrapbooking+with+your+computer&commit=Search+Blog
Sign in or sign up to reply.
Thanks Ali! I LOVE watching your process. The photoshop tutorial is very helpful. Thanks again for sharing this!
Leora
Replies to lhenkin
Sign in or sign up to reply.
Thank you Ali!! Fridays are my favorite day because of craft the story!
Replies to MaryAnnPerry
Sign in or sign up to reply.
Love how this turned out! I was literally singing "Let It Go" when you wanted to add the green line--HA! It made me laugh when you're like "someone out there is shouting NO". I like how you did the stamping inside the circles. Thank you always for sharing!
Replies to ahiggins83
Sign in or sign up to reply.