2021 Travel Collection | Special Guest Jennie Rey
Tags:Hi! Jennie here! Feeling so inspired by the Travel Start to Finish 2 class and all of the awesome travel products I decided to make a travel album about 3 trips we took to the same place in France during the pandemic.
In May of last year, we had planned a trip to Oregon so I could attend Story Camp followed by a road trip through Oregon but of course, all plans were canceled due to the pandemic. I felt sorry for myself for a little bit (I know… first world problems ;-)) and then we started looking for things that were possible at the time. We were lucky: in June it became possible to visit France again and so we booked a stay in a cute house in a very small village just over the border in France. It was perfect. It was close to home, it felt safe, there was a lot to do and see in a safe way and… we were out of the house!! Because we loved it so much we booked another week for the end of September (again we were very lucky: a few weeks later everything closed down again). And who could have known that in 2021 we would be in the same situation!? We booked another two weeks at the same place and made the best of it!
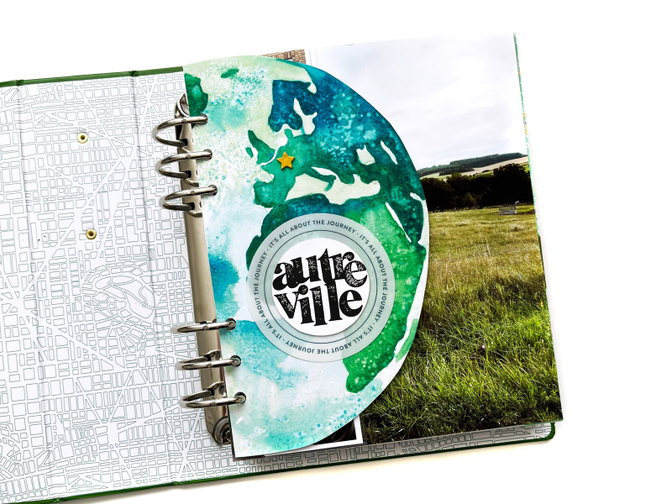
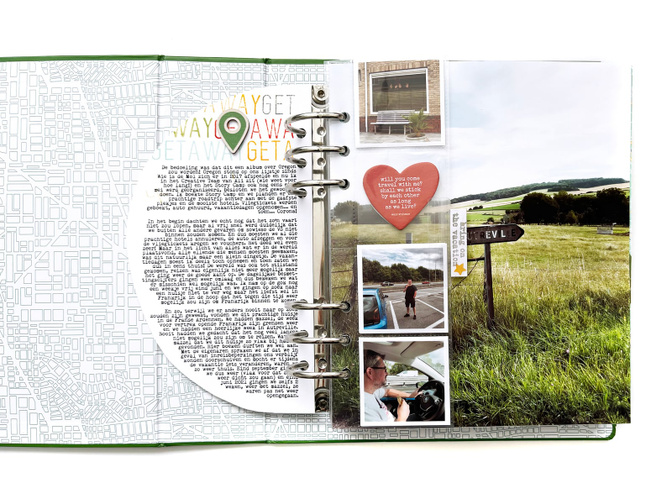
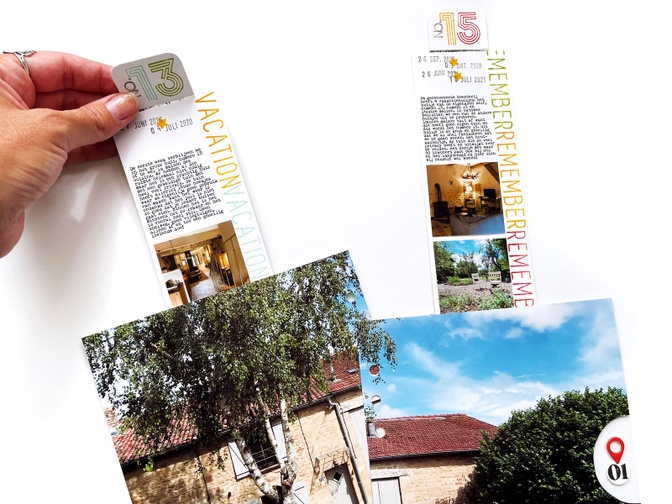
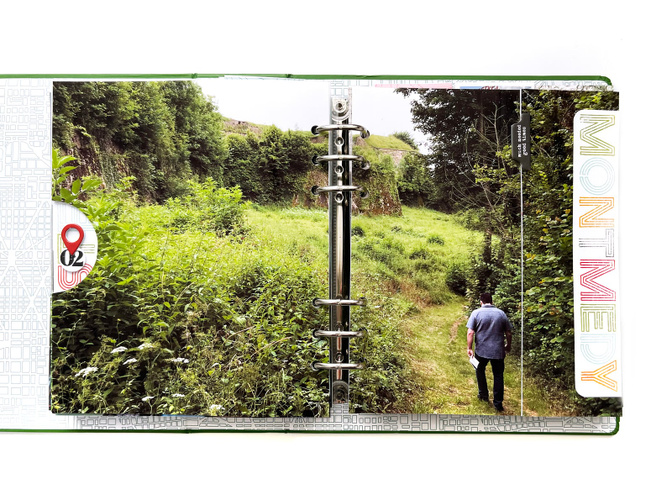
For the start of my album I enlarged the watercolor globe from one of the cards from the digital main kit in Photoshop and cut it in half. I added a star from the chipboard bundle to point out where we were and stamped the name of the village using alpha stamps and added it to one of the plastic circles from the main kit. On the backside I added my journaling about why we ended up going to this place three times and I added a cut-down 2x2’s page protector with the story of the outward journey and a big photo of the road sign entering the village.
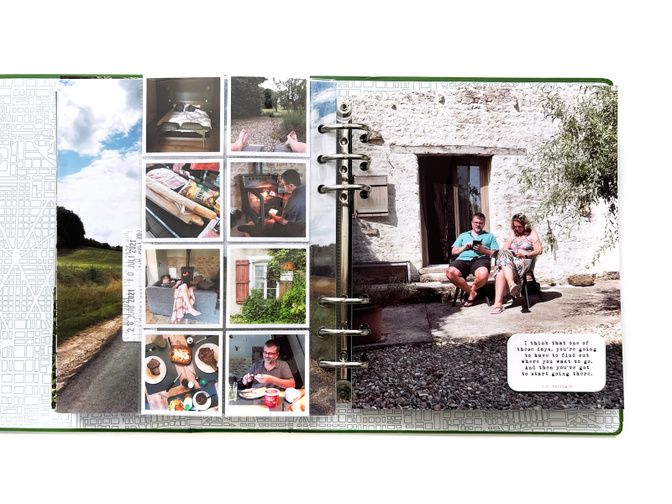
That became my ‘design formula’ for this album. The base of my album would exist of big photos of the size of the outside of the page protectors glued back-to-back and in between I would add a cut down 2x2’s page protector with some extra photos and my journaling.
Normally when making a travel album I approach it per day. So for each day I would write down my journaling, choose my photos and use my ‘design formula’ to document each day somewhat the same (in hindsight: I still think that approach works best for me ;-)). But for this album, with 3 separate trips, I decided to not document the trips per day (because there were days we did absolutely nothing but hanging in front of the fireplace with a book!) but per site/place we visited.
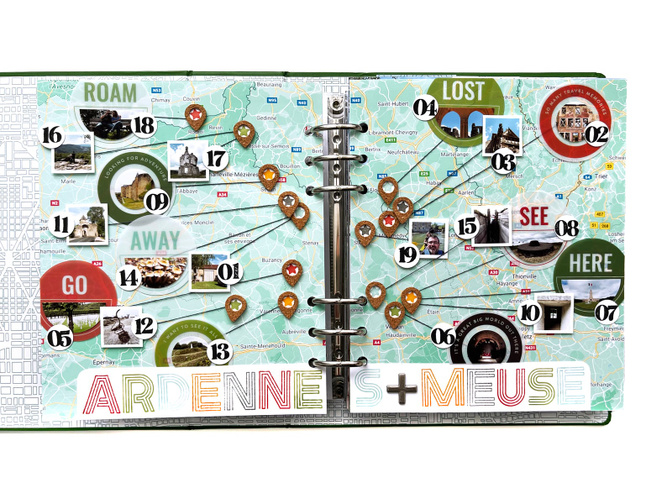
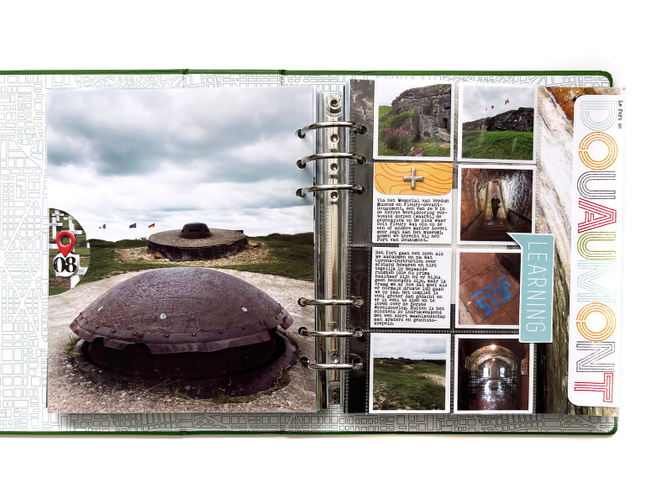
I made an itinerary page of sorts using a screenshot of Google Maps divided into two pages (they do overlap a bit to have room for the holes) and marked all the places we went to using the cork geotags from the main kit with a stamped star behind it. I also printed little photos of all those places (1x1 inch squares and 1 inch circles and 1,5 inch half circles to put on the plastic circles) and connected those to the geotags using thread.
Inspired by Kim Chaffin’s use of the lined alpha stamp (in the Travel Start to Finish 2 Class) I decided to stamp a title for each page in the colors of the kit with Ali’s inks: Pendleton, Willamette, Columbia, Tillamook and Otter Rock.
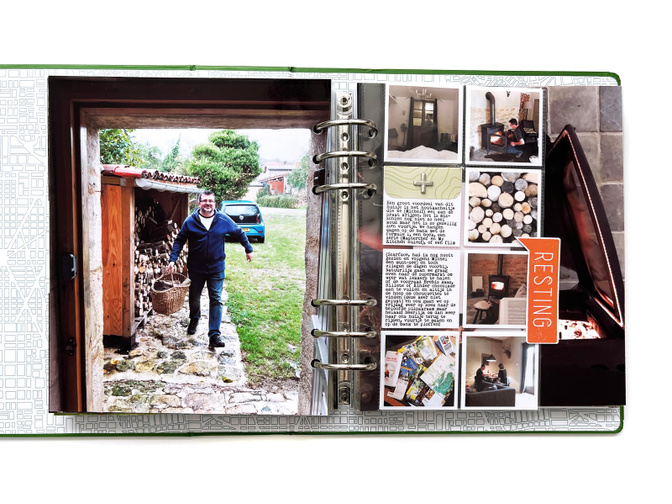
We stayed in this beautiful farmhouse that exists of 4 smaller houses and we stayed in 2 of them, both a bit different but so nice and cozy. To document the inside and outside of both houses I used a double-page photo of the outside and made a pull-out for each house with some journaling and photos of the inside.
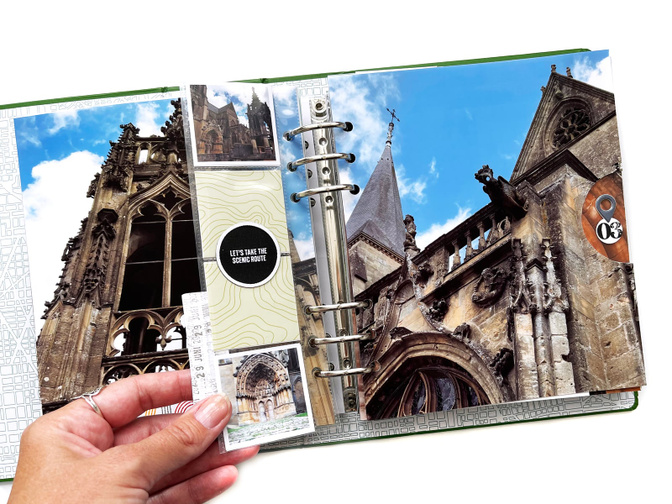
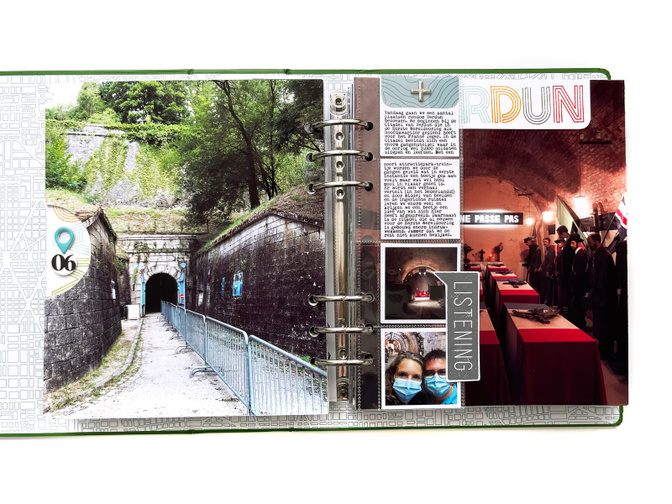
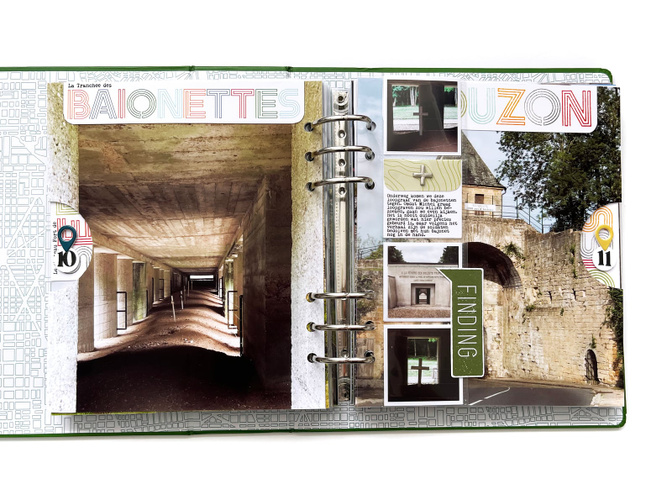
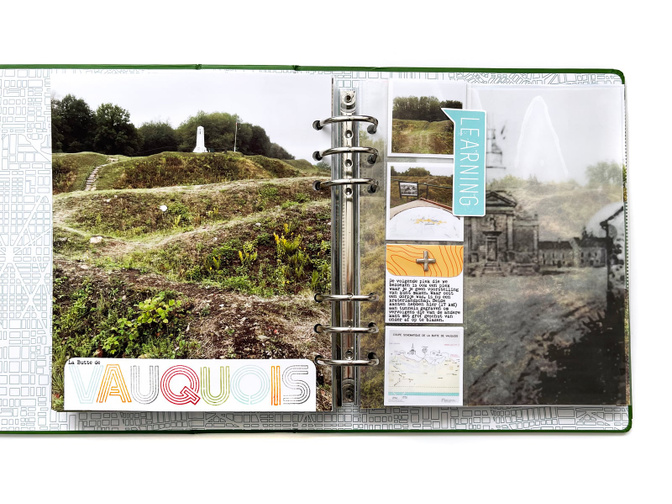
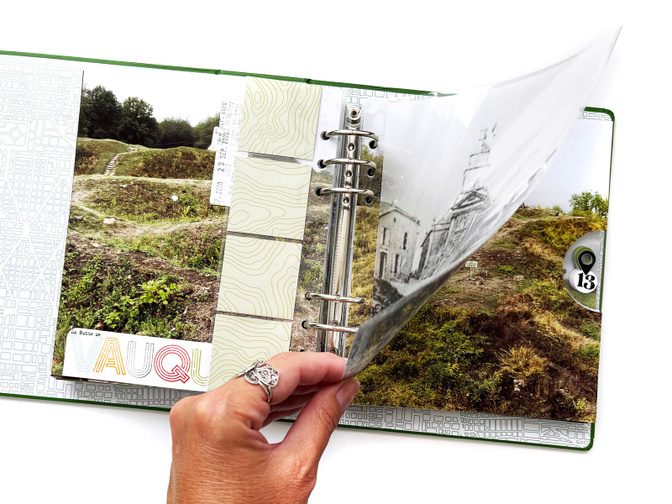
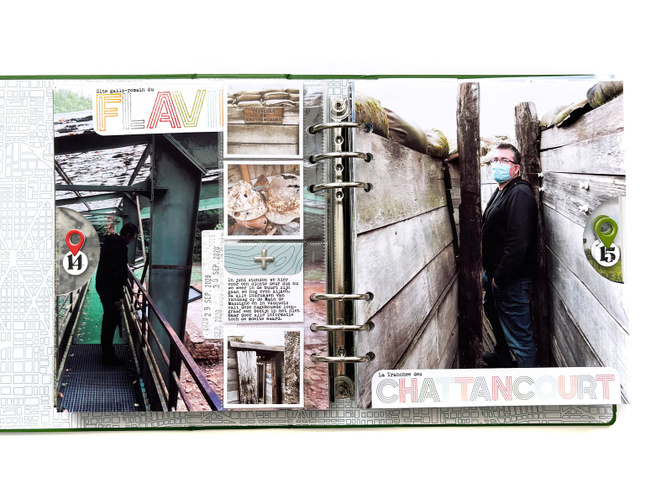
To number my pages I cut a half circle out of two photos and added a piece of transparency in between. On top of the transparency I added a geotag and a stamped number that corresponds with the numbers on my itinerary page.

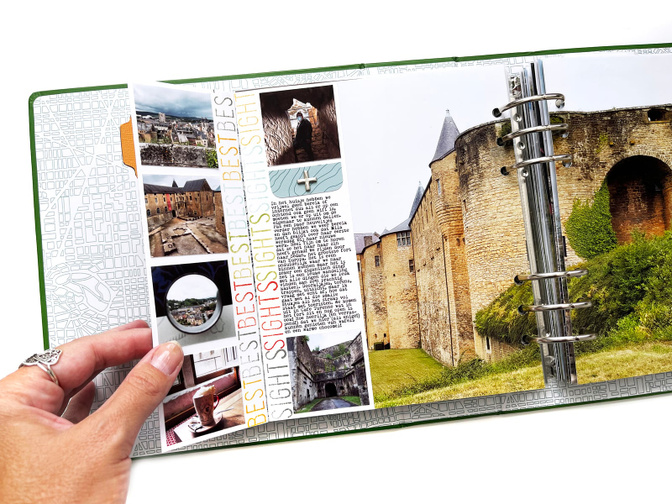
Next I typed out all of my journaling, making sure it would fit on 1, 2, 3 or 4 2x2 squares. With my journaling ready I knew how many spots I would have for photos and so I selected 2 big photos or 1 double-page photo per place we visited and a number of 2x2 photos. I also printed a few pages with 2x2 squares with patterns from the digital travel notebook (and I recolored the pattern in Photoshop to yellow/orange to have 4 different colors of patterns).
With everything all printed and ready I could start with bringing it all together! I first cut all of my photos, cut out the half circles, put the transparencies in between the pages and added the numbers.
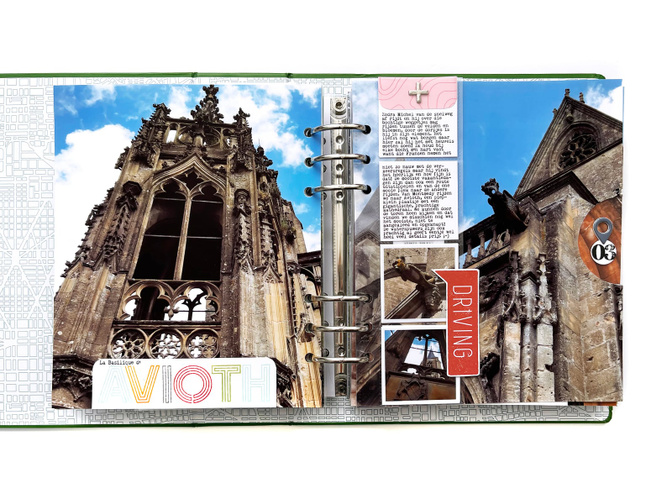
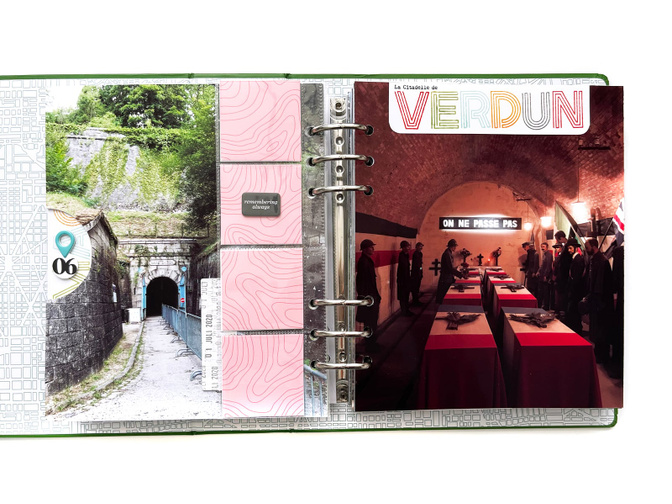
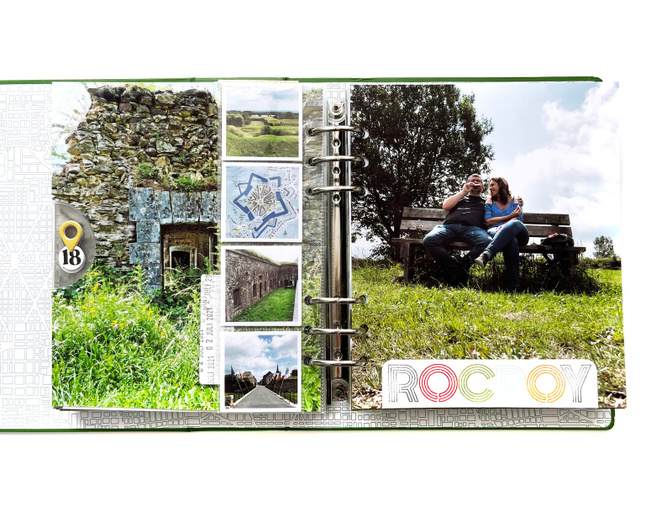
Between the 2 big photos per place we visited I added a cut-down 2x2’s page protector, 1 or 2 columns depending on the amount of journaling and photos I had. Above all of my journaling I added a strip of patterned paper (from the digital notebook), rounded 2 corners and added one of the chipboard plus signs.
I cut out the speech bubbles with the –ING words from the journal cards from the main kit and used those as a tab on the 2x2-pages. On the backside of the speech bubbles I repeat-stamped the dates.
If I didn’t have enough photos to fill all of the pockets I added 2x2 squares with patterned paper with an embellishment on the outside of the page protector (the fabric circles are from the 2020 travel collection).
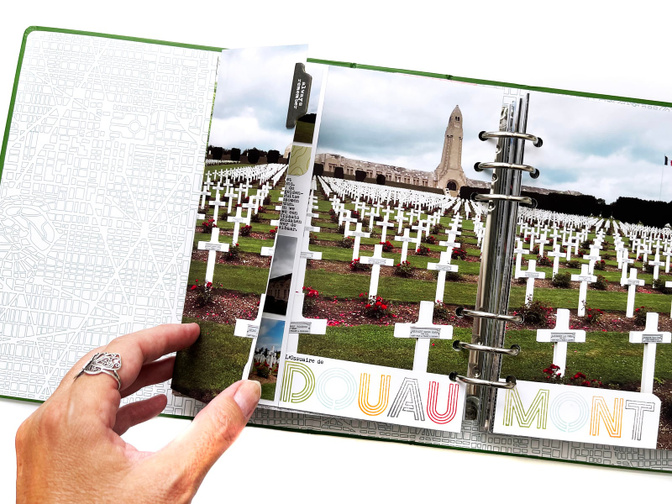
I chose to use minimal embellishing. With the big photos it felt like it was busy enough and also the places we visited, the memorial sites, the historically important places and the stories that went along with it deserved all of the focus.
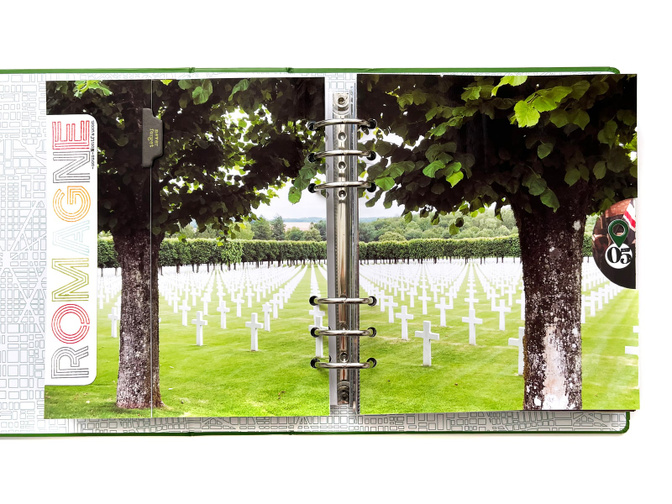
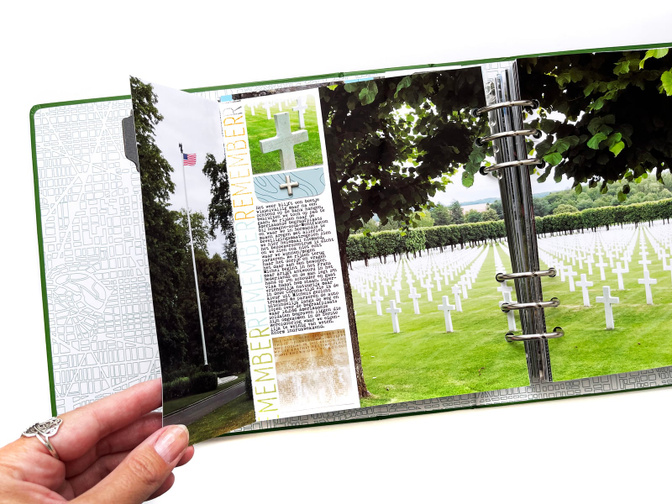
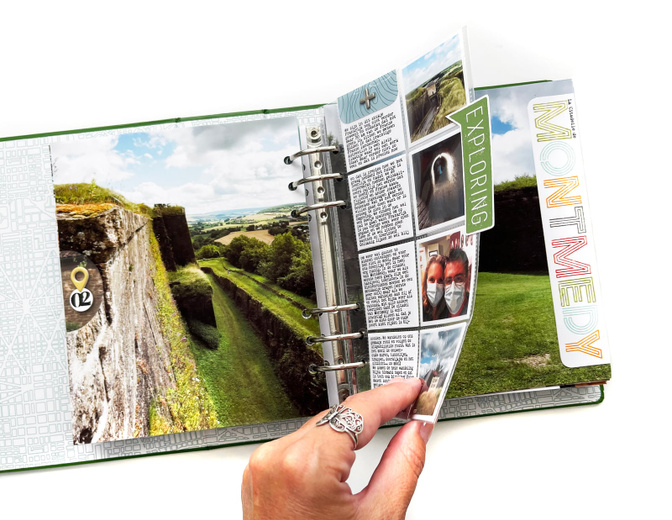
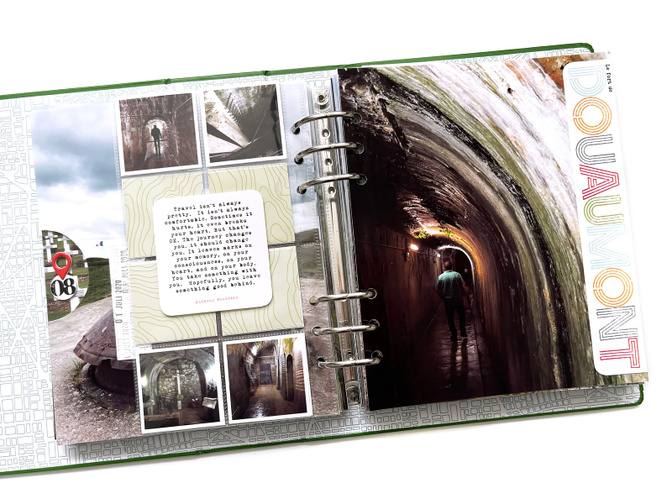
In between the double-page photos I didn’t want to include an insert with 2x2’s because I wanted to be able to see the whole photo so I decided to make a flip-out instead. For this, I have cut one part of the photo in two pieces, attached my journaling to another photo of the same size of this cut-off piece using washi tape and glued that on the backside of the previous page. On top of this flip-out I added the cut-off piece of the big photo. Next to my journaling I stamped a border using the travel phrases stamp set (https://aliedwards.com/shop/travel-collection-2021-travel-phrases-6x8-stamp-set). I added one of the chipboard tabs (backed with cardstock) to emphasize the flip-out.
On a few places I added a cut down journal card or a quote from the digital notebook on the outside of the insert/page protector.
Because I didn’t want to waste too much of the 2x2 page protectors I reused the 2 cut-off columns to make another page protector by cutting down the middle column to 0,5 inch and add holes. The page protector on the photo below is made that way, if you didn’t know it, you wouldn’t notice the difference!
The rest of the album follows the same formula: an insert for the 2 big photos or a flip-out for the double-page photos. I made sure I varied with the placement of the tabs and the chipboard plus signs, so I wouldn’t have one spot in the album that was very thick!
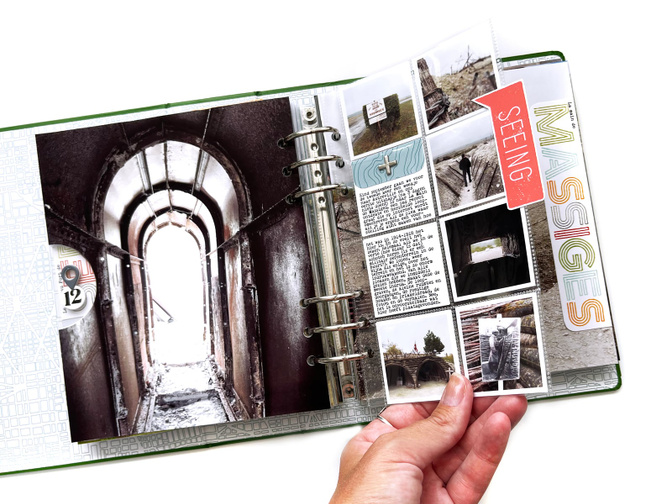
For one site we visited I added another insert: a photo on vellum of how it once was on that specific spot. In these few weeks we have learned so much about the First World War and we have heard and read so many heartbreaking stories. I feel like this old photo of a church represents the overall feeling we had when visiting these places: the importance of remembering what happened and what should have still been there.
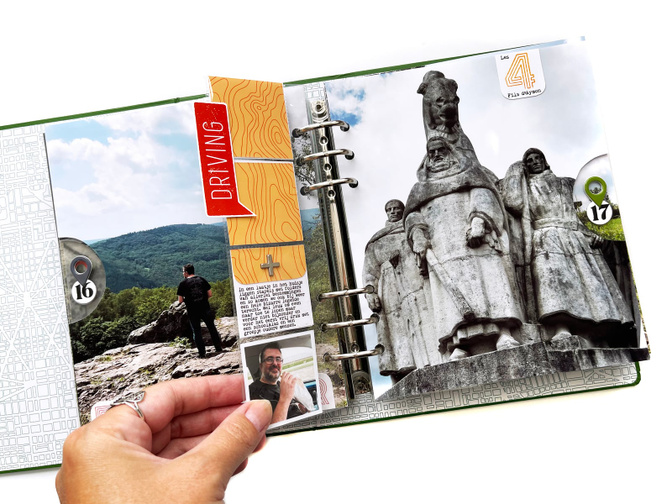
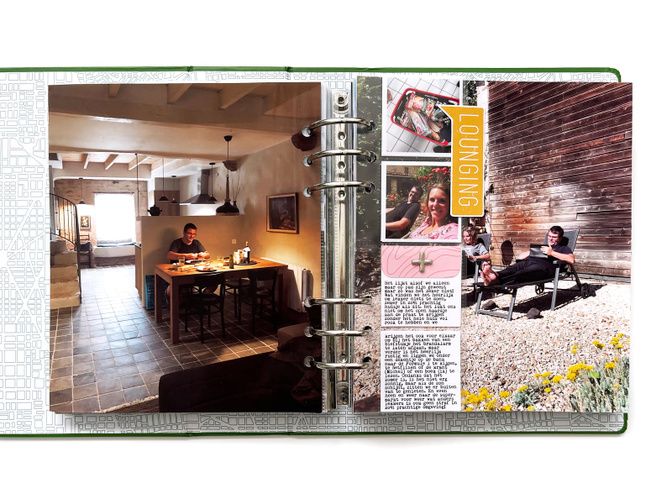
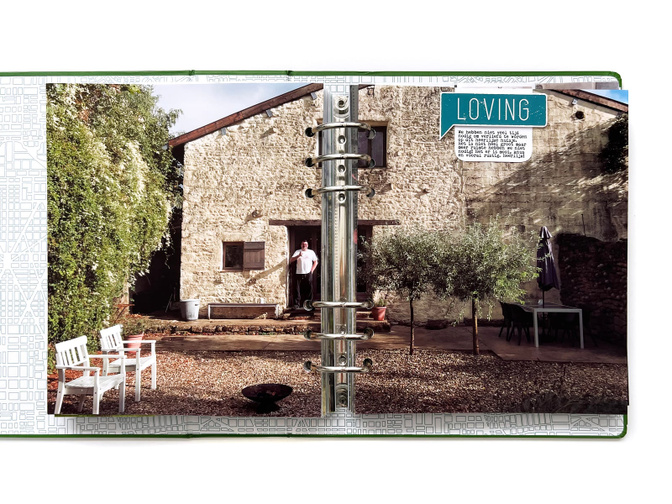
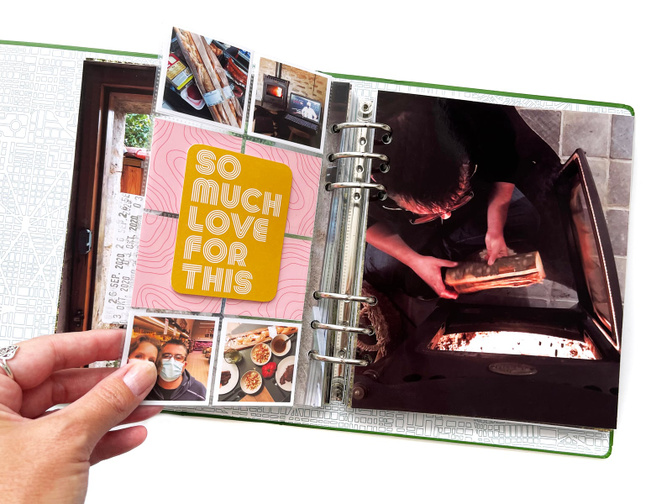
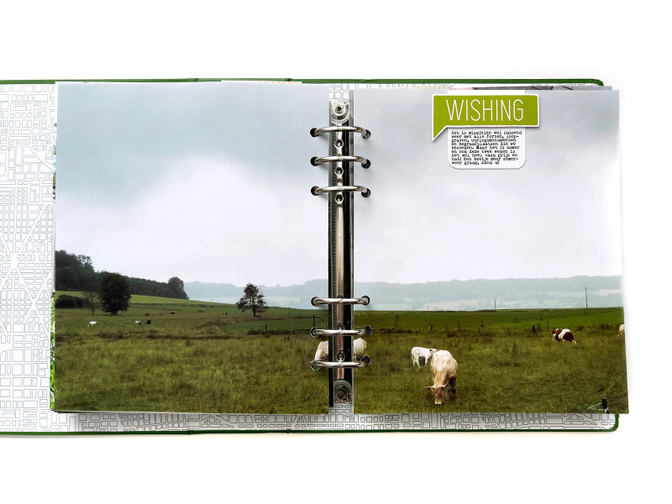
There were a few double-page photos that didn’t need an insert, so I added a bit of journaling and one of the speech bubbles directly to the photos. I did print a few extras using the digital kit and I also made the ‘loving’ and ‘wishing’ one myself using the digital cards/stamps.

I didn’t collect a lot of ephemera during these trips but I did have a few tickets, cards, a map and I had a few photos I ended up not using. To store those I used the envelope the travel kit came in and cut out the side with the flap attached to it. I printed the ‘collected on this adventure’ text from one of the journal cards onto vellum and stitched those pieces together using my sewing machine. I attached the other piece of the closure(?) on the vellum using a hot glue gun.
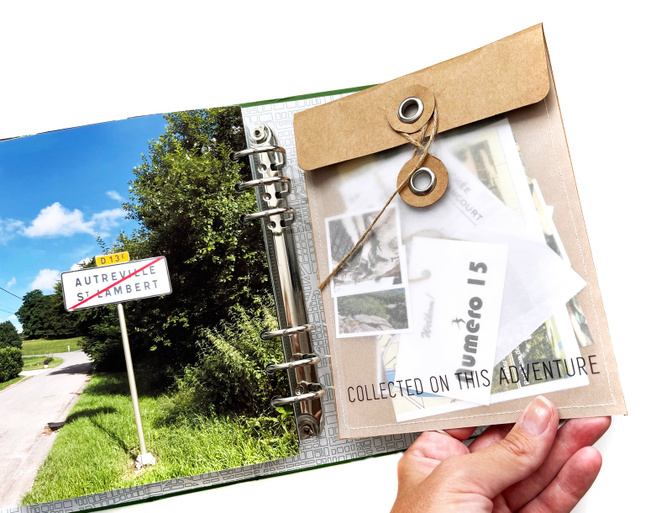
I ended my album as I started it: with a road sign! This time the road sign we passed leaving the village!
Thank you so much for taking a look at my album! A little flip through can be found on my IG: @thereypie.


Comments
Sign in or sign up to comment.
9 comments
Wow! This is beautiful and so fun to look at. Lots of inspiration here, so glad you shared.
Replies to carrieW
Sign in or sign up to reply.
Wow! Gorgeous album!
Replies to Jeannew
Sign in or sign up to reply.
I love how you worked with the big photos, having acetate between them with the number corresponding to the map - so clever! Great photos, and a very lovely and respectful approach to these historical locations. Well done!
Replies to barefootscrapbooker
isn`t it?! i looved the big photos
Sign in or sign up to reply.
omg! what a lovely album you have put together <3
great inspiration, thank you!
Replies to PatyPerez
Sign in or sign up to reply.
This is such a great format, Jennie! I also like to document travel chronologically for the most part. Thanks for these ideas!
Replies to achaffin39
Sign in or sign up to reply.
This is a marvelous album. I love how beautiful and thorough you have designed it. Truly inspiring!
Replies to Cookingmylife
Sign in or sign up to reply.
Yes my kind of vacation having days to read in front of a fire!!!
Replies to Beejay22
Sign in or sign up to reply.
Lovely album . . . especially liked the road signs for the first and last pages, the envelope holding your memorabilia, and the Google maps page with the cork geotags and tons of other elements. Thanks for sharing!
Replies to deenie
Sign in or sign up to reply.