Crafting With Krystal | Numbers Scrapbook Kit
Tags:Hey there friends, Krystal here. I’m so excited to share a handful of layouts I created using the Numbers Scrapbook Kit during my Crafting Live with Krystal series on the Craft The Story Facebook Page.
Crafting Live with Krystal is a bi-weekly live video series on the Craft The Story Facebook Page. These lives take place every other Thursday at 12PM ET and feature layout processes using the Stories by the Month Kits & special kit releases. If you are not a member of the Craft the Story Facebook page, be sure to join the group and take part in the next Live event on Thursday, October 20th, 2022!
This week, I joined in on the Number Scrapbook Kit bandwagon and shared ideas for four layout designs. If you missed the video this week, you can watch the replay below:
LET’S RECAP
In today’s video, I worked through the process of creating four different layouts using the Numbers Scrapbook Kit. I really enjoyed the challenge of working in different sizes AND thinking of ways to deconstruct the papers and create something new from them.
1. Let Me Count The Ways (6x8 Layout)

At the end of September, my son (Jonah) turned four. Working with a kit designed around numbers, a layout celebrating his new age seemed too good a chance to pass up! I knew I wanted to use the 7”x8.25” Let Me Count The Ways paper to document five things I love about Jonah right now. It’s an easy page to add in words without having to start a design from scratch.
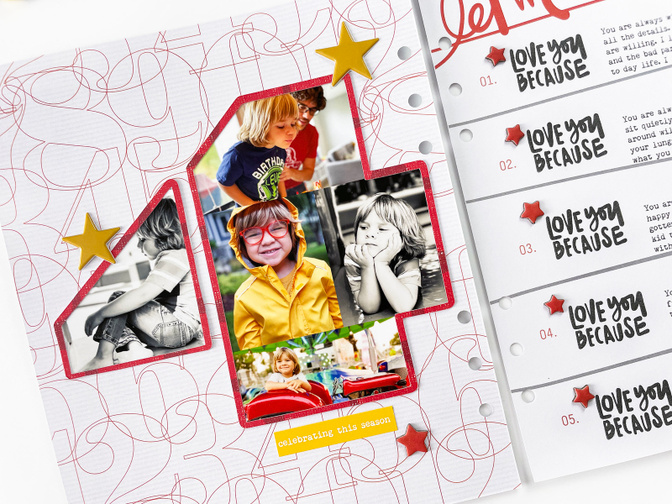
I also loved the way the red 7”x8.25” Number Outlines paper paired with the journaling page. I wanted to use it as a background… and to add photos of my son on top. To really highlight his turning four, I isolated the number 4 from the digital 12”x12” Big Block patterned paper in Photoshop. I resized the number four so it would take up a large portion of the space on the 7”x8.25” page and saved the newly sized element as a PNG.
Using the PNG #4, I create a cut file in Silhouette Studio (created by using the trace tool + offset tool), and as a layer template to clip my photos into. After printing + cutting everything out, I simply needed to adhere the cut file border to my photo, and then add that on top of my patterned page.
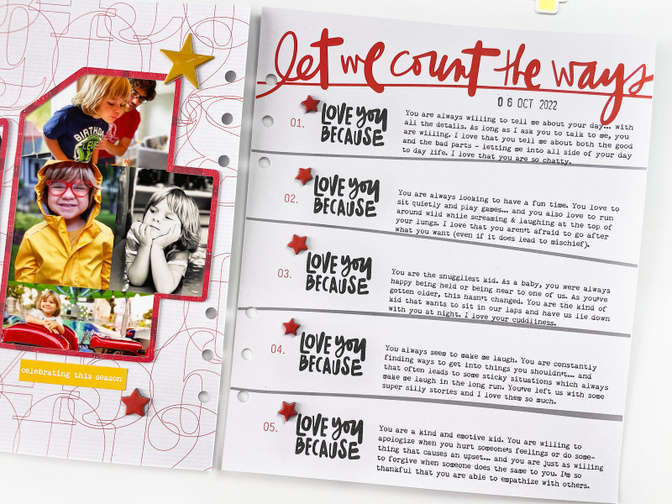
To finish off my layout, I located a few different star embellishments - six small red chipboard stars and two yellow puffy sticker stars. I added them next to a stamped “Love You Because” sentiment in each line of journaling, plus in a visual triangle around my photos.
2. Five Reasons to Love Fall (6x8 Layout)
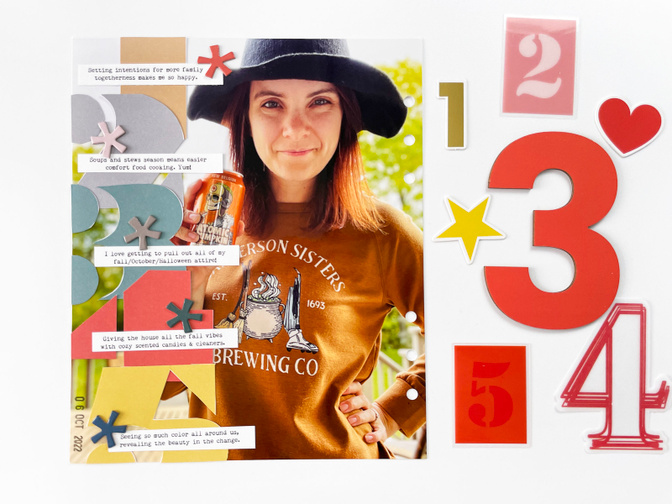
Next up, I wanted to take my physical 12”12” Big Block patterned paper and fussy cut the numbers 1-5 out. I love how retro these numbers feel… and knew I could likely get a list of five of them added vertically to a 7”x8.25” photo. I am a HUGE fan of the fall season and thought it would be fun to document five reasons to love fall.
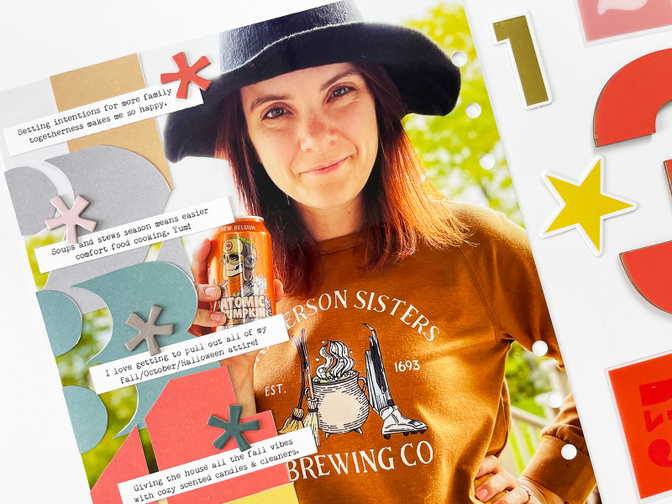
I printed a photo of myself at the full page size (7”x8.25”), which I then used as the foundation for my layout. Then, with my five numbers cut out and my photo printed, it was just a matter of layering the numbers down the left hand side so they could all fit while still being recognizable. (PS: if you love the layout concept but are not a fan of fussy cutting, this layout works great when created digitally as well!)
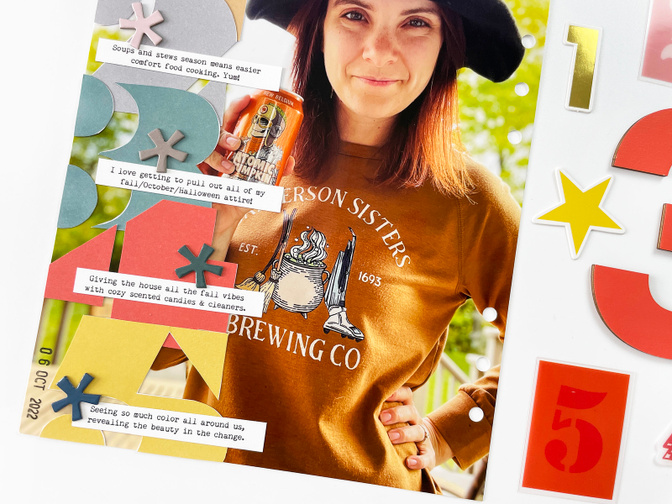
For the story, I printed five small sections of journaling - one for each reason why I love the season, trimmed them out and adhered each of them on top of a number. Then, I finished off the layout with some colorful asterisk chipboard stickers… giving this layout just a bit more dimension.
3. Top Ten (6x8 Layout)
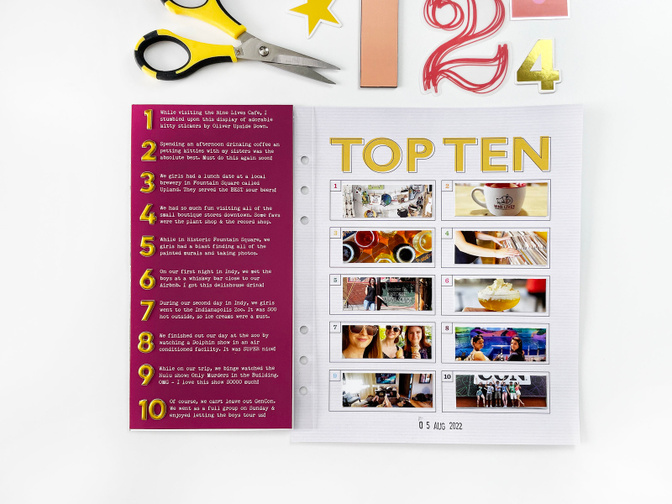
For my third project, I was inspired by the 7”x8.25” Top Ten paper. I had a blank space in my 6x8 Story Album where I’d document portions of a recent vacation to Indianapolis. Putting together an easy “top ten moments” type of layout for the trip was a great way to fill in the space and also document some of the smaller details I’d missed in my previous layouts.
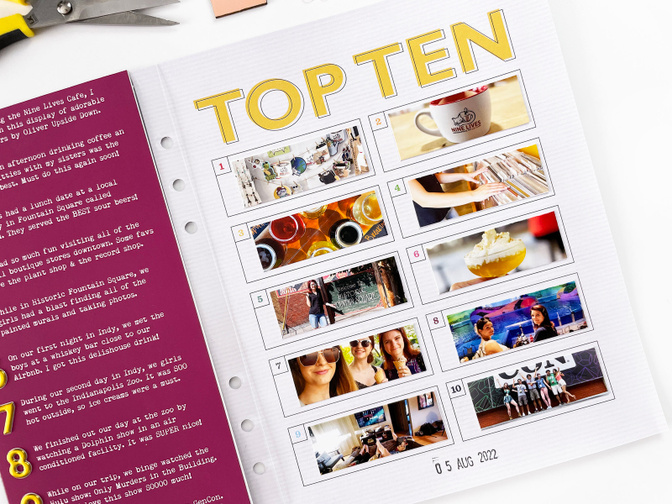
Using the Top Ten paper as my jumping off point, I printed ten photos of favorite moments of our trip - sized to fit into each of the ten boxes. I really love the visual grid look with the photos placed on the page this way.
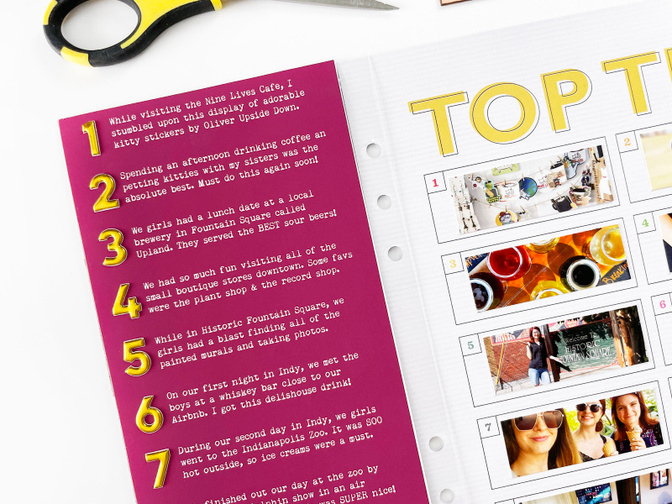
On the left side, I created a journaling page in Photoshop - sized at 4”x8”. I typed out a list of the ten favorite moments, making sure to leave enough space on the left edge to add gold foil numbers to finish the listed look. To make the journaling page pop, I made the background color match the number 8 from the Top Ten page and printed my journaling in white.
4. The Plant Life (12x12 Layout)
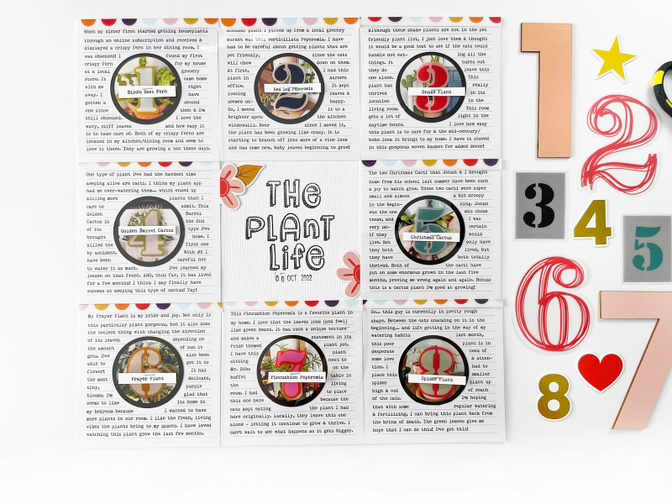
For my final layout created with the Numbers Scrapbook Kit, I wanted to create a layout that featured the 4”x4” journaling cards. I loved the idea of adding circle photos into the middle with a number on top. After searching through my photos, I found that I’d recently taken a ton of my houseplants. That prompted me to tell the story of how I’ve accumulated them and their progress in my care. (PS: you could totally use this same layout design to tell a story of the stuff of life, small details around your home, different parts of a vacation, current details for your family members, etc.)
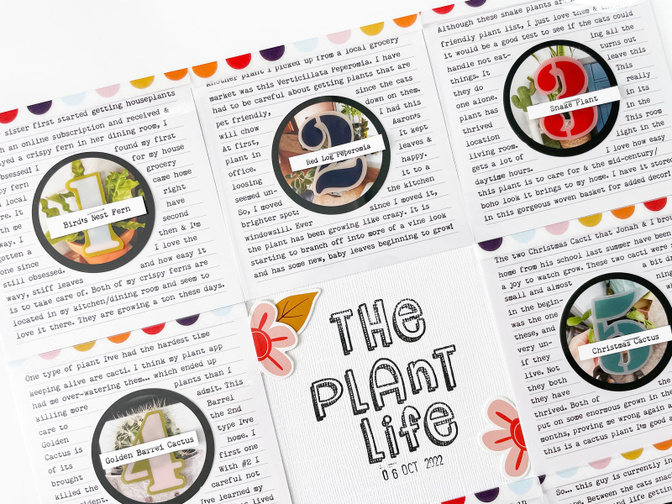
I started by printing my journaling directly onto eight of the 4”x4” cards. Then, I created my circle photos of my plants (photos sized at 1.75” circle + placed onto a black 2” circle), and punched them out with my 2” circle punch. These were added into the center section of the 4”x4” cards. Knowing I wanted to also add numbers on top of the photos but also didn’t want to cover them up, I decided to create transparent flip ups for each card.
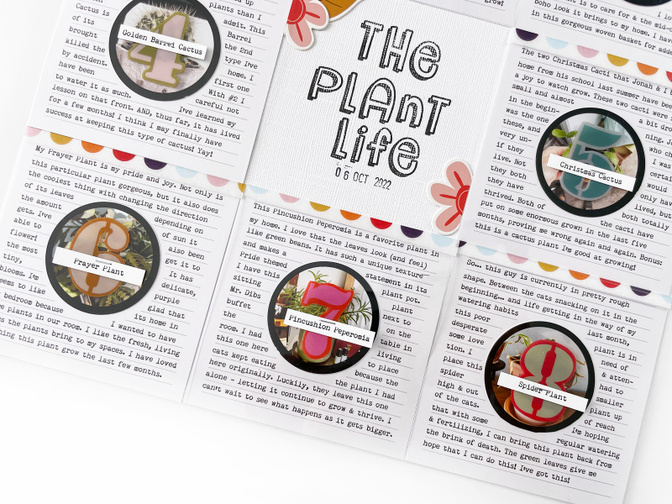
Using a piece of 12”x12” clear transparency, I cut out eight 4”x4” squares and attached them to the top of each 4x4 journaling card with washi tape. Then, I fussy cut the numbers 1-8 out of the Plastic Number embellishments from the kit. I loved the bright colors of the plastic numbers and thought it would bring a pop of color to my page!
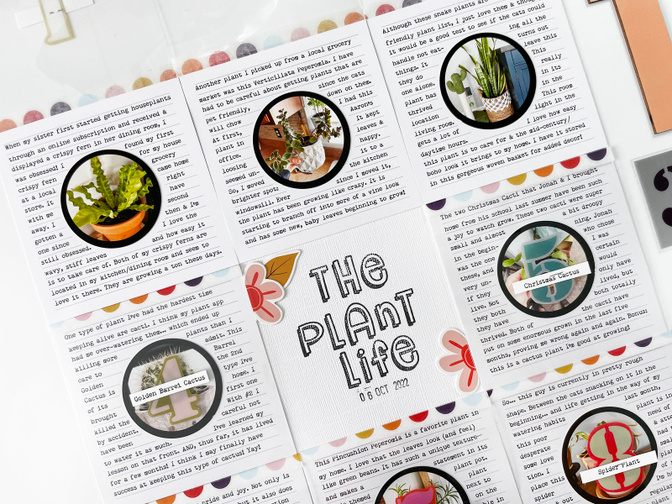
On top of each 4”x4” transparency, I added my plastic number with a tiny phrase I created on top. The small journaling phrases are simply the names of the different plants. I placed the number + name phrases in the center of the circle photos and attached them with my tiny attacher.
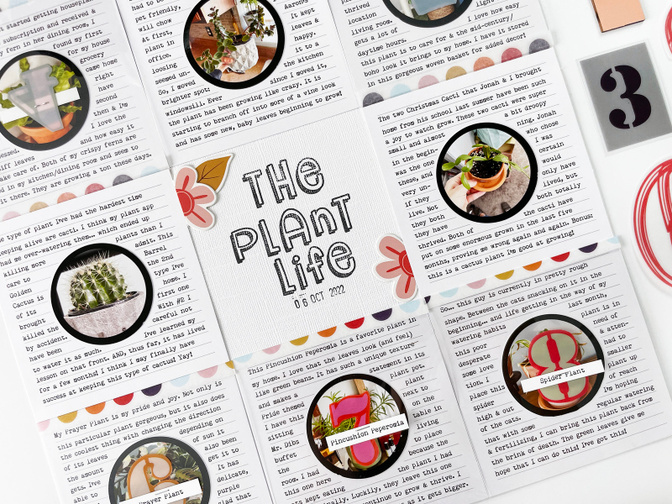
With my numbers in place, I then adhered all of the 4”x4” journaling squares around the perimeter of a piece of white textured 12”x12” cardstock. This left a section in the middle where I could add my title and date stamping.

To create my title, I stamped “The Plant Life” using the Totally Cool Alpha in black. I love how quirky and fun this font is! Finally, I completed the page by adding the flower and leaf die cuts (trimming the flower in half so I could add it in two places - helping balance the look)! This page is SUPER fun and is incredibly versatile for lots of different stories. To add this to my album, I will trim a piece of 12”x12” transparency down to 2”x12”, add my page to the strip, and hole punch it to get it in an album.
Thanks for stopping by to check out the projects I created with the Numbers Scrapbook Kit. I hope you feel inspired to tell your stories using these fun products. I can’t wait to see what YOU make.


Comments
Sign in or sign up to comment.
13 comments
Each layout is so nice, I couldn't pick a favorite!
Replies to ScrappinMyHeartOut
Sign in or sign up to reply.
Great layouts! May I ask which set the "Love You Because" stamp was in?
Thank you,
Lisa
Replies to lily5775
Sign in or sign up to reply.
Thank you for sharing this valuable knowledge! Play game https://smashy-road.io free.
Replies to bonitacaily
Sign in or sign up to reply.
Become the best archer as you take down opponents with deadly arrows
https://ragdollarchers.com/
Replies to Aloire
Sign in or sign up to reply.
What inspired you to choose "The Plant Life" as your title, and how does the Cool Alpha font enhance the overall theme of your project? Enjoy https://smashyroad.org/ now.
Replies to shohalen
Sign in or sign up to reply.
Experience the thrill of https://crossy-road.io/, where each jump could lead to victory or disaster in this addictive game.
Replies to anna12
Sign in or sign up to reply.
Love the creativity in this project! There’s something so satisfying about storytelling through art—kind of like what we try to do with anime. Thanks for the inspiration: https://gogoanime.cv
Replies to Evelyn09
Sign in or sign up to reply.
This is so inspiring! I love how Krystal used the Numbers Scrapbook Kit to create such diverse layouts. Gotta check out that Facebook page for the live replay. Thanks for sharing! https://nowgames.net/
Replies to arden222
Sign in or sign up to reply.
This is a really great site. Thanks for your sharing https://chillguyclicker.io/
Replies to Patrick243
Sign in or sign up to reply.
Lovely crafting ideas — thanks for sharing!
When I’m working on long craft sessions or using power‑intensive lighting setups, I check hourly electricity prices to optimise my energy use. I use https://xn--fiprssishknhinta-2nb23aia.fi (Sähkön Hinta Nyt) for checking real‑time Finnish electricity rates.
Replies to User56106
Sign in or sign up to reply.
These tools do not require complicated personal information, ensuring privacy. Users only need to enter their name without revealing anything else. https://love-calculator.io
Replies to hentylee
Sign in or sign up to reply.
Love this Numbers kit! miside zero download—just pure paper magic. Can’t wait to craft along live!https://misidezero.com/
Replies to User56268
Sign in or sign up to reply.
Xlope is a simple yet addictive game where players control a ball rolling down an increasingly faster slope, dodging obstacles and chasms, and trying to travel the furthest distance possible. https://xlopegame.io/
Replies to emma99
Sign in or sign up to reply.