December Daily® 2022 | Ali's Album Start
Tags: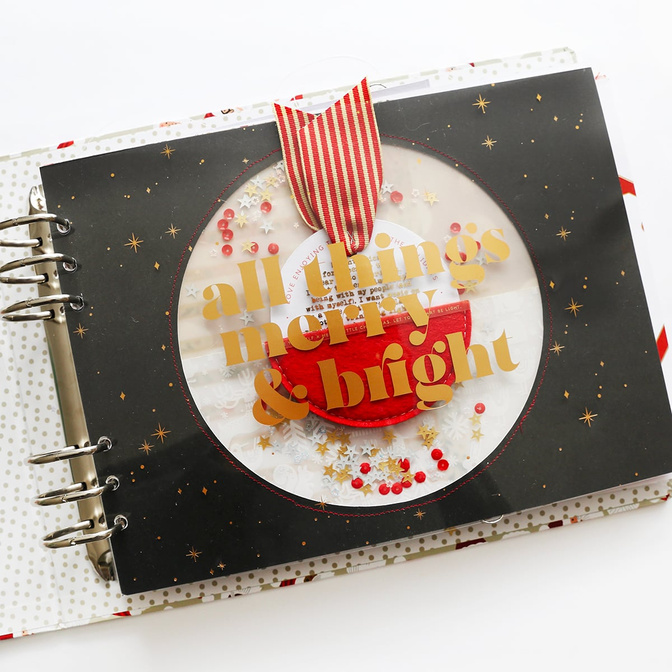
Today I'm sharing my starting place in my 2022 December Daily® album.
As many of you know I've long enjoyed doing some work in this project in advance of actually documenting my stories in December. I find that it helps me complete the project in December (which is my personal goal) and I simply enjoy a bit of a head start.
In today's post you'll find my title page/reason why/intention and a fun table of contents page. I've also got a couple downloads in a digital package for you below if you want to create some similar pages.
Don't forget to join us for a month of ideas in the December Daily® Product Play Workshop (already underway with a new idea each day for finishing up past projects or getting ready for this year's documenting) and our super fun $5 Prep Day happening on November 12th (if you can't join us on that day all the content is recorded for you to watch at a time convenient for you). Our goal is to give you lots of ideas + inspiration as we approach December.
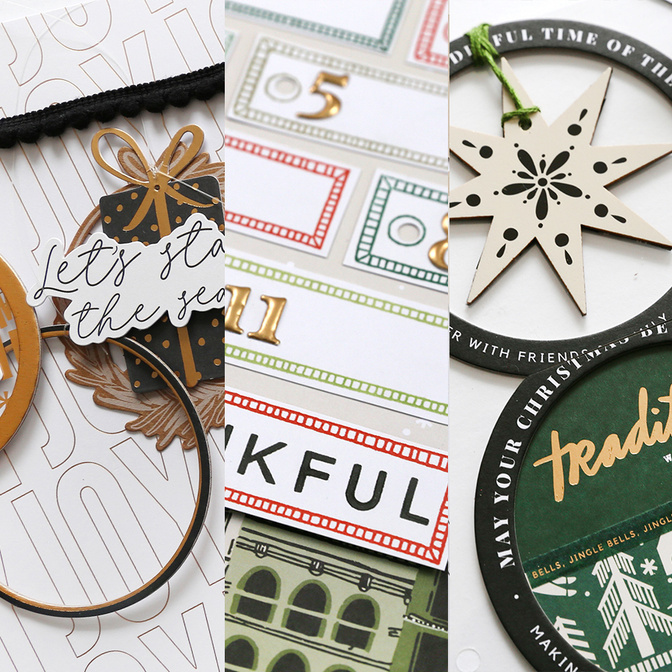
A peek at the three projects I completed for this year's Product Play workshop (I'll share these here in December when the stories are actually added):
As always I'll be posting my pages here each day in December (or almost each day) as I tell one story per day.
Let's dive in to my process video:
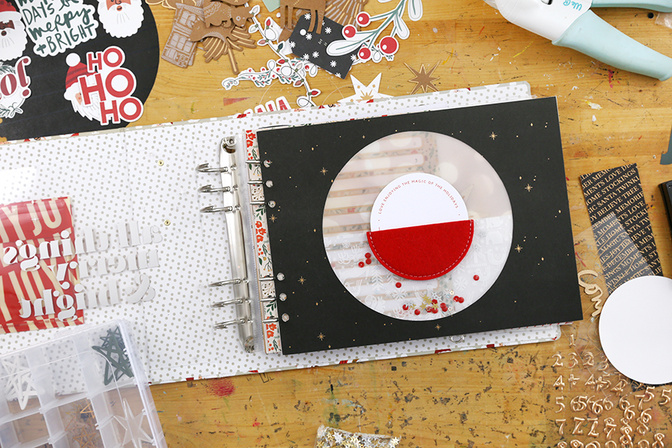
Here's a look at my album so far via images:
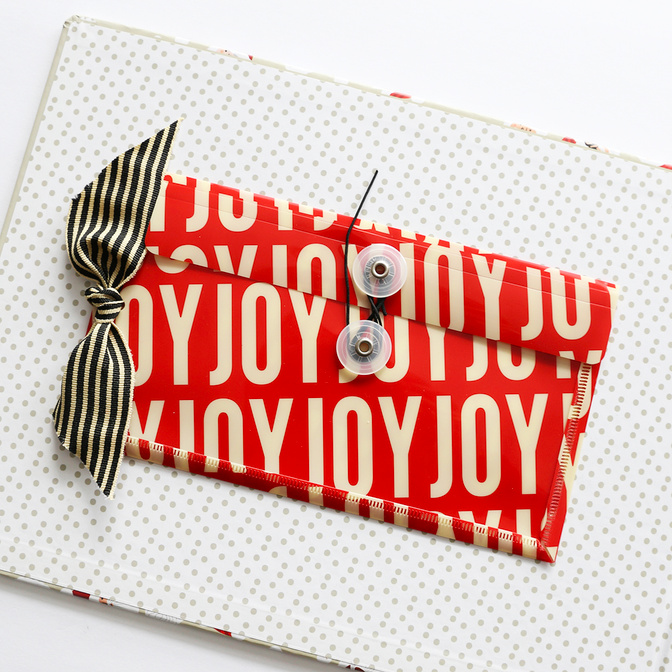
I started off my album with the JOY envelope from the Envelope Bundle (adhered with red line tape). The black + cream ribbon is tied through the holes along the edge and is from May Arts.
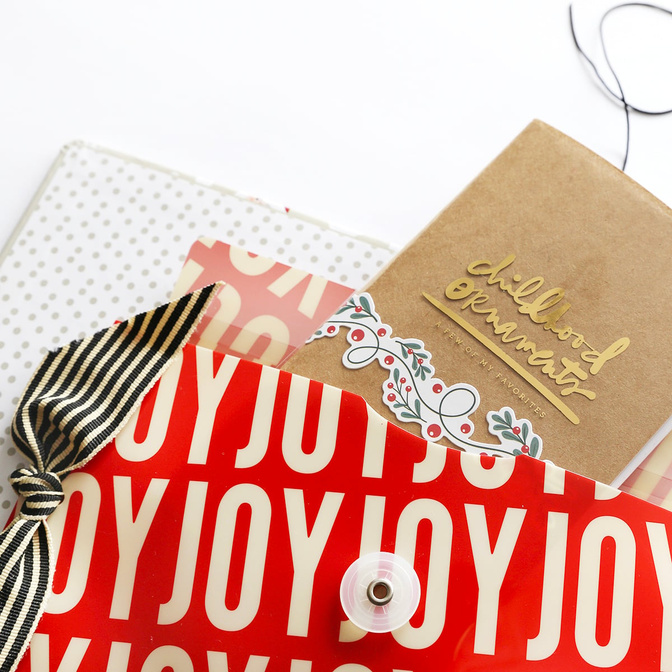
The envelope is holding one of the small notebooks we offered with the collection this year. I'll be sharing my idea for the notebook in our $5 Prep Day (will include digital downloads).
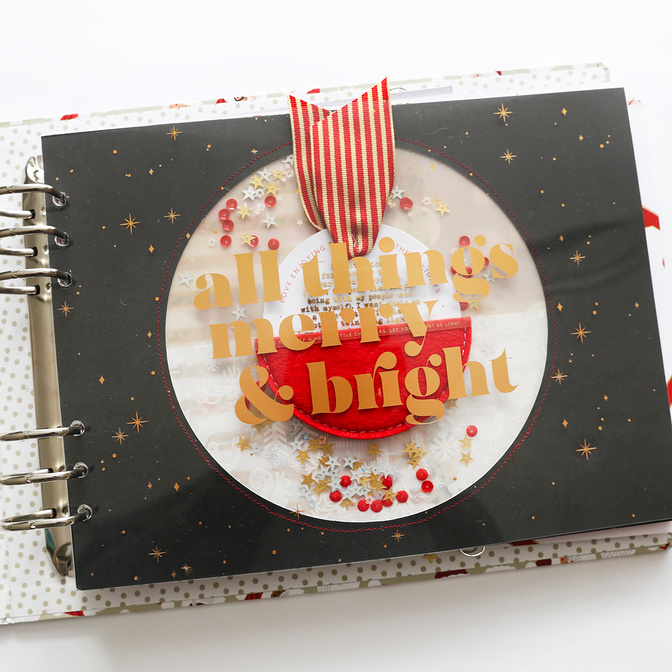
The first page in my album is the Merry + Bright transparency that was part of the Specialty Paper Bundle.
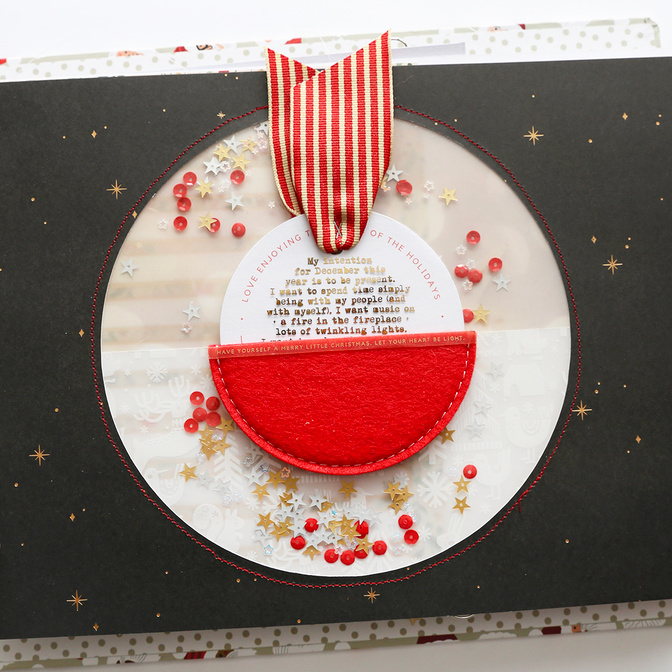
For my reason why/intention/intro page this year I decided to play around with creating a large circle window which ended up turning into a shaker pocket (you can see all the steps in my video above). On top of that circle I added one of the felt pockets from the Main Kit to hold my intention statement.
I saved my Silhoutte/SVG/PNG files for you in case you want to do something similar in your album.
Download the digital package here.
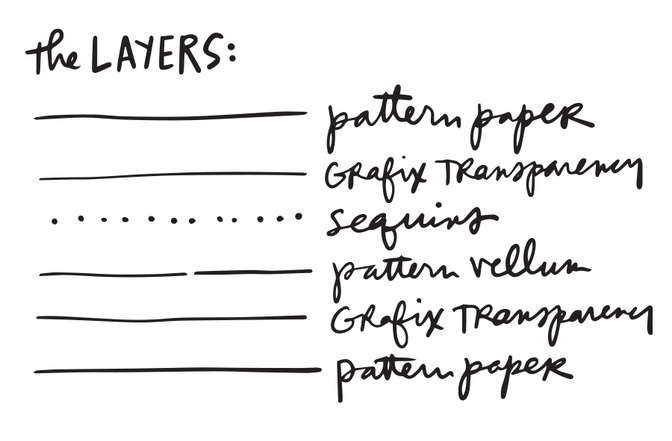
Essentially I took two of the patterns from the Main Kit and used my Silhouette to cut out the 7 inch circle from each sheet. Sandwiched in between those two pattern papers are two sheets of Grafix Transparencies + two pieces of pattern vellum from the Specialty Paper Pack that meet in the middle (so the design on the top 1/2 is different from the design on the bottom half). I added star sequins + red sequins in between the Grafix Transparency and the front of the vellum.
After I had all my layers in place and adhered I ran it slowly through my sewing machine to create a circle around the outside edge.
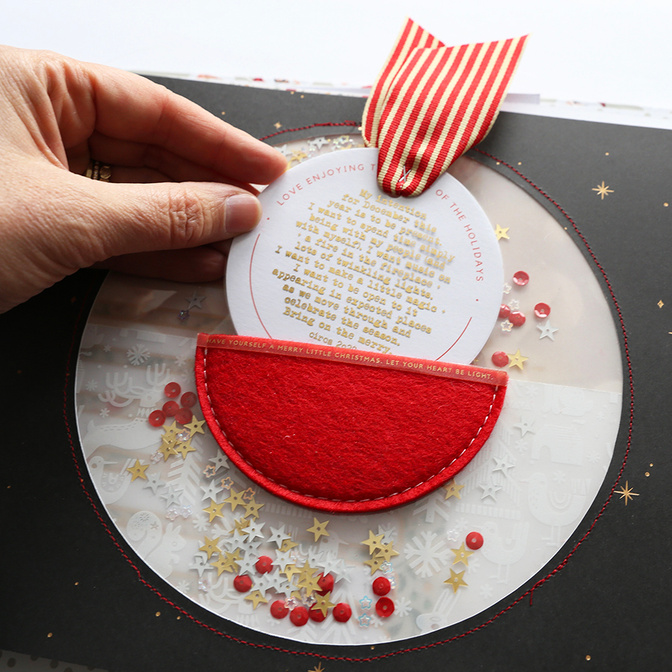
I set up my journaling in Illustrator inside of a 4 inch circle (keep some space around the outside for the text that's already on the journal card). You can also add text in a circle in photoshop and some word processing programs. I printed that on laser transparency and ran it through a Minc machine to make the text gold foil.
My reason why/intention this year is to simply be present.
I also used red line tape to adhere one of the vellum quote strips from the Main Kit to the top edge of the felt pocket.
After cutting out my journaling circle I used a We R Memory Keepers hole punch to connect my journaling + the journal card and added red + cream ribbon from May Arts.

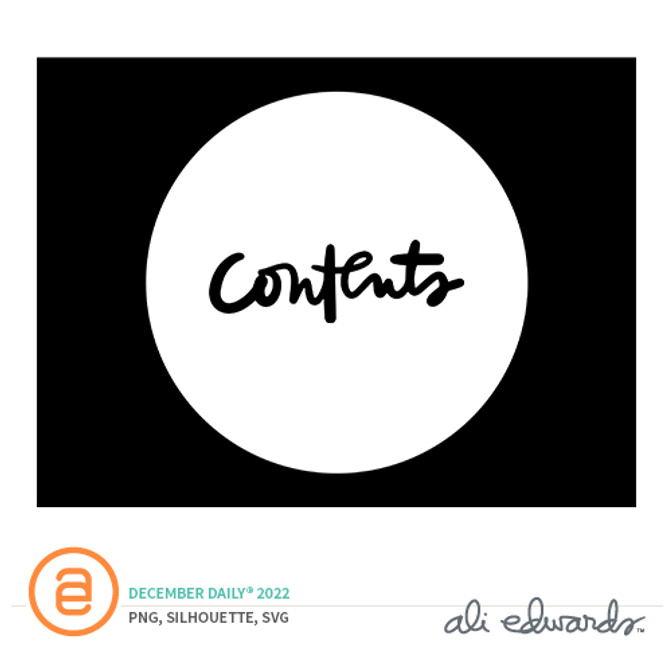
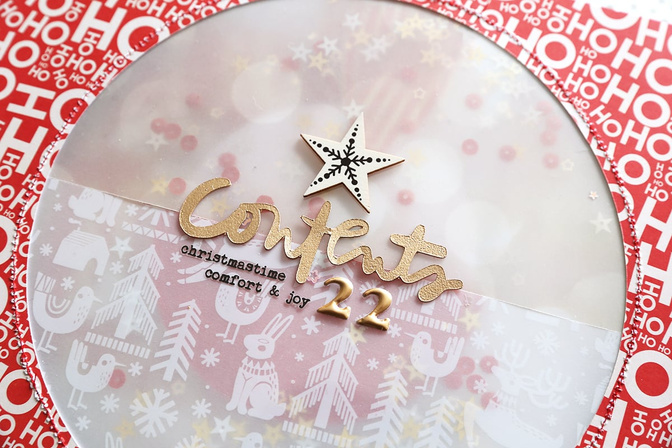
On the back of the first page (second side of the large circle window) I added the word "contents" as I decided to play around with creating a table of contents page for this project - similar to what I did earlier this year with the Begin Story Kit. The digital word art "contents" is included in the download above. I used my Silhouette to cut it out and then embossed it using gold embossing powder.
Above the word "contents" I added one of the wood veneer stars from the Main Kit and below I added the "22" using the numbers from the Main Kit. To complete this page I added a couple rub on words from Tim Holtz.
I loved working on this!
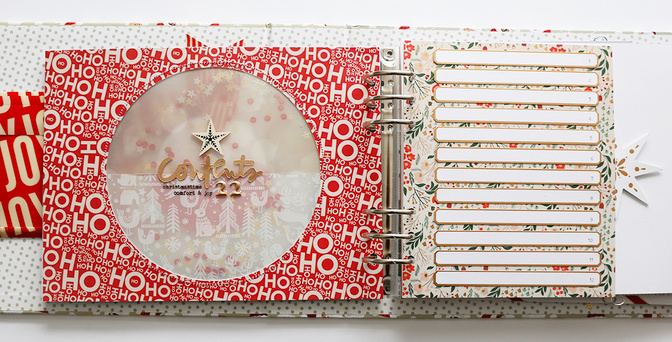
The next page is a pattern paper from the Paislee Press Mini Kit with twelve of the gold outline labels from the Main Kit. I'll use this page (and the next one) to create a table of contents for my stories this year.
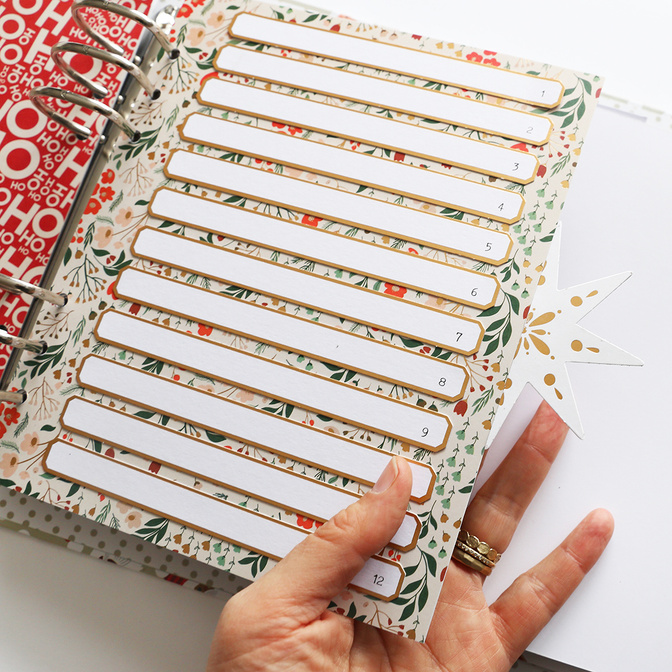
To create a tab along the edge I used one of the stars from the December Daily® Variety Die Cut Pack. I cut it in half and added an extra little piece of paper between the two halves in order to attach it to the back of my first table of contents page.
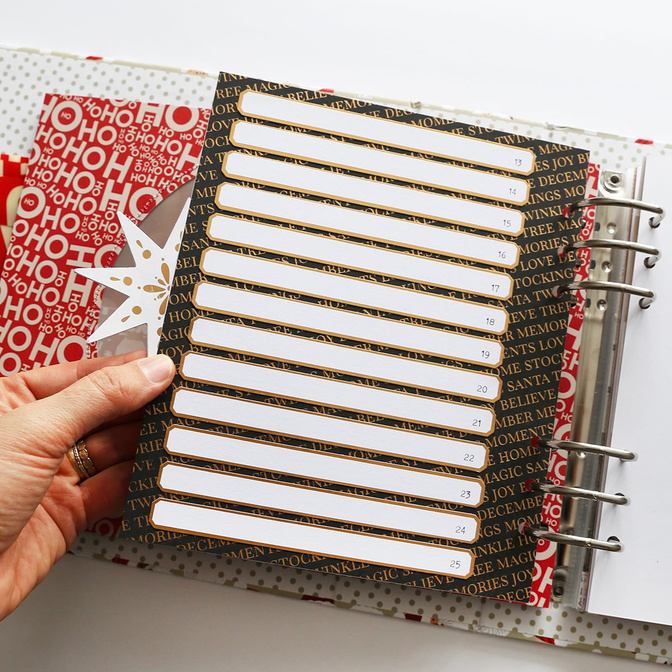
The back of this page features a pattern paper from the 10x8 paper pack and 13-25 labels. I'm excited to have a table of contents list at the beginning of my album this time - it will be fun to add story titles to those over the course of the month.
Thanks for joining me for a look at my starting place! I'll be sharing more soon.
SUPPLIES
Laser Jet Transparency (use with Minc Machine)


Comments
Sign in or sign up to comment.
10 comments
Love these ideas! I especially like the mini notebook of childhood faves. I need to remember that for next year after I visit my childhood home in Canada this Summer and can get some ornament photos (or bring them back with me!)!
Replies to barefootscrapbooker
Sign in or sign up to reply.
Wow. Beautiful and inspirational as always!
Replies to JeanetteE
Sign in or sign up to reply.
This is all just so beautiful! Makes me so excited to start on mine. Great inspiration.
Replies to justlisa
Sign in or sign up to reply.
I always love seeing your creative process Ali. Thank you for sharing.
Replies to gretchen
Sign in or sign up to reply.
Is there a digital available of the "All things merry and bright"
Replies to Tab1115
Here you go: https://www.aliedwards.com/shop/december-daily-2022-digital-10x8-specialty-paper-pack
Sign in or sign up to reply.
I love the ideas but am struggling with how to morph these into the 6x8 album. Best I’ve come up with is cutting a 5” circle to put the red felt pocket on top of and just using vellum between the papers, skipping the soaker effect. Thoughts?
Replies to pamela123d
Sign in or sign up to reply.
Thank you for the cut files. I am a novice and only just started to use my silhouette. Would it be possible to get a 6x8 off the page version? thank you so much!
Replies to jayowen
Sign in or sign up to reply.
hello, did i miss where the pdf 7" circle would be? I can't see it here.
Replies to Martinimom
Sign in or sign up to reply.