December Daily® 2022 | Story 02
Tags: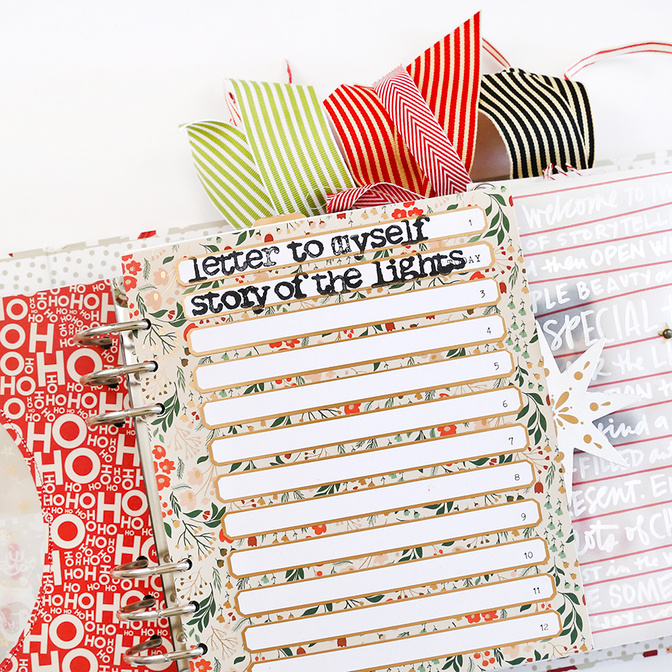
Welcome to the second story in my 2022 December Daily® album.
Man, this project makes me so happy!
Before you dive into today's project I want to remind you that there will be some days when I spend a lot of time on a project and other times when my project is faster/simpler. Today I had time available to me to play + stitch + linger and I had the best time getting my story told.
Today's project started with the full page of stamping I did as a challenge during Prep Day (you can still sign up for this + have access to all the content, downloads, etc). I knew I was most likely going to pair that full page of stamping with a full page photo + a story + I had another idea I've been just waiting to play around with on top of a photo.
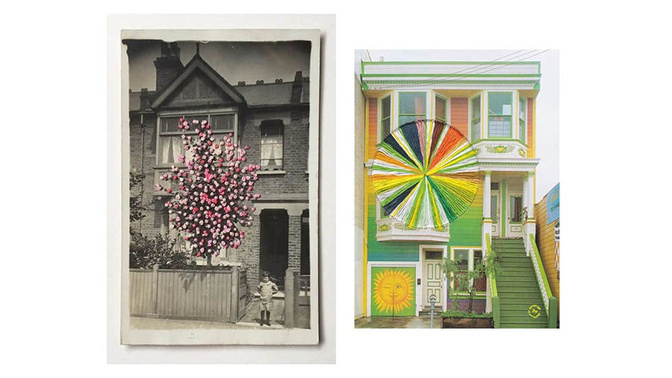
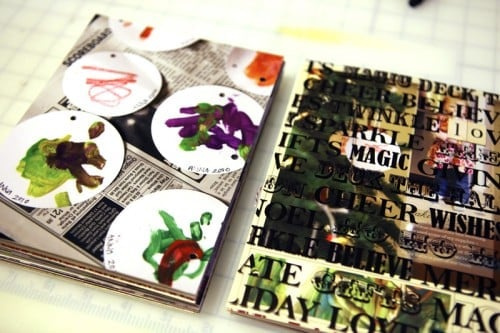
Over the last few months I've been looking at a lot of cool images on Pinterest by artists who add stitching to photos/postcards/images. It's such a fun technique/concept that we can easily adapt into our memory keeping adventures. Here are a few of those images I have saved to a Pinterest board for inspiration:

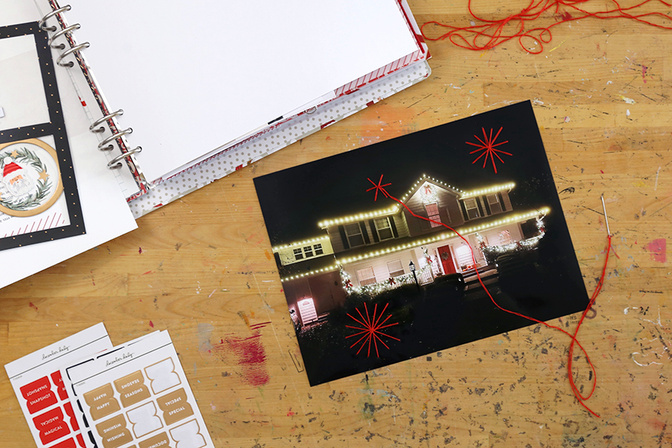
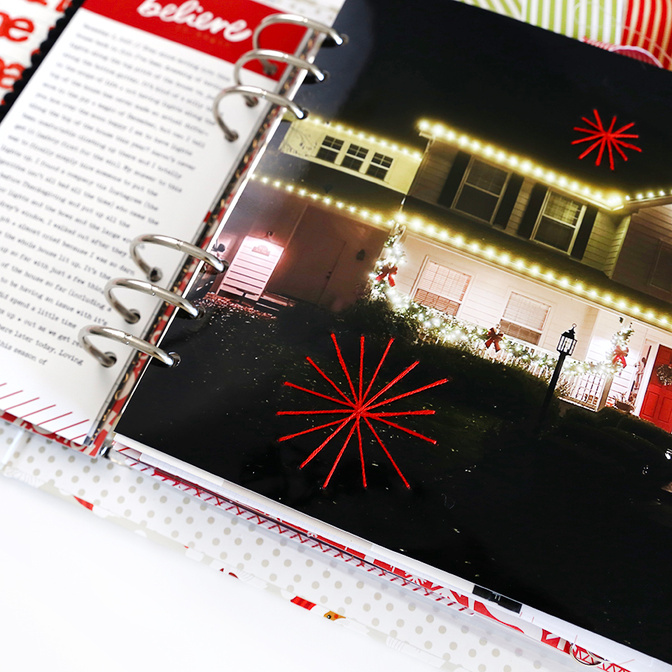
I knew I wanted to play around with this idea on a big photo this month and a photo of the lights on our house became the foundation to test this out.
In addition to those Pinterest images I also saw Leontien on Instagram doing similar beautiful stitched stars on paper:
You can see more of her projects via Instagram here.
I also know that my friend Amy Gretchen has been having an awesome time stitching in her project already this year:
Follow her on Instagram for more beautiful, fun ideas throughout December in her project.
Let's dive into today's video:
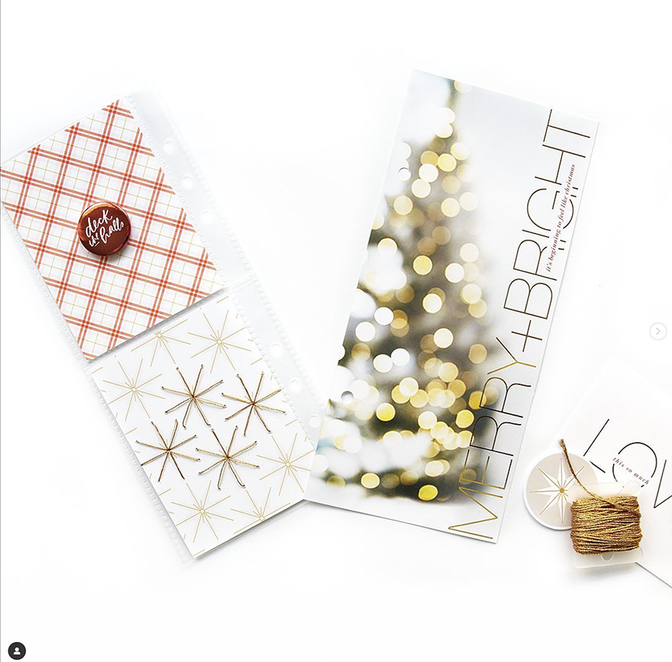
Here are additional images/details of today's story:
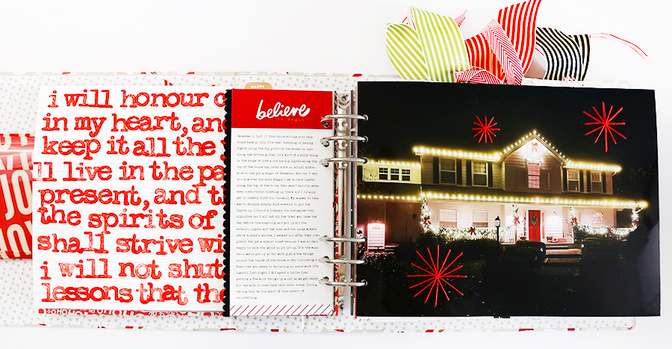
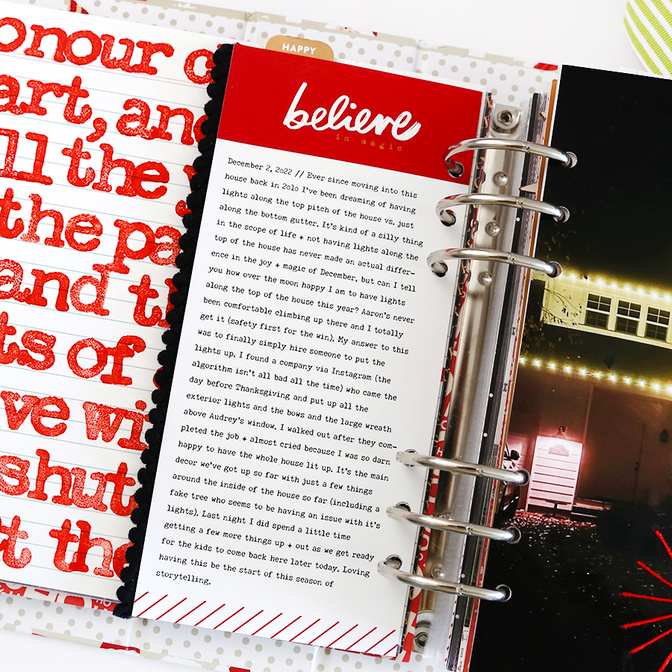
I ended up with the full page quote + an insert (playful stuff on the front + story on the back) + my photo with stitching on top.
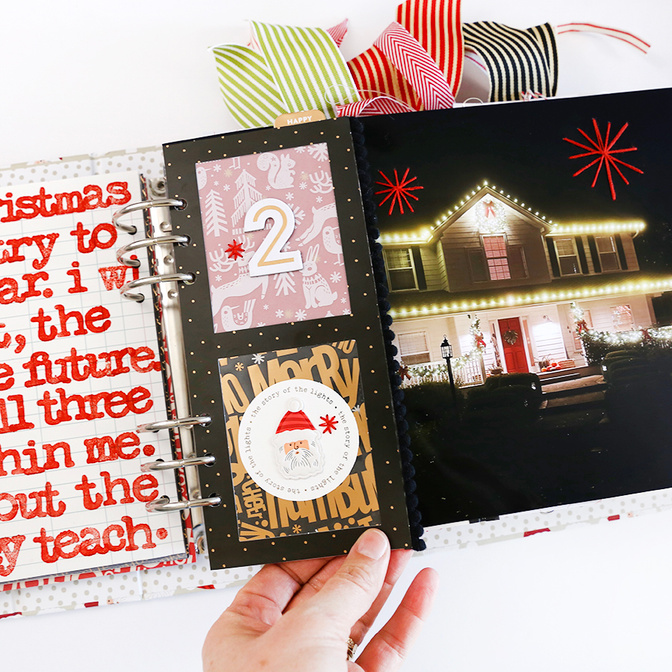
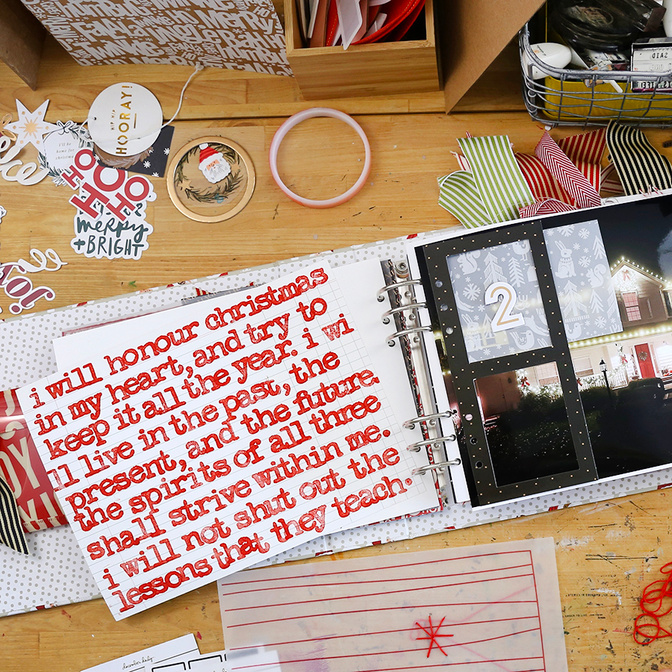
The cardstock insert became the home for my number two chipboard which was layered on top of vellum + patterned paper and for one of the puffy Santa's on top of a custom "the story of the lights" circle layered on top of a transparency on top of a pattern paper. I also added stitched stars using red embroidery floss on top of both to link it to the treatment on the full page photo.
Along the outside edge I added black pom pom trim.
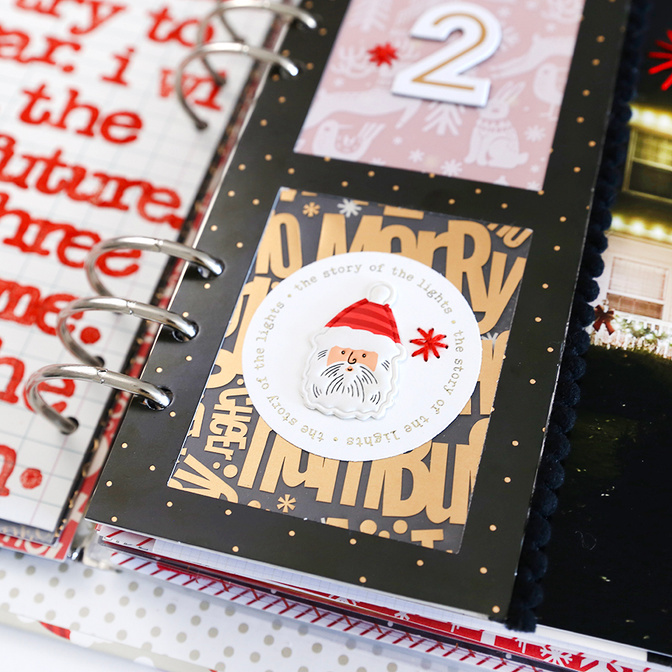
The layered Santas from the Main Kit would also work great on top of this circle. I used a 2.5 inch circle punch to punch this out after I ran it through my Minc machine to add gold foil.
Download "the story of the lights" digital circle here.
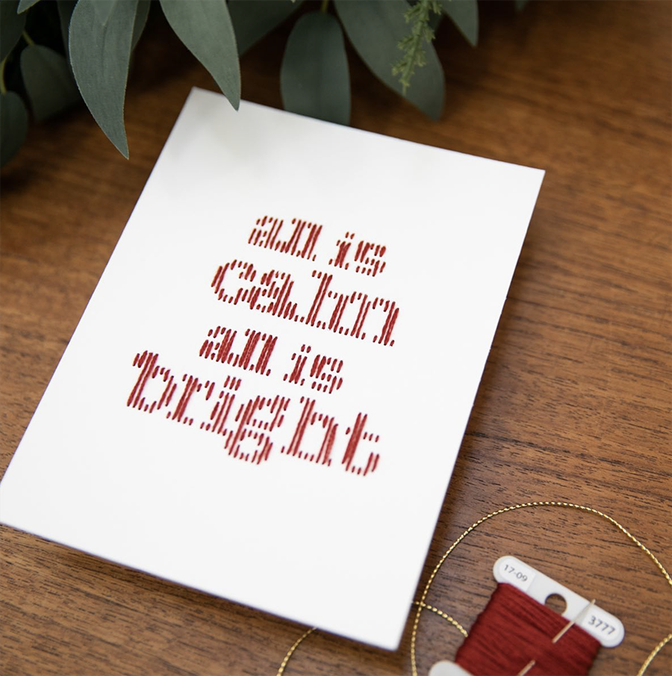
Seriously going all in on the red right now.
I used one of the digital 3x8 journal cards and added my story on top using the font Secretary Typewriter.
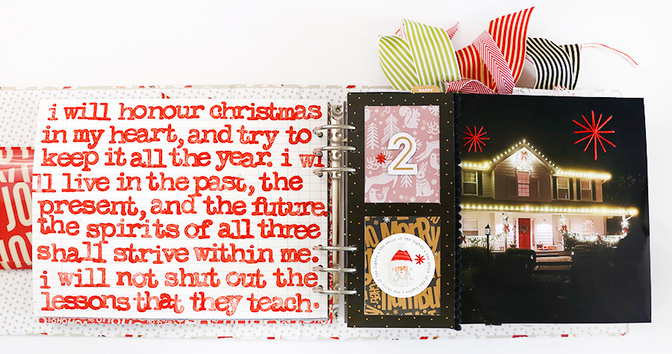
Today's story is all about getting Christmas lights on the whole house for the first time.
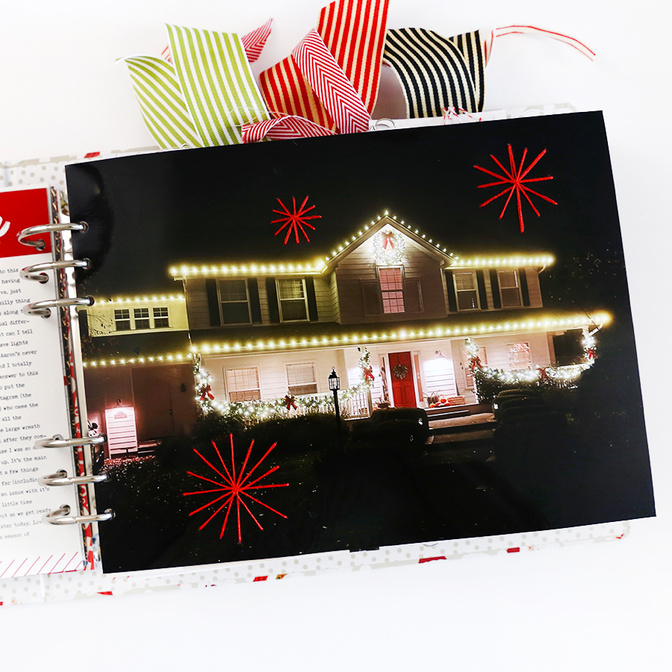
On top of my full page photo (sized 11 inches wide x 8.25 inches tall and printed here at home on my Epson XP15000) I stitched three simple, imperfect starburst shapes. In today's video I walk through my process for adding the stitches.
Now I totally want to try other shapes + words with the embroidery floss on my photos.
I hope you have a wonderful weekend!
SUPPLIES
December Daily® Main Kit (digital available)
December Daily® 10x8 Paper Pack (digital available)
December Daily® Sticker Tabs (digital available)
December Daily® Chipboard Numbers
SHARE YOUR STORY #02
You are invited to leave a link in the comment section if you'd like to share your daily pages. Please include a direct link to your blog or IG post sharing your Day 02 vs. a general blog address link.


Comments
Sign in or sign up to comment.
23 comments
Ooooohhh! I really love how this came out Ali! Off to unearth my embroidery floss 🤣🤣🤣
Replies to Nolana
Sign in or sign up to reply.
Love, love , love! Me too, off to get my needle and floss!
Replies to yin100
Sign in or sign up to reply.
After watching Pam Baldwin's class Playing with Paper, I have wanted to tackle this idea of stitching on a photo. Love how the color pops on the black.
Replies to Anne235
Sign in or sign up to reply.
Beautiful love the stitching! Thank you for sharing!
Replies to asackr01
Sign in or sign up to reply.
Hi!
Just wondering if you could share a link for the yellow glue runner tape you use?
Thanks!
Replies to katmarie1019
Here you go: https://bit.ly/3OhHZKN
Sign in or sign up to reply.
Love your layout - what I love most is the feeling it gives you to have the house glowing with pretty lights - especially since "light" has such special meaning for you. I'd shamelessly leave those upper lights on the house year round!!
Replies to ScrappinMyHeartOut
Sign in or sign up to reply.
Love this! Those lights are amazing! 🌟
Replies to Jeannew
Sign in or sign up to reply.
Your house looks so beautiful!! Yay for fulfilling a dream :)
Replies to Phineartist
Sign in or sign up to reply.
As a two story house owner, I often dream about having lights up too but never make moves to have it happen.
Don’t forget about Pam’s class for inspiration, tutorials and even practice sheets on the different stitching. She did an amazing job with the stitching on paper/ photos lesson that I wanted to stitch on every single thing after I watched it.
Replies to libbysmeyer
YES! 100%.
Sign in or sign up to reply.
WOW!!!! Best tip turning my blade pad over!!!! I have that exact paper cutter and just turned it over. LIKE BUTTER!!!! Glad you're discovering embroidery! I've been embroidering since childhood...especially crosstitch...and can be so relaxing. WONDERFUL DAY 2!!!!
Replies to dpowersfabian
Sign in or sign up to reply.
Just amazing!
Replies to Momany
Sign in or sign up to reply.
Love this! Stitching on photo looks so fun; must try. Also, could you share the link for Christmas printed vellum? Seriously can’t seem to find any printed vellum this year.
(Darn google-machine not being helpful) TIA
Replies to mommasewe
Sign in or sign up to reply.
I just love the stitching! A gorgeous page Ali!
Today I'm sharing about our tree decorating.
https://digitalscrapbookinghq.com/o-christmas-tree-december-down-under-fave-2/
Replies to mshanhun
Sign in or sign up to reply.
It's so like National Lampoon's Christmas Vacation. Love it!
Replies to minkaclark
Sign in or sign up to reply.
Just a hint from an experienced embroiderer: to thread the needle, take the floss, fold it over the needle, hold the folded floss tightly and slide it off the needle. Thread the needle with the folded edge of the floss (you want to keep a hard fold in the floss). Sounds way harder than it is! Doing it this way makes it much easier to thread a needle--it even works with yarn!
Replies to Kary13
Sign in or sign up to reply.
The stitching on the photo is awesome and something I’m gonna need to try!
Here is my day 2:
https://www.instagram.com/p/ClwBbOjOuaP/?igshid=YWJhMjlhZTc=
Replies to Mpasquini12
Sign in or sign up to reply.
Love this so much. It’s the story of lights download closer to a 2”. I’m trying to figure out if I should buy a 2.5” punch to punch it out🤔
Replies to Meltex
Sign in or sign up to reply.
Hello Ali or collegea, I bought the beautiful font Secretary Typewriter and now I like to know wich fontsize you use in your 11 x 8.5 inch album and the hight between the lines (normally I guess 1.2). Thanks for your reaction.
Replies to tomik58
I usually use a type size that is 9-11. Usually just the default line width.
Thanks! :)
Sign in or sign up to reply.