December Daily® 2018 | Foundation Pages
Tags: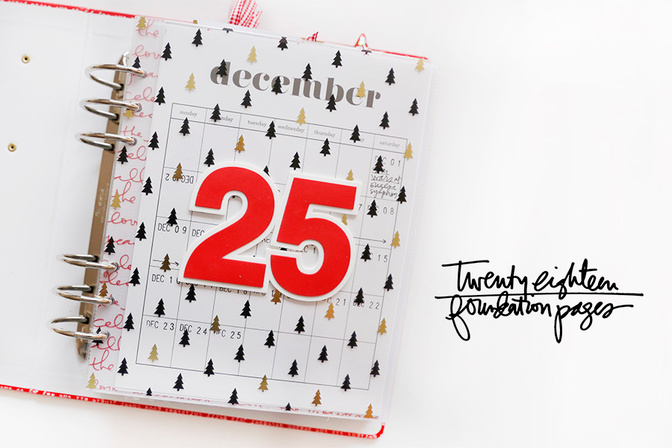
Welcome to December Daily® 2018. Today I'm sharing a look at what I'm doing in my album in advance of December.
Many of the pages I'm sharing below are part of this year's December Daily® Product Play 2 workshop which begins next week on November 6th. I designed nine specific pages using tags, titles/type, and trees for that class which includes video tutorials and additional information on how I created those pages. That workshop also includes projects from contributors so you can see how other people are playing with the products and a digital package.
Most of the products I'm using this year are from my December Daily® collection. The Main Kit + albums are still available here if you are just learning about this project or if you decide you'd like to have those to help you get your stories told this holiday season. I've also added a couple things from Tim Holtz and a few things from the Merry Days Collection from Crate Paper. I also generally incorporate a variety of random basic supplies which are listed at the bottom of this post.
If you are brand new to December Daily® I highly recommend checking out my Storytelling With December Daily® workshop. It will absolutely help you get to the heart of the matter + the project for yourself and help you get your head and your heart aligned for how you want to approach this project.
So why do this before December when I don't know exactly the stories I will be telling?
In my experience I love have something to start from vs. nothing. I also welcome the creative constraint that comes from having done a little something in advance. This is totally a personal preference and you won't know if this does or doesn't work for you until you try it. In the very beginning I used to number all my pages in advance. I don't really do that anymore but I do generally slip some things/numbers into pockets so I have a general idea of the flow of the album.
I enjoy spending time before December playing with some of the products and giving myself a chance to set myself up for storytelling success. In the case of this year, creating the Traveler's Notebook (thanks to Jess Forster for that suggestion) for the days we will be traveling gives me a specific home to hold those stories that's all ready for our adventure.
As someone who is working on this project daily in December and sharing on my blog daily, having more done in the beginning helps speed up my own personal process during the month.
A couple other general reminders as we get started:
I tell one story per day from December 1 through December 25. Just one. One is more than enough for me. Some days it's something meaningful and other days it's something silly and other days it's just something really random. Remember that the beauty in this project is that it's the sum of all the days coming together vs. any individual story that is most awesome.
YOU DO YOU. Your stories, your motivation, your enjoyment, your time constraints, your products might be totally different than mine and that is awesome. Don't feel like you have to be something you are not in this project - there's generally enough of those kinds of feelings already in the world. This is a project for you. This is not a competition or an invitation/permission to figure out a way to feel bad about yourself. Make the process and your stories work for you and your own life right now.
This year I'm giving myself some structure but also keeping it loose in order to make adjustments as I go based on my stories.
Let's start with the inside cover.
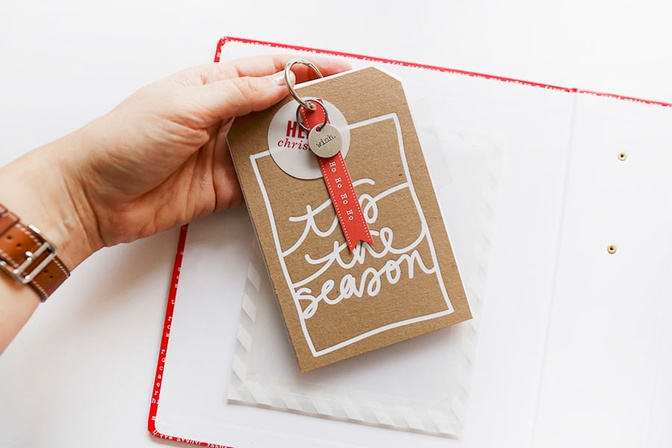
This year I'm adding a tag book to the inside of my cover. I'm using an older Story Kit™ envelope with the flap cut off as a home. The envelope is secured in the album using red line tape. More information about this tag book will be included in the December Daily® Product Play 2 workshop.
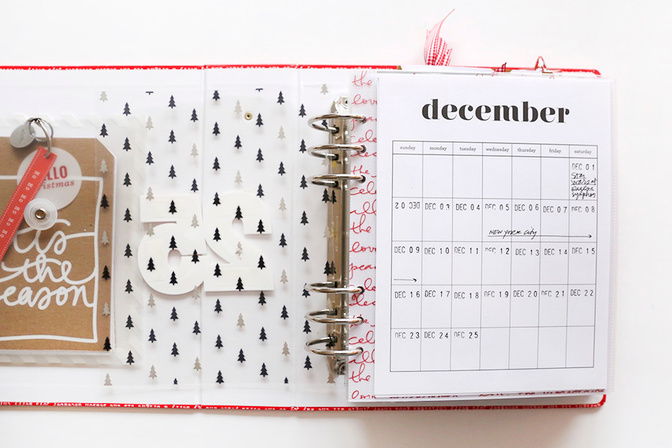
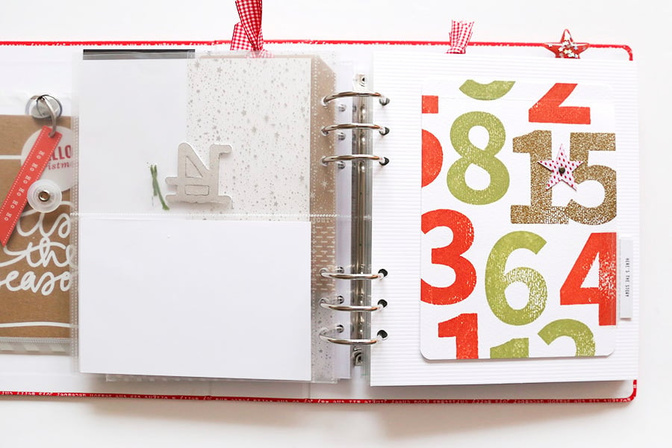
This year I'm starting off my album with the 6x8 tree pattern transparency with the rubber 25 adhered to the front with red line tape. My first page after that is the December calendar that's included in the Main Kit. As you'll see in the image above, I was able to stamp up until December 25th which works for me because I stop documenting on that day. If you'd like to go through the entire month I've updated the design of the calendar and it's available here for you to download (it includes a PDF, PNG, and JPG):
Download the updated December calendar here (includes an additional row).
I used my rolling date stamp to add the days and have so far just added a couple things I know we are planning on for sure. I will add more as we go throughout the month.
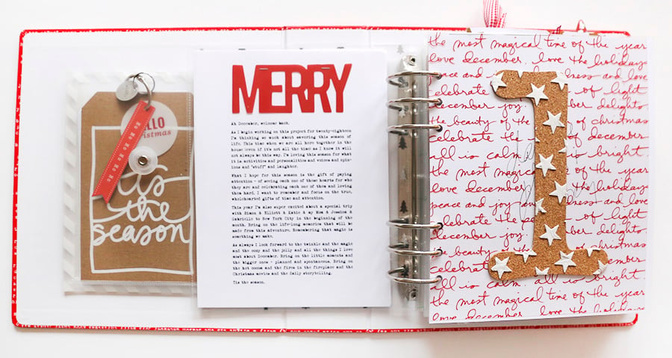
After the calendar page I'm stating my reason why/intention for 2018. I love doing this as a way to set the tone for the upcoming season. It's a great way to begin your album.
For the front of Day 1 I used a large cork #1 and the star stencil + modeling paste to create the pattern. You can read more about that idea here.
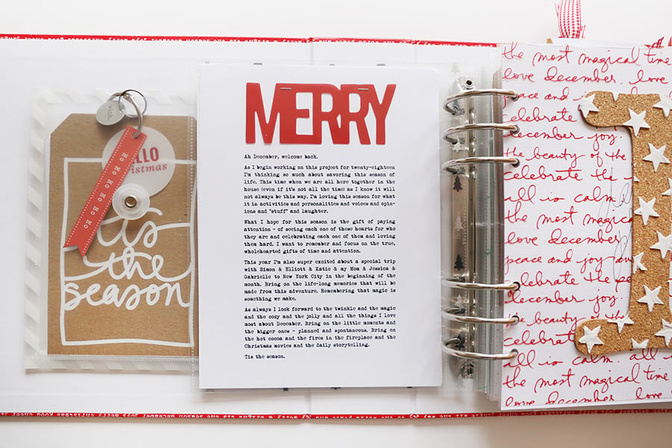
On the top of my intention/reason why I added the plastic "merry" from the Main Kit using a Tiny Attacher stapler. The font I used is Mom's Typewriter.
Here's what I wrote for this year:
Ah December, welcome back.
As I begin working on this project for twenty-eighteen I'm thinking so much about savoring this season of life. This time when we are all here together in the house (even if it's not all the time) as I know it will not always be this way. I'm loving this season for what it is: activities, and personalities and voices and opinions and "stuff" and laughter.
What I hope for this season of the gift of paying attention - of seeing each one of these hearts for who they are and celebrating each one of them and loving them hard. I want to remember and focus on the true, wholehearted gifts of time and attention.
This year I'm also super excited about a special trip with Simon & Elliott & Katie & my Mom & Jessica & Gabrielle to New York City in the beginning of the month. Bring on the life-long memories that will be made from this adventure. Remembering that magic is something we make.
As always I look forward to the twinkle and the magic and the cozy and the jolly and all the things I love about December. Bring on the little moments and the bigger ones - planned and spontaneous. Bring on the hot cocoa and the fires in the fireplace and the Christmas movies and the daily storytelling.
Tis the season.
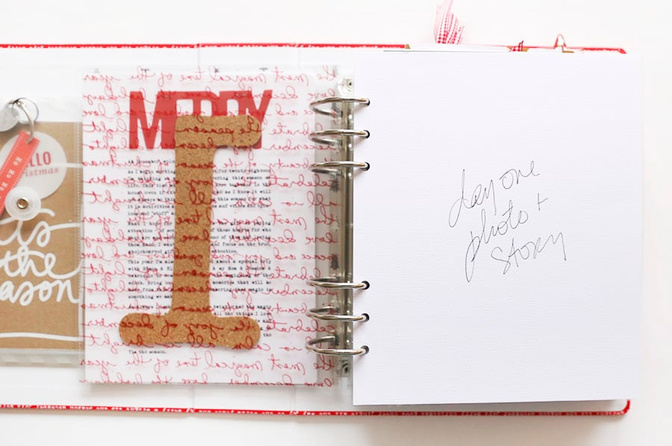
For Day One I'm planning to include a full page photo with journaling on top - possibly using one of my December Daily® 2018 6x8 Layered Templates. It might be a story about going to see Star Wars at the symphony or I might use a photo that we take of all of us before then. I may tell the Star Wars story on Day 2. Flexibility is totally welcome in this project.
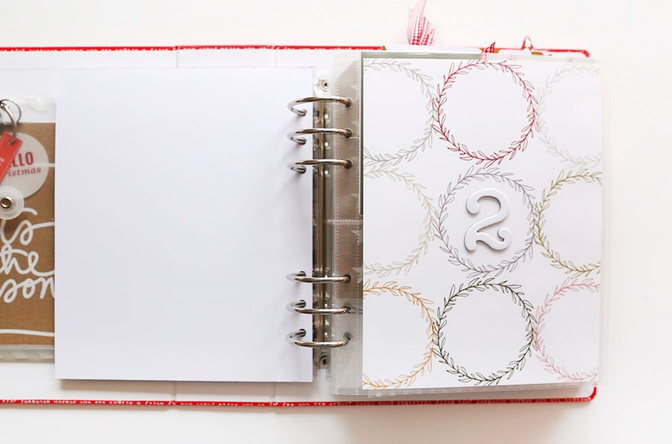
For Day 2 right now I've got one of the pattern papers from the Main Kit paired with the white chipboard #2. I will either add photos or embellishments or words inside those circles once I have established my story. The back of Day 1 will likely be a home for a full page photo.
Full page photos are my favorite.
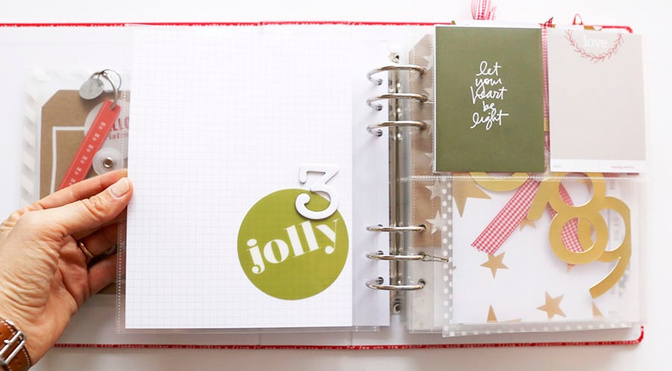
For Day 3 right now I've got one of the plastic circles from the Main Kit + the chipboard 3. The next page is a 3-pocket page with 2, 3x4's and 1, 4x6. Right now I've got a couple 3x4 cards in those pockets.
Some days I do a spread (across two pages) and other days I do a single page for the day. It really depends on the story and what I want to work with.
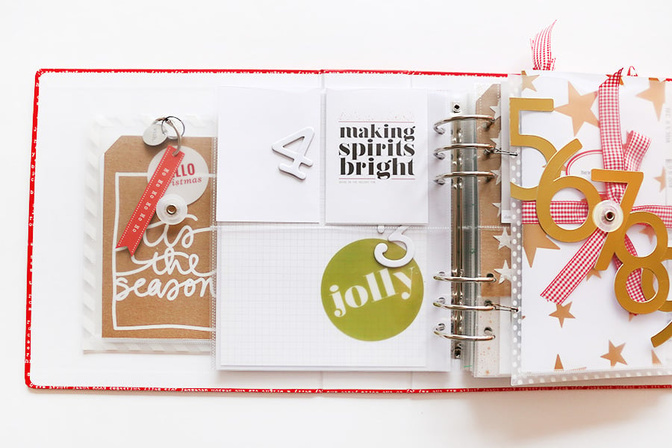
Day 4 right now just includes one of the Main Kit cards and the #4 chipboard. We will be leaving for our trip on the 5th so I imagine this day will be getting ready to head out of town.
This year, as I mentioned above, I will be traveling from the 5th through the 9th. To document our story during travel I made a traveler's notebook vs. needing to bring along my 6x8 album (after an awesome suggestion from my friend Jess).
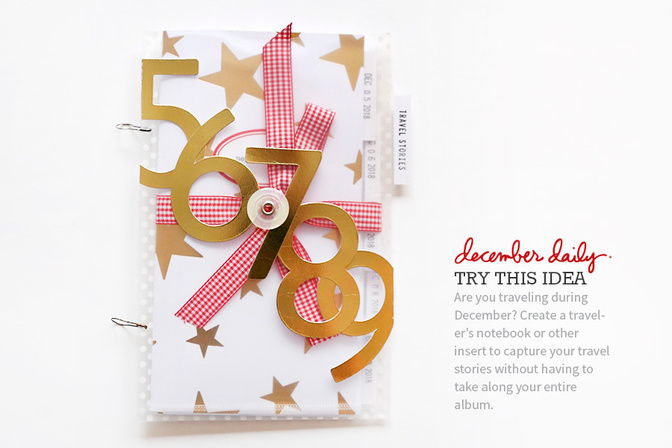
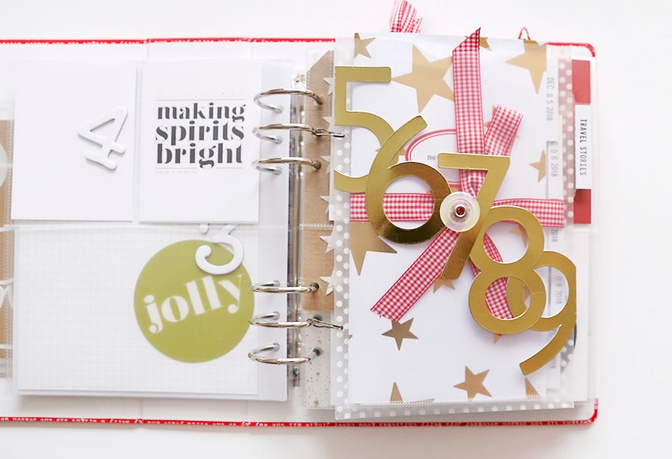
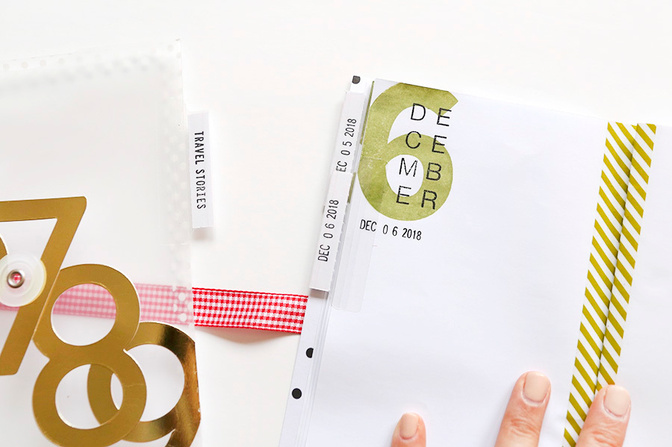
To hold my handmade travelers notebook I am using one of my Story Kit™ envelopes - the new envelopes are taller now and it's the perfect size to hold my notebook. I added gold number stickers on top of the plastic envelope for the days we will be traveling and used Tim Holtz Loop Pins to add the envelope to my album - I didn't punch holes because the traveler's notebook was too wide after I added the index tabs.
Here's a look at both pieces:
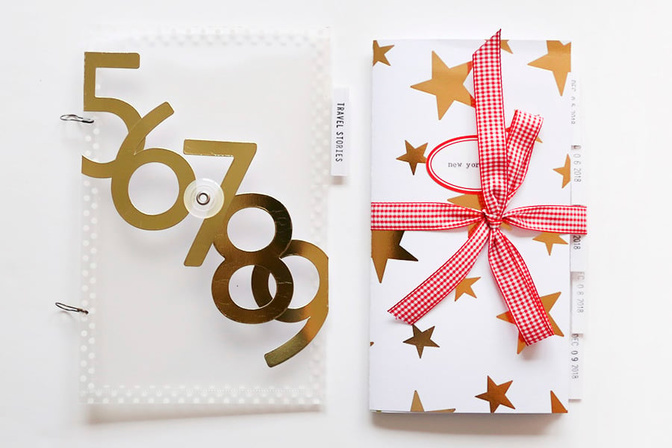
The cover of my travelers notebook is 9 x 8.25 and the interior pages are 8.5 x 8.25 and folded. The pattern paper I used for the cover is My Mind's Eye Joyful Collection Starry Night. On top of the cover I added one of the red label stickers from the December Daily® Sticker Bundle and am holding the whole thing together with some ribbon from Micheals.
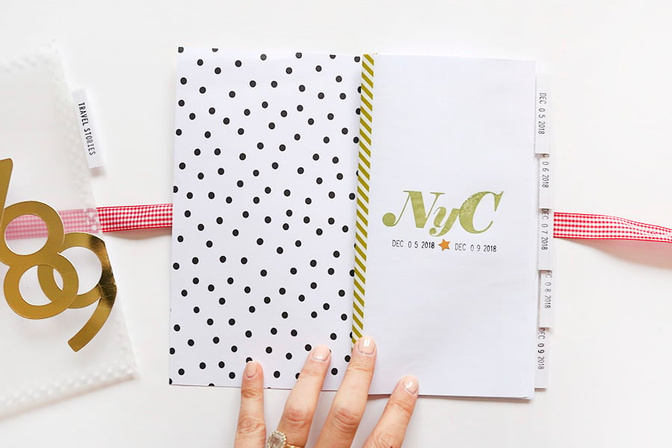
For the first page of my album I used my Mixed Alpha Stamp Set and green (Willamette) ink + a rolling date stamp to create the title.
Green washi tape was used on the front and back of the folded seam on each page. I didn't start out with this but ended up using that after I attempted to staple the inside in the wrong place. The washi is covering up the mis-stapled holes - a mistake that turned out just fine.
I used regular weight printer paper for my inside pages. I wanted to have enough to have 4 pages per day along with a few more at the end. I used Avery Index Tabs to mark each day alongside the outside edge.
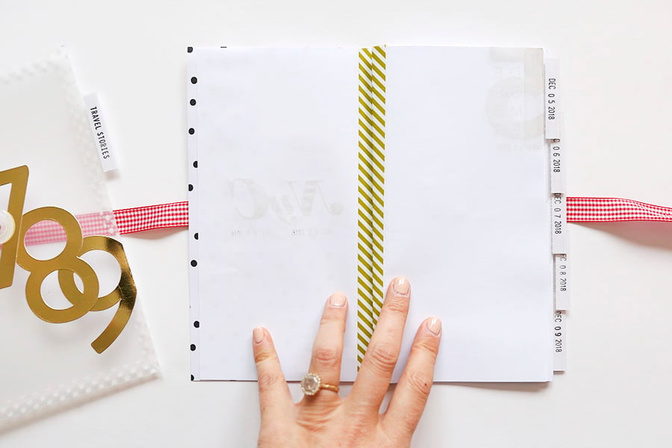
When I get back from this trip and I have everything in the place I will staple the inside together. Right now they are just individual pages laying inside each other. I'm good with that for now and for while I'm traveling. I will most likely be adding a single 3x8 photo for each day.
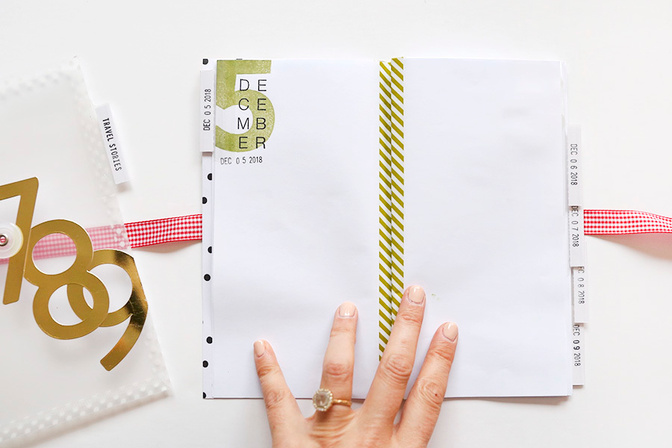
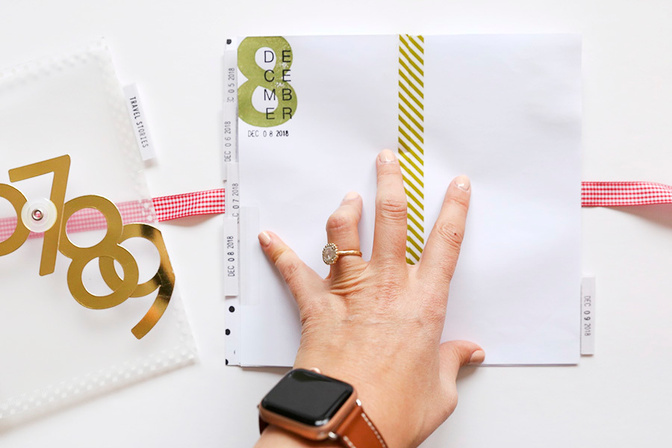
For each day I stamped the day number using the Large Number Stamps + Willamette ink + the December stamp from the Paislee Press Wish List Stamp Set. I love the simple repetition of this set up.
Each day has four pages total. Below I'm just showing you images of the dated pages:
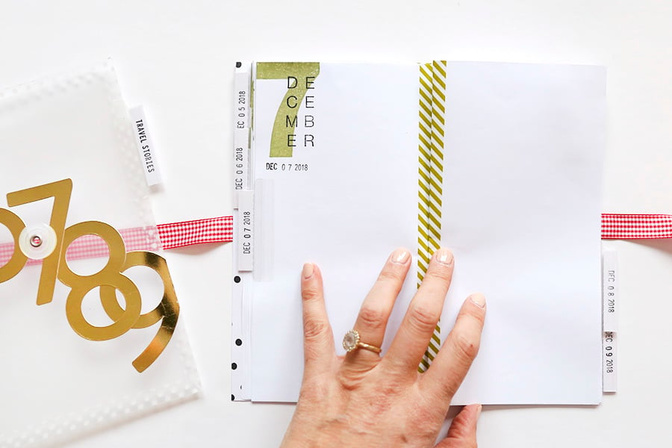
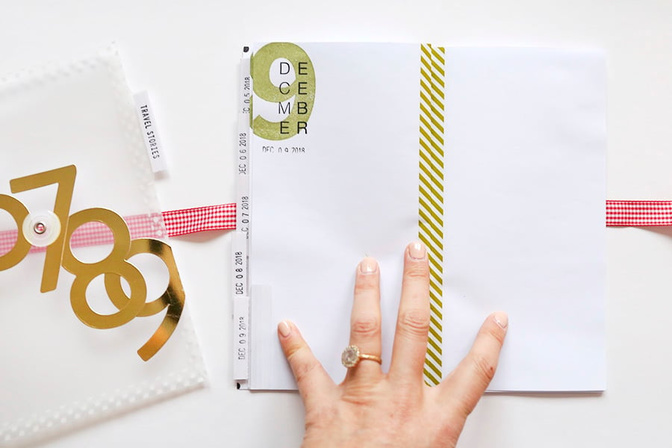
There are a few extra blank pages after Day 9.
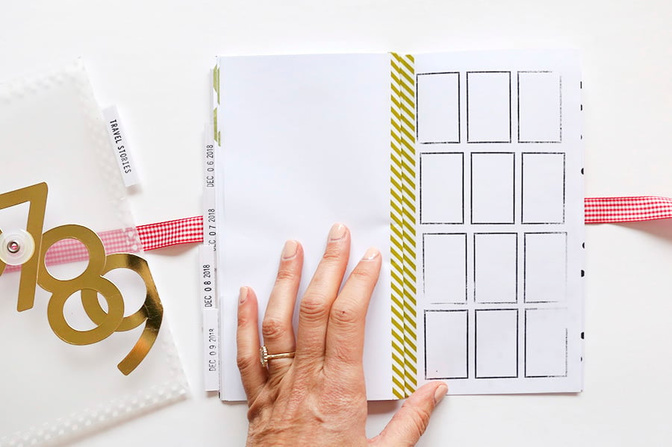
I used an old 3-rectangle stamp from my stash to create a last page that can hold "pieces" of papers that I pick up while traveling.
Will I be doing other documentation for this trip? Maybe. I might create a photobook and have it printed from Artifact Uprising when I get home and will likely add some photos to my Project Life® album. I will not be doing a separate travel album for this trip.
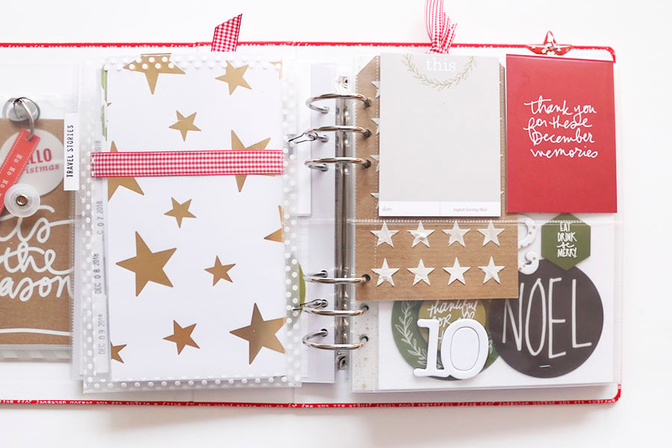
I'm sure I'll be tired when we get home. Ha. That will likely be my Day 10 story. Right now I've got the chipboard #10 in the 4x6 pocket and two 3x4 cards waiting for that days story.
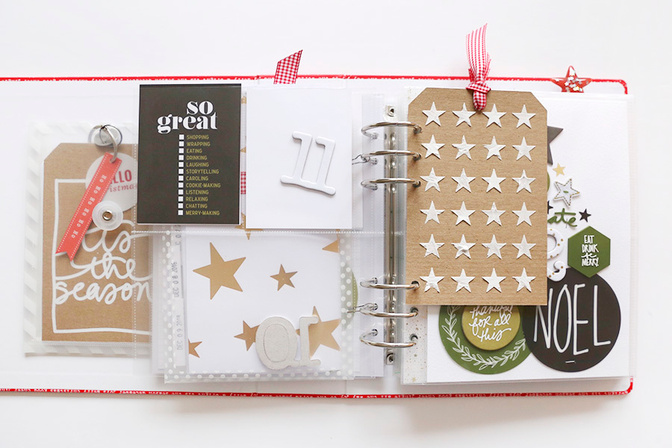
Day 11 includes the "so great" journal card from the Main Kit and the chipboard #11. I may use the star tag for Day 11 or I might use it for Day 12.
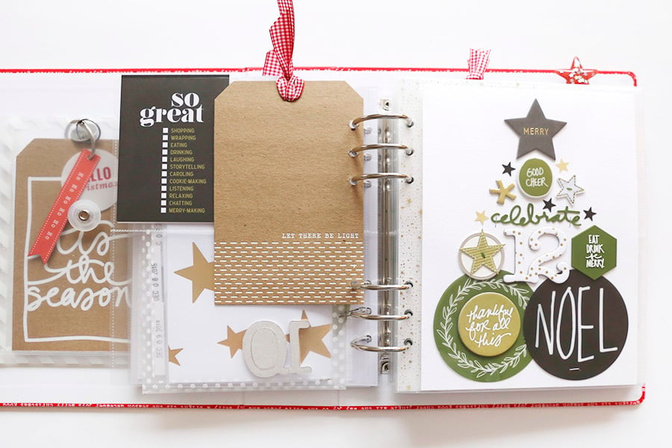
Day 12 is something I'm sharing more about in Product Play 2.
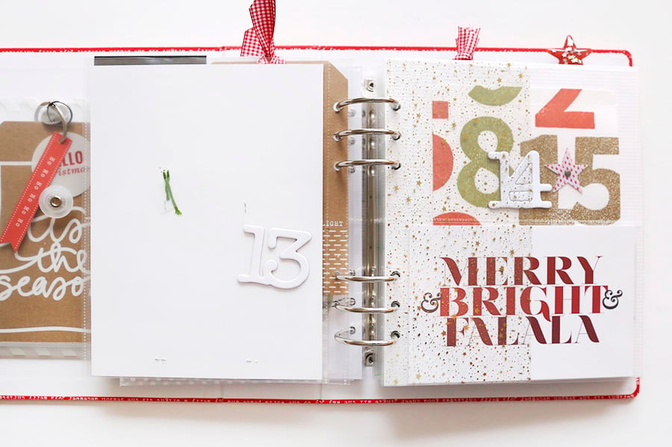
Day 13 will likely be a full page photo.

I've got one of the 3x8 transparencies between Day 13 and Day 14. I might move that around or might use that right there.
Day 14 is a 2-pocket page protector.
The majority of the following days are all featured in the new Product Play 2 workshop.
A flip-up for Day 15 with journaling underneath using the Large Number Stamp.
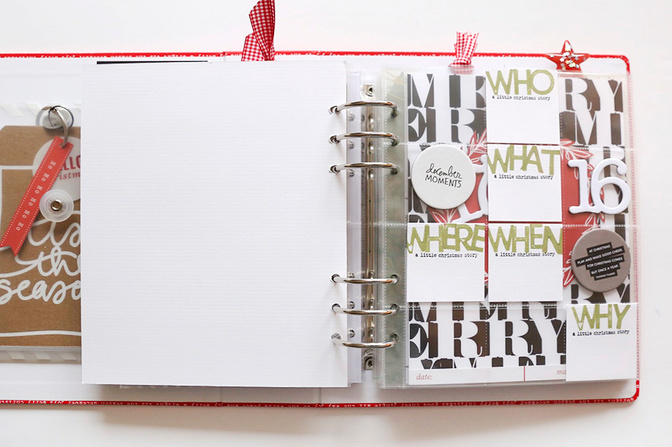
Day 16 will tell a who, what, where, when, why story using the 2x2 page protector.
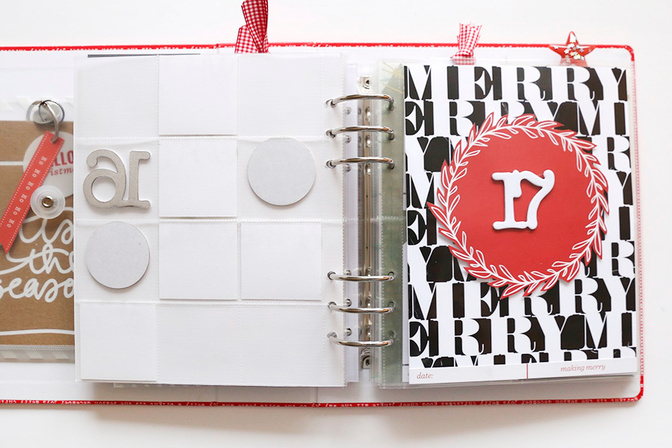
Day 17 will likely include both the back of Day 16 and a bold, type-based background.
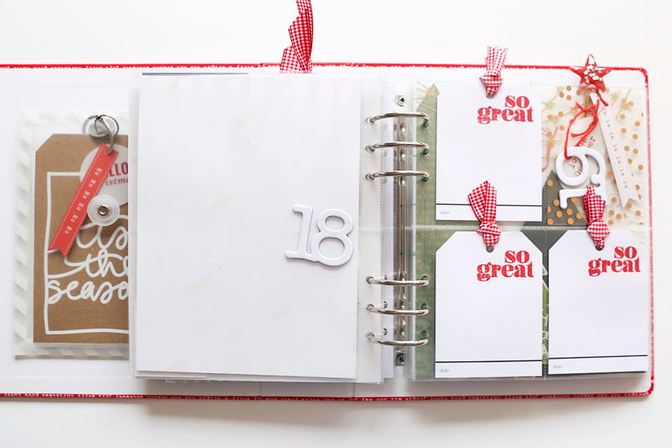
Day 18 will likely feature a full page photo story and Day 19 uses tags from the Main Kit + stamps from this Making Spirits Bright set + red embossing powder + ribbon.
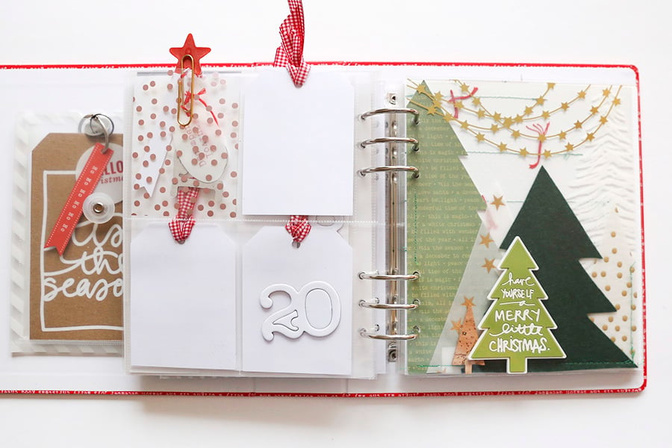
Day 20 will be on the back of the tags and the next day will feature the forest I created using a variety of trees.
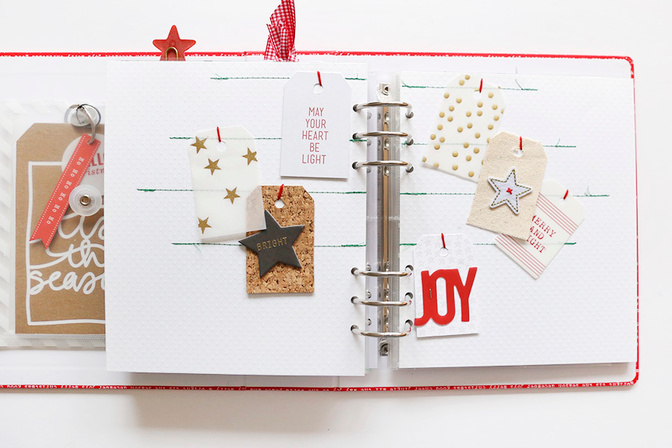
For this page I'll be adding more small tags with photos + stories.
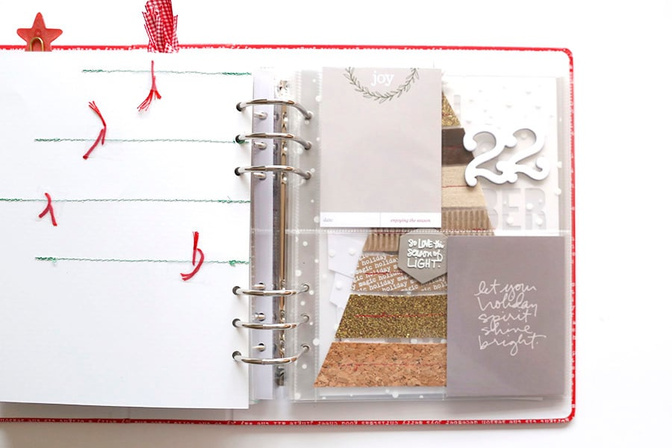
I added in a 4-pocket 3x4 page protector for Day 22.

On the back I will likely feature my Day 23 story or that might flow into the next page which is a tree I created and added to a transparency. Again, more details are in the Product Play 2 workshop.
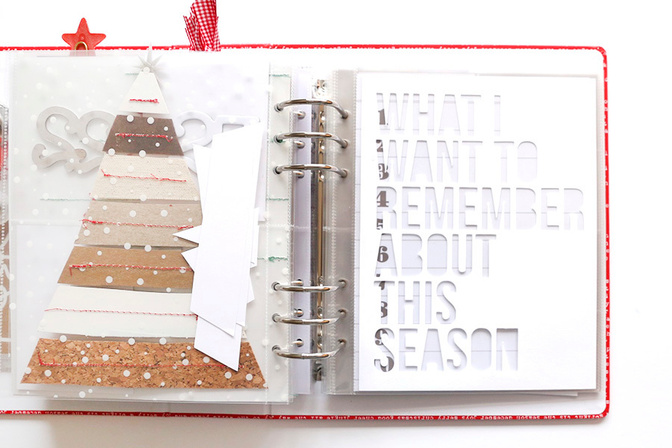
Right now in my album I have a couple of full-page Silhouette pages - these are included in the digital package for Product Play 2 - for the next couple of days. More likely than not I'll spread these out a bit more but I know, after years of doing this project, that by this point in the month things will have been moved around and I'm totally okay with that. Having these in here and ready to go works for me.

Working on this makes me so excited for the holiday season.
WALKTHROUGH VIDEO
SUPPLIES
December Daily® Large Number Stamp (should be back in stock mid-November)
Inks: Willamette (green), StazOn Black
Tim Holtz Loop Pins (to attach the Story Kit™ envelope to the binder rings)
Tim Holtz Typed Tokens (metal circle)
Pattern Paper for Traveler's Notebook Cover: My Mind's Eye Joyful Collection Starry Night
Merry Days Collection from Crate Paper: Tag Kit With Glitter Accents, Epoxy Paper Clips,
Ribbon
Green Stripe Washi Tape (similar)


Comments
Sign in or sign up to comment.
37 comments
I love how you used the Tim Holtz loop pins to hold the envelope in your album. And I also loved the TN that you made to go into the envelope. Awesome idea! I can’t wait to see more in the Product Play class! You’ve inspired me to play a little with my DD album this weekend.
Replies to hgauvin
Sign in or sign up to reply.
I think I'm seeing this right....December 2nd, on your calendar page is backwards...Yes? No?
Replies to djdouglas2002
You mean the chipboard 2? I don't think so.
Yes, the roller stamp date
The date is stamped upside down. Easy to do with roller date stamps.
Yep! Oh well - it happens!
Yes... sorry. I meant the roller stamp. ♥️
Sign in or sign up to reply.
Wow!!
Replies to JeanetteE
Sign in or sign up to reply.
LOVE!!!
Replies to Sharna_G
Sign in or sign up to reply.
Wow I love your pages Ali! This is my 10th year doing DD and I am always in awe of your albums and you inspire me to try new things and incorporate ideas/stories that are what makes this Season memorable to me and my family!
Replies to RhondaN
Sign in or sign up to reply.
So awesome! I haven't ever set up my pages before the documenting begins, but after watching the video walk through I'm inspired to do some!
Replies to laura_g_
Sign in or sign up to reply.
Are the large number stamps going to be restocked?
Replies to StephanieHokenson
I believe that is going to happen mid-November.
You can sign up for a Notify Me here: https://www.aliedwards.com/shop/december-daily-2018-numbers-6x8-stamp-set
Sign in or sign up to reply.
Your album looks great Ali! The insert for your trip is the best idea. Going to do that for sure, since I am going away those dates too :)
Thanks for the inspiration!!
Replies to DebbiG
Sign in or sign up to reply.
It’s early here in uk 🇬🇧 waiting for a cup of tea in bed. I’m getting over a chesty virus that’s been hanging around for two weeks. So how stoked am I to read and watch your foundation pages. Love 💕 it especially TN booklet shame I’m not heading to NYC but love the concept. I just squealed and husband said ‘What now’ 😂 I said ‘I’m just catching up on Ali’s DD’ and he said ‘it’s not happened yet’ 😂😂 I said ‘no the foundation pages for this year’ then reminded him I’d only just completed 2017 😂😂 love everything you do and here’s my cup of tea. He’s a diamond xx
Replies to Aliemily1
I love this story so much) made me smile really big. Thank you for sharing 😁
Sign in or sign up to reply.
I have followed you for many many years and I think these are the best foundation pages I have ever seen! GORGEOUS!!! Day 12 is what dreams are made of- I am so excited for the product play class to start next week. I hope I can focus on work today because now I just want to scrapbook! Lol.
Replies to Sumncsu
Sign in or sign up to reply.
Ali, as always, you did a spectacular job on your foundation. I especially love how you are tackling your NYC trip! Thanks for the inspiration! Now, bring on December!
Replies to Eternoly_Yours
Sign in or sign up to reply.
The tree on day 23 ❤️💚!
Replies to totteacher
Sign in or sign up to reply.
These are so great and so much inspiration! Cant wait for Product Play! Hoping to pull my stuff out and start playing next week.
Replies to Jeannew
Sign in or sign up to reply.
Love, love, love (okay, LOVE) the traveler's notebook idea. Made my hear super-happy. Love that you made your own. So excited about the project this year, and you've given me so much to think about as I prep my own supplies this weekend for the trip down next week. Thanks, Ali!!
Replies to Farrbo
Sign in or sign up to reply.
I love your album and I get new ideas every year from your foundation pages. I notice that this year you used mostly the white chipboard numbers instead of a variety from different sources. Can you explain why you made this choice this time around? I've always gone the 'variety' route, but keeping them consistent sure seems simpler!
Replies to ribosome13
I think this time I felt like I had a lot of other things going on so to keep it simple I generally just grabbed the white chipboard pieces.
Sign in or sign up to reply.
I love love love the Traveler's Notebook insert idea and the way you stamped December on top of the numbers!
Replies to ciahansen
Sign in or sign up to reply.
Dear Ali,
Thank you for these pages. I love to see your album in advance. There are a lot of ideas which I hope to include in my album too.
Last year I did foundation pages for the first time. I loved it and it helped a lot.
This year I find it hard to start without knowing what story to tell on each day and what will happen in advance.
Do you plan to incluce other voices in your album this year? I like the idea and did the same as you did last year.
The TN insert is a great idea!
I will check your previous posts for more ideas. Love it :o)
Thank you for all your inspiration!
Replies to PrinzessinN
Sign in or sign up to reply.
It is a pitty that they do not sell the Avery Index Tags here in Switzerland :o(
Replies to PrinzessinN
Sign in or sign up to reply.
Hi, so on Day 17 you have a red and white wreath, is that cut out from a journaling card?
Love this project !
Susan
Replies to Susieclow
Cut from a 6x8 paper.
I've been trying to figure out the same thing!
That's a project included in the Product Play 2 workshop - more details will be there :).
Sign in or sign up to reply.
Love Love Love the trees. Can't wait to see how you made them in class!
Replies to sparkle
Sign in or sign up to reply.