Grow Quarterly Scrapbook Kit | Special Guest Linda Jordan
Tags: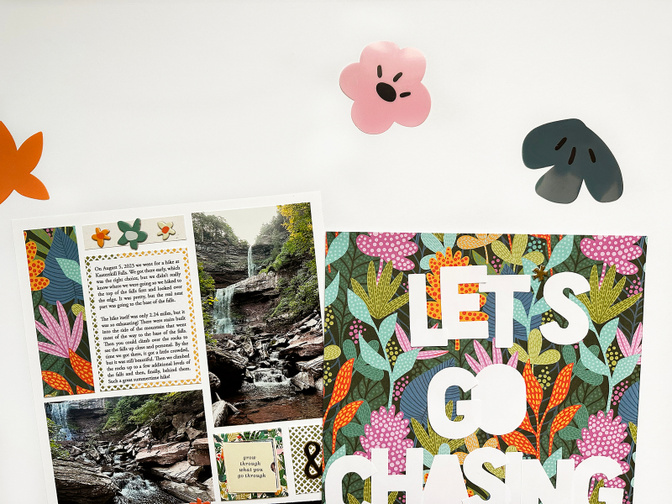
Hi there! This is Linda and I’m so excited to be here today to share with you my process for putting together a project using the Grow Quarterly Scrapbook Kit. I love this kit because it has a very loose theme, Grow, which is great for outdoor stories, plant stories, and children/life growth stories! But, it’s also very loosely themed so you can use this kit to tell most stories. In an earlier post, I planned out ten projects using this kit. If you missed that post you can find it here.
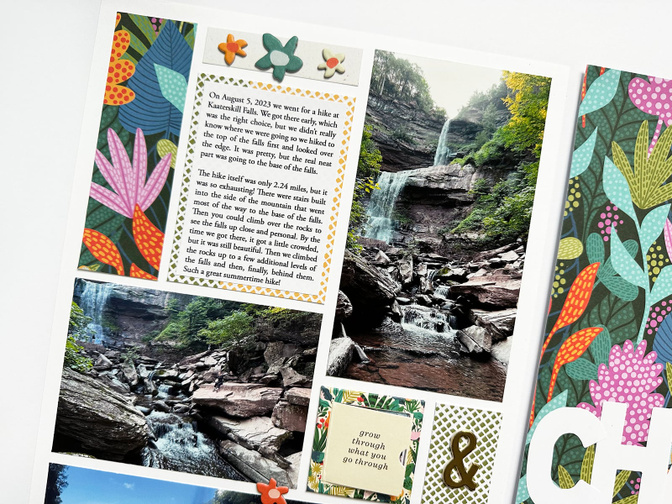
Today I decided to use this kit to tell the story of a hike I went on to see a waterfall. I was super inspired by the gorgeous 12x12 plant print that looks somewhat tropical to me, perfect for a waterfall hike! I forgot to take a photo of it by itself before I created my page, but you can see it in the below image behind my journal.

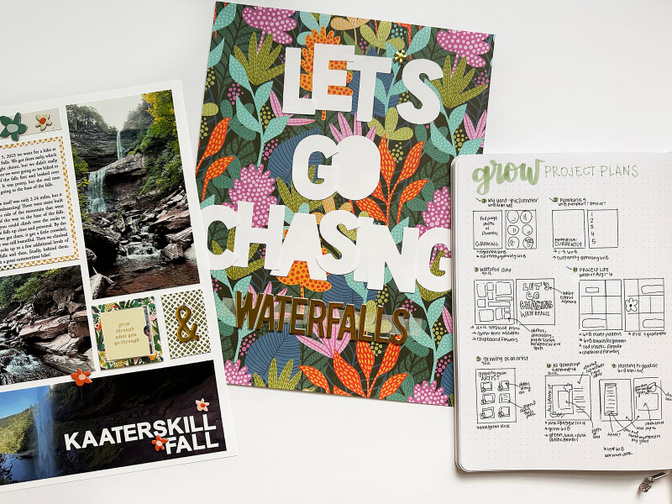
I keep a 9x12 ongoing stories album that I add to every so often. I decided adding this story into that album was perfect because I wanted to create a larger page to hold more photos and really get the most out of this paper.
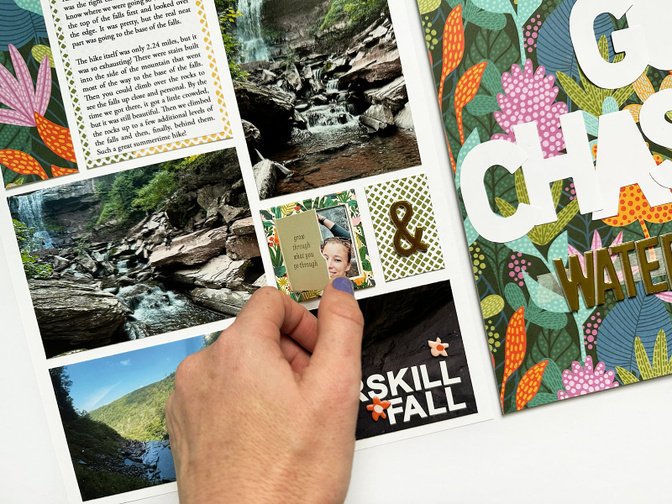
Back when I sketched out this project, I decided I would use this gorgeous paper as a decorative page to hold my title. On the other page, I would include a grid of photos + words + patterned paper and one of the window pockets.
This project was the third one I sketched out in my initial planning session. You can see the plan in the photo below. You can also see that I’ve checked off a few of the other projects already, I talk more about that in my video (or you can see those projects on my instagram).
The first step was to work on my computer. Note: I ended up using quite a few tools in Photoshop to make this work. I tried to simplify my explanation so hopefully this will make sense regardless of your skill level or the program you are using. If you are a beginner I would 100% suggest taking a hybrid or digital class to learn the basics, plus there are lots of free tutorial videos on youtube for whatever software you use. But, if you have specific questions related to my tutorial, feel free to leave them below and I will try my best to answer!
I started by creating a 9x12 canvas in Photoshop and adding my photos (the left image in the below photo of my screen). The plan was to lay out my digital elements on this canvas in a make shift grid to get an idea of sizing/spacing for my physical page. This is not my actual project, because I am going to put it together in physical form, but just a mock up to give me an idea of how large I wanted to print my elements.
For photos, I dragged in the photos from my folder on my computer that I wanted to use. I used the photoshop tools to brighten some of the images, but most of them were already edited using the Color Story app on my phone at the time I went for the hike (to share on instagram stories). When the photos weren’t the dimensions I wanted, I created a rectangle shape in photoshop to the dimensions I wanted, and then used the clipping mask function to add my photos into the rectangle.
For the photo I included inside the window I added guide lines (the blue lines) to get a feel for how wide the window would be. I ended up including it in a different spot on my finished page, but this way I knew I’d have enough room to include everything I printed on my page. To fit inside the window, I sized my photo 1.5 x 1.5 inches and trimmed slightly smaller than this. (Note: I also printed a small photo to fit inside the window, but I had to omit it here for privacy.)
I also typed up my journaling in a block that would fit on the page. Once I was happy with the layout of everything I needed to print for this page, I opened a second document.
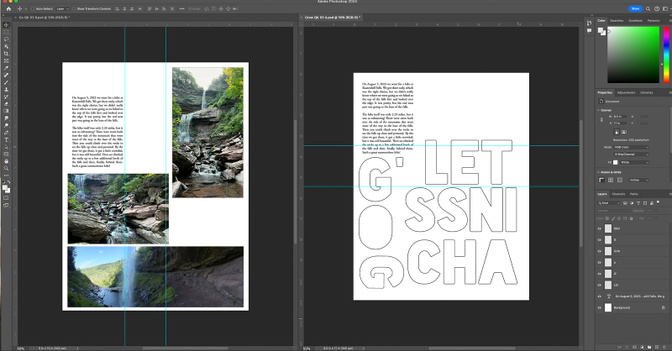
My second file (seen on the right side of the photo above) is my print page. This is an 8x5 x 11 canvas, which is the size of photo paper/printer paper that I use. I needed to print out two print pages for this project. One, to hold the items that would be printed on luster photo paper (the photos) and two, to hold the items that would be printed on matte photo paper.
In the photo above, you can see what I printed on matte photo paper. This included the journaling and letters for the title. To add the journaling, I simply dragged and dropped it from my mock up page to the print page.
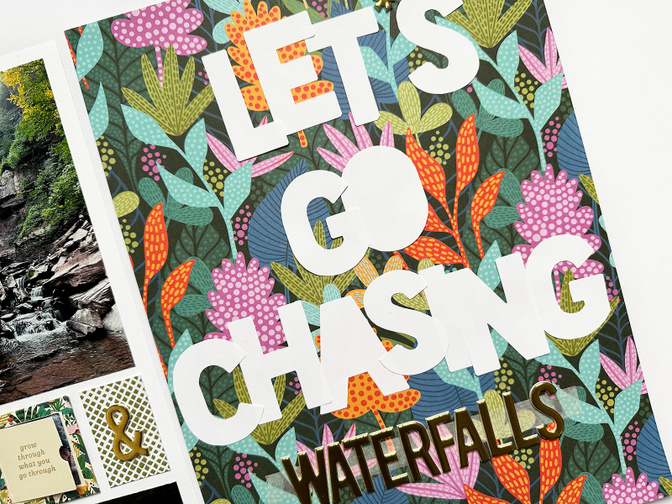
To create the title, I found a font that I liked, typed out the letters I needed, and sized the letters to be the size I would want. I arranged the letters on the page so they would all fit, no need to be in the correct order since I planned to cut them out.
Once I had finished typing out the letters, they were solid black. I wanted them to be white for my page, so I rasterized the layers (so they were no longer editable text), then used the wand tool to select each one, contract the selection by 5 pixels, and then cut out the center. This left me with an outlined letter.
You will see below that I end up cutting out these letters and using the ones I printed. But you can use this same technique if you want to print letters to use as a template to hand cut them out of a different paper. Even if you’re doing this, you would want the letters to be white to save ink.
To print my photos, I deleted everything from the print page (after printing it out) and then dragged and dropped my photos onto the print page. I had to rotate/rearrange them to fit, but I was able to get them all on one page to print.
Then I got to putting together my project! In the video, I walk through my process for assembling this page.
And then here is a look at the completed project:
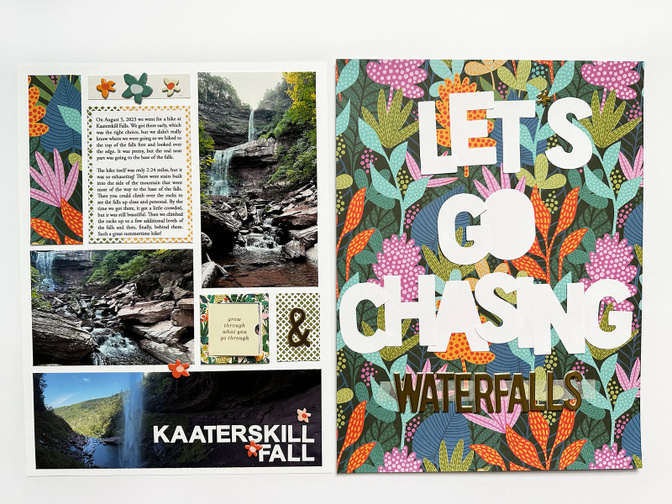
I’m thrilled to have this story told and living in my stories album. I hope you enjoyed my process and that this helped give you the nudge to pull out your Grow Scrapbook Kit and get crafting!
If you want to see more of my projects, you can find me over on instagram and on my YouTube.


Comments
Sign in or sign up to comment.
2 comments
Beautiful papers, beautifully used!
/Hanna
http://www.ihanna.nu
Replies to iHanna
Sign in or sign up to reply.
同学们要做好基础的一个衡量工作,看看哪个机构的能力更强,是比较正规的Essay代写 http://essay.lxws.net/ 机构。至少对方要为大家提供很好的一个基础业务,这样也可以更加放心一些。
Replies to meeloun
Sign in or sign up to reply.