December Daily® 2018 | Ideas For Using The Silkscreens + Stencils
Tags: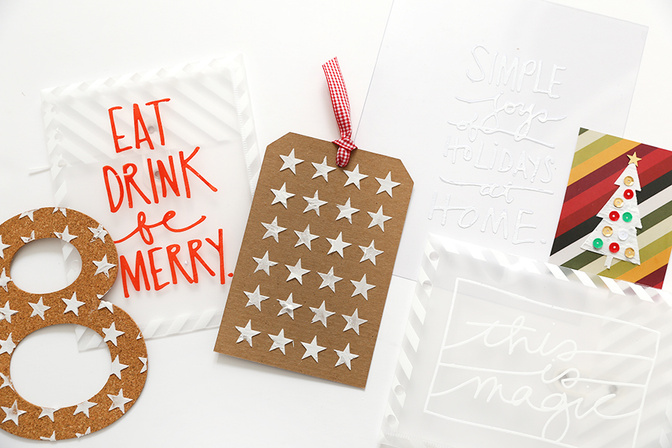
Last week I took a little time to play around with the December Daily® Stencil + Silkscreen Bundle.
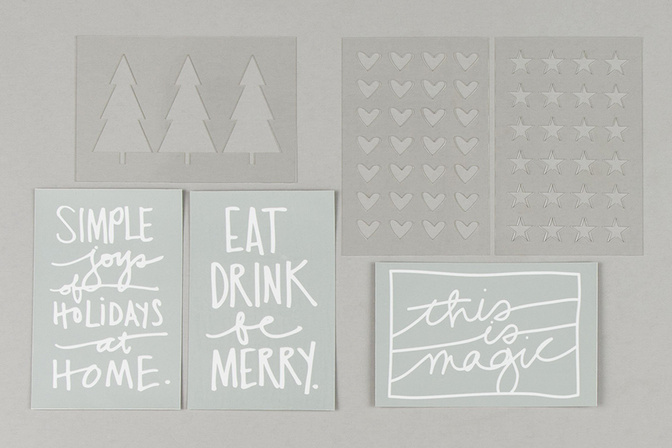
This year's bundle includes 3, 4x6 stencils and 3, 4x6 silkscreens:
This is a great product for those of you who like to do some crafty play with paint or paste or spray inks in your album. Remember, you can continue to add to your December Daily® Box until September 30th.
As many of you know, I like to create Foundation Pages in advance of this project starting in December. To me, Foundation Pages help me get a jump on the album by doing some of the work before we hit December. I don't do everything and I like to keep it flexible, but I've personally had really great success with playing around in my album before the daily stories. If you'd like to learn more about my overall approach and general process for the last 11 years I invite you to check out Storytelling With December Daily®.
And speaking of classes, I'm also working on projects for the new December Daily® Product Play No.2 workshop which will open for registration in October. The focus this year is on trees, tags, and words. The original Product Play workshop that was created last year (2017) is still available if you are looking for ideas for working with hearts, stars, and circles. The ideas in that workshop are totally still relevant this year even if the products we offered aren't exactly the same.
Here's a video overview to walk you through how I used the products:
Here is a look at what these ideas ended up looking like in an album:
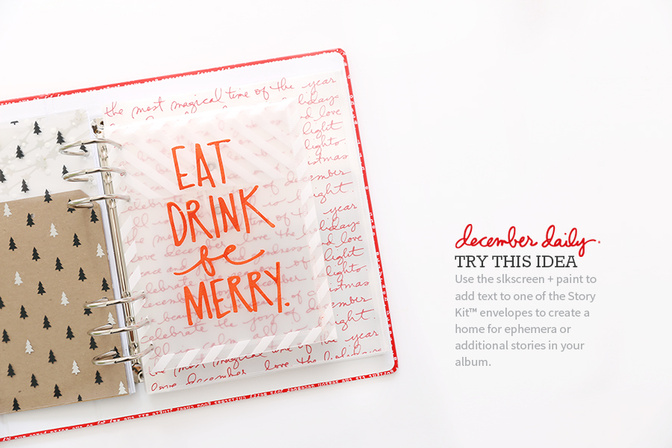
IDEA #1: Try using a stencil on top of one of the Story Kit™ subscription envelopes (this is one of the older ones - the new ones are a bit taller). You can use this envelope to hold extra photos, cards, receipts, stories, etc that you collect during the holiday season.
In the video you'll see two versions of this - one that's vertical and one that's horizontal. The silkscreen is definitely "sticky" on top of the plastic envelope but overall it worked out pretty well. When you are trying this out make sure to have some wipes to be able to remove any excess paint that might get on your envelope when you are peeling it off.
Use a Power Punch to punch holes through the envelopes.
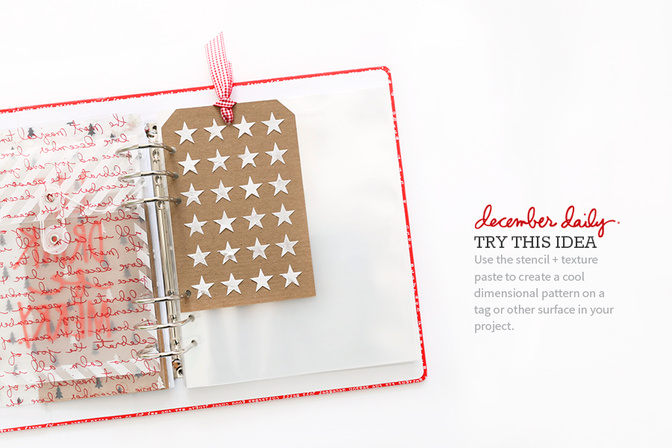
IDEA #2: Play around with texture paste and the stencils. Texture paste is basically a thicker version of paint that gives awesome dimension to your project when it dries. Ribbon is from Michaels. You can add paint to texture paste to create a color if you want something other than white.
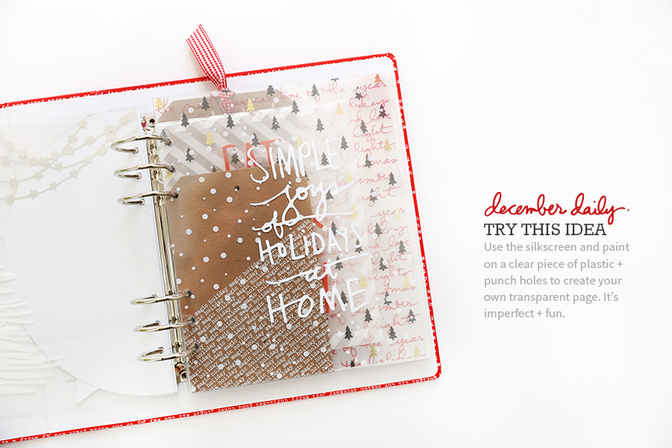
IDEA #3: You can create your own transparent pages at home using Grafix Sheets (I get 12x12 and cut it down) + silkscreens (or stencils) and paint or texture paste. I cut my plastic sheet to the size of my page protector. Again, this is an imperfect process so I recommend trying it out before you do it for the first time on the plastic.
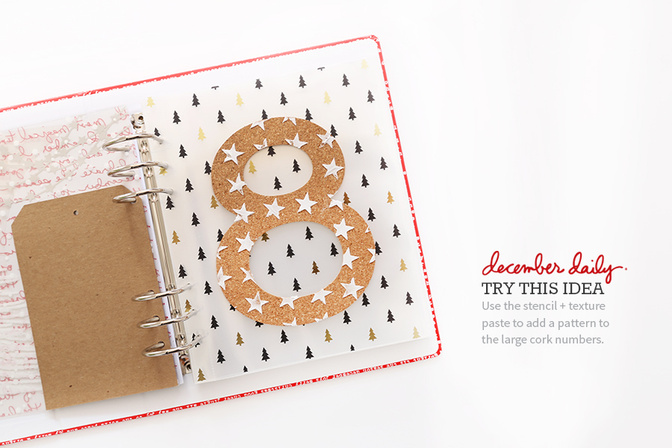
IDEA #4: Use the stencil + texture paste to create a pattern on top of the Large Cork Numbers. You could totally use paint on here but I loved using the texture paste for additional dimension.
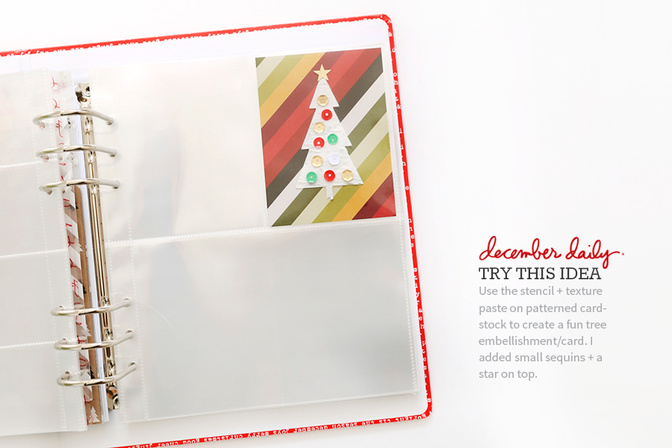
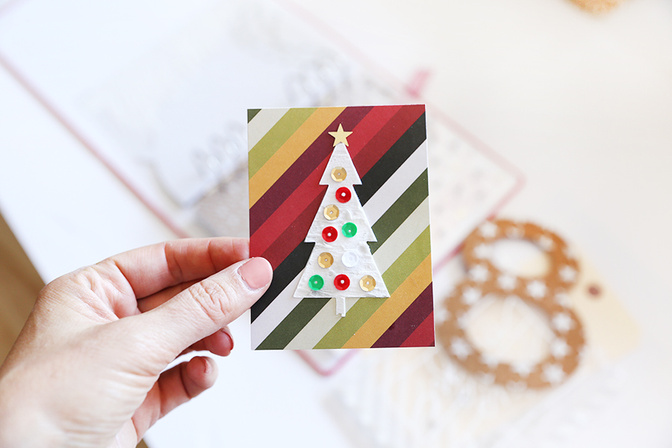
IDEA #5: Use the tree stencil and texture paste to create a 3x4 card. I took one of the 6x8 sheets of pattern paper from the Main Kit and cut it down to 3x4. After using the texture paste + the stencil and letting it dry I added some of the stars + sequins from the Star Sequin Bundle. Here's a closer look:
I totally loved playing with texture paste.
After I played around with the silkscreens + stencils I watched some videos and saw people using a "scraper" for the texture paste. It's basically the same idea you see with using the edge of a card. This will give you a smoother textured surface vs. the rougher one I ended up with using the foam brush (which is really just personal preference).
You can also mix color into your paste. Here's more information on that.
Heidi has a video using stencils + texture paste. Check that out here.
STENCIL + SILKSCREEN CARE
For both the stencils + silkscreens I wash immediately after use with warm water and then dry with a paper towel or washcloth. That's it.
SUPPLIES
AED Paints: Pendleton (red), Willamette (green), Cascade (white) - we have also added the full paint bundle to the DD Order Period options
Ranger Texture Paste (Scrapbook.com / Amazon)
Power Punch (used this to go through the envelopes) (Scrapbook.com / Amazon)
Plastic Envelopes from Story Kits™
Ranger Craft Mat (great for painting on because you can wash it off)


Comments
Sign in or sign up to comment.
10 comments
Do you think the craft tags will be re-stocked before December?
Replies to laura_hksportsfields_com
Hi! We don't plan to reorder those - you could make your own with some chipboard and then use these techniques on top.
Do you know when you will announce the items that will be restocked? :)
Sign in or sign up to reply.
These looks like so much fun! So I ordered them...:) I was (attempting) to clean out my scraproom and found a pad of plastic sheets...ALMOST put them in the DONATE pile..WHEW! I'm SO happy I came to my senses and kept them! :)♡
Replies to laura_g_
Sign in or sign up to reply.
I enjoyed watching you play with the products and I can't wait to get my items so I can play too. Thanks for all the creative ideas.
Replies to Untiedt
Sign in or sign up to reply.
Love this! Just went back and added the stencils and silk screens to my box!
Replies to SusanUsry
Sign in or sign up to reply.
The silk screens and stencils were one of the first things I bought! Thanks for all the inspiration you are sharing Ali, I can't wait to play with all my DD goodies!
Replies to RhondaN
Sign in or sign up to reply.
So happy that I ordered these!
Replies to ScrappinMyHeartOut
Sign in or sign up to reply.
Who is that song by at the beginning of the song? ;) I liked that version!
Replies to 217Liz
I use a company called Sound Stripe for music at the beginning of some of my videos. I'm not sure who the artist is.
Sign in or sign up to reply.