Go Scrapbook Kit | Special Guest Shu-Wen Tham
Tags:It’s Shu-Wen here (aka @ChouxPuffCreations), and I am so excited to be participating in this planning series featuring the new “Go” Quarterly Scrapbook Kit! Being a lover of travel-scrapbooking and arrows as a design element (read: interactive elements!!!) I LOVE this kit! In this blog post and video, I’m going to be sharing 5 different interactive page ideas featuring the “Go” Quarterly Scrapbook Kit, including the process for creating the “foundation” pages of 4 of them!
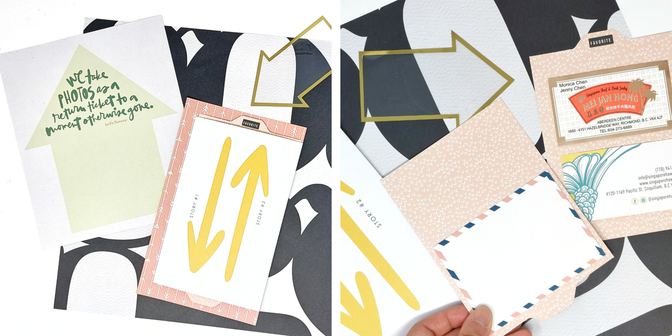
The 6x8 patterned paper with the two arrows pointing in opposite directions reminded me of the patterned paper from the “Action” Story Kit that I used in my lesson for Pam Baldwin’s Playing With Paper class, where I created a double slider mechanism to reveal two journaling cards. This inspired me to turn the patterned paper 90 degrees so that the arrows point up and down instead of left and right. I decided to simplify my interactive element this time around and create a double pocket without the slider mechanism: still lots of room for journaling and extra photos, without the fuss of creating the slider! I decided to use the orange 6x8 patterned paper with the arrows as my background because I loved that the arrows were going the same directions as the two arrows pointing up and down, and I used the coral patterned paper with the triangles to make a couple of inserts where I’ll be able to attach some photos or journaling later on. Then, I used a We R Memory Keepers Envelope Punch Board to make little pull-tabs for the edges of my patterned paper inserts.
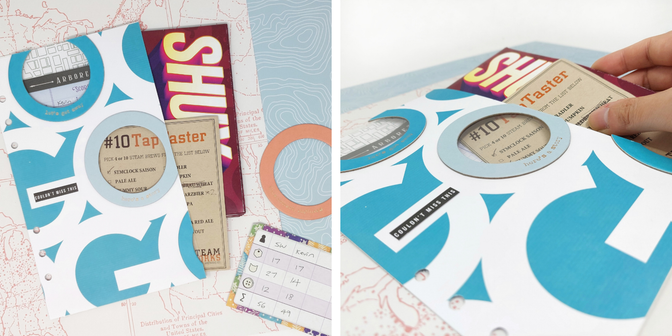
For my next foundation page, I used the 6x8 teal patterned paper with the word “GO” with some of the round chipboard frames that came in the Scrapbook Kit to make a pocket page for my travel album. First, I used a 2.25” Circle Punch to punch out the insides of each of the letter “O”s on the patterned paper. Then, I backed two of the round chipboard frames with acetate before adhering them down around the punched-out “O”s. And finally, I made the whole page into a pocket by adhering the 6x8 green map patterned paper along the top and bottom edges with some paper hinges. This pocket will be perfect for storing some of the flat memorabilia that I collected during my trip, such as receipts, game score cards, and beer flight lists!
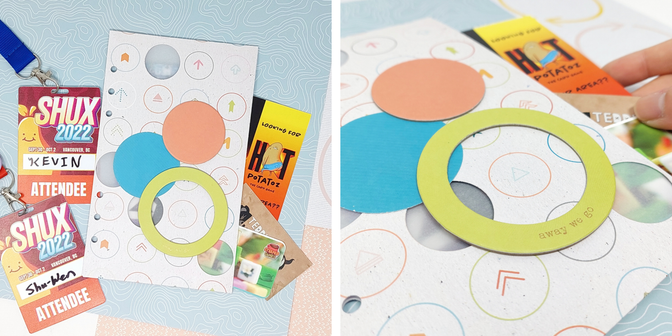
My next foundation page is also a see-through pocket page, but this one has a different assembly. I started out with the 12x12 patterned paper with the circles / arrows on it, folded it in half to make one of the sides of the pocket, then die-cut some of the circles out with my die-cutting machine. The circles on the front side of my pocket lined up pretty closely with the circles on the back side of my pocket, which created a cool see-through effect all the way through the pocket! Next, I lined the inside of my pocket with a folded piece of vellum. I tend to hoard lots of paper goods during my trips, so having two pocket pages in my travel album will allow me to save every last bit!
I took full advantage of the digital patterned papers for this next page, because I had to size it down in order to fit in my 5x8 album! Whenever I see patterned papers with lines going across the whole page, I like to think about how I can turn those lines into the edges of a pocket. In this case, I cut along the horizontal sections of the red arrow zigzagging across this patterned paper to make small pockets for the kraft tags that came in this Scrapbook Kit. Unfortunately, sizing down the patterned paper meant the tags didn’t quite fit in the pockets I made on the smaller patterned paper, so I had to trim off about 1/8” from the left and right sides of each tag. I think these tags would look so cute layered with some smaller tags, like the ones that came in the Travel Collection 2022 Mini Kit.
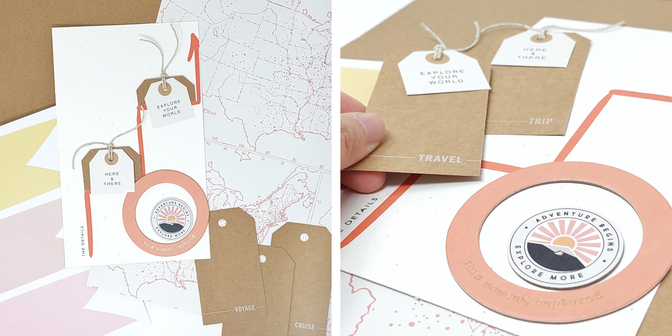
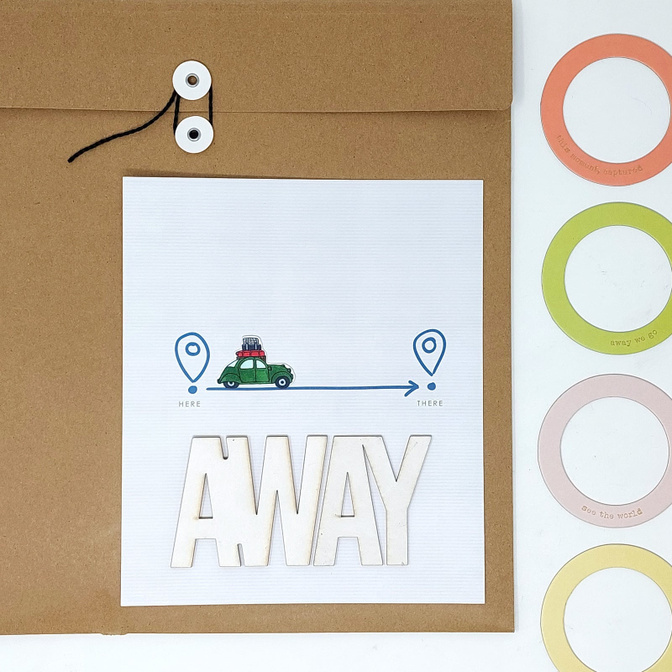
The last idea that I had for an interactive foundation page was using the 6x8 patterned paper with the “Here… There” geotags as the basis for a pull-tab slider page, similar to a layout I made in my 2022 December Daily album. I even printed out the digital car stamp from the Travel Collection 2022 6x8 Phrases Digital Stamp Set to serve as a slider piece between the two geotags! I didn’t include this idea in the foundation pages I made in my video, but it would be similar to the process video I shared for my Dec Daily page last year.
I hope this blog post inspired you to try planning out some interactive pages with this kit! Stay tuned to see how these pages turn out, and make sure to tag me @ChouxPuffCreations if you decide to try any of these interactive page ideas! I look forward to seeing your creations over on Instagram or in the Ali Edwards Facebook Group!
Shu-Wen


Comments
Sign in or sign up to comment.
6 comments
Shu-Wen! I love these ideas! You have given me tons of inspiration for my travel albums! Thank you!
Replies to kn1kdav1
Sign in or sign up to reply.
Fantastic ideas Shu-Wen, thank you. Congratulations on your engagement.
Replies to geordie281
Sign in or sign up to reply.
Thank you for the wonderful inspiration for interactive pages - so great for a travel album!
Replies to parsella
Sign in or sign up to reply.
Love these ideas! Thank you so much!
Replies to chemgirl
Sign in or sign up to reply.
I love everything you did!!!!
Replies to ElenaFarinas
Sign in or sign up to reply.
Love these ideas! Thanks for sharing, Shu-Wen!
Replies to ahiggins83
Sign in or sign up to reply.